
You do not need a traditional poured concrete slab to have a great outdoor living space. Decks, pavers, gravel pads, modular tiles, decomposed granite, and artificial turf all work well as outdoor patio alternatives depending on your budget, climate, and how you actually use your yard. For more ideas and side-by-side comparisons, see our guide to backyard patio alternatives. Most of these options cost less than a full concrete pour, and several are realistic weekend DIY projects. The right choice depends on four things: your local climate, your soil and drainage situation, how much you want to spend upfront versus over time, and whether you are comfortable doing the work yourself or plan to hire a contractor.
Outdoor Patio Alternatives: 12 Smart Options, Costs & DIY Tips

Phoebe Foster
30 Jul 2026
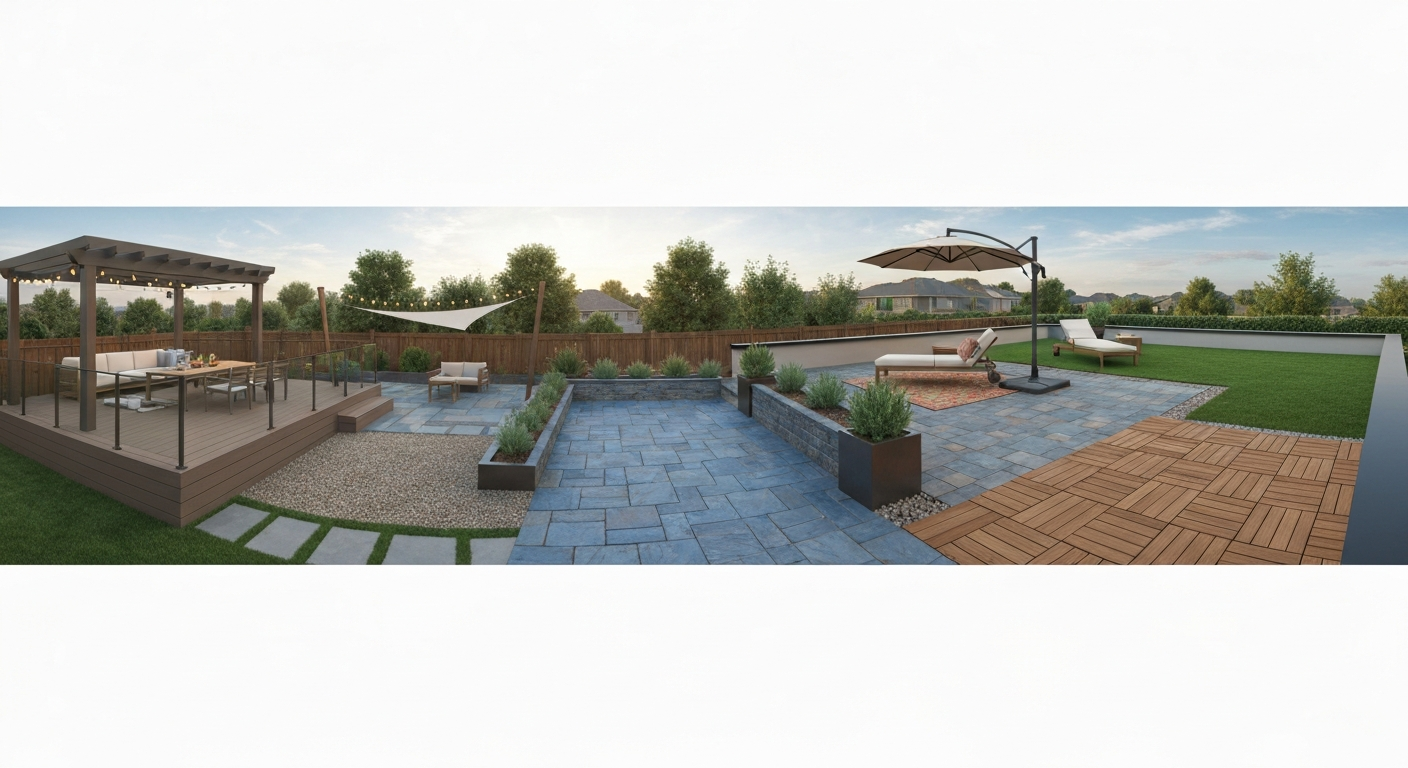
When a traditional patio is not the right answer
A standard poured concrete patio is a perfectly fine option in many situations, but it is not always the best one. Concrete installed by a contractor in a mid-size U.S. city typically runs between $8 and $20 per square foot depending on thickness, finish, and region. In a place like Houston, Angi's regional data puts basic concrete patio installation somewhere in the $1,500 to $4,500 range for a modest sized slab, and that does not account for reinforcement, drainage prep, or decorative finishes. If your budget is tighter, your yard has drainage issues, your soil shifts with freeze-thaw cycles, or you rent and cannot do permanent construction, a traditional concrete pad may create more problems than it solves. The alternatives covered here give you real options across every one of those scenarios.
A quick look at all your options
Here is a fast rundown of the main outdoor patio alternatives before we go deeper on each one. For more ideas on garden patio alternatives, see our detailed guide covering materials, costs, and climate-specific recommendations. For a side-by-side comparison of the best patio options for different budgets and climates, see our guide to the best patio options. Every option listed below has a realistic use case for either a DIYer or a hired contractor, and most work across a range of climates with the right prep work. For a concise comparison of alternative patio materials, see this guide for pros, cons, and typical costs for each option.
- Wood or composite decks: elevated or ground-level platforms, great for uneven ground
- Concrete pavers and interlocking stone: durable, repairable, and available in many styles
- Gravel, compact stone, and decomposed granite: low cost, excellent drainage, DIY-friendly
- Stamped, textured, or resurfaced concrete alternatives: better appearance than basic gray slab
- Modular deck tiles and rubber tiles: quick-install, renter-friendly, no concrete needed
- Artificial turf and low-maintenance green surfaces: visual appeal with minimal mowing
- Raised wooden platforms: affordable framing with decking boards, good for sloped yards
- Container and mini-patio or mini-deck solutions: ideal for small urban yards or balconies
Wood and composite decks
A deck is probably the most popular alternative to a ground-level concrete patio, especially when your yard is sloped, has poor drainage, or sits on clay soil that shifts significantly with moisture changes. Decks are elevated structures built on footings or ground-level blocking, and they work at any height from a few inches above grade all the way up to a second-story walkout. You have two main material choices here: pressure-treated or naturally rot-resistant wood (cedar, redwood) and composite decking made from wood fiber and plastic.
Wood decking
Pressure-treated lumber is the most affordable structural option. A ground-level treated pine deck typically costs between $15 and $25 per square foot installed, though prices vary by region and current lumber costs. The tradeoff is maintenance: wood decks need to be cleaned, sanded, and resealed every one to three years depending on your climate. In wet climates or areas with heavy sun exposure, unprotected wood can warp, crack, and develop mold within a few seasons. If you go with wood and live near the coast, use hot-dipped galvanized or 316-grade stainless steel fasteners and hardware. Standard zinc or plain steel fasteners corrode quickly in salt air, and a deck that looks solid on top can have failing structural connections underneath.
Composite decking
Composite decking costs more upfront, generally $25 to $45 per square foot installed for mid-range products, but it requires significantly less ongoing maintenance. Most reputable composite brands (Trex, TimberTech, Fiberon, and others) offer 25- to 30-year limited fade and stain warranties on their capped composite lines. One honest caveat: composite surfaces can get notably hot in direct summer sun in places like Texas or Arizona. Surface temps on dark-colored composite boards can reach 150 degrees Fahrenheit or more on a 90-degree day, so choose lighter colors in hot climates, add shade structures, or factor in outdoor rugs for barefoot comfort.
Permits and installation notes for decks
Under Section R507 of the 2021 International Residential Code, decks attached to the house generally require a permit in most jurisdictions, regardless of size. Refer to SECTION R507 EXTERIOR DECKS, 2021 International Residential Code (IRC), ICC for technical requirements, typical permit triggers, and construction details for decks blank" rel="noopener noreferrer">SECTION R507 EXTERIOR DECKS — 2021 International Residential Code (IRC) — ICC. Freestanding decks may have exemptions, but thresholds vary. A common trigger is any deck 30 inches or more above grade, or any deck with electrical or plumbing. Always check with your local building department before you start. See your municipality’s guidance (for example, blank" rel="noopener noreferrer">City of West Hollywood – Definitions & Permitting language (example: permeable surfaces definition)) for local definitions, permit triggers, and stormwater rules that can differ from state or national guidance. Footing depth must reach below the local frost depth, which ranges from zero in southern states to 48 inches or more in northern climates. Getting this wrong means frost heave will shift or crack your framing over a few winters.
Pavers and interlocking stone
Concrete pavers, clay brick pavers, and natural stone like bluestone or flagstone are among the most durable and visually flexible patio surfaces available. Done correctly, a paver patio can last 25 to 50 years or more because individual units can be lifted and replaced without disturbing the whole surface. That repairability is a meaningful real-world advantage over a concrete slab, where a crack typically means grinding out a section and patching, which rarely blends cleanly.
Types and appearance options
Concrete pavers (the type covered by ASTM C936) are the most widely available and come in hundreds of colors, textures, and profiles from brands like Belgard, Unilock, and Techo-Bloc. Clay brick pavers (covered by ASTM C62 and C67) are denser and have a more traditional look. Natural stone offers unique aesthetics but costs more and requires more careful base prep since the thickness varies from piece to piece. Permeable interlocking concrete pavers (PICP) have open joints filled with aggregate that allow stormwater to infiltrate rather than run off, which the EPA recognizes as an effective low-impact development technique for managing runoff.
Base prep and drainage
The base is everything with pavers. A poorly prepared base is the number-one reason paver patios fail. The standard installation stack-up is: excavated and compacted subgrade, a 4- to 6-inch compacted crushed stone base (deeper in freeze-thaw climates), a 1-inch bedding layer of coarse sand or chip stone, then the paver unit with jointing sand swept into the joints. In cold climates where frost depth is significant, the base aggregate layer needs to be thick enough to drain and prevent frost heave. Belgard and the ICPI (Interlocking Concrete Pavement Institute) both specify that proper base depth and a well-draining subbase are more important to long-term performance than the paver unit itself. Manufacturer warranties, including Belgard's lifetime product warranty on many units, are typically contingent on installation to spec and in some cases on ICPI-certified contractor installation.
Pros and cons of pavers
- Pros: Long lifespan (25 to 50+ years with proper base), repairable without full replacement, huge style range, good drainage with permeable options, strong resale appeal
- Cons: Higher upfront cost than gravel or modular tiles ($12 to $30 per square foot installed is typical), requires excavation and proper compaction, joint sand needs periodic re-sanding, weeds can establish in joints without polymeric sand or sealing
Gravel, compact stone, and decomposed granite
If budget is your primary constraint, gravel, pea gravel, crushed limestone, and decomposed granite (DG) are the most cost-effective outdoor patio alternatives you can install. For more low-cost ideas, see inexpensive patio alternatives. Material costs run roughly $1 to $3 per square foot, and a basic gravel pad is a genuine weekend DIY project with no heavy equipment beyond a plate compactor, which you can rent for around $75 to $150 per day. I have put in gravel patios myself and the honest truth is they look a lot better than most people expect when you edge them properly and pair them with good furniture.
How to build a gravel or DG pad that actually holds up
The difference between a gravel pad that stays put and one that wanders into your lawn within a season is almost entirely in the edging and the base prep. Excavate 3 to 4 inches, lay woven geotextile fabric to suppress weeds (not plastic sheeting, which traps water), compact the subgrade, then add your gravel or DG in two-inch lifts, compacting each layer. Install a rigid steel, aluminum, or composite edging system around the perimeter before you add your surface material. Decomposed granite compacts to a firmer surface than loose gravel and works well in hot, dry climates (Southern California, Texas, Arizona). In wet climates or freeze-thaw zones, be aware that DG can erode and wash out without stabilizer binder mixed in, and freeze-thaw cycles can shift it more than compacted aggregate.
Pros and cons of gravel and DG
- Pros: Very low material cost ($1 to $3 per square foot), excellent drainage and permeability, fast to install, easy to modify or expand, no permits required in most jurisdictions
- Cons: Not ideal for furniture with small feet (sinking), requires annual re-grading and top-dressing, weed control is ongoing, not accessible for mobility aids, loose gravel can migrate onto lawn or hardscape
Stamped, textured, and resurfaced concrete alternatives
If you already have a plain concrete slab or are committed to a concrete surface but want something better-looking, there are several ways to upgrade the appearance without pouring a whole new pad. Stamped concrete is poured and then pressed with textured mats while still wet to mimic stone, brick, or wood plank patterns. Resurfacing overlays are applied over an existing sound slab to add color, texture, or a new pattern. Exposed aggregate finishes are created by washing the surface while wet to reveal the stone within the mix.
Stamped concrete typically costs $12 to $22 per square foot installed, making it more expensive than plain concrete but still less than quality natural stone. The main durability concern is sealing: stamped and colored concrete must be resealed every two to three years to protect the color from UV fading and to prevent water infiltration that leads to freeze-thaw cracking in cold climates. In regions with significant freeze-thaw cycling, a concrete surface with a lower water-to-cement ratio (around 0.45 or less) and air entrainment performs significantly better than standard mix. Resurfacing overlays are only as good as the existing slab underneath. If the existing slab has structural cracks or settling issues, an overlay will follow the same movement and crack again.
Visual options worth knowing
- Stamped concrete: mimics flagstone, cobblestone, slate, or wood; dozens of pattern options
- Exposed aggregate: natural, textured look; slip-resistant; reveals stone in the mix
- Broom finish: simple, low-cost, slip-resistant; best for utilitarian areas
- Concrete overlay/microtopping: applied over existing slab; can be stained or patterned
- Acid staining or dye systems: penetrating color with a mottled, stone-like appearance
Modular deck tiles and rubber tiles
Modular deck tiles are one of the most underrated options in this whole category. These are typically 12-by-12 or 24-by-24 inch interlocking tiles made from composite, hardwood (ipe or teak), or rubber, and they install directly over existing concrete, pavers, a rooftop surface, or even a flat compacted base. No mortar, no adhesive, no special tools. A weekend installation for a 200-square-foot space is realistic for most people. Brands like BuildDirect, IKEA (RUNNEN), and Cali Bamboo sell these in the $2 to $8 per tile range depending on material and quality.
These tiles are especially well-suited to apartment balconies, rooftop terraces, rental properties where permanent construction is not allowed, or anywhere you want a fast visual upgrade without excavation. The flip side is durability: lower-end composite tiles can fade or warp with prolonged UV exposure in hot climates. Rubber tiles (typically recycled tire material) are better for high-traffic functional areas and play spaces than for formal outdoor living, but they are extremely durable and very easy on the budget. For best results on any tile system installed over an uneven base, make sure the substrate is reasonably flat and has drainage so water does not pool under the tiles.
Pros and cons of modular tiles
- Pros: No concrete, no excavation, renter-friendly and reversible, fast installation (a few hours for a small area), relatively low cost, good over existing surfaces
- Cons: Not suitable for uneven or soft ground without a prepared base, seams can collect debris, wood composite tiles fade in intense UV, less durable than permanent hardscape over a 10+ year horizon
Artificial turf and low-maintenance green surfaces
Artificial turf has improved significantly in the last decade. Current-generation products use multi-tone, variable-blade-height fibers that look genuinely like real grass from a few feet away, and the polyurethane or latex backing systems are more durable than older products. Installed cost typically runs $8 to $20 per square foot including base prep, and product warranties from quality brands range from 8 to 15 years. That said, artificial turf is not the right choice for every situation, and being honest about the limitations matters more than the sales pitch.
Where artificial turf actually works well
Artificial turf makes the most sense in water-restricted areas (Southern California, Arizona, Nevada, parts of Texas) where maintaining real grass is expensive or prohibited, in shaded areas where natural grass will not grow, in high-traffic play zones for kids and pets, and in small urban yards where you want a green aesthetic without mowing. It is less ideal as a primary seating surface because furniture legs can compress and damage the fibers over time, but combined with pavers, gravel, or a deck platform, it works well as a visual complement.
Heat, drainage, and upkeep by climate
Heat is the most frequently overlooked downside of artificial turf. In direct summer sun, synthetic turf surface temperatures can exceed 150 to 180 degrees Fahrenheit in hot climates, making it uncomfortable to walk on barefoot and potentially harmful to pets. Shade structures, trees, or cooling with a hose mitigate this, but it is a real factor in Sun Belt climates. Drainage is handled by perforations in the backing and a compacted aggregate base (typically 3 to 4 inches of crushed stone over compacted subgrade), which allows water to pass through at rates comparable to a natural lawn. In wet Pacific Northwest or Southeast climates, adequate base drainage is critical to prevent backing mold and odor, particularly in pet use areas. Maintenance is low but not zero: periodic brushing to lift fibers, rinsing for pet areas, occasional infill top-dressing, and checking for seam separation annually.
How all the options compare at a glance
| Option | Approx. Installed Cost ($/sq ft) | Lifespan | DIY Difficulty | Drainage | Maintenance Level | Best Climate Fit |
|---|---|---|---|---|---|---|
| Pressure-treated wood deck | $15 – $25 | 15 – 25 years | Moderate-High | Excellent (gaps) | High (annual sealing) | Most climates; use treated lumber for wet climates |
| Composite deck | $25 – $45 | 25 – 30+ years | Moderate-High | Excellent (gaps) | Low | All climates; lighter colors for hot/sun climates |
| Concrete pavers | $12 – $30 | 25 – 50+ years | Moderate | Good to excellent (PICP) | Low-Moderate (re-sanding, sealing) | All climates with correct base depth |
| Gravel / compact stone | $1 – $4 | Indefinite (with top-dressing) | Low | Excellent | Moderate (annual re-grading) | Dry/hot climates; usable everywhere with edging |
| Decomposed granite | $1 – $3 | 3 – 7 years per treatment | Low | Excellent | Moderate (re-grading, stabilizer reapplication) | Hot, dry climates best; not ideal in wet/freeze climates |
| Stamped concrete | $12 – $22 | 20 – 30 years | Low (hire pro) | Poor (impermeable) | Moderate (resealing every 2 – 3 years) | All climates; air-entrained mix needed for freeze-thaw |
| Modular deck tiles (composite/wood) | $2 – $8 per tile | 5 – 15 years | Very Low | Good (over existing surface) | Low | Most climates; avoid low-quality tiles in hot UV climates |
| Rubber tiles | $1 – $4 | 10 – 20 years | Very Low | Good | Very Low | All climates; best for utility/play areas |
| Artificial turf | $8 – $20 | 8 – 15 years | Moderate | Good (with aggregate base) | Low-Moderate (brushing, rinsing) | Dry/water-restricted climates; manage heat in full sun |
Shade, privacy, and comfort add-ons that complete the space
Once you have chosen your surface, the comfort features you add on top often matter more for daily usability than the flooring itself. In hot climates especially, a great paver patio with no shade is barely usable from May through September. The main shade alternatives to built-in patio roofs and conventional patio blinds are pergolas, shade sails, freestanding cantilever umbrellas, retractable awnings, and outdoor curtains or privacy panels. For a focused comparison of outdoor curtains, pergolas, retractable awnings, and other shade options, see our guide to alternatives to patio blinds. Each has a different cost range, wind tolerance, and visual style. Pergolas with shade cloth or polycarbonate roofing provide the most permanent and architectural coverage, typically costing $3,000 to $10,000 or more depending on size and material. Shade sails are a cost-effective middle ground ($100 to $500 for the sail itself, DIY-installed between posts or attachment points) and can be taken down seasonally. Freestanding cantilever umbrellas in the $300 to $800 range from brands like Treasure Garden or California Umbrella are the easiest to reposition and remove in high winds.
For cooling and air movement, outdoor misting systems and high-velocity fans can make a 90-plus degree space genuinely comfortable. A basic misting kit for a 10-by-20 foot area runs $30 to $80 DIY and drops ambient temperature by 10 to 20 degrees Fahrenheit in low-humidity climates. In humid climates like the Gulf Coast or Southeast, misting adds moisture to already humid air and is less effective. There, a high-velocity outdoor fan (look for damp- or wet-rated models, not standard indoor fans) moves air and creates a wind-chill effect that is more practical. For cooler evenings, propane patio heaters in the $100 to $300 range extend the usable season significantly. Infrared electric heaters are more efficient and easier to control but require wiring, which may trigger a permit.
When to DIY and when to hire a contractor
The honest answer is that the line between DIY and hire-a-pro depends on your skill, your tools, and the specific project, not just the material type. I have seen homeowners do excellent paver patios themselves and I have seen contractor-installed gravel pads wash out in one rainstorm because the base was wrong. The decision comes down to a few key factors.
- Permits required: Any project requiring a permit (attached decks, electrical, most structural work) should involve a licensed contractor unless you have the specific trade skills. Permit inspections exist for safety reasons.
- Site complexity: Sloped yards, drainage problems, unstable soil, or high water tables are contractor territory. Getting drainage wrong is expensive to fix.
- Equipment needs: Concrete work, large excavations, and heavy compaction require equipment most homeowners do not own. Rental costs can eat into DIY savings quickly.
- Timeline: Gravel pads, modular tile installs, and small raised platforms are realistic weekend projects. Full deck builds, paver patios over 400 square feet, and concrete work are multi-week commitments even for experienced DIYers.
- Warranty implications: Some manufacturer warranties (particularly for pavers) require ICPI-certified installer documentation to be valid. Check warranty terms before going DIY on premium products.
To find a qualified contractor, get at least three written quotes that itemize materials, labor, base prep, drainage, and waste disposal separately so you can compare them accurately. Ask specifically about subbase depth, compaction method, and drainage strategy for your site. A contractor who cannot answer those questions clearly is a risk. Check licensing through your state contractor licensing board and verify insurance directly rather than relying on a certificate they hand you. For paver work, look for ICPI-certified installers, as they have formal training in base prep and installation standards.
Climate-specific things to keep in mind
Where you live should influence your choice more than most articles admit. A few practical climate notes by region based on the key performance factors for each material:
- Hot, sunny climates (Texas, Arizona, Southern California): Prioritize light-colored or reflective surfaces to reduce heat absorption. Composite decking and dark pavers get extremely hot. Shade structures are not optional — they are part of the system. Decomposed granite with stabilizer works very well here. Artificial turf works well but requires heat management.
- Cold, freeze-thaw climates (Midwest, Northeast, Mountain states): Base depth is critical for everything. Poured concrete and pavers need adequate subbase and drainage to avoid frost heave. Deck footings must reach below local frost depth per IRC R507. Decomposed granite is not a great choice here. Composite decking outperforms wood in wet/freeze cycling.
- Wet, rainy climates (Pacific Northwest, Southeast): Drainage and permeability come first. Permeable pavers, gravel, and elevated decks all manage water better than impermeable concrete. Wood decks need more frequent maintenance and mold control. Artificial turf drainage must be designed carefully.
- Coastal and salt-air environments: Use 316 stainless steel or hot-dipped galvanized fasteners and hardware on any metal or wood structure. Composite decking outperforms wood here. Avoid standard steel edging for gravel patios. Rinse surfaces periodically to reduce salt accumulation.
- Windy or exposed locations: Shade sails and large umbrellas need secure attachment or they become projectiles. Cantilever umbrellas should have weighted bases rated for your wind exposure. Lightweight modular tiles can shift in very high wind on rooftop installations without additional weighting.
A practical checklist for choosing the right patio alternative
Use this checklist before you commit to any material, contractor, or shopping cart. Answering these questions first saves you from expensive course corrections later.
- What is your realistic total budget, including base prep, edging, drainage, and any shade or comfort features?
- Is the project permanent or do you need it to be reversible (renter, short-term home, etc.)?
- Does your site have drainage challenges, standing water, heavy slope, or clay soil?
- What is your local frost depth, and does your chosen surface need footings or a deep aggregate base?
- Are you in a HOA or municipality with restrictions on surface materials, runoff, or structure types?
- Will the project require a building permit (deck over 30 inches, attached structure, electrical)?
- Are you doing this yourself or hiring a contractor, and do you have the tools and time for DIY?
- What is the primary use: seating and dining, play area, garden feature, high-traffic access path?
- Do you need the surface to be accessible (mobility aids, stroller-friendly, no loose aggregate)?
- What shade and cooling solutions will you combine with the surface for your climate?
Low-cost DIY starter projects worth considering
If you want to start without a large upfront commitment, three projects give you the most usable outdoor space per dollar spent. A gravel pad with steel edging and landscape fabric is the most accessible entry point, fully achievable in a weekend for under $500 for a 12-by-16 foot area including tool rental. Modular composite or hardwood deck tiles over an existing concrete slab transform an ugly or stained patio surface in a few hours with no tools beyond a utility knife. A raised pallet or boxed-frame wooden platform using dimensional lumber and deck boards is another genuine weekend build with materials typically under $300 to $500 for a small 8-by-10 foot platform, though you should use pressure-treated or naturally rot-resistant wood and apply a UV-protective finish before the first season. For more ideas focused specifically on cheap patio alternatives, see the dedicated guide. These three options are particularly well-suited to urban small yards and garden spaces, where scale and budget both push toward simpler, lower-commitment solutions.
Whichever direction you go, the decision comes down to matching the right surface to how you actually live, your local conditions, and what you are realistically willing to spend and maintain over time. There is no universal best option here, but there is almost certainly a right option for your specific yard, climate, and budget if you work through the questions above before you start spending.
FAQ
What are the exact definitions and scope for each patio alternative I should use in the article?
List clear, authoritative definitions and system boundaries for each alternative (deck types: ground-level, elevated, composite vs. wood; poured/stamped concrete; segmental pavers vs. permeable pavers; gravel/compact stone; decomposed granite (DG); modular/interlocking deck tiles; artificial turf; raised wooden platforms; container/mini-patio). Source categories: government guidance (EPA permeable pavement pages), standards summaries (ASTM/ICPI primers), and manufacturer product overviews to ensure consistent terminology and comparability.
Which installation specifications and O&M practices must I capture for each material?
Collect manufacturer installation manuals and operations & maintenance guides for representative products to capture subbase depths, bedding/joint materials, compaction specs, sealant recommendations, and maintenance intervals. Source categories: major manufacturers/distributors (Belgard, Trex), ICPI/industry installation references, and university extension fact sheets for O&M frequencies.
How do I obtain realistic installed cost ranges (materials + labor) across regions?
Use contractor estimate databases and regional cost guides (Angi/HomeAdvisor, local contractor marketplaces) to compile material and labor ranges for urban vs rural and U.S. regional differences. Cross-check with manufacturer suggested retail prices and local suppliers for material-only comparisons.
What durability, typical lifespans, and failure modes should I report for each option?
Document expected service lives and primary durability drivers (freeze–thaw, UV, moisture, corrosion, mechanical wear) using standards and test references (ASTM, ICPI), manufacturer lifespan/warranty statements, and installer/extension guidance that describe common failure modes and maintenance needs.
How should drainage and subbase requirements be specified for different surfaces and climates?
Reference EPA permeable pavement guidance and ICPI/base-specs for recommended layer thicknesses, geotextile usage, compaction levels, and when to include underdrains or permeable designs to prevent pooling and frost heave. Include source categories: EPA stormwater pages, ICPI technical notes, and manufacturer subbase specs.
What climate-specific performance issues and countermeasures must be covered?
Identify hot/UV effects (surface heating, fading), freeze–thaw risks (frost heave, cracking), saturated/wet-soil risks (washout), wind exposure (uplift for covers), and coastal salt corrosion. Consult manufacturer technical notes, Trex/coastal guidance, ASCE/IRC design practice, and university extension resources for mitigation strategies (fastener selection, expansion gaps, drainage, coatings).
Next Articles
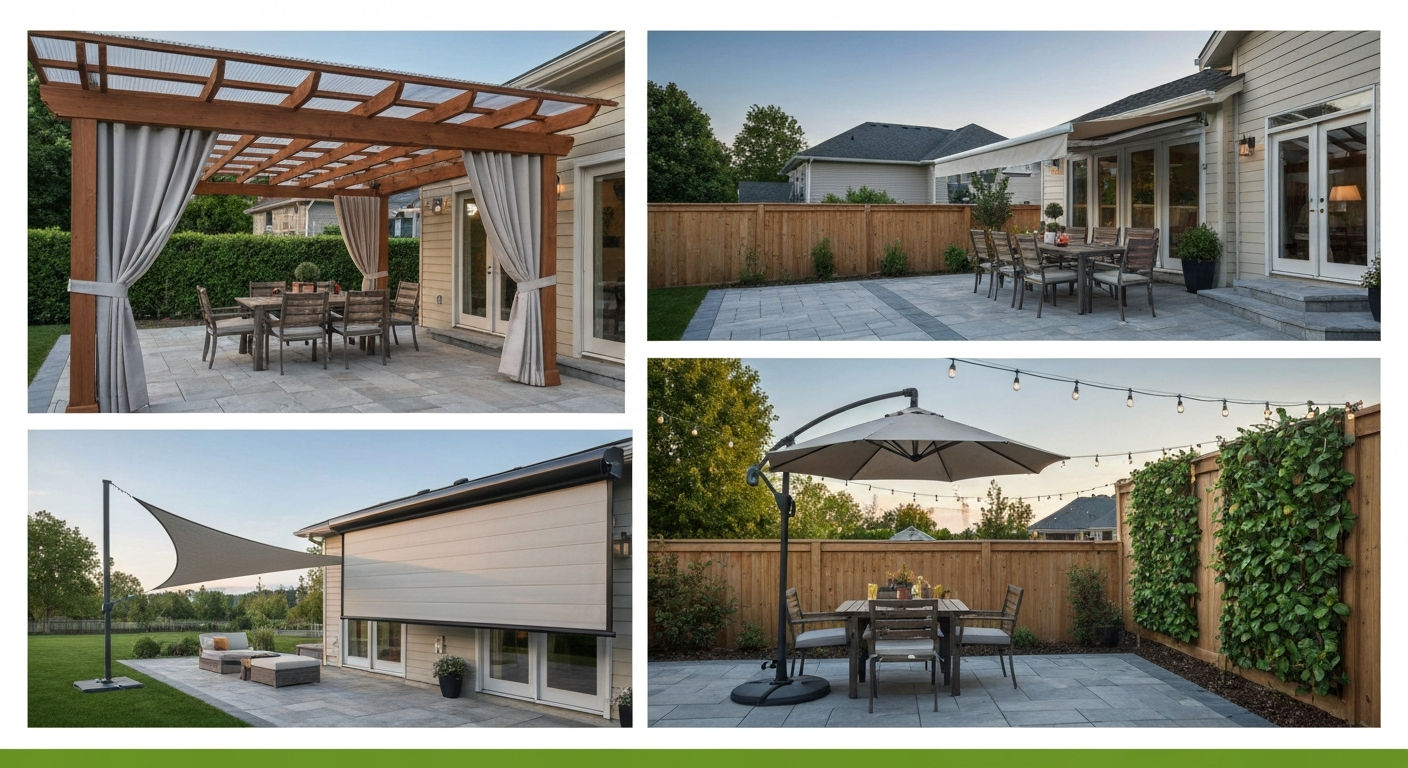
Alternatives to Patio Blinds: Best Shade, Privacy & Costs
Compare alternatives to patio blinds, awnings, pergolas, shade sails, umbrellas, screens; costs, pros/cons, DIY tips.
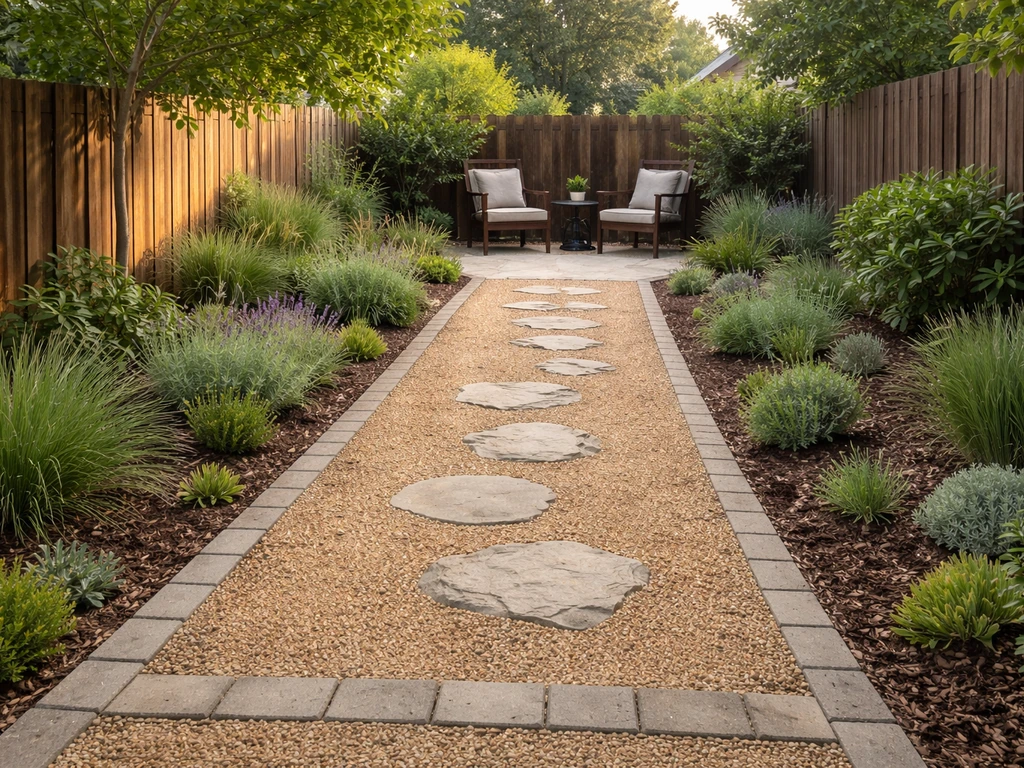
Garden Patio Alternatives: Options for Drainage, Comfort, DIY
Compare garden patio alternatives for drainage, comfort, and low maintenance with DIY layout steps and a decision shortl
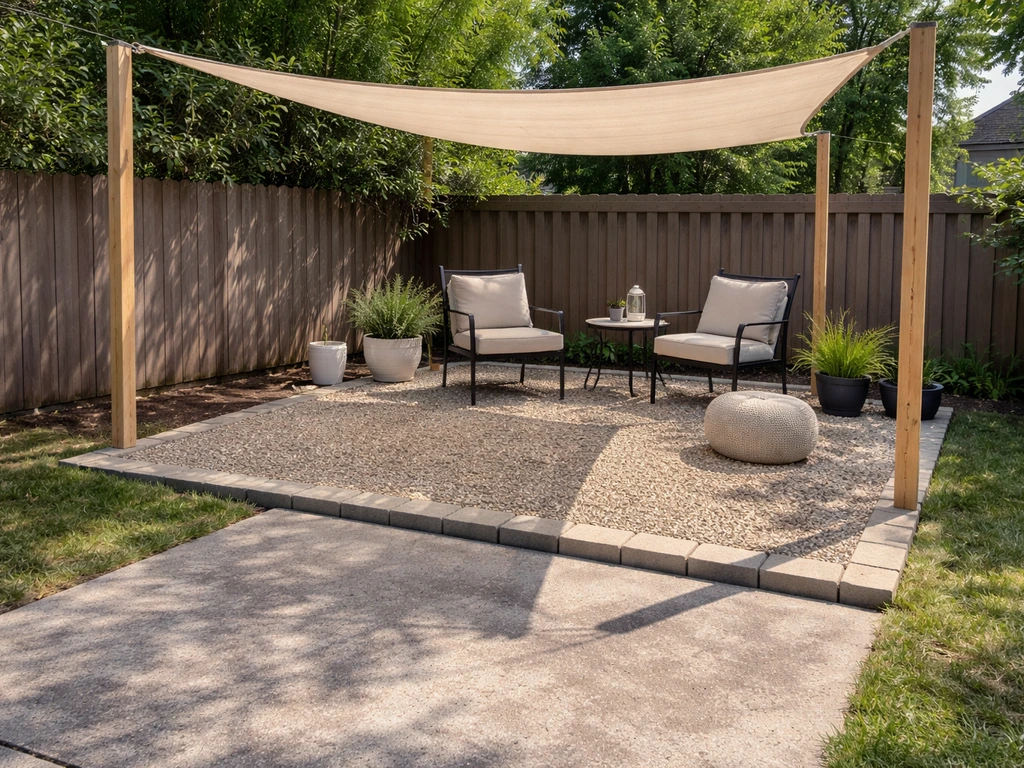
Inexpensive Patio Alternatives: Cheap Surface and Shade Fixes
Budget patio makeover ideas: cheap surfaces, shade and weather fixes, DIY vs hiring tips, costs, and installs for any ya