You can build a functional, good-looking patio for $2–$8 per square foot if you pick the right surface and do some of the work yourself. Pea gravel, snap-together deck tiles, and concrete resurfacing are the cheapest paths. If you already have a slab, a simple overlay or a set of interlocking tiles can transform it for a few hundred dollars. If you're starting from dirt, gravel or stepping stones get you there fastest and cheapest. If you want cheap patio alternatives, focus on gravel, overlays, or tile systems that match your existing base and climate. The rest of this guide breaks down every option by cost, effort, and climate fit so you can make a decision today.
Inexpensive Patio Alternatives: Cheap Surface and Shade Fixes

Phoebe Foster
29 Jun 2026
What 'cheap patio' actually means for your space
Before you shop anything, you need to define your baseline. A cheap patio means something different depending on whether you have an existing concrete slab, a gravel area, or bare soil. If you want to explore outdoor patio alternatives beyond the standard materials, compare cost, base requirements, and how each option holds up in your climate. It also depends on how you're going to use the space: outdoor dining with chairs and a table has different surface needs than a kids' play zone or a lounge area with a fire pit. And your climate matters more than most people realize. A $3-per-square-foot pea gravel patio is brilliant in Texas where drainage is the main concern. But in the Midwest where the ground heaves every winter, you'll want something that can flex without cracking.
The other thing to nail down early: are you replacing something or building from scratch? If you're tearing out an old cracked slab, expect to add about $2–$6 per square foot just for demolition and removal before your new surface goes in. That math changes your budget fast. A 200-square-foot demo job can add $400–$1,200 to the bill before a single new material is touched. If you can work with what you have, like resurfacing or laying tile on top of an existing slab, you skip that cost entirely.
Budget-friendly patio surface alternatives
These are the surfaces that actually deliver the lowest cost per square foot while still holding up to regular outdoor use.
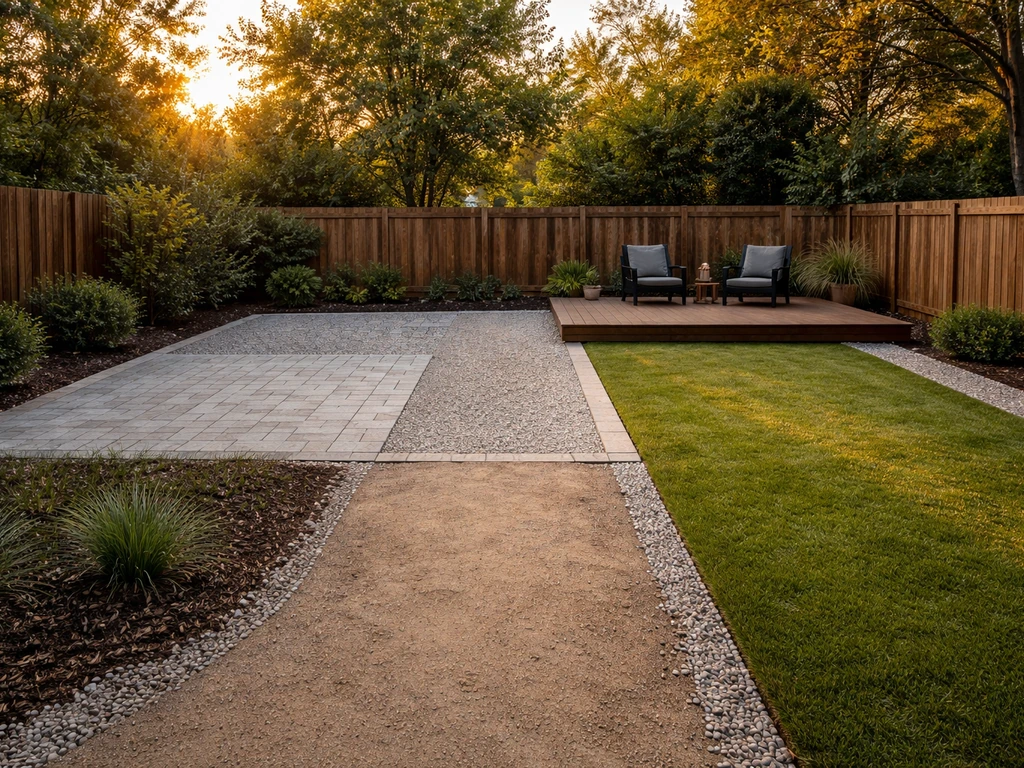
Pea gravel: the cheapest starting point
Pea gravel installed professionally runs about $1.50–$4.50 per square foot, and for a simple rectangular space you can DIY it for even less. It drains perfectly, stays cool in summer heat, and looks clean with the right edging. The catch: you need containment. Without edging, gravel migrates everywhere within a season. Budget edging as a required line item, not an optional upgrade. Gravel also isn't ideal for dining setups where chair legs sink and wobble, but it works great as a lounge or fire pit surround when you set flagstones as a firm base for furniture legs. If you want a more complete plan, compare these garden patio alternatives for lounge, dining, and fire-pit layouts based on your space and climate fire pit.
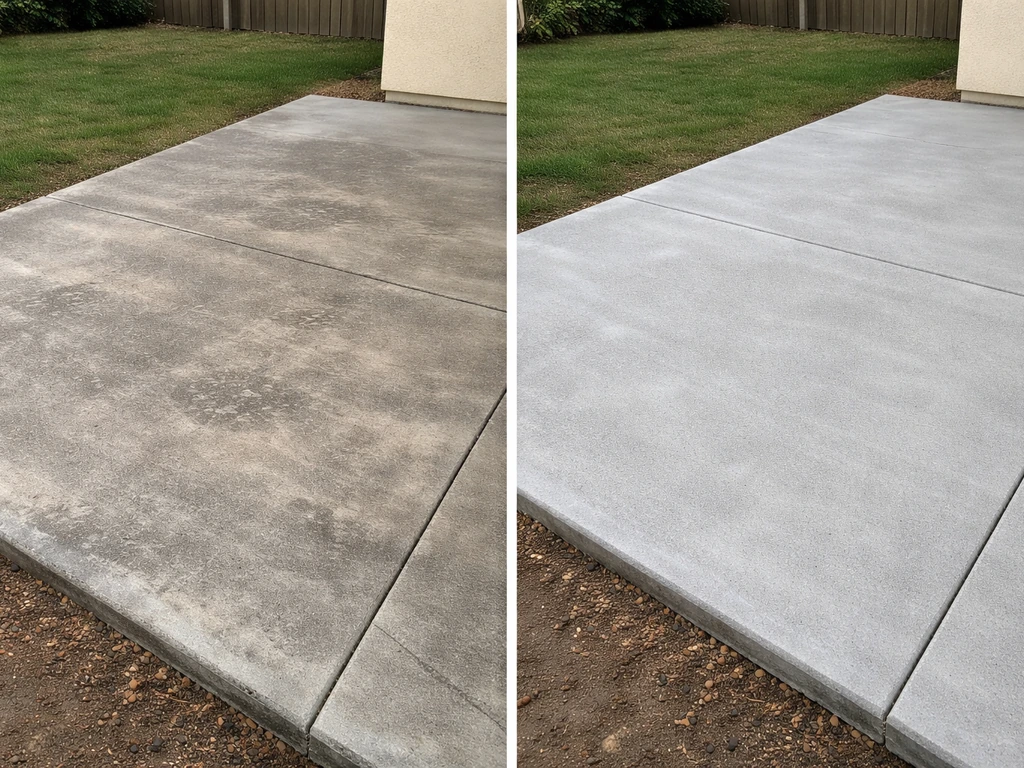
Concrete resurfacing: best value if you have a slab
If you've got an existing concrete slab that's stained, faded, or just ugly, resurfacing is the most cost-effective fix you can make. With the right choice among the best patio options, resurfacing can make a concrete patio look like new without rebuilding the whole base most cost-effective fix. blank" rel="noopener noreferrer">A plain overlay runs about $3–$7 per square foot, and a stamped decorative overlay goes $7–$20 per square foot. For a 200-square-foot patio, that's roughly $600–$1,400 for a plain resurface vs. $1,400–$4,000 for something that looks like stamped concrete. The stamped version is not DIY-friendly, but a plain skim coat overlay is manageable with some concrete experience. One important detail: if your slab has significant cracks or settling, you may want to look at concrete leveling first, which averages $3–$12 per square foot or $700–$5,000 per job depending on severity.
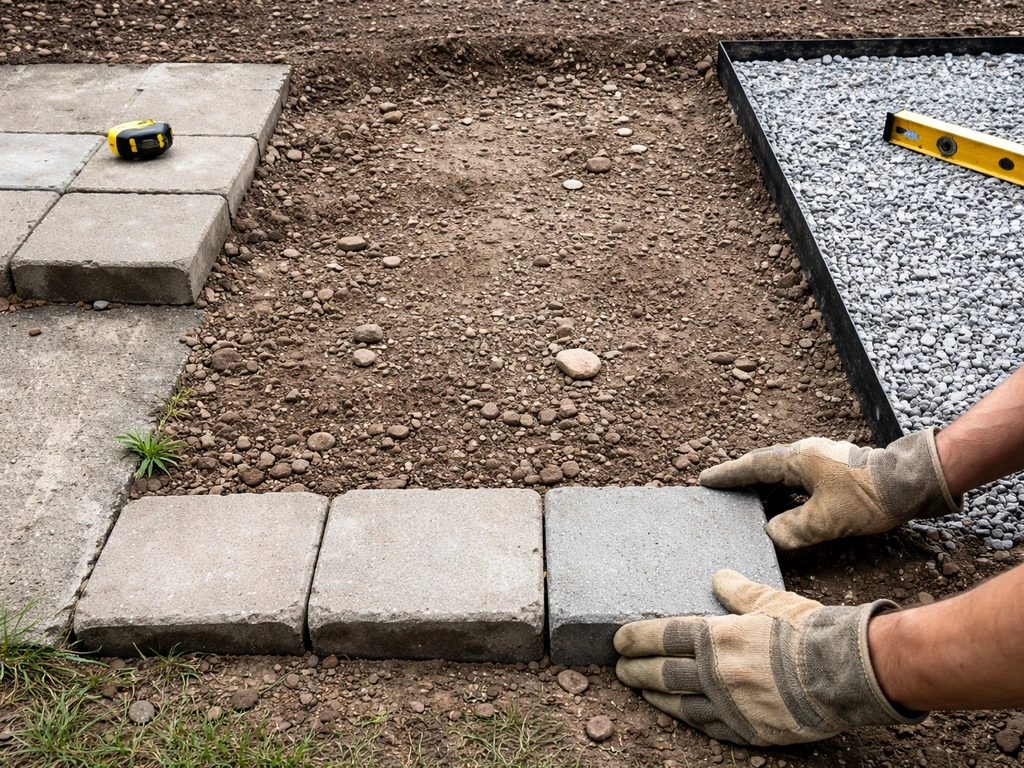
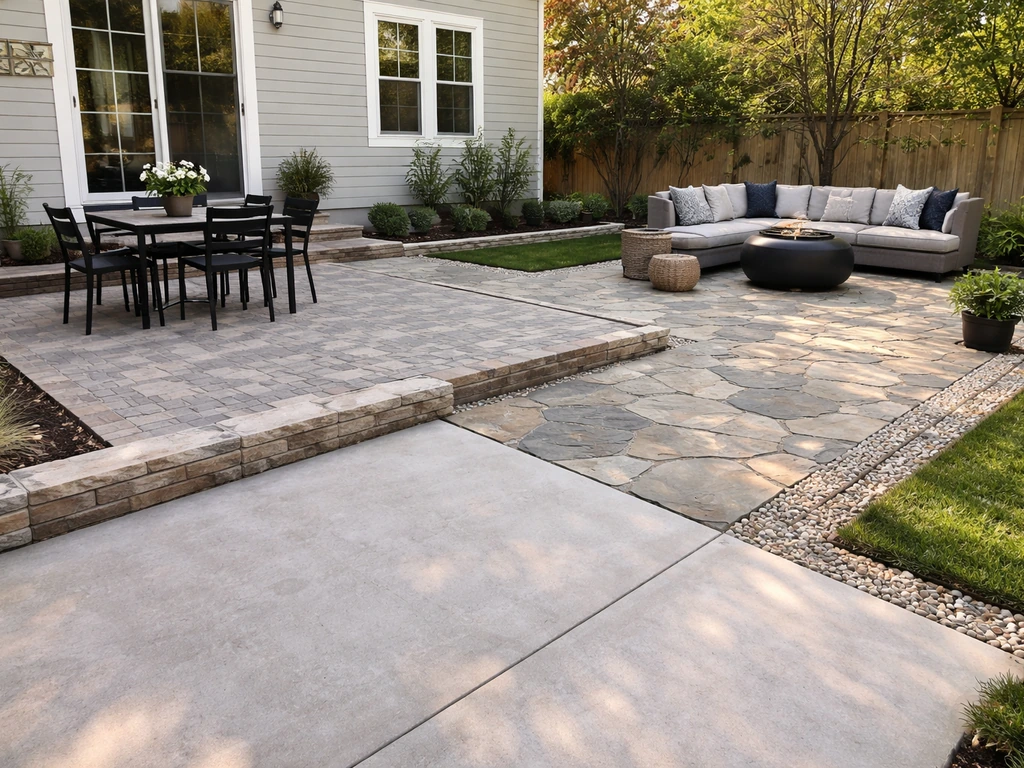
Pavers: flexible, durable, mid-range cost
Pavers land in the middle of the budget range. Labor alone runs $4–$11 per square foot based on 2026 data, with pro installers typically charging $50–$80 per hour. The total installed cost varies significantly based on material choice and base conditions, but budget-conscious paver projects using basic concrete pavers on stable ground are absolutely achievable in the $8–$15 per square foot range. What makes pavers worth it despite higher cost than gravel: they're solid underfoot, they look great, and individual units can be replaced if one cracks or settles. The non-negotiable here is base prep. The base needs to be 4–6 inches of compacted granular aggregate with 1 inch of bedding sand on top. Skip the base or go shallow, and you'll have a wavy, sunken patio after the first hard rain. This is consistently the place where cheap DIY paver jobs fail.
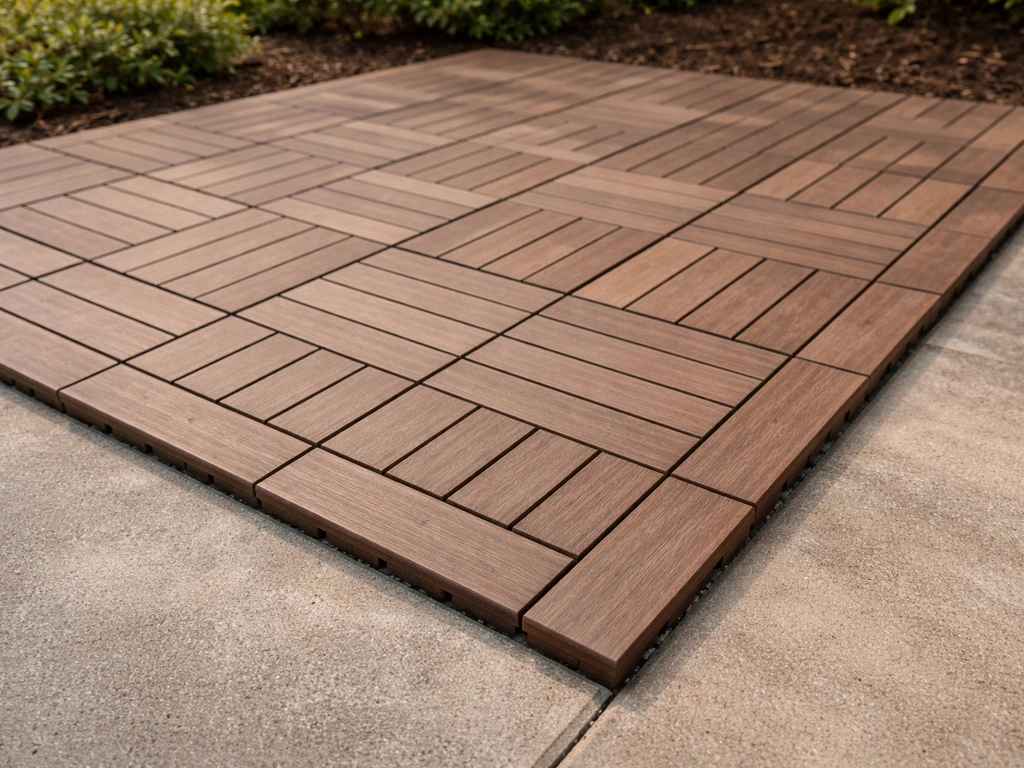
Snap-together deck tiles: instant, no-excavation option
Interlocking deck tiles, typically wood composite or porcelain, are the easiest upgrade you can make to an existing slab or firm surface. You literally click them together, no adhesive or mortar needed. They run $2–$6 per square foot for materials and can be installed in an afternoon. They're not a long-term replacement for proper paving, but for renters, for patios where you want to avoid permanent changes, or for a quick seasonal fix, they're hard to beat. The main limitation is that they only work on flat, stable surfaces. They won't fix an uneven slab.
Artificial grass: a softer surface alternative
Artificial turf makes sense for patios where kids or pets are the main users and you want a soft, low-maintenance surface. Installed costs vary by complexity, and curves or non-standard shapes add to the price. The base work here matters just like with pavers: you need a compacted base, a nonwoven geotextile weed barrier between the soil and the base material, and proper drainage design. Real drainage performance is limited by the slowest layer in the system, so if your native soil doesn't drain well, the turf will pond water no matter how permeable the backing is. Maintenance is minimal but not zero: brush the fibers monthly (more often for pets or heavy traffic), rinse when dirty, and top off infill when levels drop.
| Surface Option | Installed Cost (per sq ft) | Best For | Climate Watch |
|---|---|---|---|
| Pea gravel | $1.50–$4.50 | Fire pits, casual lounging, drainage-heavy climates | Fine in most climates; needs edging everywhere |
| Concrete resurfacing | $3–$7 (plain), $7–$20 (stamped) | Existing slabs that need a facelift | Seal in freeze-thaw climates; reseal every 2–3 years |
| Pavers | $8–$15+ all-in | Dining areas, heavy use, long-term value | Needs proper base depth in freeze-thaw zones |
| Snap-together tiles | $2–$6 (materials) | Renters, quick upgrades, existing flat slabs | Some materials expand in extreme heat |
| Artificial grass | $5–$12+ installed | Kids/pets, soft surface preference | Can get hot in direct sun; drainage must be designed in |
Low-cost patio systems: shade, covers, and comfort layers
A great surface only solves half the patio problem. If your space is unusable at 2pm because the sun bakes it, or if one rainstorm sends everyone inside, you need a shade or cover solution. The good news is that several affordable options solve this without a full pergola or permanent structure.
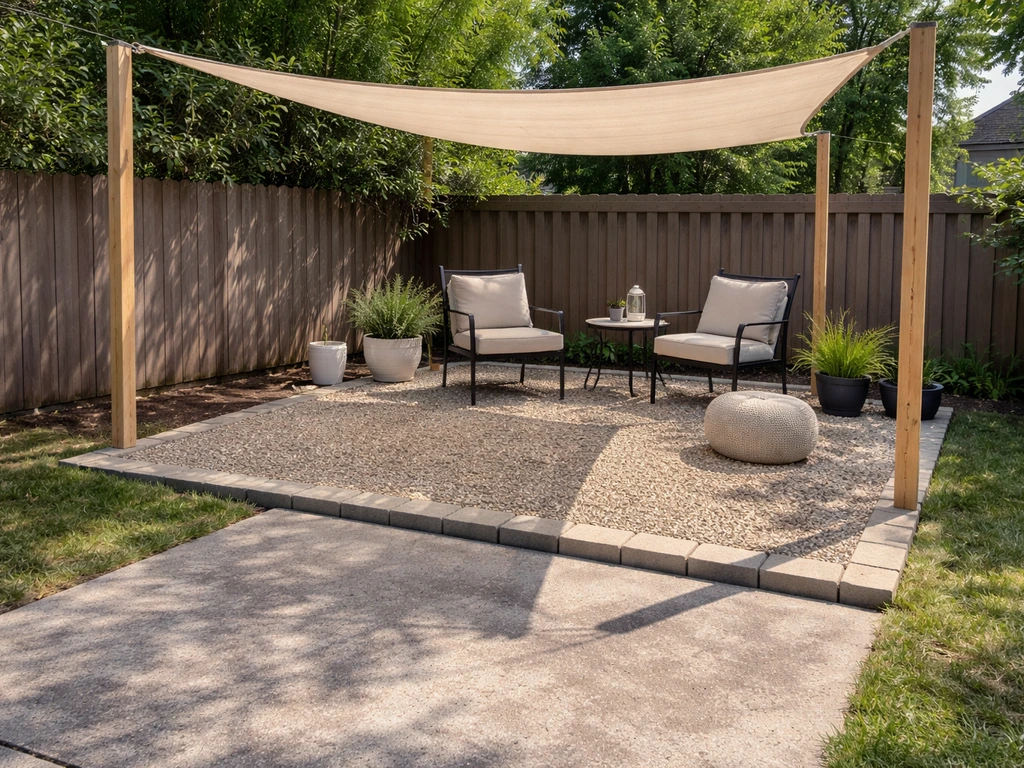
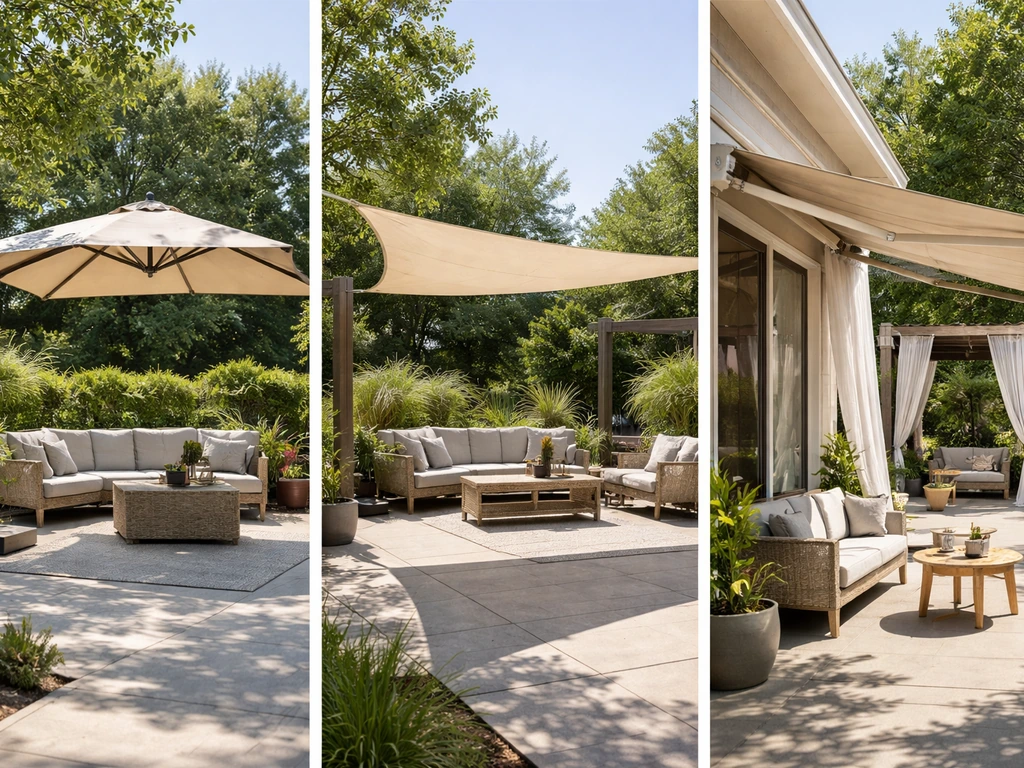
Shade sails and canopies
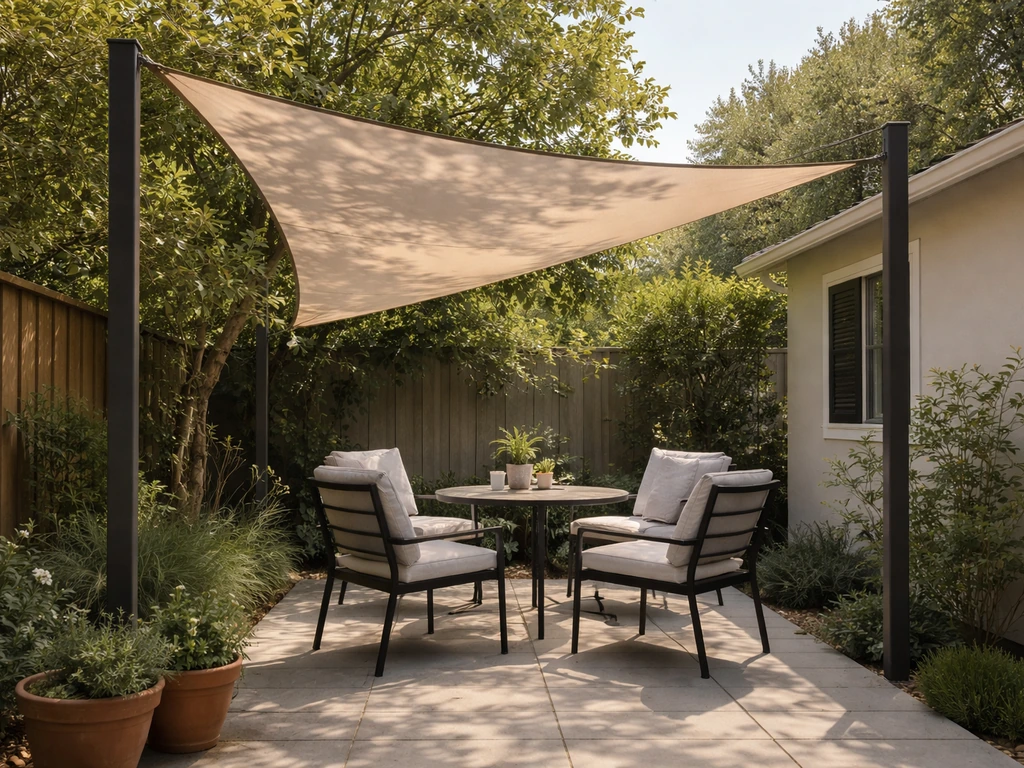
Shade sails are the most cost-effective shade solution available. A decent 12x12 or 16x16 sail runs $30–$150 depending on material quality and UV rating. They require mounting points, either existing posts, a fence, or anchor posts you drive into the ground. For a semi-permanent setup, triangle or square sails strung at an angle shed rain better than flat installations. If you want shade without committing to permanent window-style treatments, these alternatives to patio blinds can help you stay comfortable outside. They're not rated for high wind or snow loads, so in climates with strong summer storms or Midwest winters, take them down seasonally.
Retractable awnings
Retractable awnings are a step up in cost but a big step up in function. Professionally installed, they run about $15–$30 per square foot. Higher-end models include weather and sunlight sensors that extend or retract the awning automatically. For a 10x12 coverage area, you're looking at $1,800–$3,600 installed, which isn't cheap, but it's a permanent solution that adds real value. If you're covering a walkout from the house, a retractable awning is often the most practical long-term investment in this category.
Outdoor fans and misters
For hot climates like Texas or Arizona, a misting system or ceiling fan can make an already-shaded patio usable through summer. Misting kits start around $30–$100 for a basic line system you attach to a fence or pergola post. Outdoor ceiling fans mounted under a covered patio structure run $80–$300 for the fan itself. These aren't shade solutions on their own, but paired with any overhead structure, they're a cheap way to drop the perceived temperature by 10–15 degrees on a dry day.
Outdoor rugs as comfort layers
An outdoor rug on top of a slab, pavers, or even gravel (on a firm stepping stone base) changes the whole feel of a patio space. Polypropylene outdoor rugs in the 8x10 range start around $50–$150 and hold up well to sun, rain, and foot traffic. They define the seating area, soften the surface for bare feet, and add color without any installation work. This is probably the easiest and cheapest single upgrade on this entire list.
DIY vs. hiring a contractor: a simple decision framework
The honest answer is that most budget patio projects are DIY-viable for the surface work, but base preparation is where people get in trouble. Laying pavers on improperly compacted base material looks fine on day one and looks terrible by year two. The same goes for concrete leveling and any work that involves grading or drainage. Here's how to think about it.
| Task | DIY Viable? | Why It Matters |
|---|---|---|
| Pea gravel spreading and edging | Yes, easily | Straightforward, forgiving, easy to fix mistakes |
| Snap-together tile installation | Yes, easily | No special tools, no permanent changes |
| Concrete resurfacing (plain overlay) | Yes, with prep | Needs clean, stable slab; follow product instructions carefully |
| Paver installation (small, flat area) | Yes, but base matters | Compaction and base depth are critical; rent a plate compactor |
| Paver installation (large or sloped area) | Hire a pro | Drainage and grading errors are expensive to fix later |
| Concrete leveling | Hire a pro | Requires specialized equipment and material knowledge |
| Stamped concrete overlay | Hire a pro | Timing and technique are difficult; DIY usually looks bad |
| Retractable awning installation | Depends on mounting surface | Roof/fascia mounts need structural consideration |
When you do get contractor quotes, ask specifically about base prep. A quote that skips that detail, or one that seems unusually low, is almost always cutting corners on base depth and compaction. Ask the contractor: how deep is the base? What material? Will you use a plate compactor or hand-tamper? Those questions separate the good bids from the cheap ones that will cost you more to fix later.
Durability, maintenance, and climate fit
Budget surfaces aren't always low-maintenance surfaces. Here's what you actually need to know about keeping each option looking good over time.
Concrete overlays and sealers
A resurfaced concrete patio needs to be resealed to stay looking good and to protect against moisture infiltration. In freeze-thaw climates, this is not optional: water gets into micro-cracks, freezes, expands, and spalls the surface. Stamped concrete typically needs resealing every two to three years. For a penetrating silane-siloxane sealer (which soaks in rather than sitting on top), you may get five to ten years between applications. Acrylic sealers are cheaper upfront but often need annual reapplication. When you're budgeting a resurfaced patio, add sealer cost to the ongoing maintenance plan.
Pavers in freeze-thaw climates
Properly installed pavers actually handle freeze-thaw better than poured concrete because the individual units can shift slightly without cracking the whole surface. The key word is properly: that 4–6 inch compacted base is what allows movement without chaos. Use a freeze-thaw rated mortar or adhesive for any mortared applications, and be careful about using standard tile adhesives for outdoor work in cold climates. Products specifically formulated for exterior freeze-thaw exposure, like those tested to 150+ freeze-thaw cycles, are worth the slight price premium for climates that regularly see hard winters.
Artificial turf in heat and cold
Turf gets hot in direct sun. On a 95-degree day in Phoenix or Dallas, artificial grass surface temperatures can hit 150-160 degrees Fahrenheit without shade. If your patio is in full sun, pair turf with a shade sail or overhead cover. In cold climates, quality turf handles freeze-thaw fine as long as the drainage is built correctly: a frozen drainage layer with no way for water to escape creates problems. For pet owners, drainage performance is especially important and worth designing intentionally from the base up, not as an afterthought.
Gravel: lowest maintenance, some ongoing work
Pea gravel needs occasional raking and top-off as stones migrate or sink over time. In high-traffic areas, plan on adding a fresh layer every two to three years. Edging maintenance is the other regular task: check that edging stays flush and reset any sections that heave or shift seasonally. Overall it's one of the lowest-maintenance surfaces, but 'no maintenance' is not accurate.
Finishing touches: decor, lighting, and functionality on a budget
The surface and shade are your foundation, but what makes a patio actually feel finished and usable is the layer of detail on top. If you want other ways to get a similar look and feel, compare backyard patio alternatives like pavers, deck tiles, and outdoor rugs based on your climate and budget. None of these upgrades need to be expensive.
- String lights: A set of outdoor LED string lights on a 25–50 foot run costs $20–$60 and immediately makes the space feel designed and intentional. Run them along a fence line, overhead between two posts, or around a pergola. They're the single best return-on-investment patio upgrade available.
- Outdoor rug: Defines the seating zone and makes any hard surface more comfortable. Budget $50–$150 for a quality polypropylene 8x10.
- Planters and greenery: Large terra cotta or lightweight fiberglass planters with ornamental grasses or potted shrubs add visual structure and privacy without building a fence. Budget $30–$100 per planter.
- Solar path lights: Solar stake lights along walkways or around the patio edge cost $15–$40 for a multi-pack and require zero wiring.
- Furniture anchor zones: If you're on gravel or an uneven surface, use stepping stones or a small concrete pad (even poured tube form footings) as level furniture pads under table and chair legs so furniture doesn't wobble.
- Privacy screen panels: Bamboo roll fencing or freestanding lattice panels cost $20–$60 and add privacy and wind blocking without any permanent installation.
For functional upgrades, a small side table with a built-in cooler, an outdoor storage bench for cushions and tools, and a portable propane fire table all run under $200 and dramatically extend how often you actually use the space. If your patio is covered or semi-enclosed, a small outdoor Bluetooth speaker mounted under the eave completes the setup for another $40–$80.
Your shopping checklist and how to compare options fast
Before you buy materials or call a contractor, run through this list. It takes about 10 minutes and eliminates the most common budget mistakes.
- Measure your space and calculate square footage. Add 10% for waste and cuts.
- Determine your starting condition: bare soil, existing gravel, existing concrete slab, or cracked/uneven slab. This narrows your viable options immediately.
- Set your actual budget including all line items: surface material, base material (if needed), edging or border, adhesive or sand, tools or rental equipment, demolition (if applicable), and sealer or finish coat.
- Check your climate zone. In freeze-thaw areas, skip any surface or adhesive not rated for exterior freeze-thaw cycling. In high-heat areas, consider surface temperature and reflectivity.
- Define your primary use: dining (needs firm, level surface), lounging (soft or semi-soft surface OK), kids/pets (drainage and softness matter), or mixed use.
- Decide your DIY threshold: are you comfortable with a plate compactor and base prep, or do you want to hand off excavation and base work to a contractor and DIY the surface layer only?
- When comparing contractor quotes: confirm base depth and material specified, ask whether labor rate is hourly or fixed price per square foot, ask about demolition cost separately, and ask what warranty (if any) covers settling or drainage issues.
- Price materials at two suppliers: big box stores (Home Depot, Lowe's) for snap-together tiles, gravel, and overlays; a local landscape supply yard for bulk pavers, gravel by the ton, and base aggregate. Local yards are often significantly cheaper per unit for bulk material.
- Factor in ongoing maintenance cost: sealer, infill top-off, edging repairs, or re-leveling over a 5-year horizon before deciding that the cheapest upfront option is actually cheapest overall.
If you're still deciding between options after going through that checklist, the practical tiebreaker is this: if you have an existing slab in decent shape, resurface it, add snap-together tiles, or both. If you're starting from bare ground and want the lowest cost, go gravel with solid edging. If you want something that looks built-in and lasts 20 years without major re-work, pavers with a proper base are worth the extra investment upfront. Every other option falls somewhere in between those three. The best alternative patio materials depend on your existing base, your climate, and how you plan to use the space.
FAQ
What’s the cheapest inexpensive patio alternative if I need it usable immediately after installation?
Snap-together deck tiles, outdoor rugs over a stable surface, and properly installed stepping stones are typically fastest because they avoid lengthy cure times. Resurfacing and paver jobs usually require more lead time for curing and base settling, so they are not always the quickest path to “day-one use.”
Can I install deck tiles over cracked concrete or an uneven slab?
Deck tiles require a flat, stable surface. If the slab has significant dips or raised edges, the tiles can rock or separate, leading to uneven footing. For uneven concrete, consider concrete leveling or a thin self-leveling patch before installing tiles.
If I choose pea gravel, how do I keep it from disappearing into the yard?
Use continuous edging that penetrates below the gravel layer (not just surface borders) and set it on firm ground. Plan for a modest containment “upgrade” budget because gravel migration is the most common reason inexpensive gravel patios look messy after a season.
Are pavers really worth it for freezing climates, or will they heave?
They can perform well through freeze-thaw because individual units can shift slightly, but that depends on drainage and the full depth, compacted base. If water can’t exit, even a good base can pump or heave. Prioritize proper slope away from the house and avoid skipping geotextile and compaction steps.
What’s the most common DIY mistake that turns a “cheap” paver patio into an expensive fix?
Inadequate base compaction and insufficient base depth. A paver surface can look fine initially, then become sunken or wavy after rain and freeze-thaw cycles. When in doubt, rent a plate compactor and verify base thickness before placing bedding sand.
Can I do a resurfacing overlay over concrete that’s actively failing or flaking?
Generally, no. If the concrete is spalling badly, has major structural cracks, or is still moving, an overlay may bond poorly and fail prematurely. In those cases, concrete leveling or more extensive repairs come first, then resurfacing.
How often should I reseal a resurfaced patio, and what happens if I skip it?
In freeze-thaw regions, skipping sealers increases the chance of moisture entering micro-cracks, then spalling after freeze cycles. If you wait too long, you may need more than a simple recoat, such as additional surface prep to restore bond and protection.
Is artificial turf a good option for areas that get heavy rain?
It can be, but only if the drainage system is designed correctly from the base up. If your soil is prone to poor drainage, turf can trap water and lead to pooling or mud around traffic paths. The slowest layer in the build-up determines performance, so don’t assume permeable turf alone fixes it.
How do I choose between shade sails and retractable awnings?
Shade sails are lower cost and flexible, but they are not designed for high wind or snow loads, so you should expect seasonal removal in harsh weather. Retractable awnings cost more but provide more predictable coverage for everyday use, especially on walkouts and near doors.
What’s the best “upgrade order” for an inexpensive patio project?
Start with the surface and the base constraints, then add shade or weather control, then finish with comfort items like rugs or storage. Buying furniture and accessories too early can waste money if you later have to change surface height, drainage slope, or seating layout.
Should I worry about permits or HOA rules for patio materials and shade structures?
Yes, especially for anything attached to the home (awnings), anchored posts, or structures near property lines. Even low-cost changes like permanent edging, deck tiles with modifications, or mounted shade sails can trigger rules. Check before buying so you don’t have to redo an install.
Do outdoor rugs work on gravel or on pavers that shift?
They work best when placed on a firm, stable surface. On shifting pavers, rugs can bunch or wrinkle, and on loose gravel they can slide or sink unless the area is leveled and supported (for example, stepping stone bases). If you want rugs on gravel, consider a dedicated firm zone.
Next Articles
Backyard Patio Alternatives: Best Options by Budget and Use
Compare backyard patio alternatives by budget and use, with site prep, drainage, costs, and DIY vs pro install tips.
Patio Shade Alternatives: Best Options by Sun, Privacy, Budget
Compare patio shade alternatives by sun, privacy, wind and budget, with costs, DIY tips, and how to measure and mount sa
Best Patio Options: Compare Surfaces, Layouts, Costs and Setup
Compare patio surfaces, layouts, costs and setup for your budget, climate and DIY or pro install choices.