The best patio option for most homeowners is concrete pavers on a properly compacted gravel base. They hold up across almost every climate, look great, stay fixable without tearing everything out, and hit a sweet spot on cost and longevity. But "best" really depends on your yard's slope and drainage, your local climate, how much maintenance you want to deal with, and your budget. This guide walks you through the full decision stack, from picking a surface to getting a quote you can actually trust, so you can narrow it down to two or three real options and move forward with confidence. If you want garden patio alternatives, compare surfaces like stamped concrete, porcelain pavers, and modular options based on slip resistance, drainage needs, and how easy repairs are two or three real options.
Best Patio Options: Compare Surfaces, Layouts, Costs and Setup

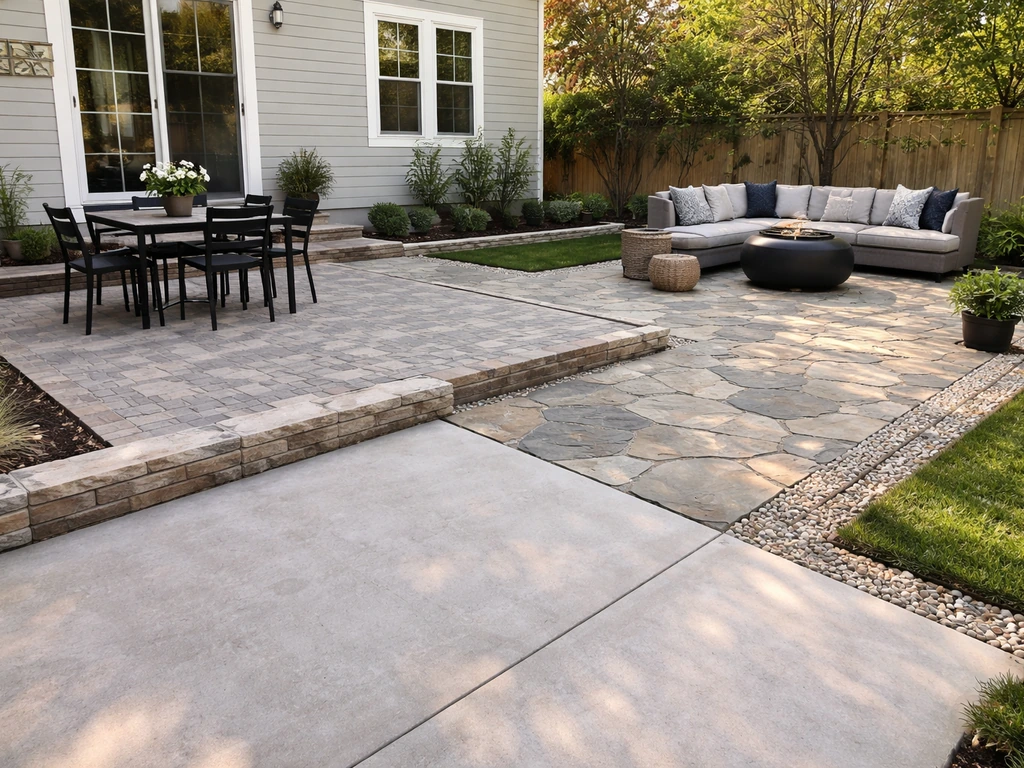
Match the patio to your space and goals first
Before you look at a single material or price, spend 20 minutes walking your yard and answering a few questions. These answers will immediately eliminate several options and make the rest of the guide much easier to use. If you're considering backyard patio alternatives beyond pavers or slabs, start by matching your space and goals first.
- How flat is the ground? Significant slope means extra grading and drainage work no matter what surface you choose.
- Does water pool anywhere after rain? That tells you drainage is a problem and needs to be solved at the base level, not with the surface.
- How big do you want the patio? A 10x10 space and a 20x30 space have very different material and labor cost profiles.
- What's your primary use: dining, lounging, entertaining, or all three? This affects layout shape and whether you need zones.
- What's your climate? Freeze-thaw cycles crack certain surfaces. Texas heat degrades some materials faster. Coastal humidity and salt air limit others.
- What's your actual budget, including base prep and drainage, not just the surface cost?
- Are you open to DIY for any part of the project, or do you need a contractor for everything?
A shady, wet Pacific Northwest yard calls for permeable pavers or gravel. A sun-blasted Phoenix backyard needs heat-resistant material and shade built into the plan from day one. A Midwest yard with hard freeze winters rules out ceramic tile unless it's rated for freeze-thaw. Get clear on your constraints before you fall in love with a look on Pinterest.
Surface and flooring options compared
Here's a practical breakdown of the most common patio surfaces. Stamped concrete, porcelain pavers, and other surfaces can be great alternatives to standard paver and slab setups, depending on your climate and budget alternative patio materials. Cost ranges reflect installed prices as of 2025-2026 and include basic labor. DIY savings are real but require the right tools and base prep knowledge.
| Material | Installed Cost (per sq ft) | Lifespan | Maintenance | Best For | Watch Out For |
|---|---|---|---|---|---|
| Concrete pavers | $10–$25 | 30–50+ years | Low (seal every 2–3 years) | Most climates, DIY-friendly | Settling if base is thin or poorly compacted |
| Poured concrete | $4–$30 (avg ~$10) | 25–40 years | Low-medium | Flat yards, simple budgets | Cracking over time, hard to repair sections |
| Stamped concrete | $8–$28 | Up to 25 years | Medium (seal regularly) | Decorative look on a budget | Slippery when wet, cracks show worse |
| Porcelain/outdoor tile | $3–$35 installed | 20–30 years | Low (easy to clean) | Covered patios, warm climates | Slippery, must be freeze-thaw rated in cold climates |
| Natural stone (flagstone, slate) | $15–$30+ | 30–50 years | Low-medium | High-end look, natural fit | Expensive, uneven surface, needs re-seating over time |
| Gravel/decomposed granite | $1–$4 | 10–20 years (with refresh) | Medium (raking, edging) | Budget builds, permeable drainage | Shifts underfoot, not ideal for furniture or heels |
| Wood decking (pressure treated) | $15–$35 | 15–25 years | High (stain, seal annually) | Raised decks, sloped yards | Rot risk, splinters, termite exposure |
| Composite decking | $20–$45 | 25–30 years | Very low | Families, low-maintenance priority | Higher upfront cost, can get hot in direct sun |
| Artificial turf | $5–$20 | 15–25 years | Low | Play areas, no-mow zones | Gets hot in summer sun, not for dining zones |
| Rubber pavers/tiles | $3–$8 | 10–20 years | Low | Play areas, budget patios | Limited aesthetic options, may fade |
A few surfaces worth calling out
Stamped concrete is popular because it mimics the look of stone or pavers at a lower cost, landing between $8 and $28 per square foot installed depending on pattern complexity. But it has a real weakness: once it cracks, repairs are obvious because matching the color and texture perfectly is nearly impossible. It's also slippery when wet unless you add a grit additive to the sealer. If you want the look but not the risk, concrete pavers give you a similar aesthetic with individual pieces you can swap out if one breaks.
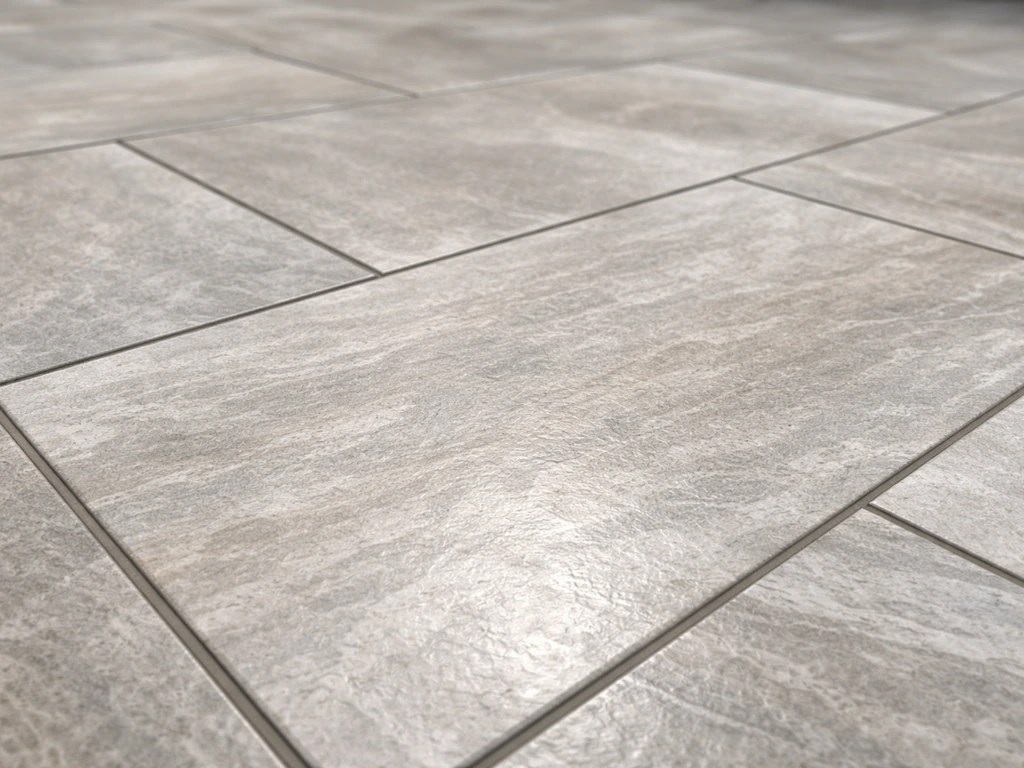
Porcelain pavers have become a serious option in recent years. They're extremely durable, don't absorb stains, and can look stunning. The catch is cost (up to $35 per square foot installed) and the fact that many porcelain products are genuinely slippery when wet. Always check the DCOF (Dynamic Coefficient of Friction) rating before buying outdoor tile. Anything under 0.42 is a slip risk. For cold climates, confirm the tile is rated for freeze-thaw cycles or you'll be replacing cracked tiles in year two.
If budget is the main constraint, gravel or decomposed granite is genuinely underrated. At $1 to $4 per square foot, it's the most affordable patio surface you can install. It drains perfectly, handles any climate, and can be dressed up with good edging and furniture. It shifts over time and isn't comfortable for bare feet, but for a side yard, a casual sitting area, or a DIY starter patio, it works well. This is where alternatives like stepping stones or mixed-material designs can stretch a budget further without sacrificing function.
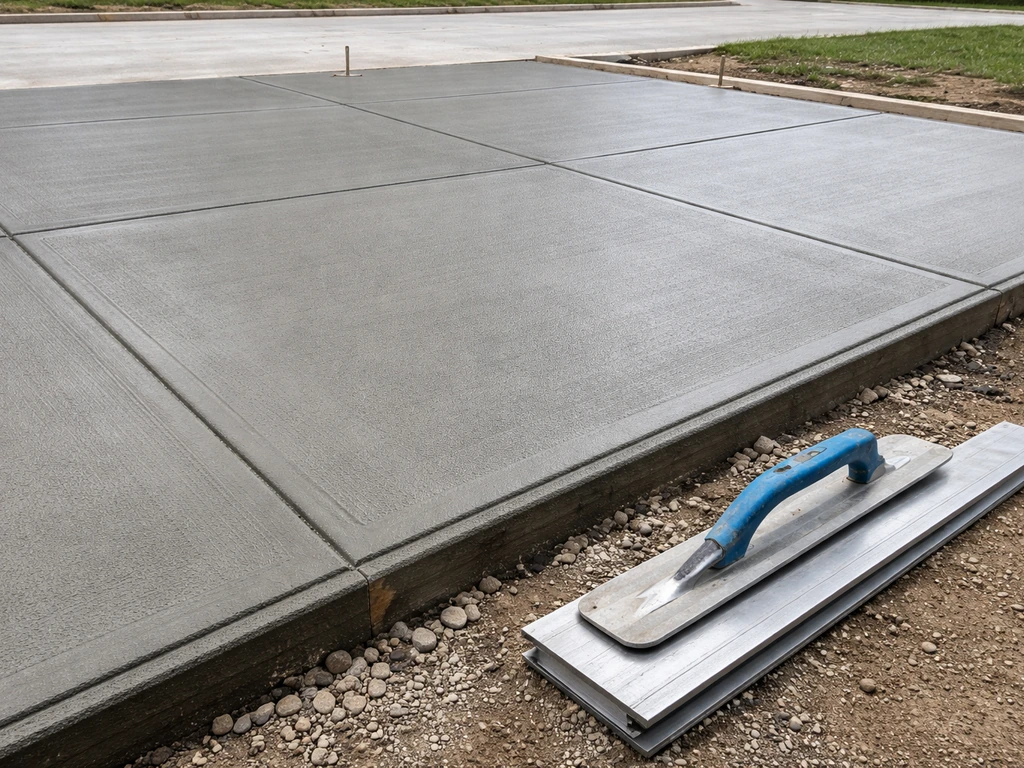
Sub-base, drainage, and leveling: the part people skip
This is the section most homeowners skim and later regret. The surface you see is only as good as what's underneath it. I've seen beautiful paver patios buckle after one winter because the installer used two inches of base gravel instead of four to six. Don't let that be your patio.
How a proper paver base is built
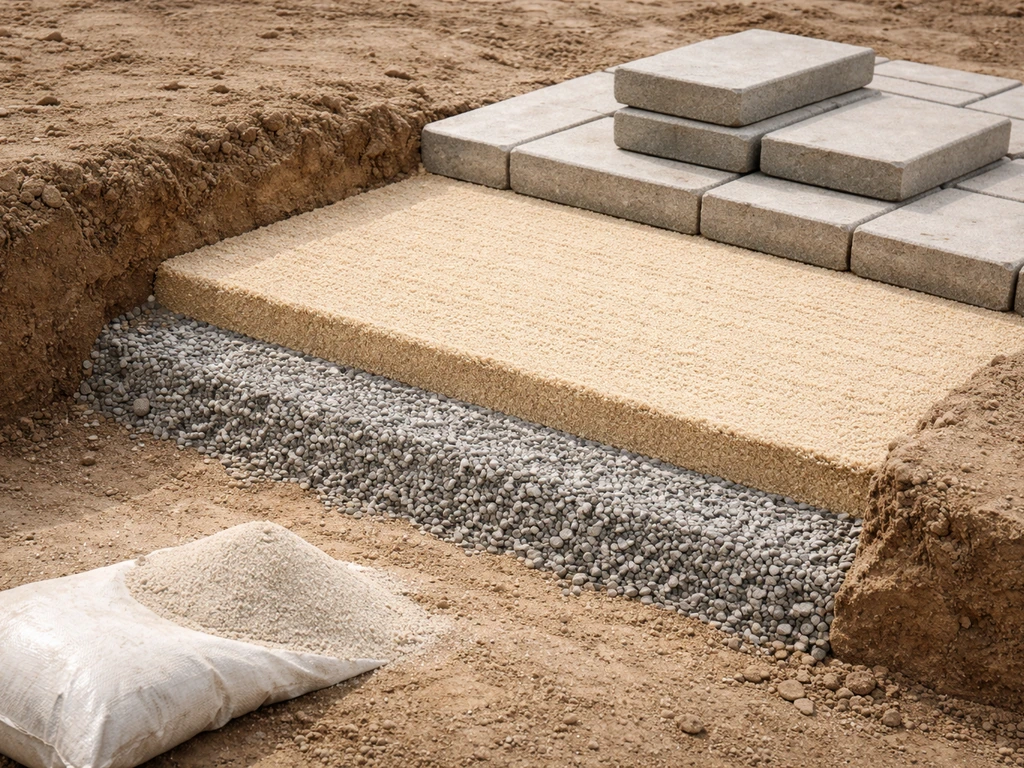
For a standard residential patio with concrete pavers, the ICPI-aligned build-up looks like this: excavate deep enough for your paver thickness plus about 4 to 6 inches of compacted gravel base plus about 1 inch of bedding sand. Total excavation depth is typically 7 to 9 inches from finished grade. The gravel base needs to be compacted in lifts using a plate compactor, blank" rel="noopener noreferrer">targeting about 95% of maximum Proctor density. A public specification example for exterior improvements requires completed subgrade uniform density not less than 95% of maximum density determined by ASTM D698, using Proctor-test benchmarks to define compaction quality blank" rel="noopener noreferrer">targeting about 95% of maximum Proctor density. The bedding sand goes on top at no more than 1 inch thick (25mm) and must be spread evenly. Pile on more sand thinking it'll level things out and you'll get settlement.
Polymeric sand goes in the joints after the pavers are set and compacted. It's activated with water, hardens up, and resists weeds and ants. The catch: it needs to be installed in dry conditions and cured without rain for 24 to 48 hours. Installing it in damp or cool weather, or getting rained on before it cures, can prevent it from setting properly. Check the forecast before you get to that step.
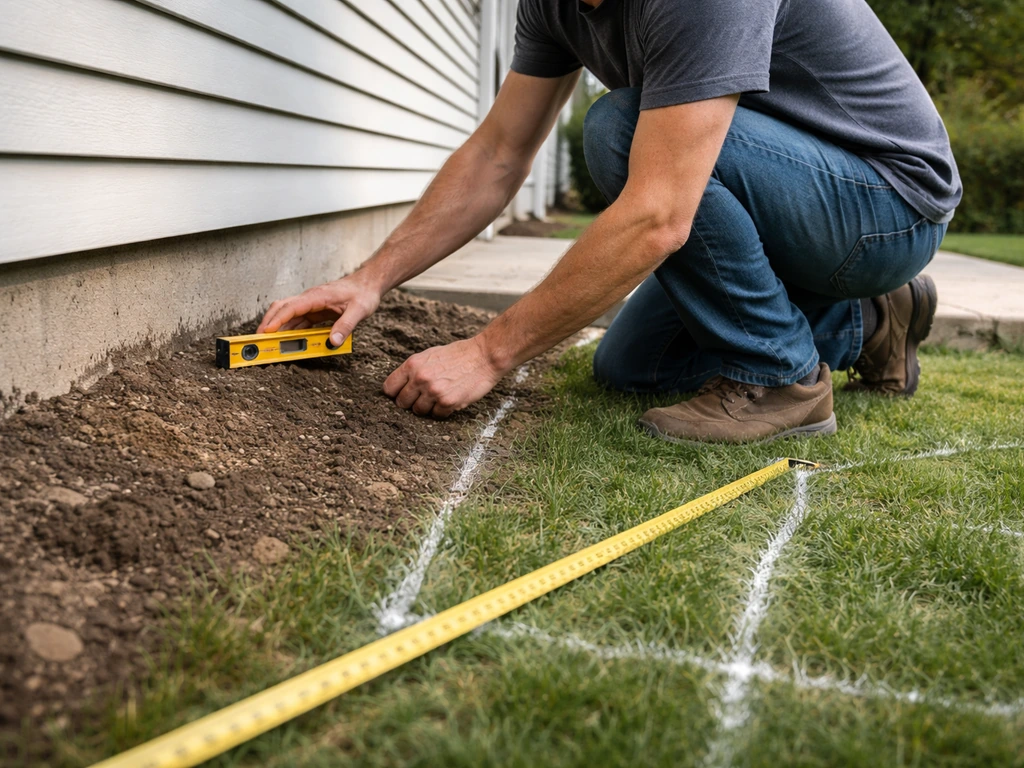
Drainage slope: get this right or nothing else matters
Your finished patio surface needs to slope away from your house at about 1/4 inch per foot. That's roughly a 2% grade. It sounds tiny, but over a 12-foot patio, that's 3 inches of drop. Too flat and you get pooling. Too steep and the patio feels off and furniture slides. If your yard naturally drains toward the house, you'll need to factor in swales, French drains, or a channel drain at the patio edge before you lay a single paver. Skipping this step is one of the most expensive mistakes you can make.
For concrete slabs, the same slope rule applies. The contractor should also install control joints (score lines cut into the slab) every 8 to 10 feet to give the concrete a place to crack without ruining the surface. If a bid doesn't mention control joints, ask about them.
Shade and weather protection options
A patio without shade is a patio you won't use in July. Weather protection is part of the core design, not an afterthought. If you want alternatives to patio blinds, focus on shade structures, adjustable covers, and heat-friendly ventilation that match your local weather Weather protection is part of the core design. Here's how the main options compare.
Pergolas
A pergola is the most popular structural shade option and for good reason. It defines the space, adds architectural interest, and can be outfitted with a roof, curtains, fans, and lights. Installed costs run roughly $10 to $40 per square foot for contractor-assembled kits on an existing foundation, and more if new footings are needed. For attached pergolas, many jurisdictions require a permit and the structure must be designed to handle dead loads plus at least 10 psf of live load per the IRC Appendix H standard. If your pergola is attached to the house, make sure your contractor pulls a permit. An unpermitted attachment can be a problem when you sell.
Retractable awnings
Retractable awnings are great for flexibility: shade when you want it, open sky when you don't. Motorized versions can be set to retract automatically in high winds. The pitch is adjustable on most models to help with sun angle and light rain runoff. The key limitation is that you must retract them in heavy rain, snow, or sustained wind. If you're not home when a storm rolls in, a motorized model with a wind sensor is worth the extra cost. Manual awnings are cheaper but require you to actually use them to get value.
Shade sails
Shade sails are budget-friendly and look modern when installed well. The most common mistake is mounting them with too much sag. A saggy sail pools water, flaps in wind, and wears out its hardware and fabric fast. They need to be pulled taut using proper tensioning hardware (turnbuckles and stainless eye bolts into solid anchor points). Triangular sails work better than square ones for tension. They're not great for heavy rain or extended wet climates but are excellent for sun protection in drier regions.
Fans, misters, and heaters
These are comfort extenders, not shade solutions, but they dramatically expand how many months your patio is usable. Ceiling fans under a pergola or covered patio reduce perceived heat significantly. Misting systems work best in low-humidity climates like Arizona or Southern California where the mist evaporates quickly. In humid climates like the Gulf Coast or Southeast, misting just makes everything feel wetter. Patio heaters (overhead radiant or freestanding propane) buy you weeks on each end of the season in places like the Midwest or Pacific Northwest. If you're wiring fans or heaters, all outdoor outlets and connections require GFCI protection per NEC 210.8(F). Don't skip that, and have a licensed electrician handle any new wiring.
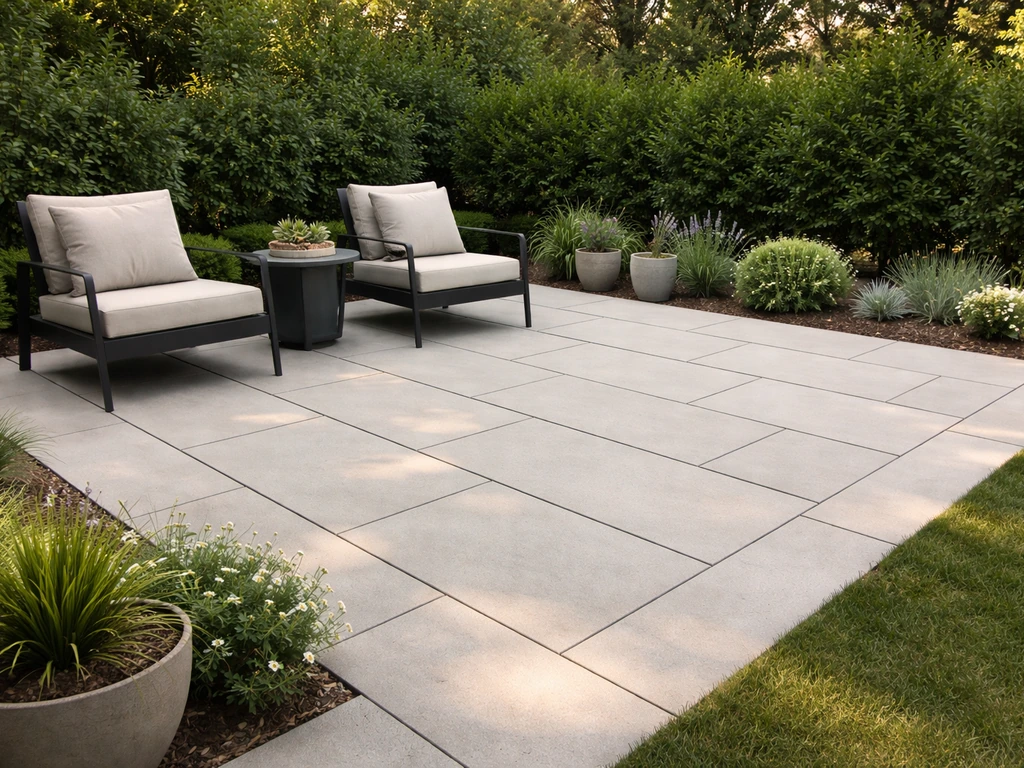
Comfort and usability upgrades worth planning for
The difference between a patio you use every weekend and one you ignore is usually comfort, not aesthetics. These upgrades make the biggest real-world difference. If you're still deciding on the look and feel, exploring outdoor patio alternatives can help you choose a surface, layout, and weather setup that fits your lifestyle and budget.
Lighting
Outdoor lighting is one of the highest-return upgrades you can add to a patio. String lights under a pergola, recessed step lights, and pathway lighting all cost very little relative to the impact. If you're having electrical run for fans or outlets anyway, have the electrician rough in a couple of dedicated circuits for lighting at the same time. All outdoor receptacles must have GFCI protection, and any fixtures need to be rated for wet or damp locations depending on placement. Plan the lighting before the concrete or pavers are poured, not after, so conduit can be run under the surface.
Privacy screens and walls
If you have neighbors close by, privacy makes or breaks how much you actually relax outside. Options range from lattice panels and fabric curtains on a pergola to cedar privacy walls, gabion walls, bamboo screens, and tall planted hedges. Screens that attach to an existing fence or pergola post are the easiest and cheapest. Freestanding walls need footings and sometimes permits. If a complete privacy barrier isn't in budget now, even a single 6-foot panel positioned strategically between you and the neighbor's sightline does a lot.
Seating zones and outdoor kitchens
Dividing a larger patio into zones, dining over here, lounge seating over there, makes the space feel intentional and work better for entertaining. Use outdoor rugs, planters, or a simple change in furniture arrangement to define zones without building anything. If an outdoor kitchen or fire feature is on your list, rough in the gas line and electrical during the patio build. Retrofitting those later means cutting into finished work, which is always more expensive and disruptive.
DIY vs hiring a contractor: know where the line is
There's a lot you can DIY on a patio project, and a few things you really shouldn't. Being honest about this saves money and avoids expensive do-overs.
Good DIY candidates
- Gravel or decomposed granite patios: excavation, edging, and spreading gravel is totally DIY-able with rented tools.
- Paver patios on flat, well-draining ground: if you're willing to learn proper base prep and rent a plate compactor, pavers are one of the most achievable DIY patio projects.
- Shade sails: installation is straightforward if you have solid anchor points and follow tensioning instructions.
- String lights and low-voltage landscape lighting: plug-in or low-voltage systems are easy and safe.
- Pergola kits: many manufacturers sell DIY-friendly kits that two people can assemble in a weekend on an existing slab.
- Furniture arrangement, planters, outdoor rugs, and decor: all DIY, always.
Hire a pro for these
- Poured concrete and stamped concrete: forming, pouring, finishing, and cutting control joints at the right time is a skill that takes practice. A bad pour is very expensive to fix.
- Any significant grading or drainage work: getting slope wrong is a serious problem that affects everything built on top of it.
- Electrical work for outlets, fans, or lighting circuits: code compliance and safety require a licensed electrician.
- Attached pergolas or patio covers that require permits: structural attachment to the house and engineer-reviewed loads need professional handling.
- Natural gas line rough-in for outdoor kitchens or heaters: always a licensed plumber or gas fitter.
- Large paver projects on sloped or problem drainage sites: the base work alone is complex enough to warrant professional installation.
The honest middle ground: you can save significantly by doing the demo and excavation yourself, then having a pro handle the base compaction and surface installation. Talk to contractors about what parts they're willing to hand off or let you assist with. Some will, some won't, but it's worth asking.
How to compare quotes and choose the right installer
Getting multiple quotes is table stakes. Getting useful, comparable quotes takes a little more work. Here's how to do it right.
What to ask every contractor
- What is the total excavation depth and base thickness you're proposing? (For pavers, you want 4 to 6 inches of compacted gravel base plus 1 inch bedding sand minimum.)
- What compaction equipment will you use, and how many passes? (A plate compactor run in multiple passes is the right answer. Hand tamping a base is not.)
- What drainage slope will you establish, and how will you verify it? (The answer should be approximately 1/4 inch per foot away from the house.)
- Will you use polymeric sand or regular sand in the joints? (Polymeric is almost always the better choice.)
- Is a permit required for this project, and who pulls it?
- What is your warranty on labor and materials, and what does it specifically cover?
- Can I see three recent completed projects I can visit or at least see photos of?
- Are you licensed and insured in this state? Can I get a copy of your certificate of insurance?
Red flags in bids and contractor behavior
- A bid that lists "base prep" with no specifics on depth or compaction method.
- The lowest bid is dramatically lower than the others (it's usually cutting something, often base depth or compaction).
- Pressure to sign immediately or an offer that's only valid "today."
- No mention of drainage slope or grading in the scope of work.
- Asking for more than 30% down before work starts.
- No written contract with scope, materials, timeline, and payment schedule.
How to actually compare bids
Don't compare total price. Compare price per square foot after you've confirmed the scope is equivalent. A bid that includes 6 inches of compacted base, polymeric sand, and edge restraints is worth more than a cheaper bid that skips any of those. Make a simple table: list each bidder across the top, then list base depth, compaction method, drainage plan, materials brand, joint sand type, warranty, and price per square foot down the side. That makes it much easier to see what you're actually getting for the money.
Narrowing to your best 2–3 options
Use this decision path to get to a short list fast. Answer each question and follow the path.
- Is your budget under $5 per square foot installed? Go with gravel, decomposed granite, or a DIY stepping-stone layout. Skip the rest of the list for now.
- Is your budget $5–$15 per square foot? Focus on poured concrete or basic concrete pavers DIY. Stamped concrete is possible at the low end of complexity.
- Is your budget $15–$30 per square foot? Concrete pavers with a proper base, mid-range natural stone, or stamped concrete with good design complexity all work here.
- Is your budget above $30? Porcelain pavers, premium natural stone, or composite decking on a raised platform are realistic.
- Do you have freeze-thaw winters? Eliminate ceramic tile, natural slate, and any surface not rated for freeze-thaw. Stick with concrete pavers, poured concrete, or quality porcelain rated for freeze-thaw.
- Is your yard wet or poorly draining? Permeable pavers or gravel surface over a properly graded base should be your first look. Any solid surface requires a serious drainage plan.
- Is maintenance a top concern? Composite decking and concrete pavers are your lowest-maintenance solid surfaces. Avoid wood decking and stamped concrete if you don't want to seal regularly.
- Do you want DIY control? Gravel and pavers are the most DIY-accessible. Concrete and anything structural should have at least the critical steps professionally handled.
Mistakes that cost homeowners the most
These come up over and over, and every one of them is avoidable with a little upfront planning.
- Skipping the drainage plan and building on an ungraded surface: water will find its way under and behind everything you build.
- Accepting a vague "base prep" line item without asking what it actually means in inches and compaction method.
- Choosing a surface based purely on looks without checking freeze-thaw ratings or slip resistance for your climate and use.
- Not running electrical conduit under the patio before the surface is installed: retrofitting it costs three to five times more.
- Installing a pergola or attached cover without a permit: it can affect your homeowner's insurance and create problems at resale.
- Using a patio contractor who doesn't pull their own permits or carry liability insurance.
- Pouring concrete in hot, dry conditions or cold weather without proper curing precautions: it compromises the slab permanently.
- Installing polymeric sand before checking the forecast: rain during curing ruins it.
- Buying the cheapest pavers or tile without verifying compressive strength or freeze-thaw cycle ratings for your region.
The good news is that most of these mistakes are completely avoidable if you slow down on the planning side. A patio built right, with the correct base, proper drainage, and a surface matched to your climate, will easily last 25 to 50 years. Rush it or cut corners and you're redoing it in five. Take the extra week to nail down the scope, get three solid bids, and confirm the details in writing before anyone puts a shovel in the ground.
FAQ
How do I decide between pavers and a slab if my budget is tight but I want low long-term hassle?
If you expect freeze-thaw, frequent wet winters, or you want targeted repairs, pavers usually cost more upfront but let you swap individual units. If your area has stable soils and you prefer a simpler look with fewer joint materials, a slab can be easier to maintain, but only if the contractor addresses control joints and proper slope and uses a base built for soil movement.
Can I install patio pavers over existing concrete or asphalt?
Often you should not. Thickness, drainage, and the need for a properly compacted base usually change the finished height, and overlaying can lock in water instead of letting it drain. A contractor should evaluate cracking, settlement, and whether you can meet the required slope away from the structure without raising the patio too high.
What’s the biggest reason a paver patio fails even when the surface looks perfect?
Inadequate base depth and compaction, especially using the wrong gravel size or skipping compaction in lifts. Even with the right face material, a weak base leads to rocking, uneven areas, and weeds in joints, usually after the first winter or heavy freeze-thaw season.
Do I need a geotextile fabric under the gravel base?
It can help, especially in areas with sandy or silty soils where fine particles migrate upward into the base. However, it does not replace base depth and compaction. The spec matters, so ask whether the plan uses a fabric to reduce soil intrusion and what it will be placed on, not just whether it’s included.
How do I prevent weeds if I choose polymeric sand for the joints?
Polymeric sand reduces weed and ant growth, but it only works when installed dry, cured properly, and confined by edge restraints. Also check that runoff is directed away from the joints, because persistent moisture at the patio edge can promote joint washout and early joint failure.
What edge restraints should I look for in bids, and why do they matter?
Ask whether the quote includes concrete or steel edge restraints (and what dimensions are specified) and how they’re tied into the base. Edges are what stop pavers from spreading, which directly affects joint integrity and the long-term slope of the surface.
If my yard slopes toward the house, what drainage steps usually come first?
Start with a site plan for surface runoff before choosing any surface material. Common approaches include a swale or trench drain at the patio edge, a French drain, or redirecting downspouts away from the patio. The goal is to keep water from pooling at the base, not just to make the patio look level.
How can I confirm a patio contractor’s compaction quality before work starts?
Ask what equipment they use for compaction (for example, plate compactor) and whether they compact in lifts to the specified depth. If possible, request documentation of compaction targets (such as Proctor density) and how they handle areas that are harder to compact, like near posts or at irregular borders.
What DCOF number should I require for porcelain pavers, and what if the tile is already installed?
You should request the specific outdoor slip rating (DCOF) from the product documentation before purchase. If porcelain is already installed and is too slick, options are limited because you typically cannot fix it without surface changes, such as approved sealers with grit or replacing the surface. This is why confirming the rating and the specific finish matters.
Is stamped concrete actually slippery, and how do I evaluate it for my climate?
It can be slippery when wet, depending on the sealer and finish. Ask about the sealer type and whether an anti-slip additive is included, then evaluate samples using water and foot traffic patterns similar to how you’ll use the space, especially near stairs or cooking areas.
What’s the correct slope for a patio, and how should I measure it?
Aim for about a quarter inch per foot away from the house (roughly 2 percent). Contractors should show a layout with string lines or laser leveling so you can verify the grade across the patio footprint, especially at transitions like steps, door thresholds, and drainage channels.
Do retractable awnings and shade sails require the same kind of structural permitting as pergolas?
Not always, but anything attached to a building or requiring new anchors can trigger permits, depending on your local rules. Pergolas are more frequently regulated, especially when attached to the house. Ask your contractor to confirm permitting for your specific attachment method and wind rating.
When should I choose a patio fan, mister, or heater for comfort?
Match it to humidity and season patterns. In low-humidity climates, misting can actually cool, while in humid climates it can feel wetter. If your area has shoulder-season comfort issues, overhead or radiant heaters often extend use more reliably than misting, and fans help under a covered structure.
Do outdoor outlets and lighting circuits need special electrical requirements?
Yes. Any outdoor receptacles and many exterior fixtures must be protected with GFCI devices, and outdoor wiring needs wet or damp location ratings. If your project requires new wiring, plan for a licensed electrician and ensure the patio build schedule includes rough-in before pavers or concrete are poured.
What patio upgrades can I phase later without damaging the base work?
Electrical rough-in for lighting and outlets, adding conduit runs, and setting up designated locations for irrigation or drainage are best done before the surface. You can usually phase furniture, rugs, planters, and decorative lighting later, but avoid planning future fire features or outdoor kitchens unless you already planned gas and electrical routing during the build.
What questions should I ask about warranties and repairs before signing a paver or slab contract?
Ask what the warranty covers specifically (materials, labor, base failure, and joint issues), what triggers voiding (for example, failure to maintain joint sand), and what response timeline is promised for settlement or cracking. Make sure the warranty details are in writing and align with the build scope you reviewed in the price-per-square-foot comparison.
How many quotes should I request, and what makes quotes truly comparable?
Request at least three. Quotes become comparable when scope items match, including base depth, compaction method, drainage approach, edge restraints, joint sand type, and any required slope work. Compare price per square foot only after the depth and drainage details are equivalent, not just the surface material.
Compare alternative patio materials for durability, maintenance, weather performance, costs, comfort, and installation t

Affordable patio alternatives with costs, easy DIY surfaces, durability tips by climate, and step-by-step next actions.

DIY outdoor patio ideas for planning, building, upgrading, and maintaining floors, shade, privacy, lighting, and decor.