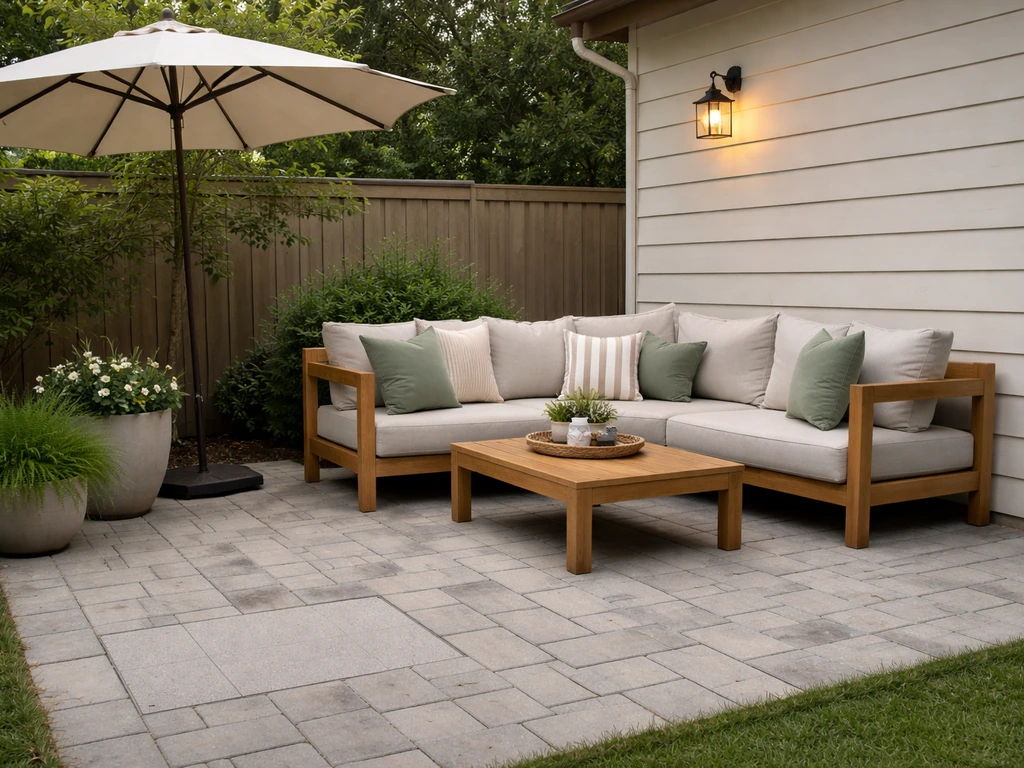
The best time to lay a patio in the UK is between late March and October. That window gives you the warmest ground temperatures, the lowest frost risk, and the longest dry spells, all of which directly affect how well your mortar, bedding, and jointing materials cure. If you're planning a DIY project or booking a contractor right now in mid-June, you're sitting right in the sweet spot.
Best Time of Year to Lay a Patio UK Guide and Timing Tips

Phoebe Foster
15 Jun 2026
Why timing actually matters for patio quality
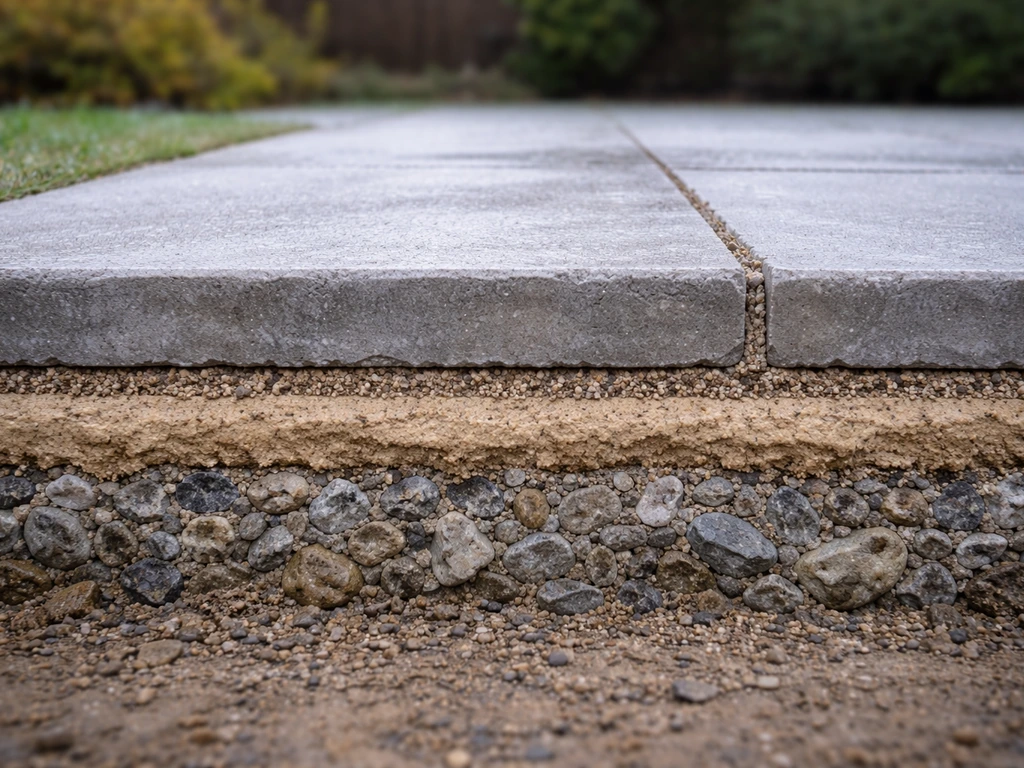
A patio isn't just slabs dropped on dirt. Every layer, from the compacted sub-base up through the bedding mortar and the jointing compound, relies on temperature and moisture conditions to set and cure properly. Get those conditions wrong and you're looking at slabs that move, joints that crack or wash out within a season, and bedding that never fully hardens.
Cold is the biggest enemy. Ground frost can push slabs vertically or horizontally after they've been laid, breaking the bond between slab and bed. Wet conditions matter too. If residual water sits in your joints when you apply cementitious jointing compound, it throws off the water-to-cement ratio, which leads to reduced strength, shrinkage, cracking, and faster erosion. Neither of these failures is obvious the day you finish the job. They show up three or six months later, and by then you're relaying sections rather than just admiring the finished patio.
The ideal seasonal window, UK vs general
In the UK, Marshalls and most professional paving bodies recommend working between March and November, treating December through February as the high-risk frost period to avoid. That's a broad window, but within it, late spring through early autumn (roughly April to September) is where you'll find the most predictable conditions. Spring is ideal for getting ahead of summer use. Autumn works well too, as long as you finish jointing well before the first hard frosts arrive.
For readers in other temperate climates, the same logic applies: aim for the months where overnight temperatures stay reliably above 3°C and you can count on at least 24 to 48 dry hours after jointing. In hotter climates like the southern US, the concern flips slightly, since extreme summer heat can accelerate curing too fast in some materials, so spring and autumn become the prime windows there.
| Season (UK) | Conditions | Overall Suitability |
|---|---|---|
| Late March – May | Rising temps, manageable rainfall, low frost risk | Excellent |
| June – August | Warmest and driest, long dry spells, ideal curing | Excellent |
| September – October | Cooling but still workable, watch late frosts | Good |
| November | Frost risk rising, shorter dry windows, proceed carefully | Marginal |
| December – February | High frost risk, cold ground, avoid if possible | Poor |
Day-to-day checks to confirm the conditions are right
The calendar gets you in the right ballpark, but you need to check actual conditions before you mix a single bag of mortar. Here's what to look at on the day you plan to lay or joint.
Temperature thresholds
This is non-negotiable. NCC Streetscape is clear: bonded natural stone, concrete, or ceramic paving should never be laid or jointed below +3°C on a rising thermometer. Steintec adds a complementary rule: don't lay bedding or joint paving if the temperature is below 3°C on a falling thermometer, or below 2°C on a rising thermometer. Marshalls' concrete paving guidelines are similar, citing 3°C on a falling thermometer and 1°C on a rising thermometer as stop points. The key distinction is whether the temperature is rising or falling, because a thermometer reading 4°C at 8am that's heading downward toward 0°C overnight is a very different situation from a 4°C reading at 7am that's climbing toward 12°C by midday.
Ground frost check
Even if the air temperature looks fine, scrape back the surface of your proposed patio area and feel the top 50–100mm of soil or existing base. If it's frozen or has ice crystals in it, stop. Laying over frozen ground means the frost will move your slabs as it thaws, and no amount of good mortar underneath will save you.
Rainfall and joint dryness
Before jointing, check that the joints themselves are dry. A simple test from Pavingexpert: rake out a small section of two or three joints and feel or inspect the jointing sand at depth. If it's damp, wait. You also need to be confident that rain isn't coming within the next 24 hours after you joint, because most cementitious and polymeric jointing products need that dry window to set. Sakrete's polymeric jointing sand, for example, explicitly requires 24 hours of rain protection. Check a reliable forecast before you start, not just a glance at the sky.
Sub-base moisture and compaction
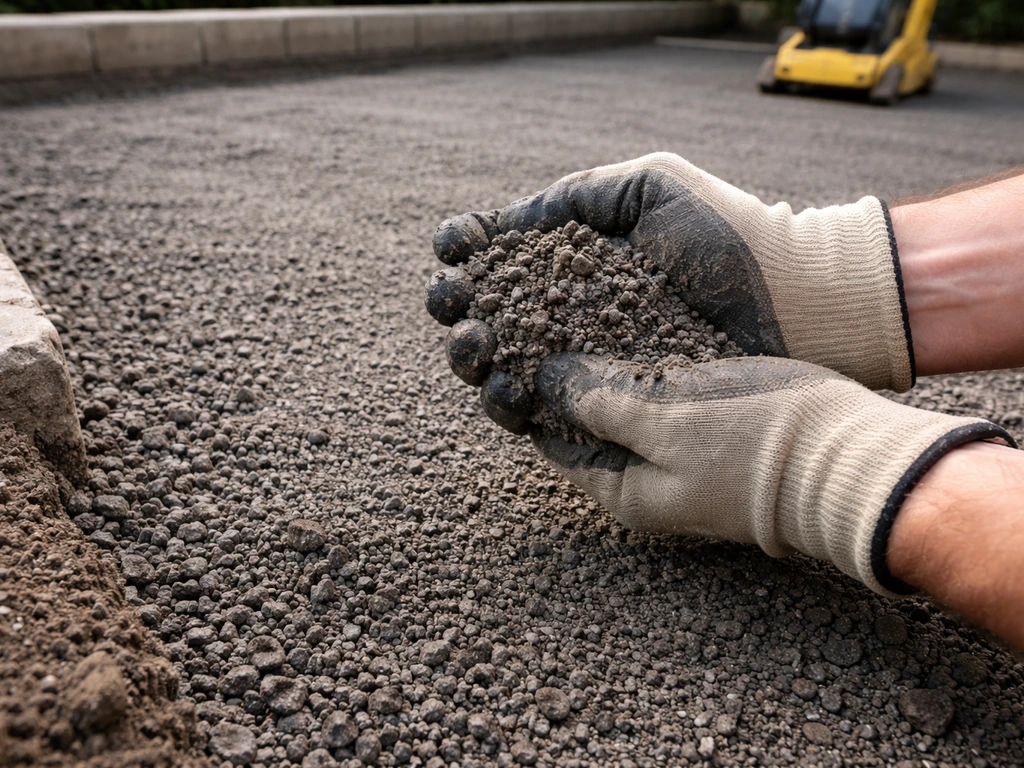
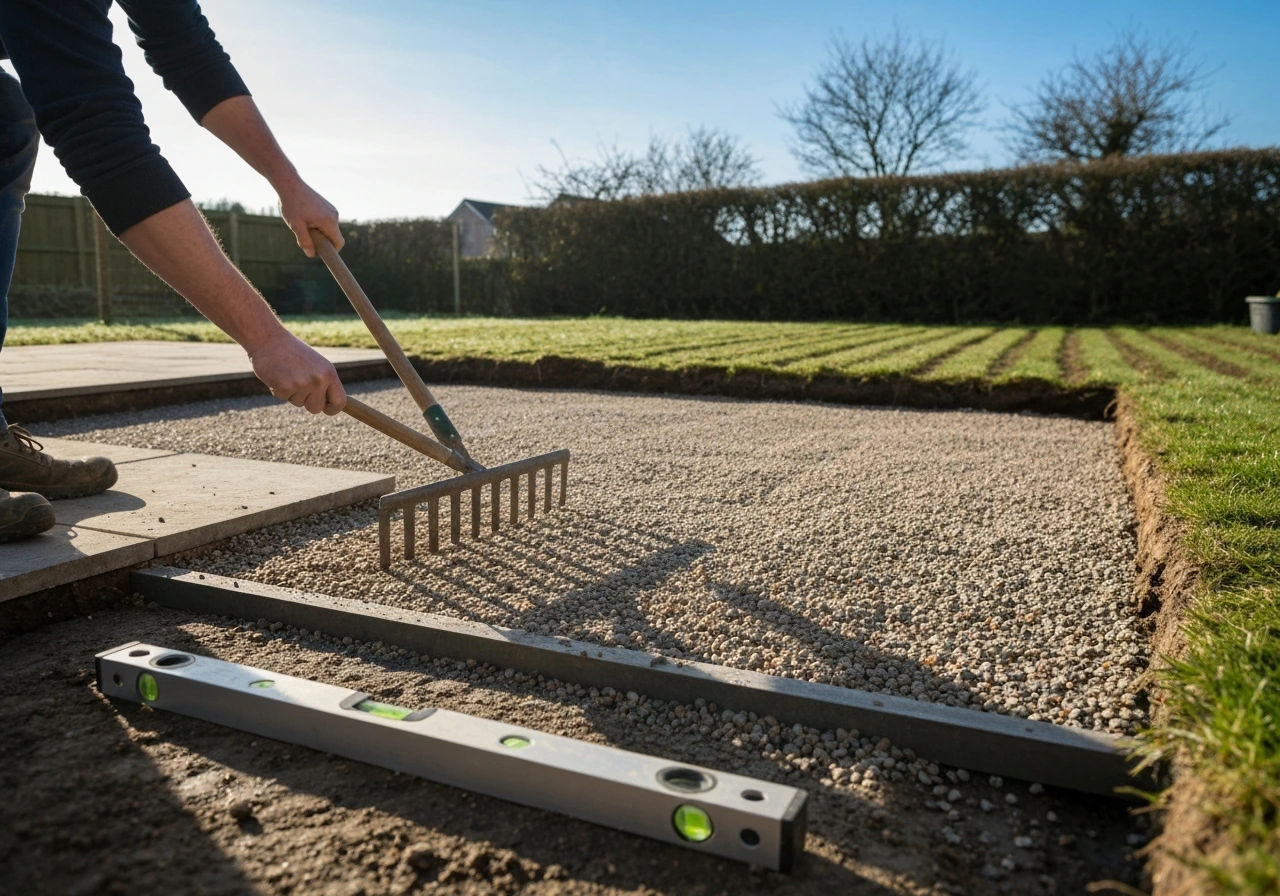
Your sub-base aggregate needs to be at the right moisture content for proper compaction. Too wet and it won't compact evenly, which means an uneven base that causes rigid paving to crack over time. A quick test is to squeeze a handful of aggregate: it should hold its shape briefly but crumble when you prod it. If water squeezes out, it's too wet to compact well. Let it drain or dry before proceeding.
How your material choice shifts the timing
Not all patios follow the same rules. The material and construction method you choose affects how sensitive your project is to weather conditions, and in some cases narrows your ideal window significantly.
| Material / Method | Key Timing Sensitivity | Additional Notes |
|---|---|---|
| Natural stone or concrete slabs (mortar bed) | Temperature above 3°C, dry joints for pointing | Most common; follow standard thresholds above |
| Block paving (flexible) | Sub-base compaction and moisture, jointing dryness | More forgiving than rigid; still needs dry jointing window |
| Concrete pour / screed base | Above 0°C; protect curing for minimum 3–7 days | Use frost blankets and accelerators in marginal conditions; don't pour below 0°C |
| Resin-bound surfacing | Ideal 10°C–20°C, dry sub-base, no late frosts during cure | Narrowest window; late-season frosts can ruin the bond entirely |
| Porcelain on pedestals (raised deck) | Less sensitive to ground frost, still needs dry conditions | Most flexible timing; suited to autumn installs |
Resin-bound surfaces deserve a special mention because they have the tightest window. Star Uretech's installation guidance puts the ideal temperature range at 10°C to 20°C, and multiple installers note that late-season frosts during curing can destroy the surface bond entirely. If you're planning a resin-bound patio, April through September is your realistic target. Don't push it into November hoping for the best.
Concrete pours for base slabs are in their own category. Cold-weather concreting is possible but requires planning: protecting the pour with insulating blankets, potentially using a set accelerator, and ensuring curing continues for at least 3 to 7 days depending on conditions. Below 0°C, postponing is simply the right call. Concrete that freezes before it reaches adequate early strength is structurally compromised.
What to do if you've missed the ideal window
Sometimes life doesn't line up with the weather calendar. You get approval from your partner in December, or a contractor has availability in November, or you've just moved into a new house and want the patio sorted before spring arrives. Here's how to handle it practically.
- Work to thresholds, not just the month: The calendar is a guide. A mild November week with temperatures sitting at 8°C, dry forecasts, and no ground frost is perfectly workable for standard slabs. Check the thermometer and the forecast, not just the date.
- Separate the tasks: You can do sub-base preparation and compaction in cooler months when cementitious products aren't involved. Save the bedding, laying, and jointing for a confirmed dry and warm stretch, even if that means a few weeks between stages.
- Delay jointing if needed: Slabs can be laid and left un-jointed temporarily in dry conditions. Come back to jointing when you have the right temperature and a solid dry-weather window. This is a legitimate approach used by professionals in shoulder-season installs.
- Use cold-weather protection for concrete: If you're pouring a concrete base in marginal conditions, use frost protection blankets and plan for extended curing time. Consider a set accelerator if your supplier offers one for the mix you're using.
- Avoid resin-bound in winter full stop: There's no real workaround for resin below its curing temperature range. Reschedule it to spring rather than risk an expensive failed installation.
- Consider material choice: If you're planning a new patio and timing is uncertain, flexible block paving or slab-on-pedestal systems give you more scheduling flexibility than mortar-bedded natural stone or resin. The material choice itself can reduce your timing risk.
Scheduling your next steps today
Whether you're hiring a contractor or doing it yourself, here's a practical action plan based on where you are right now in mid-June, which is genuinely one of the best times of year to be making this decision.
If you're hiring a contractor
- Get quotes now. Good patio contractors book up fast through summer. Contacting them in June means you can realistically schedule work for July, August, or September, all excellent months for installation.
- Ask specifically about their cold-weather policy and how they handle marginal forecasts. A professional should have a clear view on temperature thresholds and what happens if the weather turns during your install.
- Build a weather buffer into your schedule. Book for a week where the five-day forecast looks stable and dry, not the first available slot regardless of conditions.
- Confirm jointing is included in the quote and ask what product they use. Knowing whether it's cementitious, polymeric, or a slurry grout matters for understanding the dry-window requirement.
If you're doing it yourself
- Order materials now and plan your install for a confirmed dry spell of at least three to four consecutive days, with overnight temperatures above 5°C throughout.
- Do your sub-base work first. This is the least weather-sensitive stage and can be done on a damp day as long as you're not placing cementitious materials.
- Check your air temperature with an actual thermometer on the morning of laying, not just a phone app. Make sure it's on a rising trend, above 3°C, and that no frost is forecast for the coming nights.
- Rake out test joints before you start pointing to confirm they are dry at depth, and check a 24-hour rain forecast before you begin jointing.
- Keep frost protection materials (old carpet, bubble wrap, or proper horticultural fleece) nearby if there's any chance of an unexpected cold snap in the first 48 hours after laying.
The material you choose will also influence your timeline beyond just the weather. If you're still deciding between patio types, it's worth thinking through costs and difficulty levels alongside timing. If you’re trying to work out what is the easiest DIY patio for your garden size and surface, comparing patio types by cost and difficulty is a good next step. If you want to keep your budget tight, it helps to compare what is the cheapest patio option for your ground conditions and how much prep work you will need. Some materials that are easier to lay yourself also happen to be more forgiving of imperfect conditions, which can simplify your scheduling considerably.
The bottom line: if you're asking this question today in June, act now. You have the best three to four months of the year ahead of you. If you're trying to work out what fall for patio, start by matching your planned install dates to the temperature and frost risks for your area. Check your temperature, check your forecast, get your sub-base sorted, and you'll be sitting out on a properly laid patio before autumn arrives. If you are still wondering what is the best patio for your garden, start by matching the materials to your local weather window properly laid patio.
FAQ
Is it safe to lay a patio in early March if the weather looks mild?
It depends on ground conditions, not just daytime temperatures. Even when air temperatures rise, soil can still be near-frozen. Do the 50 to 100 mm scrape-and-feel check, and only proceed if the ground is not frozen and joints, bedding, and sand will have a dry spell to set.
What should I do if a frost night is forecast after I’ve laid slabs but before I’ve finished jointing?
You can protect against some damage, but you cannot fully “undo” frost movement risk. Keep the bedding and any partially cut areas covered overnight, delay jointing until you have a safe window, and prioritise getting final joints completed only when the forecast supports proper curing.
Can I lay the patio when it’s above 3°C but the thermometer is falling?
Often, it’s not advisable. The key guidance in the UK is whether temperatures are rising or falling, because a safe reading can still drop below the critical thresholds overnight. If the forecast suggests a fall toward frost, reschedule rather than relying on a mid-morning reading.
How long after laying do I need to keep foot traffic off the patio?
Aim to minimise traffic until bedding and joint materials have gained strength, not just until the slabs look set. If you’ve used cementitious bedding and cementitious or polymeric jointing, treat curing as a period of days, and follow the product-specific instructions for the minimum restriction time.
Is rain the only weather risk after jointing?
No. Wind-driven rain can still wet joints quickly, and damp conditions can leave jointing sand or compound trapped with moisture at depth, which affects water-cement ratio and performance. Protect joints from both direct rain and prolonged dampness, and avoid opening the patio to use until the joints are properly set.
Do I really need a dry window of 24 to 48 hours, or can I joint right before showers?
If showers are likely within that period, wait. Most cementitious and polymeric jointing products need that dry curing time to reach strength. Jointing before rain increases the risk of shrinkage, cracking, and erosion that may only show up months later.
What happens if the jointing sand is slightly damp when I apply it?
Slight dampness can lead to incomplete set and reduced strength, especially at joint depth where moisture is slower to leave. Instead of trying to speed it up, let the area dry and confirm joints are genuinely dry where it matters, by raking and checking at depth.
Should I compact the sub-base immediately after wetting it, or let it dry first?
Let it reach a workable moisture content before compaction. If water can be squeezed out, it is too wet and will not compact evenly, leading to uneven support and later cracking. Drain or dry until the squeeze test shows it holds briefly but crumbles when poked.
Does the best time of year change for different patio materials?
Yes. The ideal window can narrow for systems that are sensitive to temperature, for example resin-bound surfaces with a tighter workable range. Concrete pours for base slabs also need separate planning because freezing before early strength is achieved can compromise the pour.
If the patio is for a small garden, can I work in a shorter weather window?
You might reduce the project duration, but you still need curing and dry protection for bedding and joints. Small patios often tempt quick sequencing, but the weather still governs set and strength gain, so plan for the full curing and rain-protection period, not just the slab placement day.
What’s the safest way to plan a job when I can’t choose the exact day?
Work backwards from your jointing completion date. Choose a day where temperatures meet the rising or falling thermometer rules, confirm the ground is unfrozen, and ensure you have at least 24 hours (often 24 to 48) of dry conditions after jointing, plus a buffer for any delayed finishing tasks.
Are DIY patios more likely to fail if the timing is slightly off?
They can be, because smaller mistakes in curing control and moisture handling have bigger knock-on effects. Contractors may have more experience managing sequencing and protection. If you must work near the edge of the season, slow down, add weather protection, and be extra strict about dry joints and correct sub-base moisture.
Next Articles

Do It Yourself Outdoor Patio Ideas: Build, Upgrade, Maintain
DIY outdoor patio ideas for planning, building, upgrading, and maintaining floors, shade, privacy, lighting, and decor.
Quick Fix Patio Ideas for Instant Comfort and Style
Quick fix patio ideas for fast comfort and style: cleanups, repairs, shade, flooring tweaks, and safe upgrades on any bu
Cheap Do It Yourself Patio Ideas: Budget Build Guide
Budget DIY patio ideas with step-by-step flooring, prep tips, cost ranges, upgrades, and safety mistakes to avoid.