The best patio is concrete pavers for most homeowners. They hit the sweet spot on cost ($10–$50 per sq ft installed), durability, repairability, and looks. But "best" genuinely depends on your budget, climate, how you'll use the space, and how much maintenance you're willing to do. If you're in a freeze-thaw climate, stamped concrete cracks more than pavers. If you want zero upkeep, gravel beats everything on price but limits your furniture options. If you're entertaining adults on a budget, brushed concrete still works great. This guide walks through each realistic option so you can figure out what "best" actually means for your specific yard.
What Is the Best Patio for Your Yard Climate Budget

Phoebe Foster
21 Jun 2026
What 'best' actually means for your yard and lifestyle
Before you pick a material, get honest about four things: your climate, your budget, your use case, and how much maintenance you'll realistically do. A patio that looks great in a magazine but cracks every winter or needs annual resealing is not the best patio for you. Someone in Houston who hosts cookouts needs something totally different from a Midwest homeowner with small kids and a big dog who just wants a low-maintenance surface that survives frost.
Think about it in these terms. Climate matters because freeze-thaw cycles destroy certain materials (stamped concrete, standard ceramic tile) and heat makes others uncomfortably hot to walk on barefoot (dark concrete, some pavers). Budget matters not just upfront but over 10 to 20 years, because a cheap gravel patio might need replacement where a paver patio installed correctly lasts 30-plus years. Use case matters because a space for kids and pets needs different slip resistance and edge treatment than a quiet adult dining area. And maintenance matters because almost nobody keeps up with the resealing schedule they planned on at installation.
- Freeze-thaw climate (Midwest, Northeast, mountain regions): avoid stamped concrete and non-frost-rated tile; stick with pavers, natural stone, or composite/wood decking
- Hot and sunny climate (Southwest, Texas, Florida): choose lighter-colored materials and plan for shade from day one; dark surfaces can exceed 140°F in direct sun
- Rainy or wet climate: prioritize drainage slope and slip-resistant finishes; porcelain pavers and broom-finished concrete both perform well
- Entertaining-focused use: larger square footage, durable surface, good lighting infrastructure
- Kids and pets: slip-resistant texture, easy-clean surface, no sharp gravel edges
- Low-maintenance priority: pavers (individual piece replacement) or poured concrete (sealed once every few years)
Comparing the top patio materials head to head
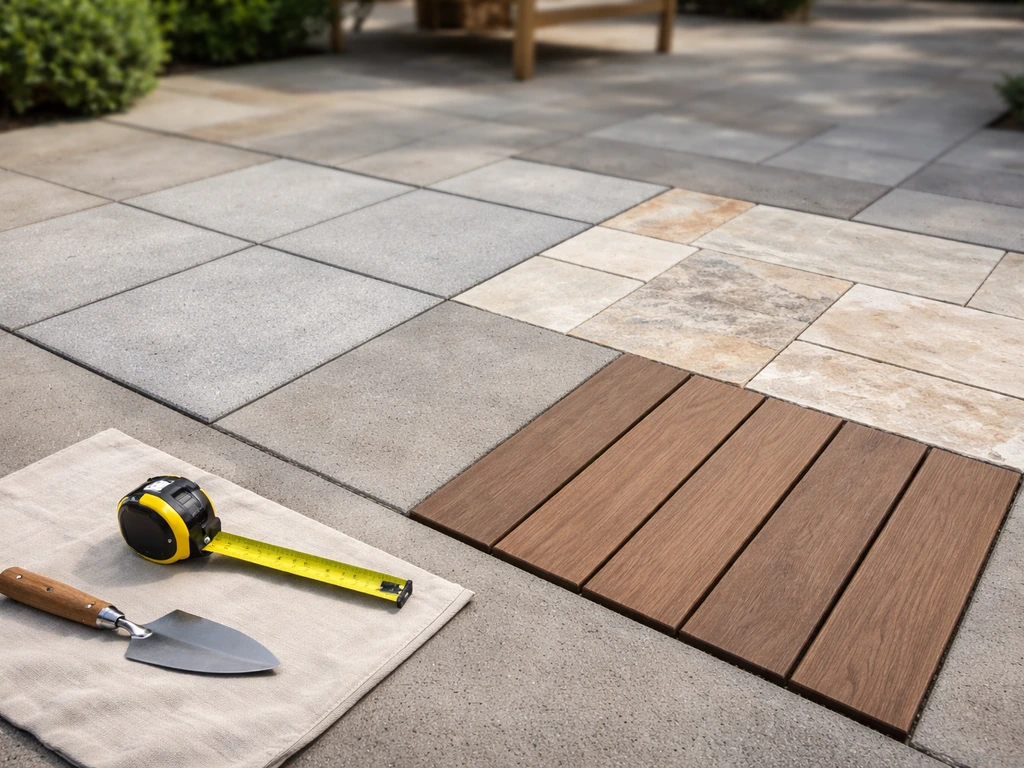
Here's a practical breakdown of every realistic patio material, including cost ranges, how long they last, how much work they need, and where they make the most sense.
| Material | Installed Cost (per sq ft) | Lifespan | Maintenance | Best Climate Fit | DIY-Friendly? |
|---|---|---|---|---|---|
| Concrete pavers | $10–$50 | 30+ years | Low (resand joints every few years) | Most climates | Yes, with effort |
| Poured/brushed concrete | $6–$12 | 25–30 years | Low (seal every 2–3 years) | Mild to warm climates | Not recommended |
| Stamped concrete | $8–$28 | 20–25 years | Medium (reseal annually) | Mild climates only | No |
| Natural flagstone | $15–$35 | 40+ years | Low-medium (weed control, occasional reseal) | Most climates | Possible for dry-lay |
| Brick | $12–$25 | 50+ years | Low (occasional joint sand) | Most climates | Yes, with effort |
| Porcelain/outdoor tile | $15–$35 | 25–30 years | Low (easy to clean) | Mild or warm climates | No (requires bonded install) |
| Gravel/crushed stone | $1–$4 | Ongoing (refresh every few years) | Medium (weed barrier needed, raking) | Any climate | Yes, very easy |
| Composite/wood decking | $20–$45 | 25+ years | Low-medium (composite) to high (wood) | Any climate with proper drainage | Medium difficulty |
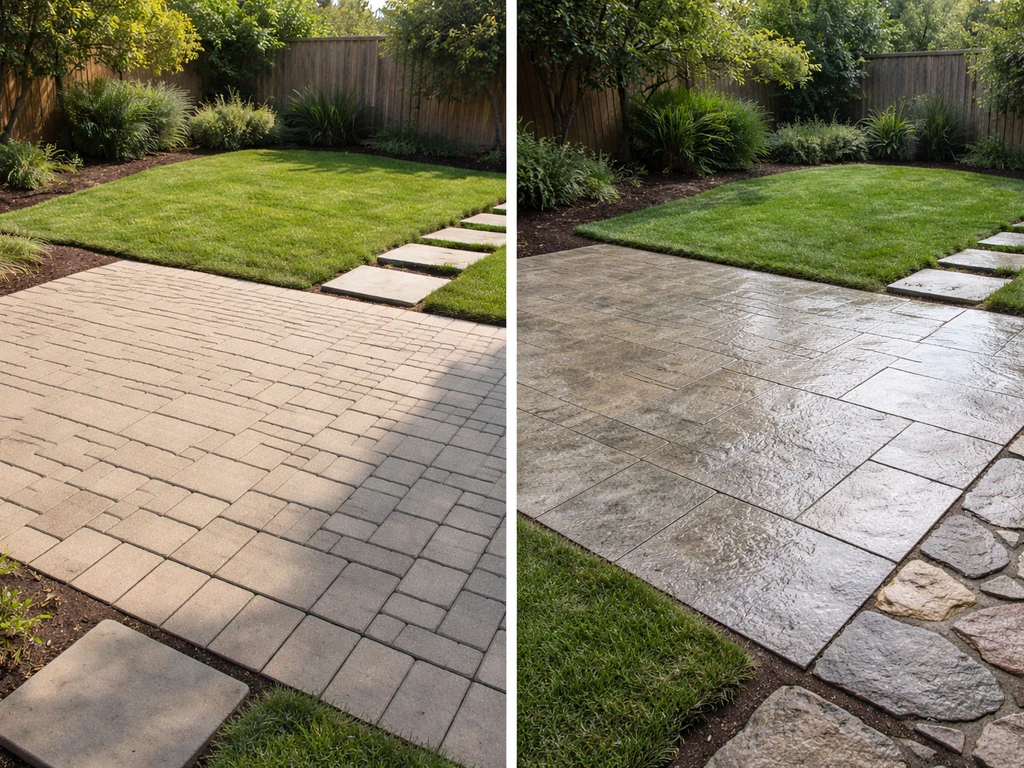
Concrete pavers: the most versatile choice
Pavers are the go-to recommendation for most homeowners because they combine good looks, real durability, and the ability to repair single pieces without tearing out the whole surface. If a tree root heaves a section or a heavy planter cracks one piece, you pull out that paver, fix the base, and put it back. That's not possible with poured concrete. The base prep requirement is real, though. You need a compacted aggregate base of about 4 to 6 inches for foot traffic (deeper for driveways), 1 inch of bedding sand, and a drainage slope of 1/4 inch per linear foot away from your house. Builders on a Reddit hardscaping discussion also describe aiming for about a 1/4 inch per foot slope as a common rule of thumb a drainage slope of 1/4 inch per linear foot away from your house. Skip any of those steps and you'll have settlement and drainage problems within a few years.
Poured and stamped concrete: lower upfront, higher long-term risk
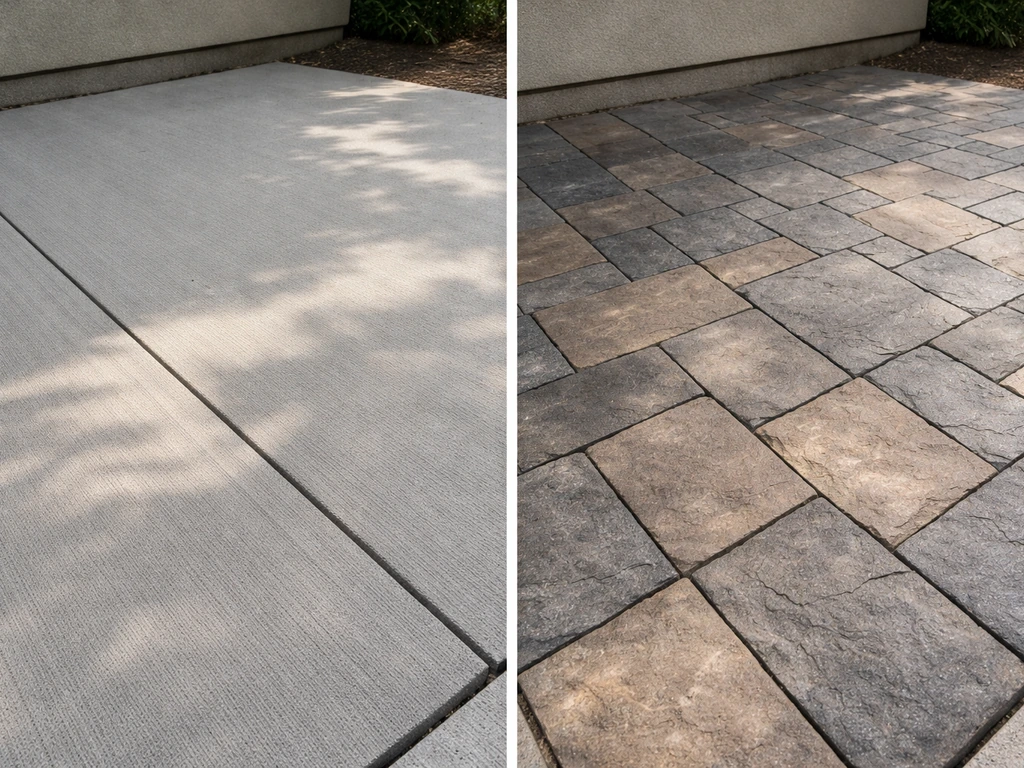
Plain broom-finished concrete is the cheapest durable option, typically $6–$12 per sq ft installed, and it works well in mild climates. Stamped concrete looks great but runs $8–$28 per sq ft depending on the pattern and coloring, and it needs annual or biannual resealing to hold its color and protect the surface. The big issue is cracks. In freeze-thaw climates, water gets into micro-cracks, freezes, and expands. Over time, stamped concrete in those regions often looks bad within 10 years without significant upkeep. In warmer climates like Texas or Southern California, it holds up much better.
Natural stone and brick: premium look, long lifespan
Flagstone and natural stone patios cost $15–$35 per sq ft installed and can last 40 or more years when properly set. Brick is in a similar range at $12–$25 and is practically bombproof in most climates. Both materials have a timeless look that concrete can only imitate. The trade-off is cost and, with flagstone especially, the irregular surface that can be a tripping hazard if not set carefully. Dry-laid flagstone on a compacted gravel base is a legit DIY project if you're comfortable with physical work and have a good eye for fitting irregular shapes.
Porcelain outdoor tile: sleek but specific
Outdoor-rated porcelain pavers (typically 20mm thick, about 3/4 inch) look incredibly clean and modern and are easy to wipe down. The catch: they require a bonded installation over a concrete slab, a minimum drainage slope of 1/4 inch per foot, and must be frost-rated if you're in a freeze-thaw climate. Indoor tile absolutely cannot go outside in cold climates as water absorption causes cracking. Done right, they're durable and low-maintenance. Done wrong, they pop and crack within a season.
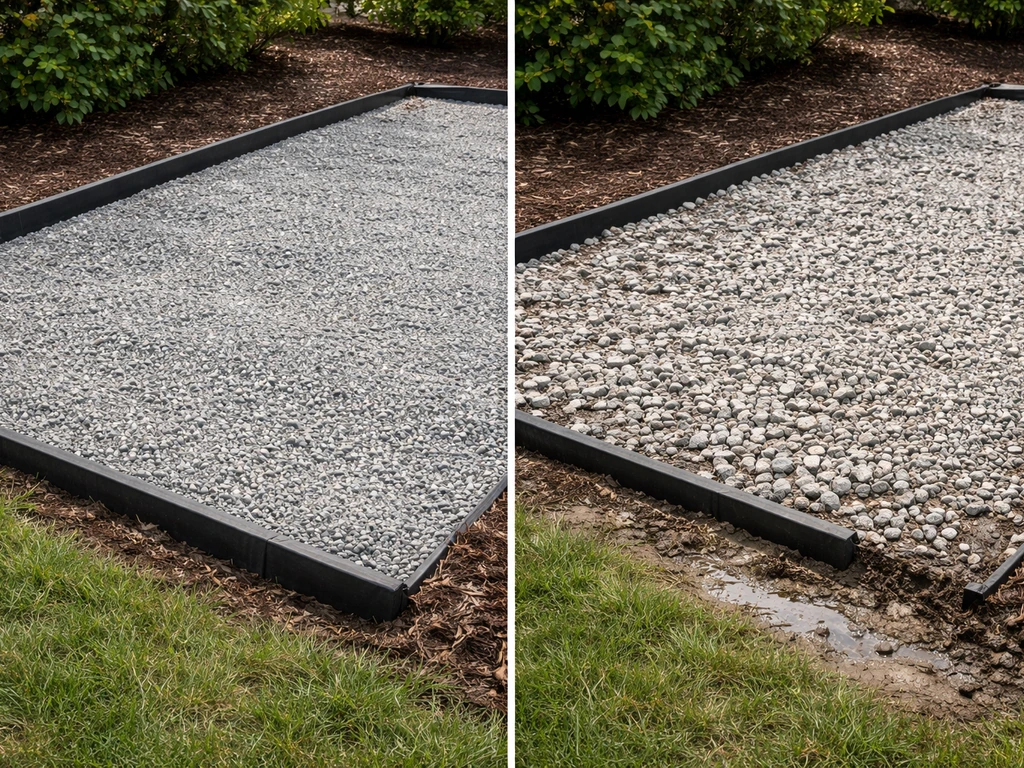
Gravel: the budget hero for low-use areas
At $1–$4 per sq ft, crushed stone or pea gravel is the cheapest patio option that still looks intentional. It drains perfectly, works in any climate, and can be done as a weekend DIY project. The downsides are real: furniture legs sink in, it migrates over time, pets track it inside, and kids find it more interesting than you'd like. A weed barrier underneath helps, but weeds still find a way through eventually. For a secondary seating area or a path between spaces, gravel is hard to beat. As a primary entertaining patio, it has limits.
Composite and wood decking: when a deck beats a patio
If your yard slopes significantly or you need to bridge a level change, a deck surface built with composite decking can be the most practical solution. Composite options from brands like Trex and TimberTech carry 25-year limited residential warranties and require far less maintenance than natural wood. The cost runs $20–$45 per sq ft installed depending on the product and deck complexity. Real wood decking costs less upfront but needs staining or sealing every one to two years to prevent rot and splitting. On a flat or slightly sloped yard, a patio is usually cheaper; on a significantly sloped lot, decking may be the only sensible option.
Layout and design choices that change how usable your patio actually is
Material gets all the attention, but layout decisions make or break how much you actually use the space. A 10x10 patio feels cramped with a table and four chairs. Most outdoor furniture sets need at least 12x16 feet to feel comfortable, and if you want to add a grill zone or a lounge area, plan for 300 to 400 square feet minimum. The shape matters too. Rectangular layouts are easiest to build and furnish. L-shapes work well for separating a dining zone from a lounge or grill area. Freeform or curved edges look great in photography but cost more to build and are harder to work with when buying furniture.
Think about sun exposure at the times you'll actually use the space. A west-facing patio in Texas or Arizona will be brutal from 3 to 7 PM without shade. A north-facing patio might stay cool but could feel dark. If possible, orient a dining area so it gets morning sun and afternoon shade. And plan your access points before you finalize the layout. Nothing is more annoying than a beautiful patio where you have to squeeze around a corner with a platter of food to get from the kitchen door to the table.
- Minimum size for a table and 4 chairs: 12x16 feet (192 sq ft)
- Comfortable entertaining patio with grill zone and lounge: 300–400+ sq ft
- Keep a 3-foot clearance around furniture for easy movement
- Plan electrical conduit and gas line rough-ins before laying the surface, not after
- Consider lighting placement at the design stage; surface-mounted post lights need anchor points in the base
- Leave a gap of at least 1/2 inch between the patio surface and your home's foundation or siding for drainage and expansion
DIY vs hiring: where to draw the line
The honest answer is that base prep and drainage are where most DIY patio projects fail. The surface you can usually handle; the 4 to 6 inches of compacted gravel underneath is where most homeowners underestimate the labor and equipment required. Renting a plate compactor and doing your own base is totally doable, but it's a full weekend of physical work, and if the base isn't compacted properly in layers, you'll have settling and drainage issues within a year or two.
Gravel patios and dry-laid flagstone are the most DIY-friendly options. If you're looking for the easiest diy patio, start with gravel patios or dry-laid flagstone, since they skip the most difficult concrete steps. Concrete paver installation is manageable for a motivated DIYer on a smaller patio (under 200 sq ft). Poured concrete, stamped concrete, and bonded porcelain tile are not DIY projects unless you have real concrete experience. The finishing window on concrete is short, the tools are expensive to rent, and mistakes show permanently.
If you're hiring out, ask contractors these things before you sign anything: What base depth are you planning? What compaction method are you using? What drainage slope will the finished surface have? Do you use a geotextile fabric under the base? What warranty do you offer on labor? Any contractor who can't answer those questions directly is a risk. The best time of year to hire for installation also matters since many contractors are booked solid in spring; fall installations often come with shorter lead times and sometimes better pricing. Many contractors also have more openings in fall, which can be a great time to schedule patio installation, depending on your local climate and weather best time of year.
| Project Type | DIY Feasibility | What You Save | Main Risk |
|---|---|---|---|
| Gravel patio | Very high | $1–$3/sq ft labor | Weed control, edge retention |
| Dry-laid flagstone | Medium-high | $8–$15/sq ft labor | Uneven surface, tripping hazard |
| Concrete pavers (small) | Medium | $10–$20/sq ft labor | Base compaction, drainage slope |
| Poured concrete | Low | $4–$8/sq ft labor | Permanent surface errors, finishing timing |
| Stamped concrete | Very low | $10–$18/sq ft labor | Color inconsistency, poor finish |
| Porcelain tile (bonded) | Very low | $10–$20/sq ft labor | Cracking, lippage, drainage failure |
| Composite decking | Medium | $15–$25/sq ft labor | Structural framing errors |
Drainage, base prep, and the mistakes that cost the most
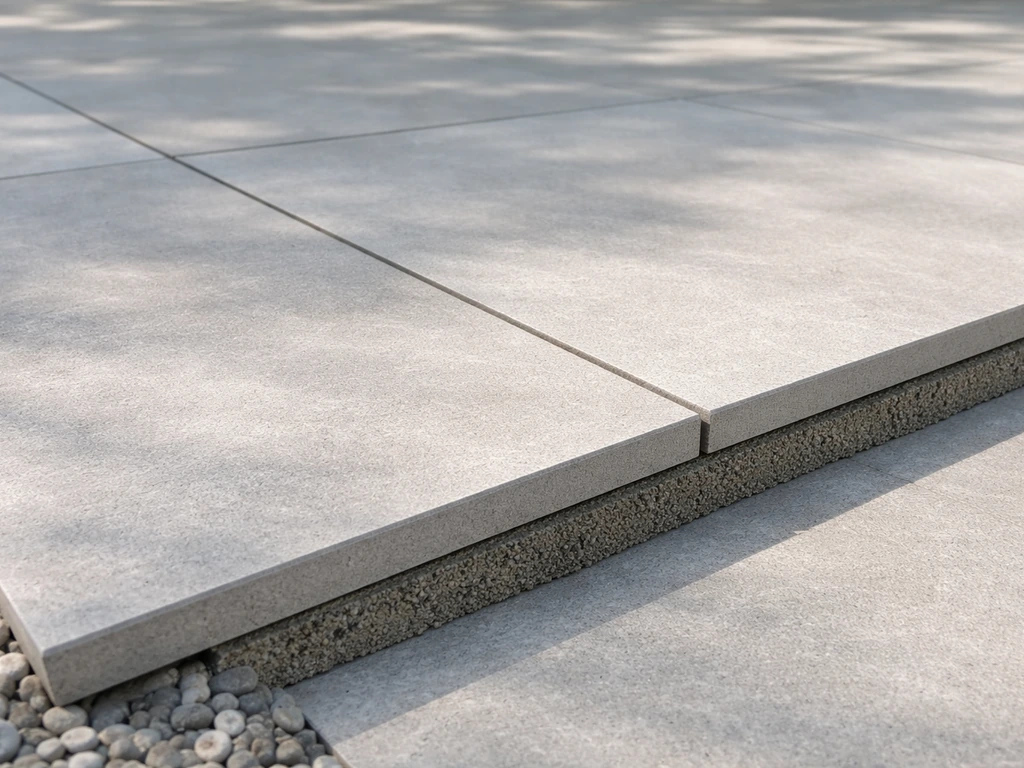
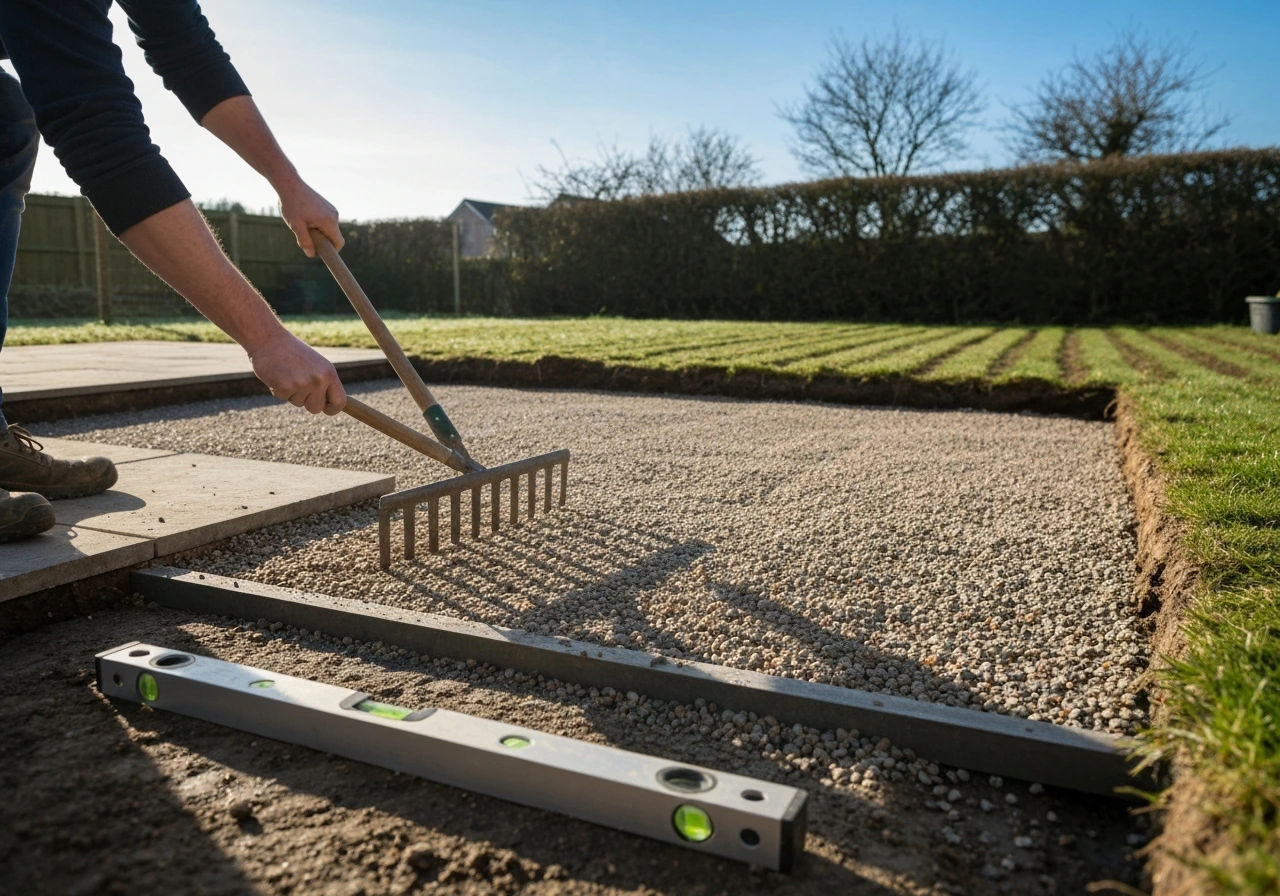
This is the part most people skip in their research, and it's where the most expensive problems come from. A patio without proper drainage will heave, crack, settle unevenly, and in some cases direct water toward your foundation. The standard drainage slope for any patio surface is 1/4 inch per linear foot away from the house. That means a 12-foot-deep patio should drop 3 inches from the house to the outer edge. Some sources cite 1/8 inch per foot as acceptable on very stable soils, but 1/4 inch is the safe target.
Below the surface, a typical paver or stone patio needs a compacted aggregate base of 4 to 6 inches for foot-traffic areas, topped with 1 inch of bedding sand that gets screeded smooth before laying the surface material. Skipping the compacted base or using too little depth is the single most common DIY mistake. The subgrade (native soil) also needs to be compacted before any base material goes down. In clay-heavy soils, some installers add a geotextile fabric layer at the bottom to prevent base material from migrating down into the soil over time.
- Always slope away from the house at 1/4 inch per linear foot
- Compact the native soil before adding any base material
- Use 4–6 inches of compacted aggregate base for pedestrian patios
- Add 1 inch of bedding sand for paver installations, screeded flat
- Install edge restraints to prevent pavers from spreading over time
- Compact base material in 2- to 3-inch lifts, not all at once
- Use polymeric sand in joints to limit weed growth and ant activity
- Never pour concrete or set pavers on frozen or waterlogged ground
- For bonded tile or stone, check that the concrete slab base has no cracks over 1/8 inch before bonding
A common mistake with stamped concrete is insufficient control joint placement, which leads to random cracking. Another is sealing too soon after pour, trapping moisture. With pavers, the most common error is setting the finished surface at the same elevation as the surrounding grade, leaving nowhere for water to go. The finished paver surface should sit slightly above the surrounding soil to promote runoff, and the slope should be consistent across the entire surface, not just the edges.
Shade, weather protection, and comfort upgrades worth the money
A bare patio in full sun is uncomfortable for six months out of the year in most of the country. Shade and weather protection aren't luxury add-ons; they're what actually determines how much you use the space. A pergola or covered patio structure is the most impactful upgrade you can make, but it's also expensive. Full covered patio and pergola construction can range from $40,000 to $125,000 depending on scope, materials, and whether you're adding an outdoor kitchen or electrical. A basic freestanding pergola kit starts much lower, around $2,000 to $8,000 for a quality prefab unit you install yourself.
If a full structure isn't in the budget, a quality retractable awning ($1,500 to $5,000 installed) covers a lot of ground. In hot, dry climates, outdoor misting systems make a 15 to 20 degree difference in perceived temperature and can be installed on a pergola or along a fence line for a few hundred dollars on the DIY end. Outdoor ceiling fans add comfort and help with bugs. Shade sails are a budget-friendly visual option but require anchor points and don't hold up as well in heavy wind or rain.
- Pergola or covered patio: highest impact, widest cost range ($2,000 DIY kit to $125,000+ custom structure)
- Retractable awning: good middle ground for rain and sun protection ($1,500–$5,000 installed)
- Shade sail: affordable and stylish, but limited durability in wind ($200–$600)
- Outdoor ceiling fan: adds comfort and discourages flies, requires electrical run ($150–$400 for fan, plus electrician)
- Misting system: highly effective in dry climates, less useful in humid regions ($200–$800 DIY)
- Privacy screen or lattice fence: extends usability by creating a defined, sheltered space ($400–$2,000)
- String lights and landscape lighting: the single cheapest way to extend evening use ($50–$500)
- Outdoor heater (propane or electric): extends fall/winter use in mild climates ($150–$600)
Outdoor kitchens are the biggest splurge category and the one with the most variation in return on investment. A basic built-in grill surround with a counter runs $3,000 to $10,000. A full outdoor kitchen with refrigeration, a sink, and a pizza oven can push $30,000 or more. They add real resale value in warm climates where outdoor living is a year-round feature. In cold climates, the ROI is lower because the space sits unused for five or six months.
Your decision checklist and next steps
Use this framework to narrow down your best patio option before you call a contractor or start shopping materials. If you're still deciding, also review what fall for patio to compare common layout and material mistakes people make.
- Define your use case first: Is this for entertaining, kids/pets, quiet dining, or all of the above? That determines minimum size and surface texture requirements.
- Set a realistic total budget: Include base prep, surface material, edging, and at least one shade element. Most homeowners underestimate by 20–30% when they only price the surface material.
- Check your climate: If you get hard freezes, cross stamped concrete and non-frost-rated tile off your list. If you get heavy rain, make sure your chosen material has a slip-resistant finish.
- Measure your space and draw a rough layout: Mark doors, existing structures, trees, and utility lines. Decide on size before you price materials.
- Choose your material using the comparison table above: For most people, concrete pavers are the best all-around answer. For budget-only builds, broom-finish concrete or gravel. For premium looks in a mild climate, natural stone or porcelain.
- Decide what you'll DIY vs hire out: If you're doing it yourself, plan for base prep as the majority of the work. If you're hiring, get three quotes and ask each contractor the drainage and base depth questions listed above.
- Plan your shade and comfort upgrades now, not later: Rough in electrical conduit before the surface goes down. Decide where posts or anchor points will go before you finalize the layout.
- Get permits if required: Most municipalities require a permit for permanent structures like pergolas and outdoor kitchens. A patio surface alone often doesn't need one, but check your local rules.
- Schedule installation at the right time: Spring and early summer book up fast. Fall is often a better window for scheduling and sometimes pricing. Avoid laying any base material or concrete during freeze risk periods.
Quick recommendations by scenario
| Your Situation | Best Material | Key Priority |
|---|---|---|
| Tight budget, any climate | Gravel or broom-finish concrete | Keep base prep costs low |
| Freeze-thaw climate, mid budget | Concrete pavers | Proper base depth and drainage slope |
| Hot/sunny climate, mid budget | Light-colored concrete pavers | Add shade structure early |
| Premium look, mild climate | Natural flagstone or porcelain pavers | Hire a skilled installer |
| Kids, pets, high traffic | Concrete pavers or brushed concrete | Slip-resistant texture, no gravel |
| Entertaining focus, larger budget | Pavers with pergola and lighting | Plan size and layout for flow |
| Sloped yard, any climate | Composite decking on framed structure | Hire for structural framing |
| Low maintenance priority | Concrete pavers or poured concrete | Polymeric joint sand, minimal sealing |
If you're still weighing whether to tackle this yourself, the easiest DIY patio options are gravel and dry-laid flagstone. If cost is the main driver, it's worth exploring what the cheapest patio options look like before committing to a more involved build. And if you're planning to install in the near future, timing your project right (fall installations often come with better contractor availability) can save you real money and headaches. A recommended fall for patio installation can also help you avoid extreme heat and often makes contractor scheduling easier fall installations.
FAQ
What patio surface is best if we want to walk on it barefoot in summer?
A “best patio” for barefoot use usually means you want a lighter surface color and materials that do not store heat. Dark broom-finished concrete and dark pavers can feel painfully hot in late afternoon, so if you are in a hot climate, choose lighter paver tones, consider adding a pergola or umbrella, and plan a shade-friendly layout for the dining zone.
Which patio option holds up best in freeze-thaw winters?
If you live in a freeze-thaw area, prioritize frost-rated materials and joints that can handle movement. Outdoor porcelain pavers must be installed as a bonded system over a properly prepared slab, and stamped concrete needs careful control joint layout and realistic resealing. For many homeowners in cold regions, pavers on a compacted base are more forgiving because individual units can be replaced.
How do I know if my patio will drain correctly, and what should I ask a contractor?
Look for two things: a truly adjustable slope and a clear water path away from the house. The common rule of thumb is 1/4 inch per linear foot away from your foundation, and the surface must not sit at the same elevation as surrounding soil or mulch. If your yard has poor runoff, ask how the contractor will direct water at the lowest points (for example, toward a drain or swale) rather than hoping it “soaks in.”
What are the most common design mistakes that cause water pooling or early settlement?
Avoid designs that create “puddling” or trap water at seams. For gravel, plan for edge containment (bordering material or paver edging) to reduce migration, and add a thicker base where foot traffic will be heaviest. For pavers, keep the slope consistent across the whole field, not just at the edges.
What patio material is best for homes with pets and heavy traffic?
For pets, slip resistance and ease of cleaning matter more than the look of the surface. Pavers and properly set natural stone can work well if the finish is not overly smooth, and the patio should have enough slope to prevent lingering dampness. If you choose gravel, expect paw tracking and reduced footing stability for small dogs, so a border of pavers at doorways can help.
Is flagstone safe for kids, and what should I watch out for during installation?
Flagstone and other stone options can be safe if they are installed with consistent bedding and the walking surface is set flat without rocking. The main safety risk is irregular edges or uneven heights, especially on dry-laid projects. If you have kids, choose a finish that provides traction (not overly polished) and consider rounding or selecting pieces that minimize trip points.
Which patio is truly the lowest maintenance over 10 years, gravel or pavers?
If you want the lowest ongoing effort, pavers and gravel usually win, but the “maintenance” differs. Gravel requires weed control and occasional top-ups to maintain an even surface, while pavers mainly require keeping joints filled and correcting any edging or low spots. If your preference is “set it and forget it,” gravel can be appealing, but only if you accept furniture legs sinking and periodic replenishment.
What type of outdoor furniture works best with gravel versus pavers?
Select furniture based on how the surface will behave under load. On gravel, choose furniture with wider feet or use patio mats/rugs designed for gravel, and anchor planters if they can shift. For pavers and concrete, choose the right base bedding so you do not create rocking or sink points, especially under heavy outdoor dining sets.
Can I install a patio grill or fire feature on any patio material without issues?
If you plan to heat the space, avoid materials that will crack or degrade from thermal cycling. Poured and stamped concrete can be more sensitive if heating elements create uneven temperatures. With pavers, ensure proper base prep and consider a contractor-designed hearth or slab area around grills or fire features rather than relying on the patio surface alone.
What’s the best approach if my yard is significantly sloped?
If your lot slopes a lot, decking can be the most practical because it bypasses extensive earthwork and base reconstruction. A patio can still work, but you may need terracing, retaining solutions, and more complex drainage control. The key decision aid is cost per usable square foot, if the patio requires heavy retaining and grading, decking often becomes the cheaper “best patio” for the situation.
When is a DIY patio a smart idea versus hiring it out?
If you are unsure whether to DIY or hire, a good rule is this: if your design relies heavily on base prep and drainage (almost all patios do), you should either be comfortable renting the right equipment or hire it out. DIY is most successful with gravel and dry-laid flagstone, and paver DIY can work for small areas. Stamped concrete, poured concrete, and bonded porcelain tile are higher-risk because mistakes show permanently.
When should I schedule installation if I want the best pricing and fewer delays?
If you want a “best time” to hire, consider contractor availability and weather risk. Many contractors are busier in spring, while fall often provides more openings and less extreme heat. Still, you should confirm your local weather window, because freezing conditions can interrupt base and curing-related steps for certain materials.
Next Articles
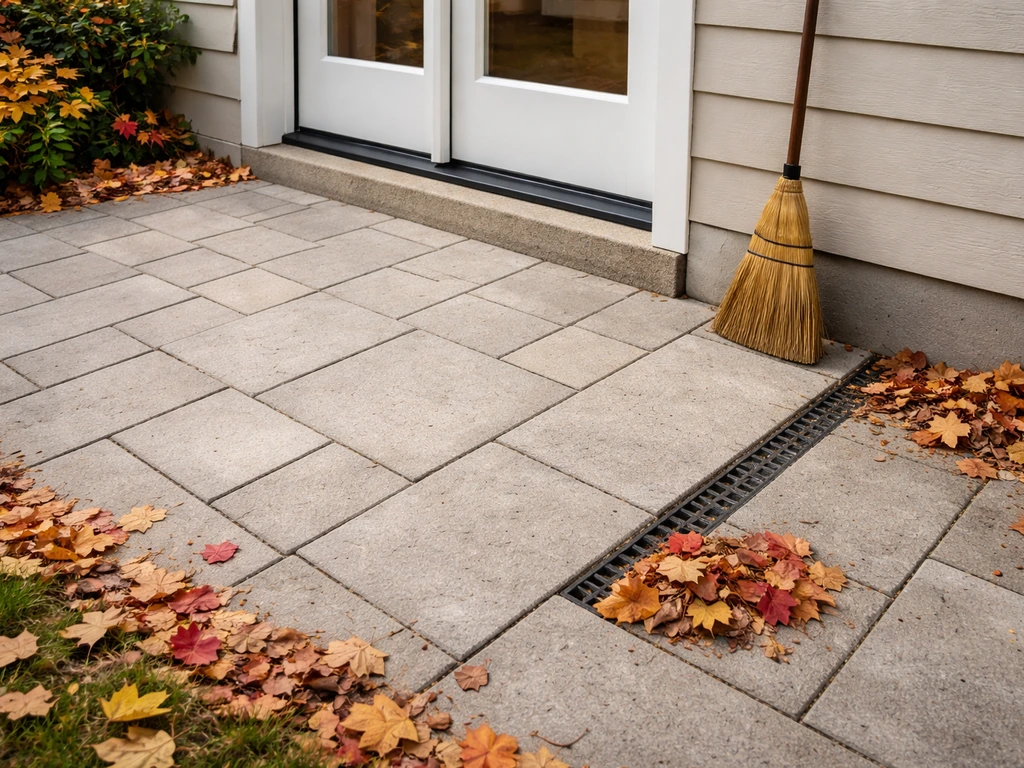
What to Do for a Patio in Fall: Cleanup, Safety, Drainage
Step-by-step fall patio prep: cleanup, safety checks, drainage fixes, and material-specific protection to prevent water
Best Time of Year to Lay a Patio UK Guide and Timing Tips
UK timing guide for patio laying: best season, daily ground checks, frost and rain risk, and material curing schedules.

Do It Yourself Outdoor Patio Ideas: Build, Upgrade, Maintain
DIY outdoor patio ideas for planning, building, upgrading, and maintaining floors, shade, privacy, lighting, and decor.