For most patios, you want a fall (drainage slope) of 1/4 inch per foot, sloped away from your house or toward a drain. That's the number contractors and tile installers consistently target, and it's enough to move water without making your patio feel like a ramp. If you're in a pinch and hitting that full 1/4 inch isn't possible, 1/8 inch per foot is the accepted minimum for concrete slabs, but anything flatter than that and you're inviting puddles.
Recommended Fall for Patio Drainage: How to Measure

Phoebe Foster
29 Jun 2026
What 'recommended fall' actually means on a patio
Fall is just a contractor's word for drainage slope, the intentional tilt built into a patio surface so rainwater flows in a controlled direction instead of sitting there. It's sometimes called pitch, grade, or cross-fall depending on who you're talking to, but they all mean the same thing: a consistent drop over a horizontal distance.
This is different from the overall grading of your yard (how the ground around the house slopes). Patio fall is specifically about the finished walking surface. You can have a yard that drains fine but a patio that pools, because the patio itself wasn't set with enough slope. The fall built into the patio surface is what determines whether water sheets off quickly or lingers long enough to seep under edging, soak into joints, or push back toward your foundation.
There are two ways water gets directed off a patio: away from the house toward the yard or a perimeter edge, or inward toward a central or channel drain set into the patio itself. Both approaches work, but they require the fall to be designed in from the start. You can't retrofit a slope into a flat concrete slab after the fact without a serious amount of work.
How to measure and calculate patio fall correctly
The math is simple once you have the concept down. A 1/4 inch per foot fall means that for every foot of horizontal distance, the surface drops 1/4 inch. So a 12-foot-wide patio sloped at 1/4 inch per foot has 3 inches of total drop from the high point (near the house) to the low edge. A 16-foot patio at that same rate drops 4 inches.
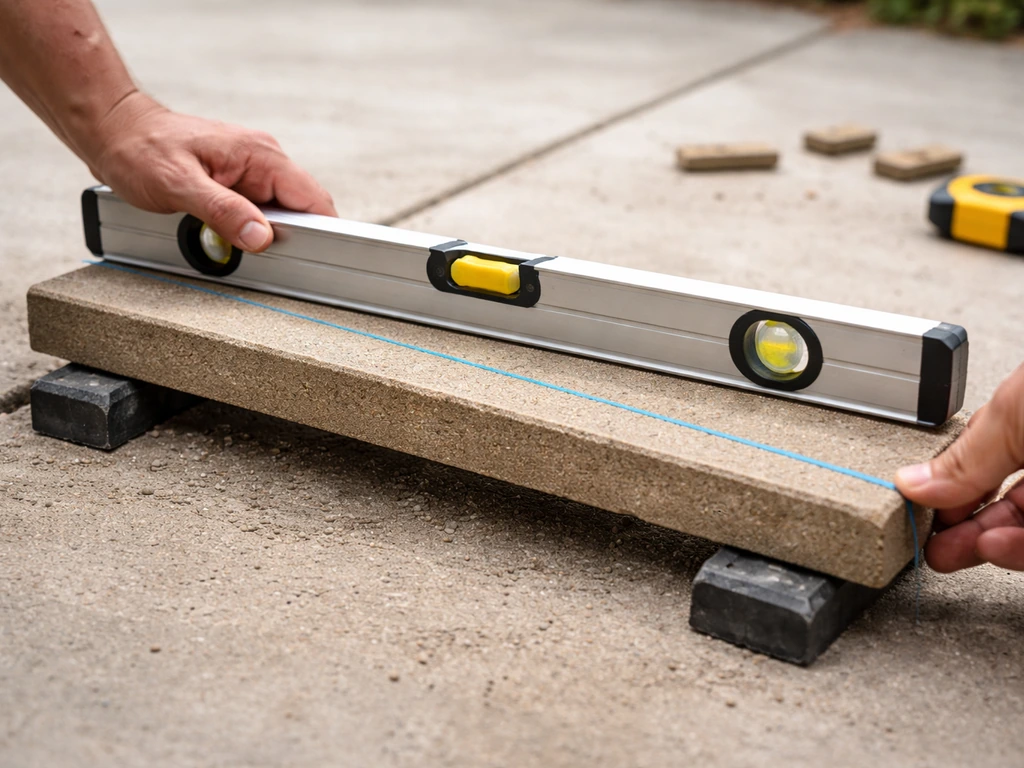
To verify or plan fall on an existing or planned surface, all you need is a long level (a 4-foot level works well for smaller areas, and a digital smart level is ideal for larger runs) and a tape measure. Place the level flat on the surface and measure the gap between the level's low end and the surface. On a 4-foot level, a 1-inch gap at the low end equals about 1/4 inch per foot of fall. A 1/2-inch gap equals about 1/8 inch per foot.
For planning purposes during construction, contractors set up string lines from batter boards and use a line level or laser level to establish the intended grade across the subgrade before any base or bedding goes down. If you skip this step and try to adjust slope in the bedding layer alone, you'll struggle, because the bedding sand is only supposed to be 1/2 to 1 inch thick (roughly 13 to 25 mm per ICPI Tech Spec 8). That's not enough depth to fix a subgrade that's flat or sloped the wrong way.
| Patio Width | Fall Rate | Total Drop |
|---|---|---|
| 8 feet | 1/8 inch per foot | 1 inch |
| 8 feet | 1/4 inch per foot | 2 inches |
| 12 feet | 1/8 inch per foot | 1.5 inches |
| 12 feet | 1/4 inch per foot | 3 inches |
| 16 feet | 1/8 inch per foot | 2 inches |
| 16 feet | 1/4 inch per foot | 4 inches |
| 20 feet | 1/8 inch per foot | 2.5 inches |
| 20 feet | 1/4 inch per foot | 5 inches |
Recommended fall ranges depending on where water needs to go
Not every patio drains the same direction, so the recommended fall range depends a bit on your specific drainage goal. Here's how to think about it by scenario:
Sloping away from the house toward the yard
This is the most common setup and the one building codes typically address directly. The City of Redding and similar municipal permit guidance cite 1/8 inch per foot as the minimum for exterior concrete slabs, while Los Angeles County Public Works references 1/4 inch per foot as the positive drainage minimum to avoid ponding. In practice, 1/4 inch per foot is the target most experienced contractors shoot for because it handles real-world runoff volumes without looking or feeling steep. At 1/8 inch per foot you're at the low end, and any minor settling or construction tolerance issues can push you below that threshold quickly.
Sloping toward a central or perimeter drain
If you're routing water to a drain rather than off the edge, you still want 1/4 inch per foot but the slope runs from the perimeter inward or from all four sides down to the drain point. This is common on covered patios or situations where you can't direct water toward the yard without it pooling against a fence or property boundary. The same slope target applies, but the geometry gets more complex, especially on larger patios where you may need to design in multiple drainage planes.
Maximum slope to keep in mind
There's also a practical upper limit. For most residential patios, anything beyond about 2% (roughly 1/4 inch per foot) starts to feel noticeable underfoot and can create issues with patio furniture sitting level. Pervious concrete systems sometimes reference a maximum slope of 5%, but that's a specialty application and well beyond what feels comfortable on a patio you're actually using. A pervious concrete typical detail also specifies a blank" rel="noopener noreferrer">maximum slope of 5% and guidance for a minimum gravel base course depth of 12 inches. For standard patio use, stay in the 1/8 to 1/4 inch per foot range and you'll be in good shape.
Design details that affect how fall works in the real world
Getting the slope right on paper is one thing. Keeping it right through installation and over time is where most problems actually show up. A few specific details matter a lot:
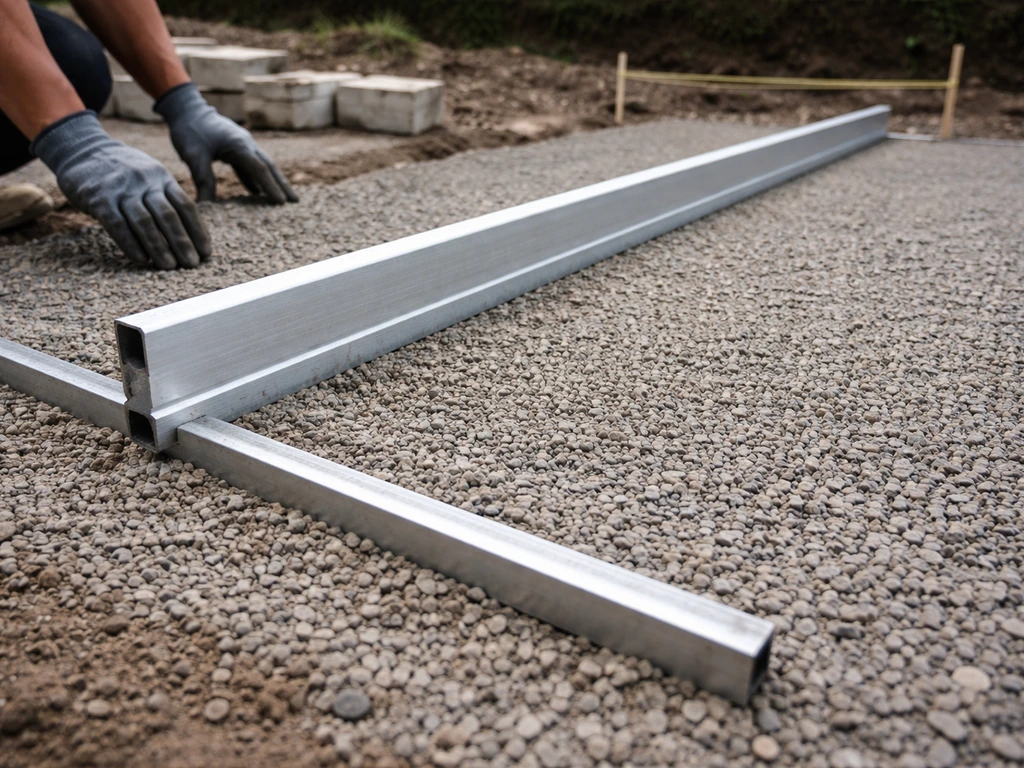
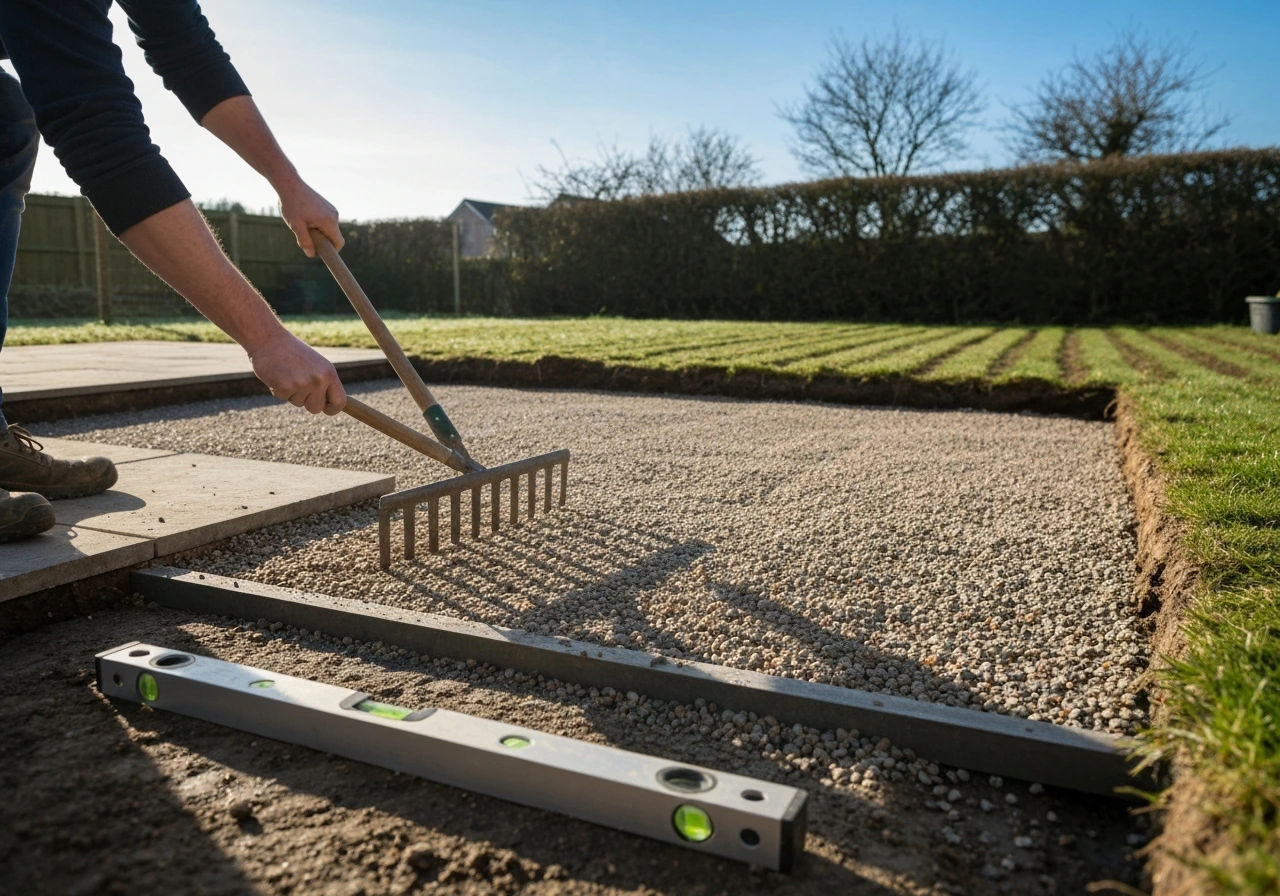
Base layers and subgrade
The slope needs to be established in the subgrade (the compacted soil or gravel base beneath everything) before you lay a single paver or pour a single inch of concrete. If the subgrade is flat, no amount of adjusting in the bedding layer will give you a reliable slope. The bedding sand for pavers is only supposed to be 1/2 to 1 inch thick, scraped to a consistent depth, not used as a wedge to tilt the surface.
Settlement allowances
CMHA's paver installation guidance notes that final paver elevations should sit about 1/8 to 1/4 inch above edge restraints to account for compaction and minor settling over time. That means when you're first installing, the surface should be slightly proud of the edges, so that after settlement, it ends up at the right elevation rather than dipping below the drainage plane. If you install flush and then the surface settles even slightly, you can end up with low spots that collect water against the edges.
Edge restraints
Edge restraints keep pavers from spreading laterally, but they also act as the low point of the drainage plane. If your edge restraints are too high, or installed without accounting for the settlement allowance, water can pool against them instead of flowing over or past them. CMHA recommends edge restraints with a smooth vertical face that allows full paver edge contact, and the installation height should factor in roughly 1/4 inch for initial compaction plus another 1/8 inch for long-term settling.
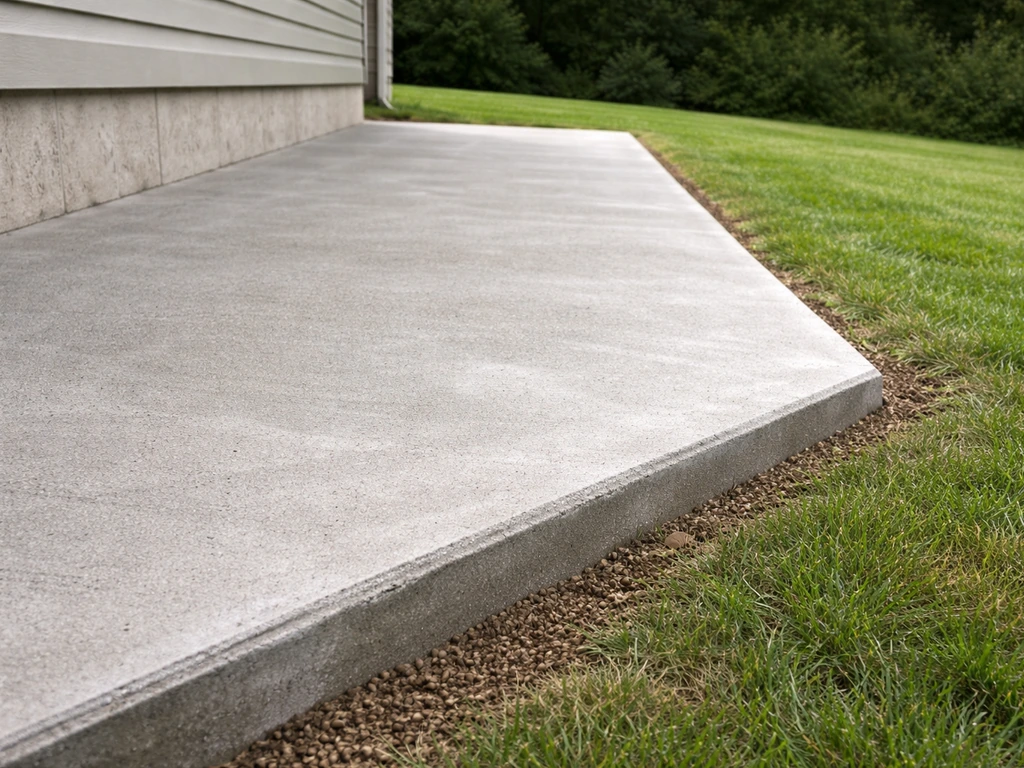
Door thresholds and transitions
The most common mistake I see is a patio that slopes correctly in the middle but transitions poorly at the door. The patio surface needs to sit below the door threshold (typically at least an inch below the finished floor level inside), and the slope away from that threshold has to start immediately, not several feet out. If the patio near the door is flat or slightly back-pitched even by a fraction of an inch, rain blowing in or runoff from the door overhang will sit right at your threshold and eventually find its way inside. This transition detail is worth spending extra time on during layout.
How material choice affects fall requirements
Different patio surfaces respond to slope and drainage differently. Here's a practical comparison:
| Material | Recommended Fall | Key Drainage Consideration | Settling Risk |
|---|---|---|---|
| Concrete pavers | 1/8 to 1/4 inch per foot | Slope must be set in subgrade; bedding sand is only 1/2 to 1 inch thick | Moderate: joint sand can erode if pooling occurs; polymeric sand not rated for standing water |
| Poured concrete | 1/8 inch min, 1/4 inch preferred | Slope locked in when poured; fixing later requires overlay or saw-cut/re-pour | Low once cured, but joints/cracks can channel water incorrectly if not detailed properly |
| Exterior tile/stone | 1/4 inch per foot | Requires mortar bed slope or drainage mat system (e.g., drainage mat over membrane); tile itself is impermeable | Low with bonded mortar bed; drainage mat systems add complexity but manage limited construction height well |
Concrete pavers
Pavers are the most forgiving to adjust during installation because each unit is placed individually. Mutual Materials' installation guidance specifies 1/8 to 1/4 inch per foot as the slope target, and that falls squarely in line with the ICPI industry standard. The risk with pavers isn't usually the initial slope, it's what happens to the joints over time. Polymeric sand from Sakrete is swept into paver joints and then activated and finished, with attention to how the polymer behaves during cleanup, to help ensure joints are properly filled and less prone to erosion Polymeric sand is swept into paver joints and activated during cleanup. If water pools on the surface (because slope was lost to settling), it works its way into the joints and undermines the bedding sand. Polymeric sand products explicitly state they're not designed for areas subject to standing water, so getting and maintaining slope is critical to joint longevity.
Poured concrete
Poured concrete is the least flexible, because the slope is locked in the moment the slab cures. Professional concrete contractors follow a strict 1/4 inch per foot minimum as standard practice, and ACI tolerance standards mean construction variance can push you toward the low end. When planning a poured patio, communicate the slope requirement to your contractor explicitly, and ask them how they'll verify it before the pour. If a concrete patio ends up flat, your options are a surface overlay (which can be done but adds cost and thickness), grinding to create micro-channels, or living with it.
Exterior tile and stone
Tile is fully impermeable, so every drop of rain has to go somewhere via the surface slope. Daltile's exterior mortar bed warranty guidance specifies 1/4 inch per foot slope to drain as the requirement, which matches the industry standard. Systems like ARDEX's Watec drainage mat (a drainage mat installed over a waterproofing membrane with outdoor mortar) are designed specifically for situations where you have limited construction height but still need to manage water flow. LATICRETE makes a similar point: exterior tile renovations fail most often when slope-to-drain and waterproofing are skipped or done carelessly. If you're installing tile over an existing concrete slab, the slab's slope becomes your starting point, and you may need a self-leveling overlay with intentional pitch if that slab is flat.
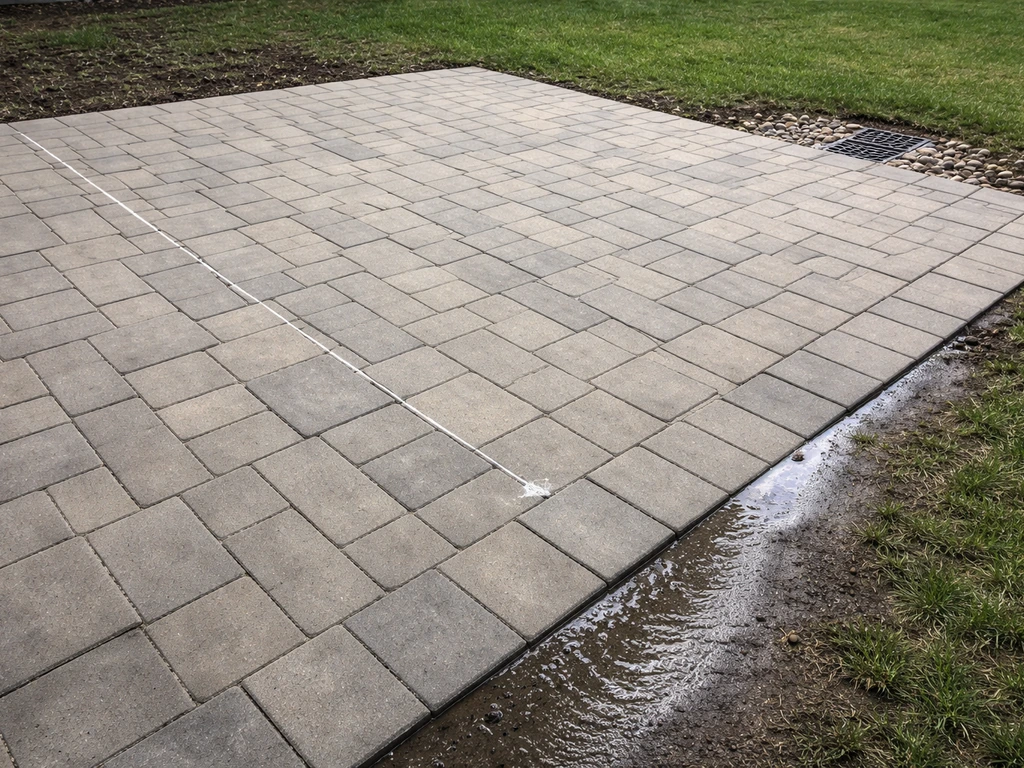
Testing for pooling and fixing drainage problems after the fact
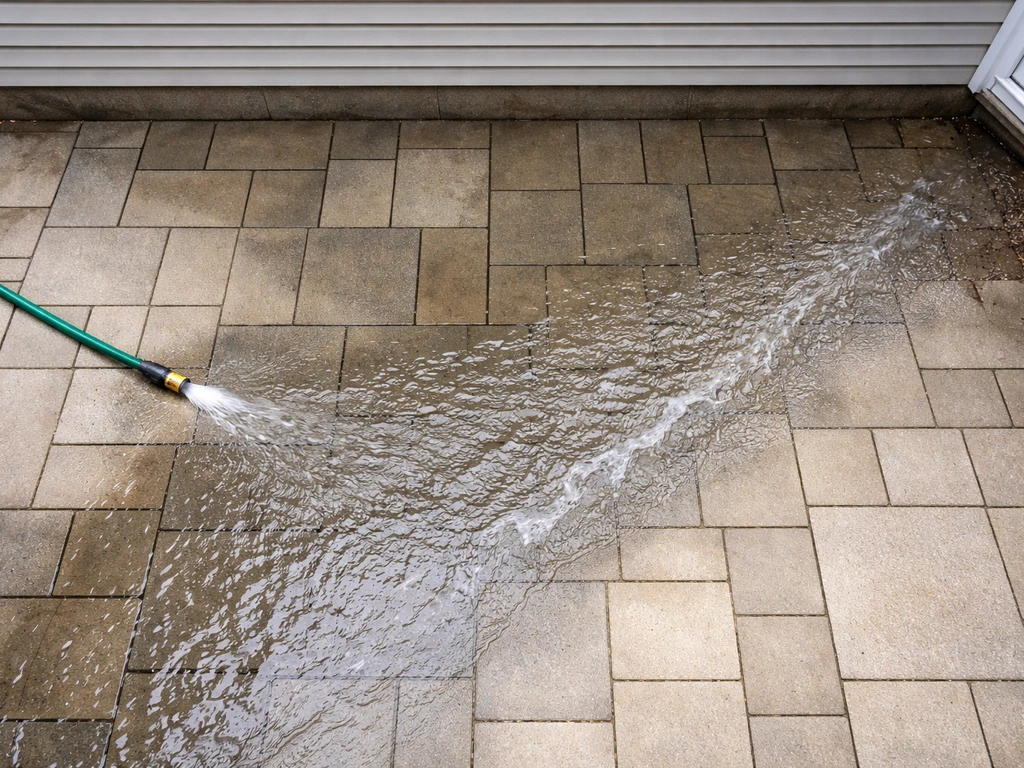
The simplest test is also the most honest one: run a garden hose on the surface for a few minutes and watch where the water goes. It should sheet off toward the intended low side within seconds, not linger in the middle or at the edges. Do this test at multiple points across the patio, not just in one spot, because a surface can slope correctly in one area and have a low spot in another.
If water pools near the house or stalls in the middle of the patio, you have one of three problems: the subgrade wasn't graded correctly from the start, the surface has settled unevenly since installation, or the edging or threshold detail is trapping water. According to Rochester Concrete Products, standing water on a paver patio is almost always a sign that something is wrong below the surface, not just with the joint sand. Don't just refill joints and hope for the best.
Fixes for paver patios
For pavers, the good news is that the surface can be pulled up and re-set. If you have a localized low spot, remove the pavers in that area, add to or regrade the bedding and base, and re-lay. For a whole-patio slope problem, you'll need to remove pavers, regrade the base, and relay everything with proper screed rails to guide the bedding sand to the correct pitch. It's labor-intensive but very doable as a DIY project on a small to medium patio. If you're looking for what is the easiest DIY patio, start with a smaller layout and a paving approach that lets you fine-tune the drainage as you install DIY project.
Fixes for concrete and tile
For poured concrete, a polymer-modified self-leveling overlay can be feathered to create slope, but you're limited in how much you can build up before it becomes visible as a step or bump. For minor corrections (a localized flat spot), concrete grinding can create a slight channel to move water. For tile, if the substrate slope is wrong, the tile has to come up and the substrate needs to be corrected before retiling. There's no good way to fix tile drainage by adjusting the tile itself.
DIY vs hiring a pro: what's reasonable and what to watch out for
Laying a paver patio with correct drainage is one of the more achievable DIY projects for a homeowner who's willing to rent the right equipment and do the subgrade work carefully. If you compare material and site-prep costs, you can often get the cheapest patio by choosing a surface that’s easy to install and maintain while still meeting minimum drainage slope what is the cheapest patio. The key is spending time on layout and slope before a single paver goes down. If you're replacing an existing patio with pavers, check the existing base slope first, because if it's flat or back-pitched, you'll need to add fill and regrade before you start.
Poured concrete and large-format exterior tile are much harder to DIY with confidence. Concrete slope is determined at the pour, and correcting a badly sloped slab is expensive. If you are deciding what is the best patio for your space, choosing the right surface comes down to how well it can maintain drainage over time poured patio. Tile over exterior substrates requires waterproofing and slope detailing that's easy to get wrong. For those, it's worth paying a pro.
What to ask a contractor before hiring
- What slope will you build into the surface, and how will you verify it before finishing?
- How are you establishing grade in the subgrade, and what base depth are you using?
- Will the patio slope away from the house continuously, or does water route to a drain?
- How are you handling the transition at the door threshold to make sure water can't back up?
- What's your tolerance for surface slope variation, and how do you check for low spots before the work is done?
Most common mistakes that lead to standing water
- Setting slope in the bedding sand rather than the subgrade, which shifts and settles
- Installing edge restraints at the wrong height so water pools against them instead of flowing past
- Not checking fall near the house where the patio meets the threshold, where back-pitch is most dangerous
- Skipping the hose test before calling the job done
- Using too little base depth, which allows frost heave or soil movement to flatten the slope over time
- Leaving paver joints unfilled or flush with the surface, which accelerates joint erosion when pooling does occur
If you're evaluating contractor bids or checking work that's already been done, the slope question is one of the most important things to nail down upfront. A patio that looks great on day one but pools water after the first rain is a frustrating and expensive problem. For choosing the best time of year to lay patio, you want conditions that let the base and concrete set properly so the drainage slope stays true pools water. Get the fall right in the design and subgrade stages, verify it before finishing, and you'll avoid most of the drainage headaches that come up later. If you're still deciding on materials, the choice of pavers versus concrete versus tile also connects to what kind of patio you want long-term, which is worth thinking through before committing to any one approach.
FAQ
How do I figure out the total height difference across my patio when the goal is 1/4 inch per foot?
You can calculate the total drop by multiplying the required fall (in inches per foot) by the horizontal run to the low point. For example, if you want 1/4 inch per foot and the run from the high side to the drain is 9 feet, the surface should drop 2.25 inches (9 x 0.25). Make sure you measure the horizontal distance, not the length along a slope.
What happens to drainage slope when my patio has steps, raised sections, or transitions to other surfaces?
Yes, but you still need slope continuity. If a patio changes height for steps, decks, or different slab thicknesses, the finished walking surface must resume the drainage plane immediately after the transition, with no flat “landing” that catches water. Plan the slope so the low area still directs water toward the edge or drain, not toward the house or an interior doorway.
If I’m sloping toward a trench or channel drain, how do I design the slope so it actually captures water?
For an exterior perimeter drain or trench drain, build slope toward the drain from multiple points rather than relying on one straight line. In practice, you want the tile or paver surface to “shed” water into the drain intake quickly, so avoid placing the high point at the far end of the patio. Also confirm the drain capacity and grate placement, because a well-sloped patio can still overflow if the drain inlet is too small for the runoff volume.
Is polymeric sand a good choice if I’m worried about maintaining slope over time?
Polymeric joint sand is fine only if water cannot remain on the surface. If you regularly see water lingering after a rain (even briefly), that is a sign slope or edging details are trapping water, and polymeric sand can fail prematurely as joints cycle through moisture and washout. A hose test at several locations is the quickest way to decide whether you need more slope work before sealing or switching joint materials.
Why do my puddles collect right near the edges even though I thought the patio was sloped?
Edges and restraints can “pin” the drainage plane if they are installed higher than the finished drainage grade expects. A common fix is to adjust edge restraint height and to include the settlement allowance so the finished surface ends up slightly proud initially and then settles to the intended plane. If edges are already installed and the surface is back-pitched, regrading is usually more reliable than trying to compensate with joint sand thickness.
What’s a practical way to check fall on an existing patio beyond doing one hose test?
Use a straightedge or long level to map the surface, then compare readings at multiple points, not just one measurement. A simple method is to mark a few “station” points across the patio (near the house, mid-patio, and near the low side), then measure the gap at each. If you find one corner that consistently reads higher, that corner is likely creating a local low spot.
My patio pools right at the door area, how should the threshold and starting slope be corrected?
If water pools at the threshold or near a door, the patio surface is usually too high at the exterior side or the slope start is delayed. The drainage plane needs to begin essentially right at the door threshold transition, and the outside finished surface typically must sit below the inside finished floor by enough to prevent rain from migrating inward. Even small flat spots near thresholds can become persistent leak paths when wind-driven rain hits the door area.
What’s the most common mistake when homeowners try to fix slope using bedding sand during paver installation?
For pavers, you generally want the slope created in the compacted base, then verify the pitch while setting. A frequent error is trying to “wedge” pavers on too-thick bedding sand, which leads to movement when traffic, compaction, or freeze-thaw occurs. If your slope is wrong after setting, plan to lift and re-set the affected zone rather than trying to fix it by adding more sand in place.
How can I hold a concrete contractor accountable to get the slope right before the pour?
Concrete slope problems are hard because the pour sets the grade permanently, so the contractor verification process matters. Ask for how they will measure during form setup, and specifically request confirmation that the surface elevation matches the intended drainage plane before the concrete goes down (not after finishing). If a slab is flat, options often include overlay work, micro-channel grinding, or major rework, which usually costs more than preventing it.
Is there a comfort limit for how steep a recommended fall for patio can be?
Yes, you can feel noticeable difference when slope gets too steep, but the bigger issue is functionality, especially for furniture and rolling items. If the upper end of the patio is very steep, you may also get more water streaking and uneven drying, which can affect grout lines and joint appearance. For most standard residential use, staying in the 1/8 to 1/4 inch per foot range keeps drainage reliable without making the surface feel like a ramp.
Next Articles
What Is the Best Patio for Your Yard Climate Budget
Pick the best patio by climate, budget, and lifestyle with head-to-head material and layout comparisons, DIY vs hire tip
What to Do for a Patio in Fall: Cleanup, Safety, Drainage
Step-by-step fall patio prep: cleanup, safety checks, drainage fixes, and material-specific protection to prevent water
Best Time of Year to Lay a Patio UK Guide and Timing Tips
UK timing guide for patio laying: best season, daily ground checks, frost and rain risk, and material curing schedules.