The cheapest patio you can build is a pea gravel patio, which runs as little as $1–$4 per square foot installed. If you want something more solid underfoot, a plain poured concrete slab comes in at $4–$12 per square foot, making it the most affordable hard-surface option. A good way to avoid regret is to focus on the fall season and low-cost patio landscaping that supports drainage and soil stability fall patio. Either way, your total bill depends less on which material you pick and more on how much prep work your yard actually needs, whether you hire anyone, and how complex your design gets.
What Is the Cheapest Patio? Options, Costs, and Tips

Phoebe Foster
5 Jul 2026
Cheapest patio types and why prices vary so much
Patio costs can swing wildly from one yard to the next, even for the exact same material. A perfectly flat, well-drained backyard with easy access is a completely different job than a sloped lot with clay soil and a fence gate too narrow for equipment. That said, here is where the most common patio types typically land on installed cost per square foot:
| Patio Type | Typical Installed Cost (per sq ft) | DIY Friendly? | Longevity |
|---|---|---|---|
| Pea gravel | $1–$4 | Yes | Moderate (needs replenishing) |
| Plain poured concrete slab | $4–$12 | Difficult | 25–30+ years |
| Concrete pavers (basic) | $8–$25 | Yes, with effort | 20–25+ years |
| Brick pavers | $5–$10 and up | Yes, with effort | 20+ years |
| Stamped concrete | $8–$30 | Not recommended | 15–25 years |
| Flagstone | $15–$30 | Partial | 20–30+ years |
The big reason prices vary so much: labor accounts for roughly 50% of total patio installation cost when you hire a pro. That means a material that costs twice as much per square foot does not necessarily produce a final bill twice as high. Design complexity drives cost just as hard as material choice. A simple rectangle with a single paver pattern costs far less than the same square footage laid in a herringbone fan pattern with curved edges and built-in steps.
Where your money actually goes: materials, base prep, labor, and extras
Most people focus on the material cost and forget that the base underneath the patio often costs just as much or more to install correctly. Here is how a typical patio budget breaks down:
- Materials (pavers, concrete, gravel, stone): typically 30–50% of total cost, depending on what you choose
- Base prep (excavation, 4–6 inches of compacted gravel, 1 inch of bedding sand): often $2–$5 per square foot on its own, and this does not change much between paver types
- Labor: roughly 50% of the total installed price when hiring a contractor, per HomeAdvisor estimates
- Grading and drainage: budget $500–$1,000 for basic yard leveling and slope correction; more if your yard has serious drainage issues
- Accessories and edging: edge restraints, joint sand, sealers, and lighting add up fast if you are not watching the line items
The base is non-negotiable regardless of material. A proper paver patio needs roughly 4–6 inches of compacted aggregate base plus about 1 inch of bedding sand before a single paver goes down. Skipping or skimping on this is the number one reason DIY patios turn into wobbly, uneven messes within two or three years. That base cost exists whether you install pavers, brick, or flagstone, so it narrows the real-world price gap between cheap and mid-range materials more than the sticker prices suggest.
The lowest-cost material options, honestly assessed
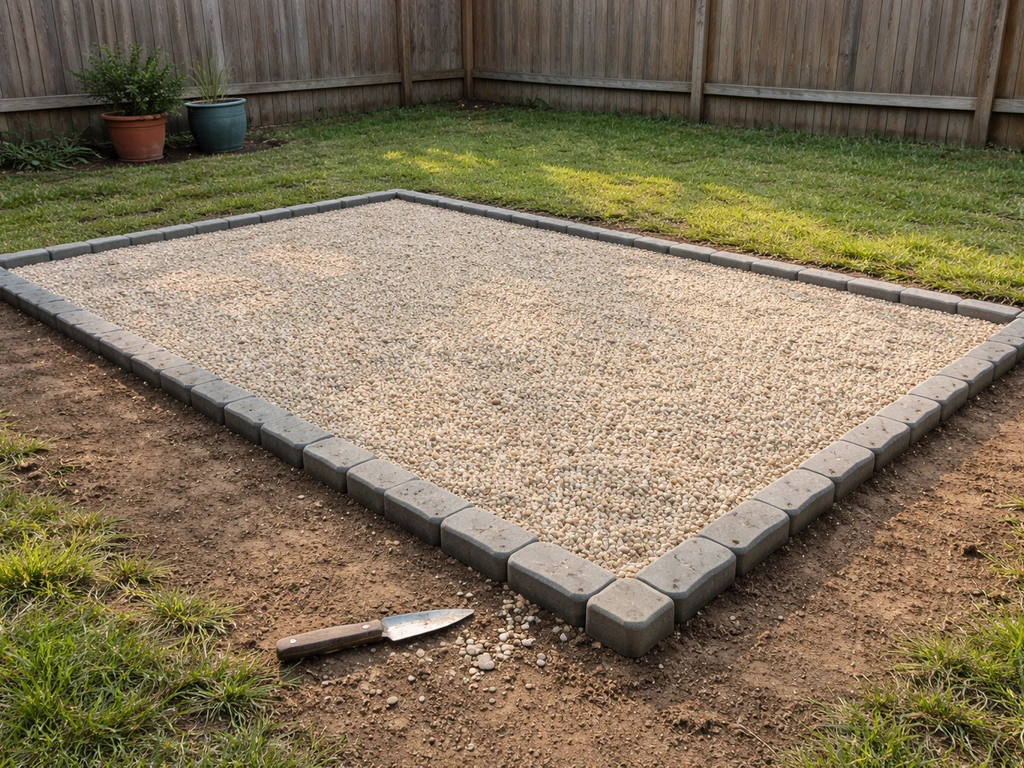
Pea gravel

Pea gravel wins on upfront cost, no question. At $1–$4 per square foot installed, it is the most accessible starting point for almost any budget. You can do it yourself with basic tools, it drains naturally so drainage prep is minimal, and you can add it in stages. If you want the easiest DIY patio, start with a simple paver layout on a properly compacted base. The downsides are real though: it shifts underfoot, furniture legs sink into it, it migrates out of the space over time, and it requires periodic replenishment. In climates with heavy rain or wind, you will be chasing it around the yard every season. It works well as a casual seating area, especially when contained with solid edging.
Poured concrete slab
A plain concrete slab is the cheapest solid, permanent surface at $4–$12 per square foot installed. It is not glamorous, but it is tough, low-maintenance, and takes paint or stain well if you want to dress it up later. The catch: pouring concrete is not a beginner DIY project. You need to get the grade right, the forms set, the mix proportioned correctly, and the finish done before it sets. Mistakes in concrete are expensive to fix. If you are hiring out, this is where you get solid value. If you are going full DIY, stick with pavers or gravel.
Concrete and brick pavers
Basic concrete pavers are the sweet spot for budget-conscious homeowners who want a durable, attractive surface they can actually install themselves. Installed costs typically run $8–$25 per square foot for concrete pavers, with brick starting around $5–$10 per square foot at the lower end. Rainplan reports permeable pavers typically run about $8, $30 per square foot installed for residential projects, including base layers and materials as described on the page $8–$30 per square foot installed. Pavers are individual units, so mistakes are fixable without starting over, and a cracked paver can be swapped out years later without affecting the rest. The base prep work is significant (and is a real cost), but the material itself is widely available, often discounted at the end of season, and forgiving enough for a skilled DIYer.
Stamped concrete and flagstone
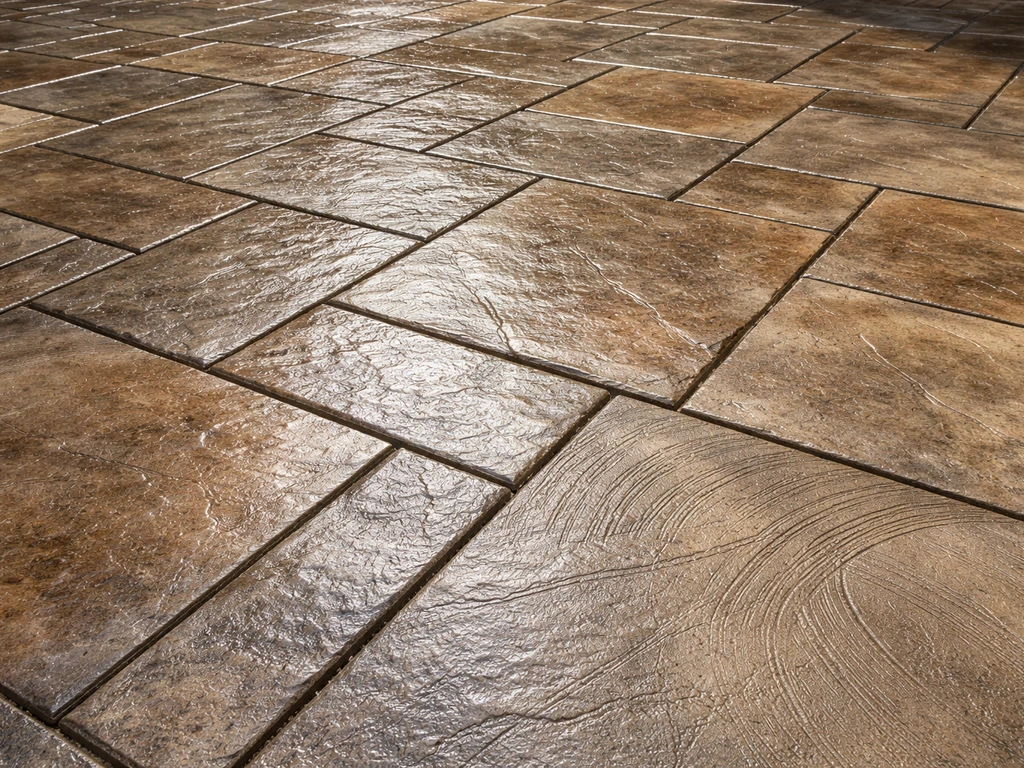
These are not cheap options. Stamped concrete runs $8–$30 per square foot and requires professional installation. Cracks are hard to repair without the color mismatch being obvious, and the surface needs resealing every two to three years to stay protected and looking good. Flagstone sits at $15–$30 per square foot installed and higher for premium stones. Both look great but belong in a different conversation from budget patios. If you are here to spend the least possible, skip these two for now.
DIY vs. hiring a contractor: when DIY actually saves you money
Since labor is roughly half the total cost of a patio installation, doing the work yourself is theoretically a 50% discount. In practice, it depends a lot on what the job actually requires. Here is a straight breakdown of when each approach makes sense:
| Scenario | Best Approach | Why |
|---|---|---|
| Flat yard, simple rectangle, pea gravel or basic pavers | DIY | Low technical difficulty, easy to correct mistakes, no heavy equipment needed |
| Slight slope, good drainage, concrete pavers on basic base | DIY with research | Manageable with rented plate compactor and patience; base prep is learnable |
| Significant slope, poor drainage, clay soil | Hire a pro for prep, DIY finish if possible | Grading and drainage require equipment and expertise; getting it wrong costs more to fix |
| Poured concrete slab | Hire a pro | Concrete has no margin for error; bad pours crack and cannot be patched invisibly |
| Stamped or decorative concrete | Always hire a pro | Requires specialized tools, timing, and finishing skills; Concrete Network explicitly advises against DIY |
One thing that trips up a lot of DIYers is the base compaction step. Renting a plate compactor is not expensive, but skipping it or doing it halfway is the most common reason paver patios settle unevenly within a few years. If you are going DIY on pavers, rent the right tool, follow the 4–6 inch compacted base guideline, and do not rush the preparation phase. The actual paver-laying part is the easy bit.
One more thing on timing: if you are hiring a contractor, spring tends to be the busiest and most expensive season for patio work because everyone wants it done at the same time. If you want the best time of year to lay a patio, aim for weather windows that let the base and materials set properly without constant rain spring tends to be the busiest and most expensive season for patio work. Early fall can be a better time to get competitive quotes and faster scheduling. Related to this, if you are buying materials yourself, both Home Depot and Lowe's run significant spring and late-summer sales on patio materials, and end-of-season clearance on pavers and edging can cut your material costs noticeably.
Hidden costs that can wreck your 'cheapest' option
This is where a lot of homeowners get surprised. The material you choose is almost never what blows the budget. Here are the costs that show up after you start digging:
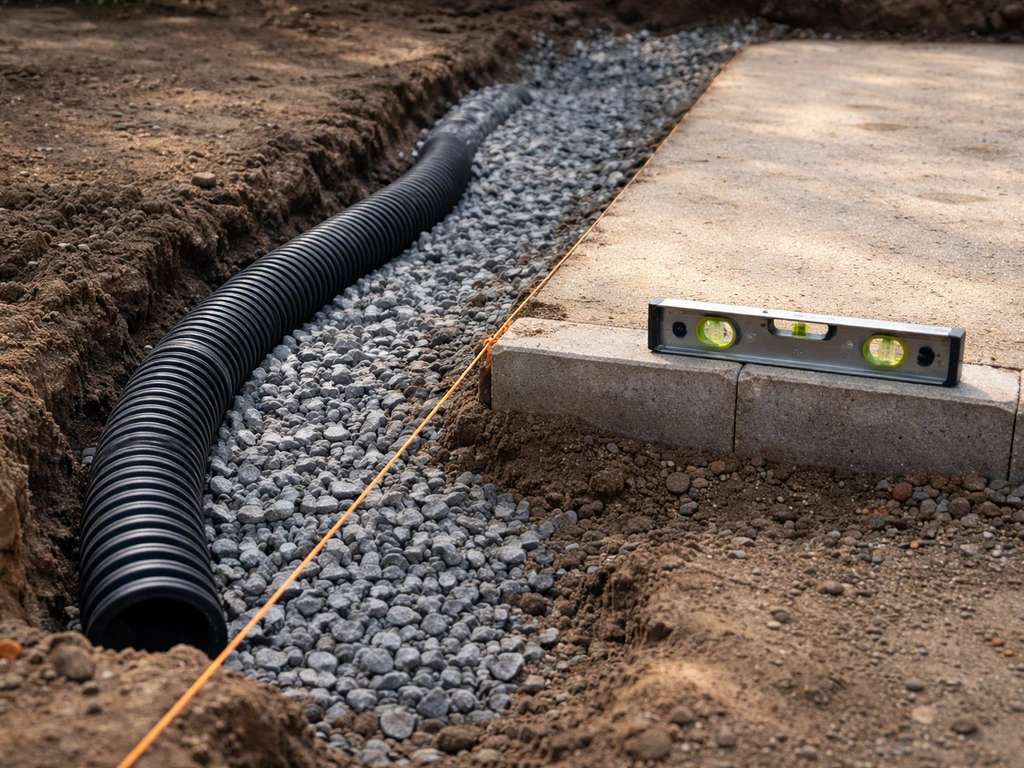
- Yard grading and drainage: expect $500–$1,000 for basic leveling and slope correction; seriously problematic drainage can push this much higher and may require a French drain or catch basin
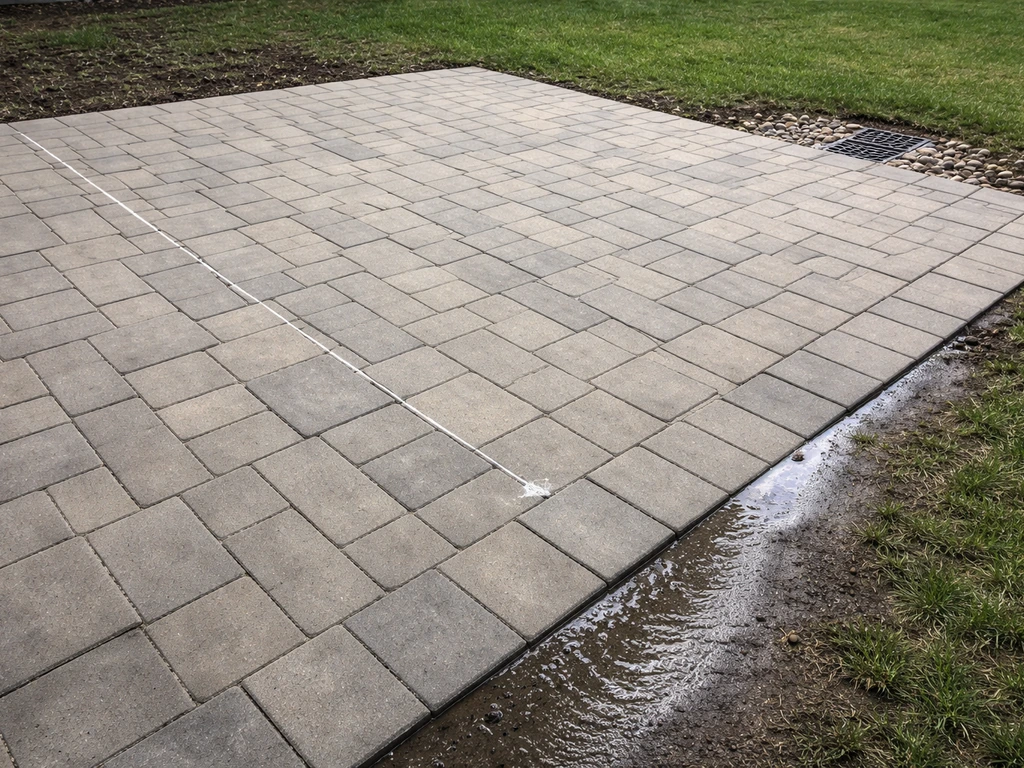
- Drainage slope design: any hard surface needs to slope away from the house (typically 1 inch per 8 feet); getting this wrong leads to water pooling, which damages the base and the structure over time
- Permits: some municipalities require permits for paved surfaces over a certain size, especially if they affect stormwater runoff; check before you dig
- Utility locating: always call 811 before any excavation, full stop; hitting a gas or electrical line is not a budget item, it is an emergency
- Old patio demolition: removing an existing concrete slab or paver surface adds cost that is easy to forget; demo and hauling can run hundreds to over a thousand dollars depending on size and material
- Access: if equipment cannot get into your backyard easily, manual labor costs go up or certain prep steps become much harder
- Maintenance over time: pea gravel needs replenishing, concrete needs sealing, and pavers can settle and need re-leveling; a slightly more expensive material that lasts twice as long is not always the more expensive choice in the long run
The drainage point deserves extra emphasis. A flat, properly sloped patio on well-drained soil is a straightforward job. A yard that pools water after rain needs real drainage work before any surface goes down, regardless of how cheap the material is. Skipping it means your 'cheap' patio is sitting on a ticking clock. If you are planning the build, your recommended fall for patio materials and weatherproofing can help you avoid delays and costly rework.
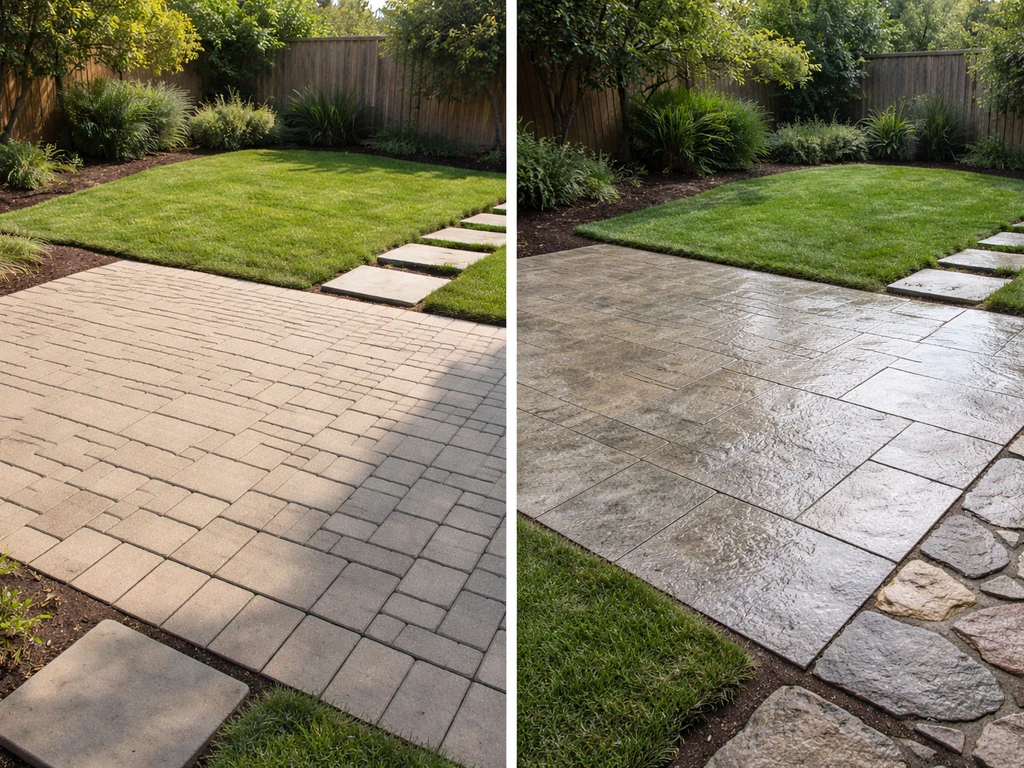
How to design a budget patio that still looks good
Cheap does not have to mean plain and depressing. A few design choices make a huge difference in what you get for the money:
- Keep the shape simple: a square or rectangle requires almost no cutting, no specialty pieces, and less labor. Curves and custom shapes add cost fast.
- Use a single paver pattern: running bond (brick-style offset rows) is the easiest and cheapest to lay. Herringbone looks great but creates far more cuts and waste.
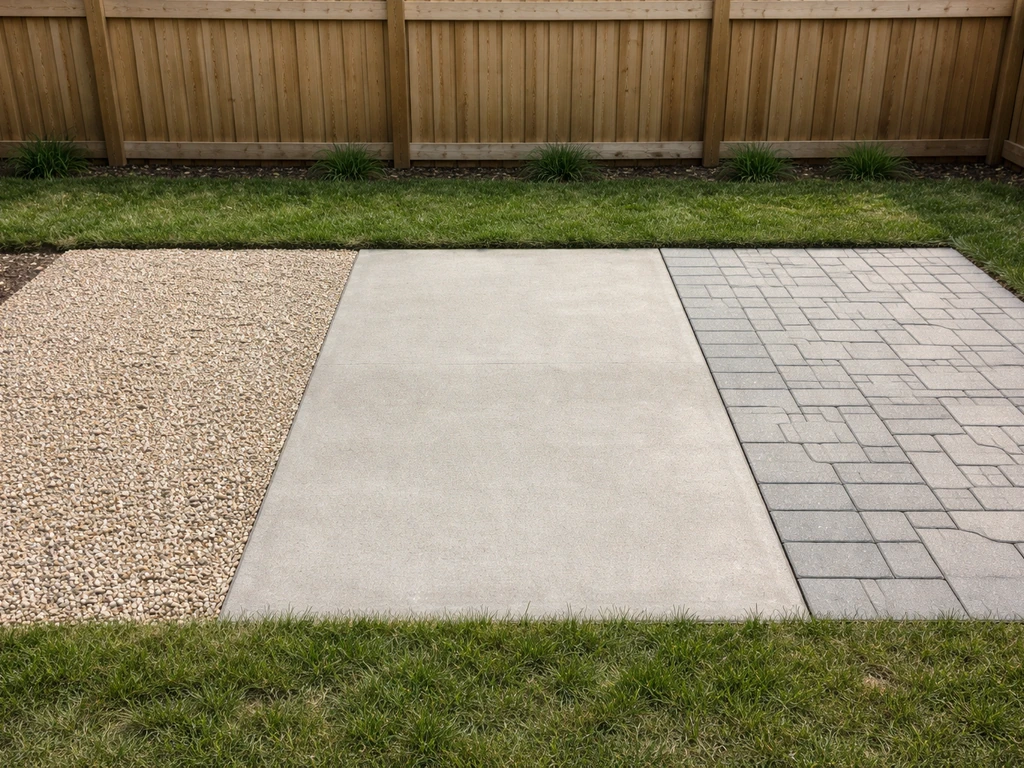
- Mix materials intentionally: a concrete slab as the main surface with a gravel border, or pavers as a perimeter with a gravel fill, costs less than full paver coverage and can look deliberately designed.
- Shop leftover and clearance pavers: many hardscape suppliers and big box stores sell overstock, discontinued, or damaged-lot pavers at significant discounts. The catch is limited quantity, so measure your space first and buy enough to complete the job.
- Use plants and potted greenery: a basic concrete pad surrounded by container plants and a simple string-light setup looks intentional and finished for very little money.
- Size it right: only build what you will actually use. A 10x12 patio done well beats a sprawling 20x30 done on the cheap and half-finished.
If you are interested in the best-looking patio for your money rather than just the cheapest, that is a slightly different conversation worth exploring separately. But for pure budget goals, the above principles consistently deliver the most value per dollar.
Your next steps checklist to find the cheapest build for your yard
Here is what to do right now to turn this from general information into an actual plan:
- Measure your space: get the square footage of the area you want to pave. This single number drives every cost estimate you will get.
- Walk the yard and assess the slope and drainage: does water pool after rain? Is the ground noticeably unsloped toward the house? If yes, factor in $500–$1,000 or more for drainage work before anything else.
- Pick one or two material options to compare: based on your budget and DIY willingness, narrow it to pea gravel (cheapest, easiest DIY), plain concrete slab (cheapest permanent surface, hire out), or basic concrete or brick pavers (best DIY balance of cost and durability).
- Call 811 before any digging: utility locating is free and required. Do it first, not as an afterthought.
- Check local permit requirements: call your municipality or check their website to find out if a patio of your planned size requires a permit. It often does not, but finding out after the fact is expensive.
- Get at least two contractor quotes: even if you plan to DIY, getting a pro quote tells you what the full job actually costs and gives you a reference point for your DIY savings.
- Check for material sales: if your timing is flexible, end-of-season sales (late summer and fall) at Home Depot and Lowe's, plus local hardscape supplier clearance lots, can cut material costs by 20–40%.
- Decide DIY vs. hire based on the drainage and slope reality: if your yard is flat and well-drained, DIY is genuinely cheaper. If it needs real grading work, consider hiring out at least the prep phase.
The cheapest patio that holds up is not always the one with the lowest material cost per square foot. It is the one sized correctly, built on a proper base, with drainage that works, and chosen to match what you are realistically willing to do yourself. Nail those four things and you will spend less in the long run than someone who went with the flashier option on a shortcut base.
FAQ
What is the most accurate way to estimate the total cost of the cheapest patio?
Measure your patio area in square feet, then add 10 to 15% for cutting waste and layout adjustments (especially for borders or irregular edges). A “cheap” quote per square foot can look low when it ignores the extra materials you will need.
Is pea gravel always the cheapest patio option if my yard has drainage issues?
If your yard stays wet after rain, pea gravel may look inexpensive at first, but you may end up paying more later for repeated replenishment, reshaping, and edging. In pooled-water situations, budget for drainage grading (and sometimes a drain line) before choosing a low-cost surface.
How much slope should the patio have to avoid settling and puddling?
For pavers, “level” is not enough, you still need a gentle slope away from the house, typically about 1/4 inch per foot. A patio that drains poorly may settle and shift even if the base thickness is correct.
What part of a patio build most often ruins the budget later?
In most cases, the base is the make-or-break cost driver. If you do gravel or pavers, plan on spending money on the correct depth of compacted aggregate base and proper bedding sand, because a thin or poorly compacted base usually causes unevenness within a few years.
Can you combine materials to keep costs low (for example, gravel plus pavers)?
Yes, but only if the product is compatible with your use. For example, loose gravel is not ideal under heavy furniture or frequent wheelchair and stroller traffic. If you need stability, consider edging that contains the gravel and a layout that minimizes walking paths.
What should I question in a contractor quote for the cheapest patio?
If the contractor says they will install over existing soil or old debris, treat that as a red flag. Removing unsuitable material and preparing a firm base is what prevents future sinking and wobble, even when using “cheap” surfaces.
Does the cheapest patio choice change depending on my climate?
Season and weather affect labor availability and curing, but your local climate also affects performance. In freeze-thaw regions, poorly draining bases and shallow installs are more likely to heave, so you may need to budget extra attention to base prep and drainage.
Is it worth renting a plate compactor, and when should I hire help for base prep?
For DIY pavers, a plate compactor rental is usually worth it, but the real decision is whether you can compact the entire area evenly in lifts. If the job is large or access is difficult, hiring out compaction and base prep can cost less than replacing a settled patio.
How can I use sales to lower costs without compromising installation quality?
Yes, end-of-season sales can reduce material costs, but don’t let them push your schedule into rain-heavy weeks if drainage and base work will be exposed. Buying materials early without clear staging can also lead to delays and storage damage.
How do I troubleshoot a patio that starts to look uneven after a season?
A wobbly surface usually means base compaction or thickness is off, not just “bad material.” Look for areas that feel soft, rocking stones, or uneven edges, then correct the problem by adjusting the base and re-laying localized sections instead of trying to patch the surface alone.
Next Articles
Recommended Fall for Patio Drainage: How to Measure
Learn recommended fall for patio drainage, how to measure slope, avoid pooling, and verify runoff away from your home.
What Is the Best Patio for Your Yard Climate Budget
Pick the best patio by climate, budget, and lifestyle with head-to-head material and layout comparisons, DIY vs hire tip
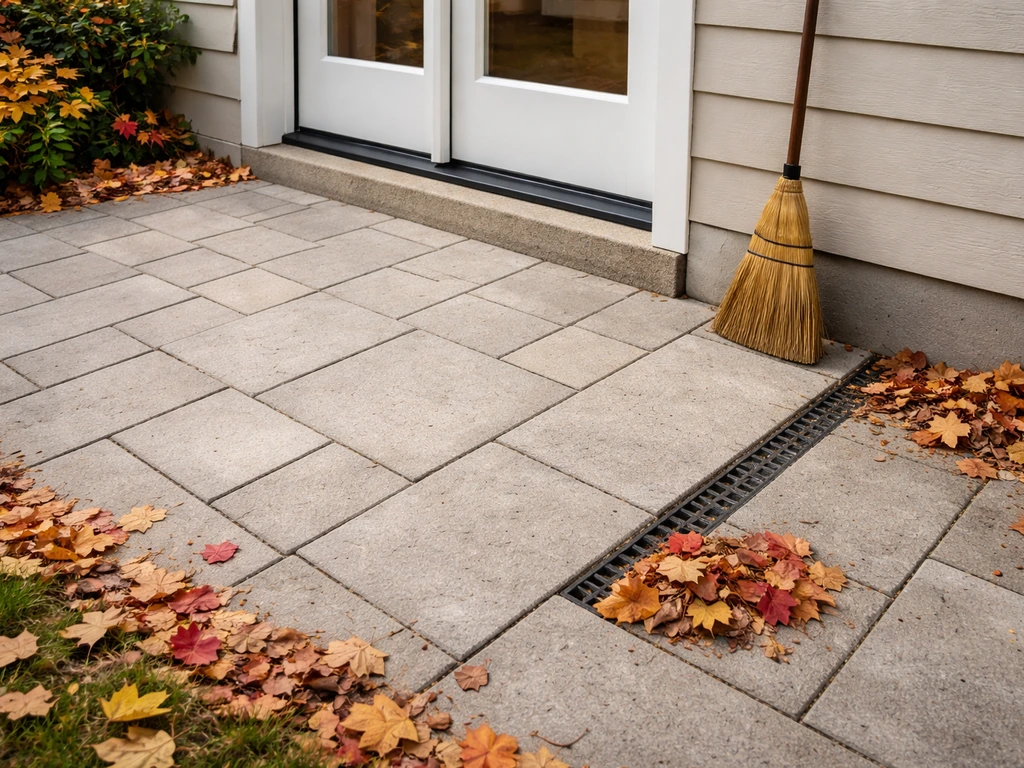
What to Do for a Patio in Fall: Cleanup, Safety, Drainage
Step-by-step fall patio prep: cleanup, safety checks, drainage fixes, and material-specific protection to prevent water