Patio Mate screened enclosures are worth considering if you want an affordable, DIY-friendly screen room attached to an existing deck or concrete patio, and you live somewhere without heavy snow. The kits run roughly $1,500 to $4,000 depending on size, the galvanized steel frame genuinely holds up over years, and when installed correctly they handle rain, wind, and bugs well. The honest catch from real reviews: the vinyl roof tends to leak after about five years, the instructions are genuinely frustrating, and the product is not built for snow loads or severe storm seasons without seasonal roof removal. If those tradeoffs work for your situation, it can be a solid value. If they don't, there are better-engineered options to consider.
Patio Mate Screened Enclosure Reviews: Buyer Guide

Phoebe Foster
17 Jun 2026
What you actually get in a Patio Mate kit
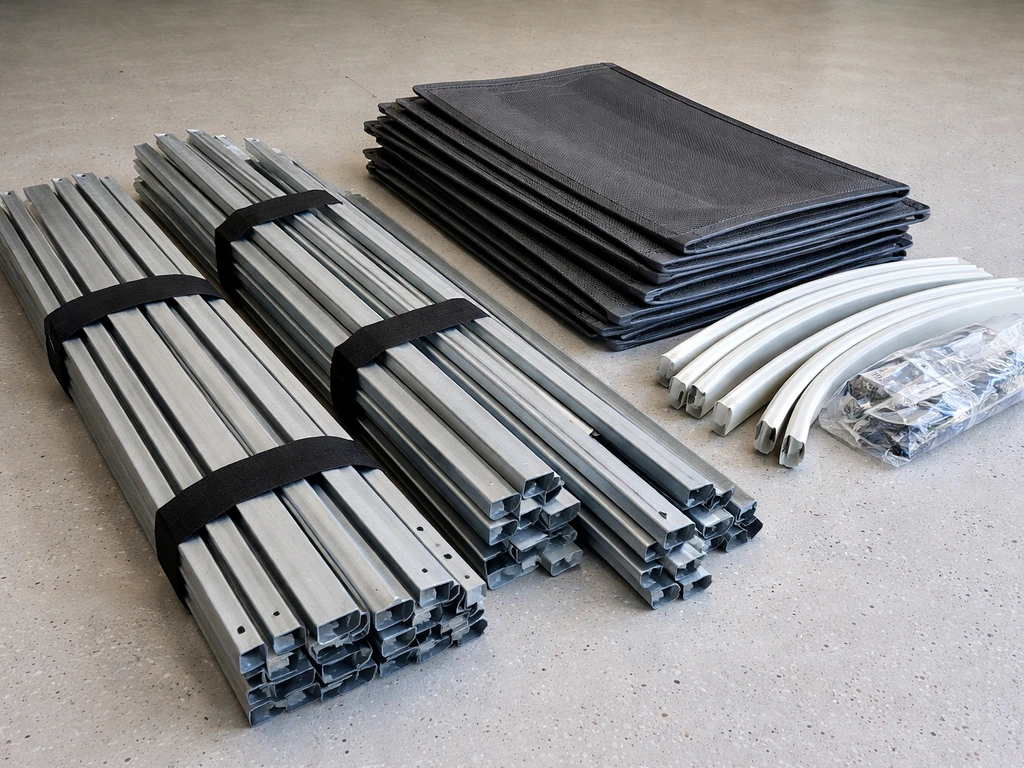
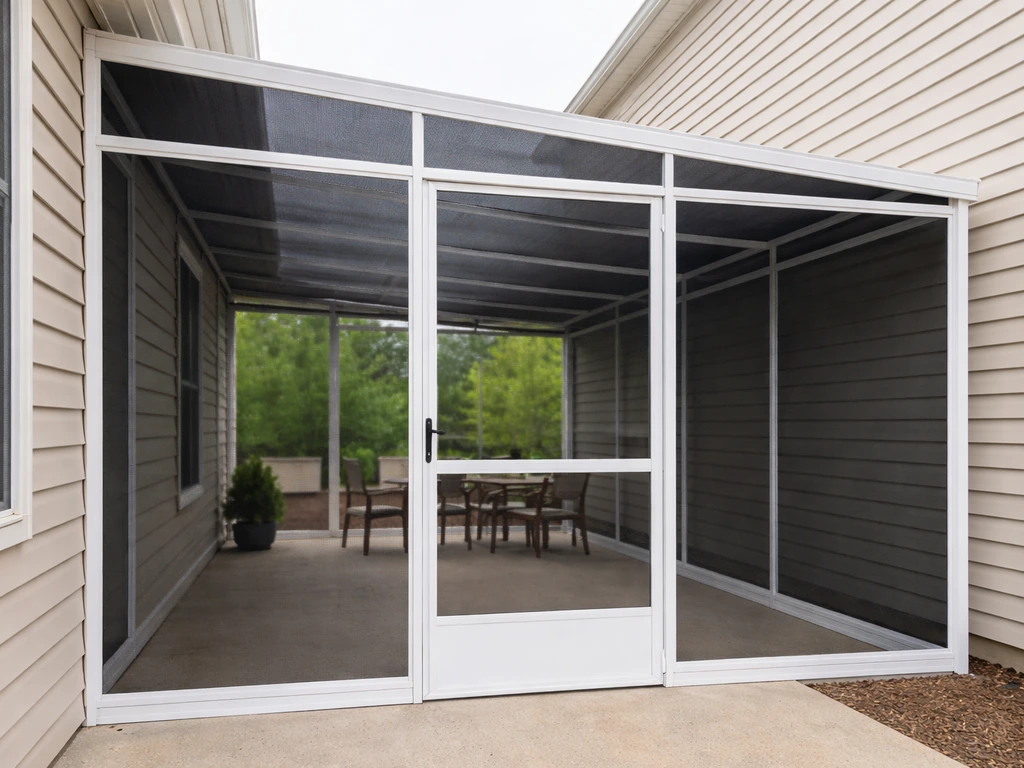
Patio Mate (also written Patio-Mate, made by Kay Home Products) is a house-attached, lean-to style screen enclosure. It attaches to the wall of your home and sits on top of your existing concrete slab or wood deck. It is not freestanding and not a permanent addition in the way a contractor-built sunroom would be. You get a modular system of screen panels, a detachable vinyl roof, sliding doors, and the hardware needed to anchor everything to your foundation and house wall.
The frame is heavy-duty galvanized cold-rolled steel with a baked-on architectural finish designed to resist fading and oxidation. The screen walls use 18x16 fiberglass mesh, which is the standard for keeping insects out while still letting a breeze through. The roof is a three-ply laminated vinyl construction: top and bottom layers of pebbled vinyl (roughly 0.0045 inches thick) sandwiching a 450-denier polyester scrim layer for structural reinforcement. It is mildew resistant and flame retardant, but it is not a permanent hard roof.
Sliding doors come standard on all Patio Mate configurations, with a heavy-duty zinc die-cast latch finished in wear-resistant black lacquer. The roof is designed to be detachable for off-season storage, and a deck anchor kit is included to secure the structure against wind. Sizes vary significantly: a smaller 7'8" x 19'3" model covers about 148 square feet and lists around $1,540 at Menards, while a larger 7'8" x 30'9" model (12 panels, roughly 236 square feet) runs around $4,000 before installation.
What real reviews actually say, translated into pros and cons
Reading through customer reviews across multiple retailers, a few consistent themes come up. If you are specifically looking for elegant patio enclosures reviews, compare how different brands handle leaks, installation clarity, and long-term parts availability. The good news is that the frame holds up. The not-so-great news is that the roof eventually does not. Here is what that looks like in practice.
The real pros
- Frame durability: Multiple reviewers report the galvanized steel frame surviving years of outdoor use without rusting or warping. One homeowner noted that after five years the frame was still solid.
- Wind stability when properly installed: One reviewer mentioned their enclosure went through numerous thunderstorms without shifting, and the roof did not flap. That is the key phrase though: when properly installed.
- Effective bug and weather protection: The 18x16 fiberglass mesh does its job keeping insects out, and the roof provides genuine shade and light rain protection for three-season use.
- Modular, scalable sizing: Panel-based design lets you pick a configuration that fits your patio dimensions rather than custom-building from scratch.
- Relatively affordable kit price: Compared to a contractor-built screen room (which typically runs $8,000 to $15,000 installed), a Patio Mate kit is a meaningful cost saving if you can manage installation.
The real cons
- Roof leaks after several years: The most consistent long-term complaint is that the vinyl roof develops multiple leaks around the five-year mark. The frame outlasts the roof, but replacement canopy tops are not stocked by most retailers, meaning you have to contact the manufacturer directly.
- Shipping and delivery damage: At least one customer reported bent screens on arrival, likely due to the bulky single-box shipping format. Inspect the entire kit before you start installing.
- Instructions are genuinely difficult: Multiple reviewers note the assembly instructions are not clear. One homeowner ended up hiring a contractor specifically because of this. If you are not comfortable with ambiguous DIY instructions, budget for professional installation.
- Lower corner fit issues: A recurring complaint is difficulty closing the lower corners tightly where the enclosure meets the house. If your wall or foundation is not perfectly level, this gap gets worse.
- Not built for snow or severe storms: The manufacturer explicitly states this product is not designed to support snow loads. In northern climates, you are expected to remove the roof every fall and reinstall every spring. Ignoring this will shorten the roof's lifespan.
- Only a one-year limited warranty: For a product with a five-year roof life cycle concern, a one-year warranty is a notable gap.
Key features to inspect closely before and during installation
Whether you are buying directly from a retailer or having someone install it for you, these are the specific things worth checking carefully. Skipping any of these is where most of the installation problems originate.
Frame and base
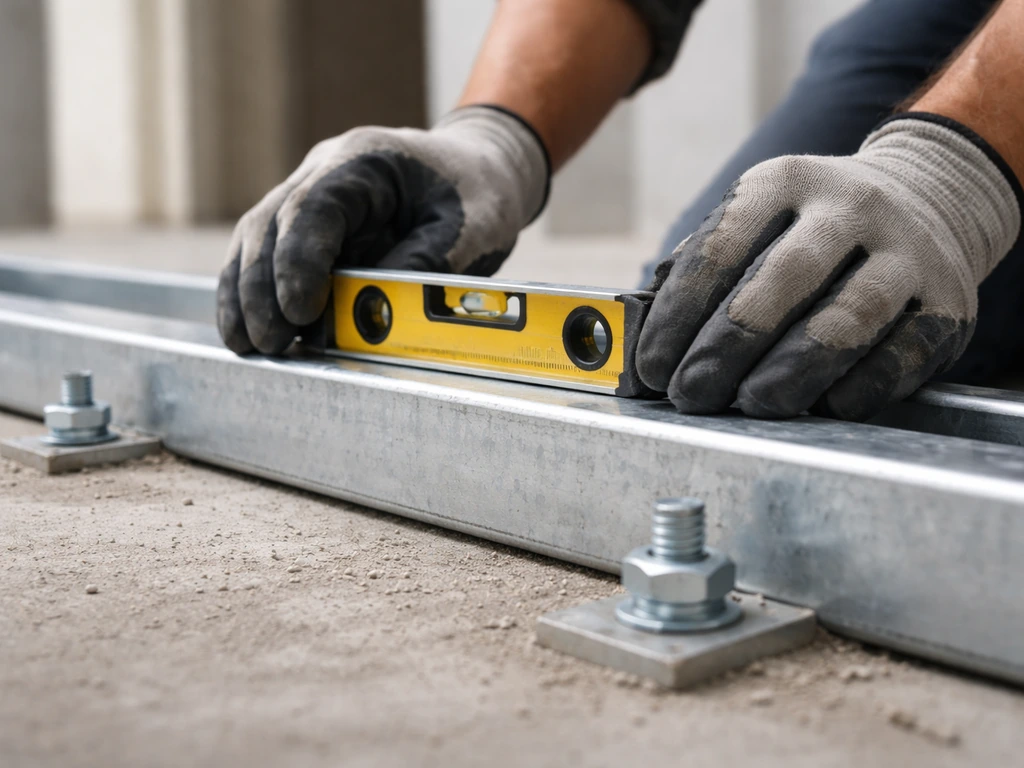
The single most important installation requirement is a level base. The manufacturer is explicit: Patio Mate must be erected on a level surface, whether that is a concrete slab, a wood deck, or a treated 2x4 wood base placed on level ground. If your patio has even a slight slope or uneven sections, you need to address that before the first panel goes up. An unlevel base is the root cause of alignment problems, gap issues at the corners, and door difficulties down the line.
Screens and screen panels
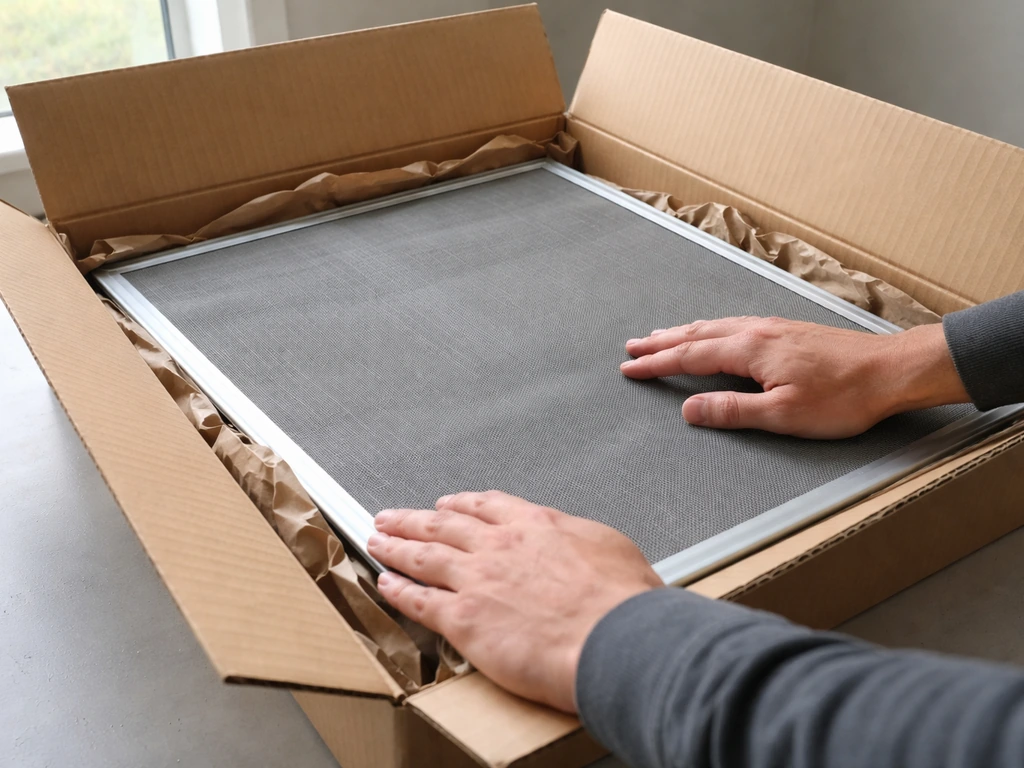
Open every screen panel from the box and inspect for bends or creases before installation begins. Bent screens on arrival are documented in reviews and are much easier to address before assembly than after. The 18x16 fiberglass mesh is rust-proof and a good standard, but fiberglass screens can be punctured or torn by pets and sharp furniture corners, so think about your use case honestly.
C-channel and wall attachment
The C-channel that runs along the house wall is where many reviewers run into trouble. It must be level and centered on the horizontal furring strip that attaches to your house. Even a small deviation makes roof installation harder and creates the lower-corner gap complaints. Take your time here before moving on. The instructions also call for foam strip between the furring and the house wall to block moisture and bug entry at that joint. Do not skip this step.
Roof
The three-ply vinyl roof is functional but it is the weak link over time. Confirm that your home has rain gutters above the Patio Mate installation point. The manufacturer actually requires this: gutters are needed to prevent excessive water accumulation on the roof. Without gutters, water pools and accelerates the vinyl degradation that leads to those five-year leaks. Also confirm the roof is fully seated in the C-channel with no lifted edges before calling installation done.
Doors and hardware
Test every sliding door before you consider installation complete. The zinc die-cast latch is a quality component on paper, but door alignment depends on the overall frame being plumb and level. If a door drags or does not latch smoothly, it is almost always a frame alignment issue rather than a defective latch.
Ventilation
The 18x16 fiberglass mesh walls allow cross-ventilation naturally, which is one of the main benefits of a screened enclosure over a closed sunroom. For hot climates like Texas or the Southeast, that passive airflow matters. If your patio orientation does not get much natural breeze, plan for a ceiling fan or wall-mount fan from the start. Running electrical for a fan or lighting is easier to account for before the enclosure is fully assembled than after.
Installation, maintenance, and what to expect over time
Patio Mate is marketed as a DIY kit, and it can be a DIY project, but it is not a simple afternoon job. The shipping box is large and heavy, the panels are bulky to handle, and the instructions are noted by multiple reviewers as unclear. Plan for a full weekend with two people minimum. If you are not comfortable with layout, leveling, and working with concrete anchors, the cost of hiring a contractor for installation is worth it.
For concrete slabs, anchoring uses 1/4" x 1" Tapcon concrete screws at each anchor bracket point. This requires a hammer drill and the right bit, which not everyone has on hand. For wood decks the anchoring process is more forgiving, but you still need the deck to be structurally sound and level first.
Long-term maintenance comes down to two things: the roof and the screens. The blank" rel="noopener noreferrer">roof needs to come off every fall if you live anywhere with snow, and you should honestly consider removing it during any severe storm season even in the South. Leaving it up through ice or heavy snow loads will damage it faster than anything else. For screen maintenance, fiberglass mesh resists rust but will need eventual replacement from UV degradation or physical damage. Because replacement parts are not stocked at most retailers, contact the manufacturer proactively to understand current parts availability before you need them.
Realistically, expect the frame to last a decade or more with normal care. The vinyl roof is more like a five-to-seven year component if you manage it well and remove it seasonally in cold climates. Build a roof replacement cost into your long-term budget from the start.
What drives the total installed cost

The kit price is just the starting point. Here is a realistic picture of what total cost looks like once you account for everything.
| Cost Item | What to Expect | Notes |
|---|---|---|
| Kit price (materials) | $1,540 to $4,000+ | Depends on size; larger 30'9" model is ~$4,000 before installation |
| Base prep (if needed) | $200 to $1,500+ | Leveling an uneven slab or building a treated wood base adds cost quickly |
| Professional installation | $500 to $2,000+ | Varies by region and complexity; strongly recommended if DIY instructions concern you |
| Concrete anchors and tools | $50 to $150 | Tapcon screws + hammer drill rental if not owned |
| Electrical (fan/lighting) | $300 to $1,200+ | Running a circuit for a ceiling fan or lights; hire a licensed electrician |
| Gutter installation (if missing) | $300 to $800 | Required above the enclosure to prevent roof pooling |
| Permits and HOA review | $0 to $300+ | Some municipalities require permits for attached structures; HOA rules vary |
| Future roof replacement | $150 to $400 (part cost) | Plan for this around year five; confirm part availability before buying |
For comparison, a professionally designed and installed screen room from companies like Champion or similar contractors typically runs $8,000 to $15,000 fully installed for a similar footprint. Patio Mate's all-in cost of $3,000 to $6,000 (kit plus installation and extras) is still a meaningful savings, but the gap is smaller than the raw kit price makes it appear.
Who this product is actually right for
Patio Mate fits a specific homeowner profile well. If you are outside that profile, a different solution probably makes more sense.
It is a strong match if you live in the South, Southeast, or Southwest where three-season or near-year-round use is realistic without heavy snow removal concerns. Think Florida, Texas, Georgia, Arizona, or similar climates where bug control and shade are the primary needs. It also works well for homeowners with an existing level concrete patio or sound deck who want to add screened coverage without a full construction project, and for budget-conscious buyers who are comfortable with occasional maintenance and eventual roof replacement. If your goal is better living patio rooms, screened coverage like this can help you get more usable outdoor time without a full room build.
It is a poor match if you live in a climate with regular snow or ice, since the roof must come down every fall or risk damage. If you are aiming for better living patio enclosures, comparing build quality, roof expectations, and installation constraints can help you choose the right fit for your climate. It is also not the right choice if you want a permanent year-round enclosure with significant weather sealing, or if you want a product with a longer warranty and stocked replacement parts readily available through retailers.
Alternatives worth comparing
If Patio Mate is not quite the right fit, the alternatives break down roughly by budget and permanence. Contractor-built screen room systems from companies like Champion Patio Enclosures or Elegant Patio Enclosures are more engineered, carry better structural warranties, and are built to your exact dimensions rather than modular panel sizes. For readers comparing options, Champion Patio Enclosures reviews can help you understand what a more professionally engineered screen room looks like in real-world installs. They cost significantly more but come with professional installation and better long-term support. Better Living Patio Rooms offer a middle-ground option with modular sunroom systems that can include screened configurations with more robust framing than a DIY kit.
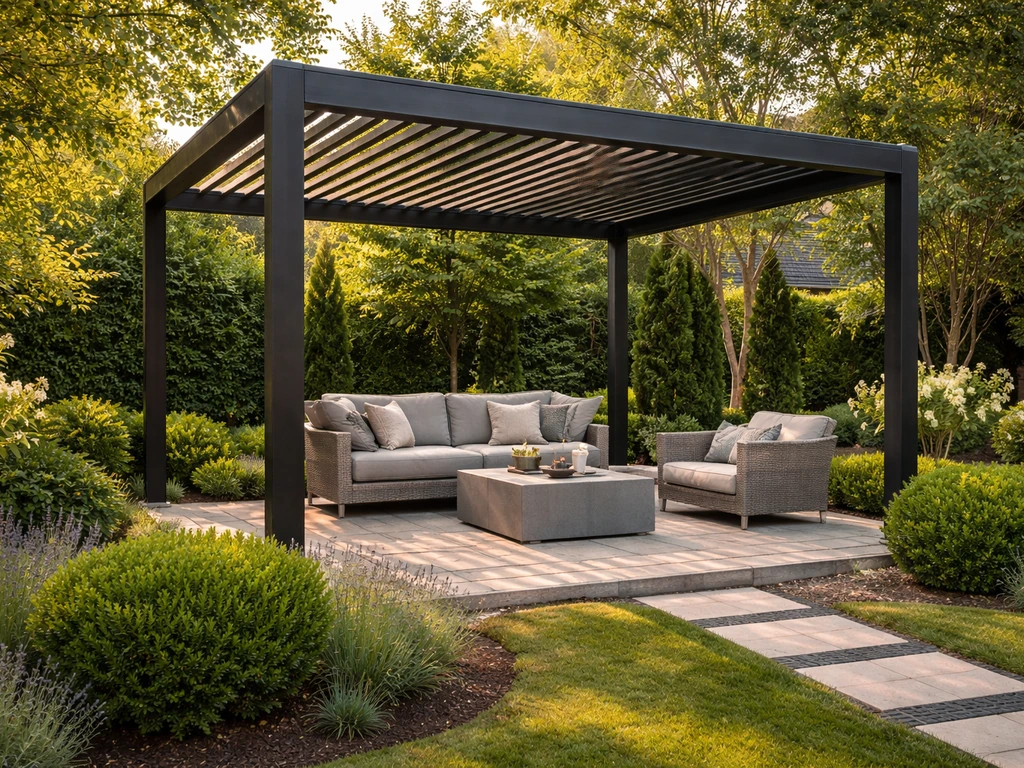
If your need is more about shade and partial weather protection without full bug enclosure, a well-chosen pergola with a shade cover and separate bug netting can be a flexible and often lower-cost path. Pergola systems with screen curtains have improved significantly and are worth pricing out as a comparison before committing to a full screen enclosure.
Before you buy: a practical checklist
Run through these before you place an order or sign a contract. This is where most buyers either set themselves up for a smooth project or walk into problems they could have seen coming.
Measurements and site prep to confirm today
- Measure your patio's usable footprint accurately (length x width), and note which wall the enclosure will attach to. Compare your dimensions against available Patio Mate configurations to find the closest fit.
- Check whether your existing slab or deck is level. Use a long level or a laser level if you have one. Any slope greater than roughly 1/4" per foot is going to cause alignment headaches.
- Confirm there are rain gutters on the house directly above where the enclosure roof will sit. If not, factor gutter installation into your project budget.
- Identify where existing obstacles are: electrical outlets, hose bibs, HVAC units, or anything that will need to be worked around or relocated.
- Decide now whether you want electrical inside the enclosure for a fan, lighting, or a mister. Roughing in conduit or wiring before the enclosure goes up is far easier than doing it after.
Questions to ask the retailer or manufacturer
- What is the current lead time and shipping method? Is the kit shipped as one large box or multiple packages? Ask about damage inspection procedures on delivery.
- Are replacement canopy tops and screen panels currently available directly from the manufacturer, and what is the approximate cost? Do not assume they will be available when you need them in five years.
- What is the exact warranty coverage? Confirm whether it is one year on all components or if there are different terms for the frame versus the roof.
- Does your municipality require a building permit for an attached screen enclosure? Call your local building department before you start, not after.
- Does your HOA have rules about enclosure materials, colors, or height? Get any HOA approval in writing before purchasing.
Specs to confirm before installation begins
- Inspect every screen panel out of the box for bends, tears, or damage before assembly starts. Document any damage with photos immediately for a warranty claim.
- Confirm all hardware is present by checking the parts list in the manual before discarding packaging.
- Verify you have the right concrete anchor hardware: 1/4" x 1" Tapcon screws for concrete slabs, and confirm you have or can rent a hammer drill.
- Confirm the foam strip for the furring-to-wall interface is included in the kit or sourced separately.
Red flags to watch for
- Any installer who does not check for level before the first panel goes up. This is non-negotiable for a good outcome.
- Skipping the foam strip between the furring and the house wall. It is a small detail that prevents moisture and bug infiltration at the most vulnerable joint.
- Leaving the roof on through a northern winter without verifying snow load. The manufacturer is clear: this product is not designed for snow load.
- A contractor who says they can skip the Tapcon anchoring on a concrete slab to save time. Proper anchoring is what keeps the structure stable in wind.
- Buying without confirming replacement parts availability. If the manufacturer no longer supports the specific model you buy, you are on your own when the roof needs replacing.
FAQ
Do I really need gutters above the Patio Mate roof to avoid the leak problem?
Check your gutters before you assume “screened” means “low maintenance.” If your home roofline does not already drain into gutters at the exact wall side above the enclosure, you may need an added gutter extension or downspout reroute, otherwise water can pool on the vinyl roof and shorten its service life.
If I live in a borderline climate (some snow, but not heavy), is it still worth buying Patio Mate?
Yes. Because the roof panel is detachable, many owners plan to remove it as part of seasonal maintenance in cold weather areas. If your winters include repeated freeze-thaw cycles or you regularly exceed light snow conditions, budget time and storage space, or choose a different enclosure type entirely.
Can I install the enclosure on a slightly sloped patio by shimming a few points?
No. If your patio or deck has any noticeable slope, you should level the entire base, not just “shim” one corner. Small mis-leveling can create uneven door travel, corner gaps, and difficulty seating the roof in the wall channel.
How many people and how much time should I plan for a DIY install?
Plan for at least two people for handling panels and for careful alignment of the wall channel. Even with two installers, the slow step is usually lining up the C-channel and furring strip so the roof seats flat without lifted edges and the doors align for smooth latching.
What should I do before buying to make sure replacement parts will be available later?
Have a backup plan for parts availability now, not later. Since screens and some roof-related components are not widely stocked at retailers, contact the manufacturer with your kit size and panel count before you need replacements, and confirm you can get them quickly if a section is damaged.
Can I add a ceiling fan or outdoor lights to a Patio Mate screened enclosure?
You can, but you should treat it as an add-on project rather than “plug and play.” Make sure you can safely route electrical and that any wiring will be protected from moisture where it enters the enclosure. It is also easier to plan the fan location before the final roof seating so you are not working overhead later.
My sliding door doesn’t latch smoothly, what’s the first thing I should troubleshoot?
If the door drags or won’t latch cleanly, first check that the frame is plumb and level and that the roof channel and base alignment did not shift during installation. Latch issues are often the symptom, not the root cause, and correcting frame alignment usually resolves smooth closing.
What’s the most common spot where bugs or water enter after installation?
Yes, insects and moisture issues usually trace back to missed joint sealing. The foam strip at the house-wall joint is meant to block both water entry and bug entry, so verify it is installed exactly where the instructions call for it before the roof goes on.
How durable are the 18x16 fiberglass screen walls in real home use (pets, kids, patio furniture)?
Pet and furniture damage is the biggest practical risk. Even though the fiberglass mesh resists rust, it can tear from punctures or sharp edges, so consider adding protective barriers for high-traffic areas and keeping grills, planters, and chair legs positioned away from the panel surfaces.
Is Patio Mate a good choice for year-round use where snow and ice happen regularly?
If your goal is an enclosure that stays put through winter conditions without seasonal roof removal, Patio Mate is usually a mismatch. For long, heavy snow or ice exposure, you will likely spend more time managing the roof than enjoying the space, and damage can occur before you are able to remove it.
Next Articles
Best Patio Pergola: How to Choose the Right One Today
Choose the best patio pergola by size, shade, materials, costs, and installation tips for your sun, wind, and rain.
Elegant Patio Enclosures Reviews: Compare and Choose
Compare elegant patio enclosures by reviews: pros, complaints, best fit, and a checklist to choose wisely.
Better Living Patio Rooms and Sunrooms: Buyer Guide
Choose Better Living patio rooms or sunrooms with features, layout tips, climate fit, and how to compare quotes.