The best patio cover idea for your space comes down to three things: what you're trying to block (sun, rain, or both), what your climate throws at you year-round, and how much you want to spend upfront versus over time. A solid attached aluminum pergola with a polycarbonate roof panel is probably the most versatile all-weather option for most homeowners, but wood looks better, vinyl needs less upkeep, and a shade sail costs a fraction of all of them. This guide walks you through every realistic option so you can match the right cover to your actual situation, not just pick whatever looks good on Pinterest. If you want a quick recommendation, use these factors to narrow down the best type of patio cover for your needs.
Best Patio Cover Ideas: Designs, Materials, Costs

Phoebe Foster
24 May 2026
Start here: what do you actually need your patio cover to do?
Before you pick a material or a style, get clear on your primary goal. Most people say they want shade, but what they often mean is a combination of things that point to very different solutions. It helps to rank these four categories in order of importance for your situation.
- Sun and heat reduction: If your patio bakes from afternoon sun, you need solid overhead coverage or a louvered roof that blocks direct rays. A basic open pergola with no roofing material won't cut it in Texas or Arizona summers.
- Rain protection: For real rain coverage, you need a pitched, solid roof with proper drainage. Flat or nearly-flat covers pool water and eventually leak. If you live in the Pacific Northwest or anywhere with regular afternoon storms, this is your top priority.
- Privacy and wind blocking: Screens, lattice side panels, or full enclosures address this. A roof cover alone won't help much if wind or neighbors are the problem.
- Year-round use: If you want to use the space in winter, you're looking at a more enclosed structure, possibly with a solid insulated roof, screen walls, or even a full patio room addition. This is a different budget category entirely.
- Low maintenance: This should factor into material selection from day one. Wood looks great but needs annual sealing. Aluminum and vinyl are nearly hands-off.
Most homeowners have two or three of these goals, and that's fine. Just rank them. It will make every decision downstream easier, from the roof pitch you choose to whether a DIY kit makes sense or you need a contractor.
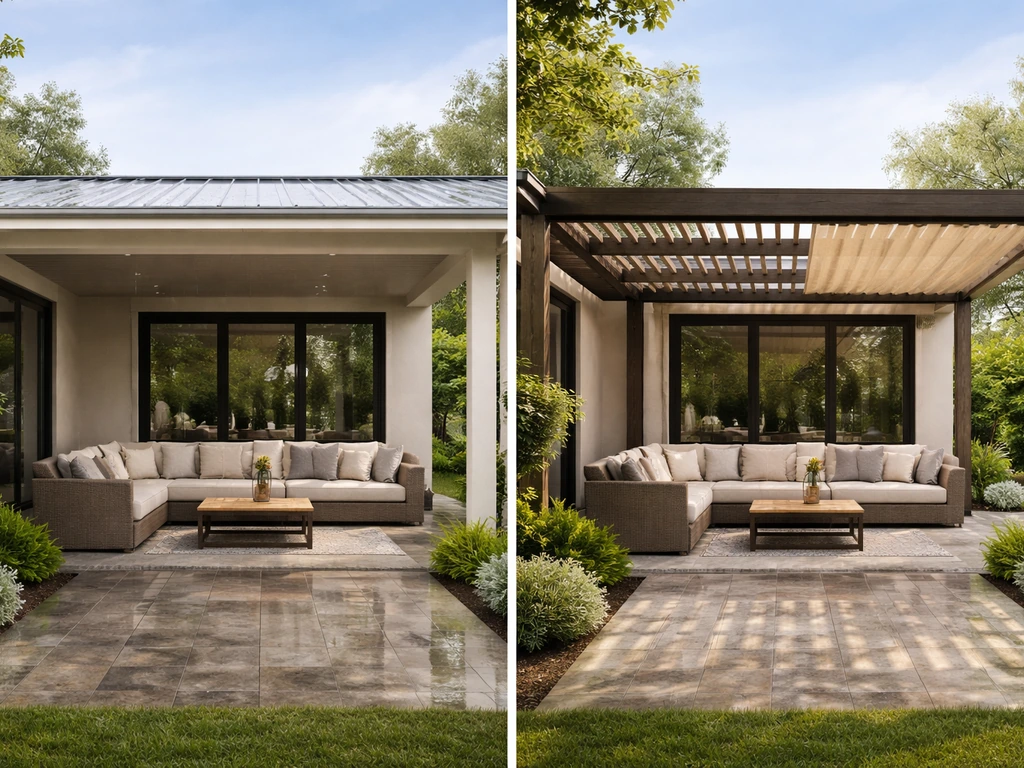
The main patio cover designs and when each one makes sense
There are more layout options than most people realize, and the right one depends on your house attachment, patio shape, and how permanent you want the structure to be. Here are the most practical configurations:
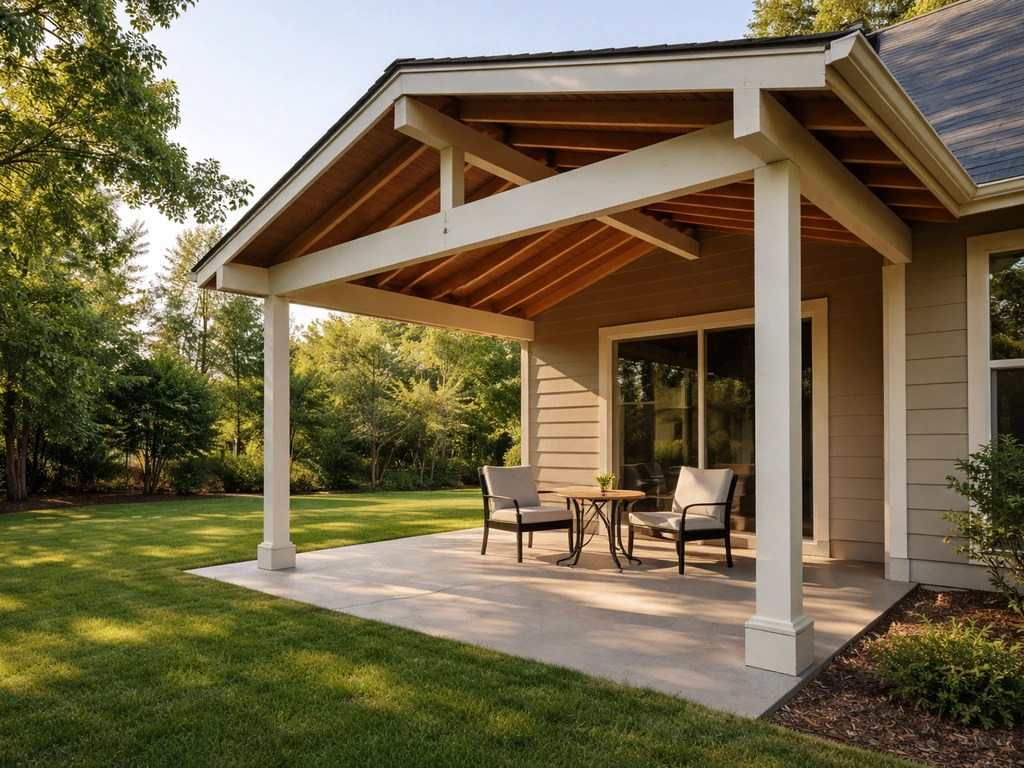
Attached patio covers (lean-to style)
This is the most common setup: one side mounts to the house, two posts support the outer edge, and the roof slopes away from the wall. It's efficient, looks clean, and ties into the existing structure. The downside is that it typically triggers a building permit in most jurisdictions since it attaches to your home. This type works best for rectangular patios directly adjacent to the house and is available in every material from wood to aluminum kits.
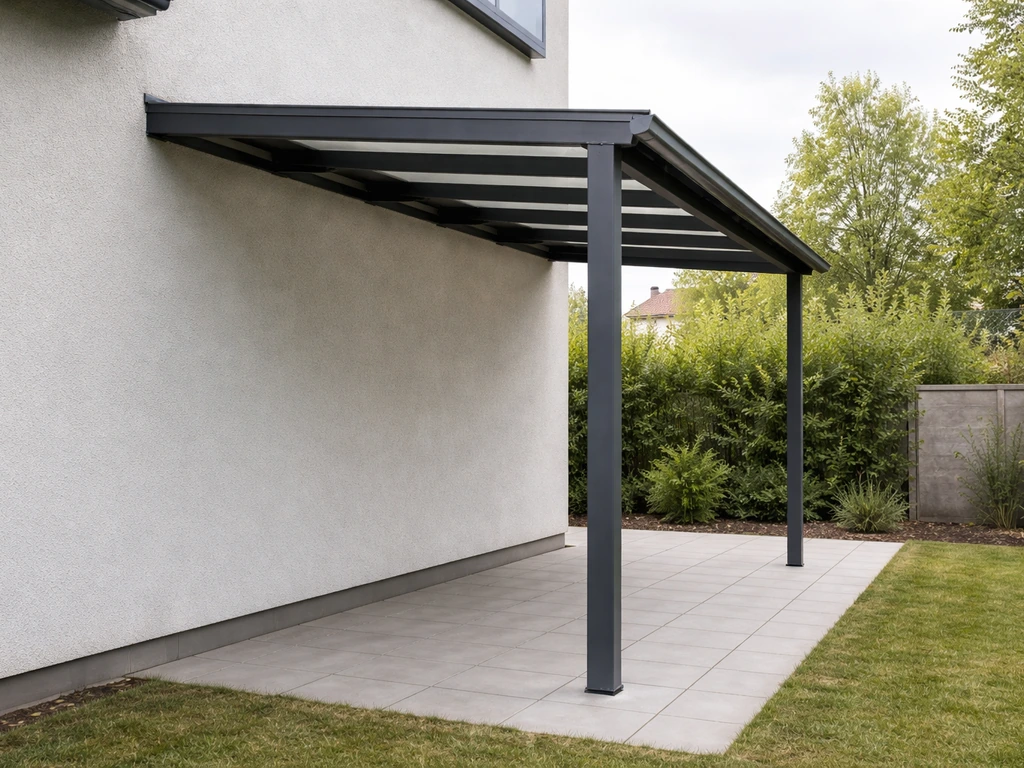
Freestanding patio covers
Four posts, no house attachment. A freestanding cover works well when your patio is detached from the main structure, when you want flexibility to relocate it later, or when a building permit for an attached structure would require major hassle. Freestanding covers are also easier to permit in some areas since they don't affect the home's envelope. The trade-off is that they need more posts and footings, which adds cost and anchoring complexity, especially in high-wind regions.
Pergolas (open or roofed)
A pergola is technically a type of cover, not a separate category, but it's worth calling out because so many people confuse it with a full patio roof. A traditional open pergola with rafters and no roofing material gives you filtered shade and a nice look but almost zero rain or heat protection. Once you add polycarbonate panels, shade fabric, or louvered slats to a pergola, it becomes a functional rain and sun cover. Louvered pergolas (motorized or manual rotating slats) are one of the most popular upgrades right now and give you adjustable light control throughout the day.
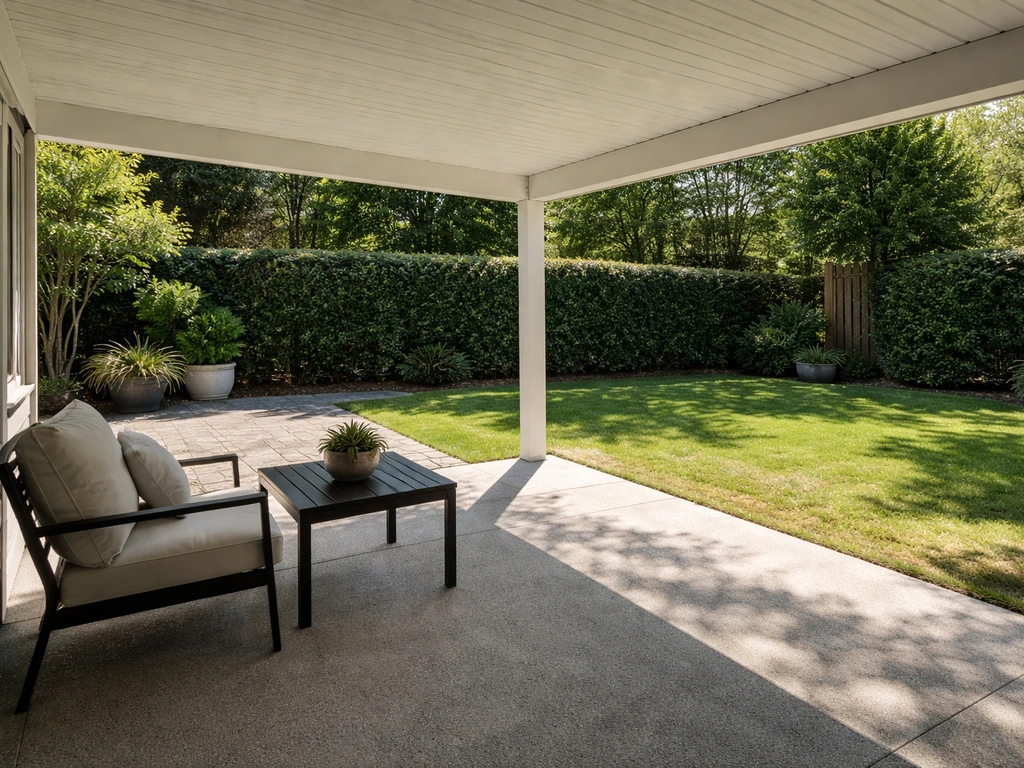
Solid patio roofs
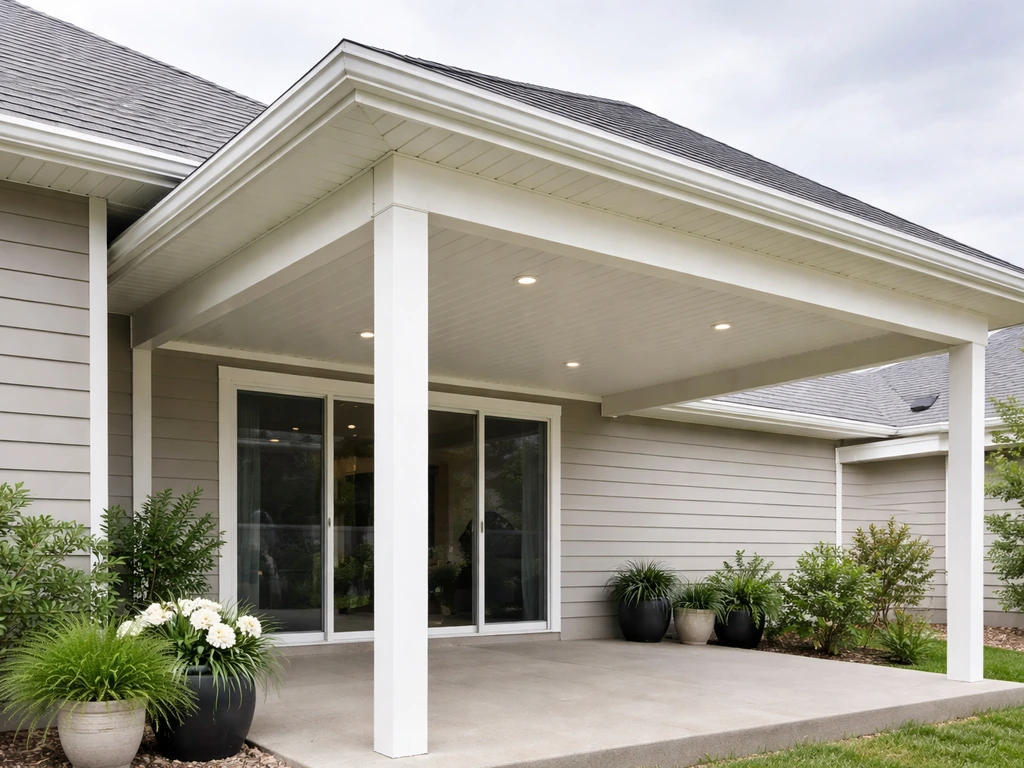
A solid roof cover is exactly what it sounds like: a fully covered structure with a watertight roof, usually matching or complementing the home's existing roofline. This is the most protective option and the most expensive. It handles rain, blocks 100% of sun, and can be insulated for year-round comfort. It also almost always requires a permit and, in many cases, a structural review. If you want to eventually enclose the space with screens or walls, a solid roof is the right foundation to start with.
Shade sails and retractable awnings
These are the budget-friendly, low-commitment options. Shade sails are tensioned fabric panels anchored to posts or the house and work surprisingly well for sun coverage, though they don't handle rain well and need to come down in high wind or winter. If winter weather is your priority, focus on solid, snow-ready roof options as you compare the best patio covers for winter. Retractable awnings mount to the house and extend out over the patio, giving you on-demand coverage.
They're great for mild climates or as a complement to a partial structure. Neither option competes with a solid cover for durability or weather resistance, but both can be installed over a weekend for a few hundred to a couple thousand dollars.
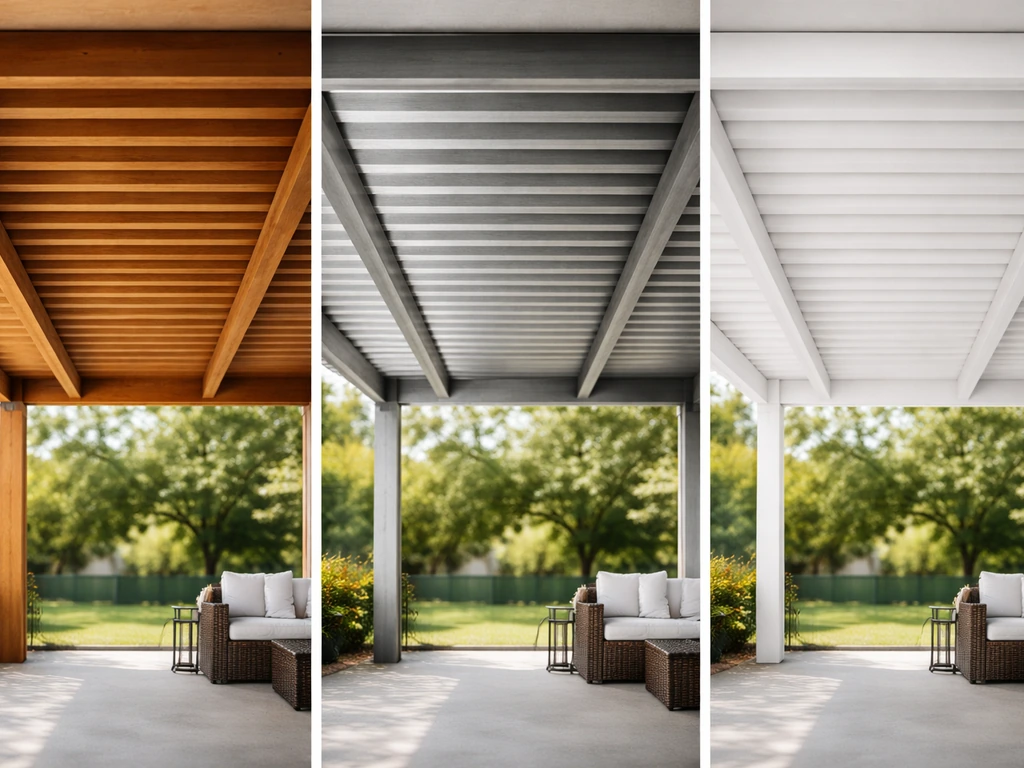
Choosing your material: wood vs aluminum vs vinyl vs polycarbonate

Material choice affects how long your cover lasts, how much maintenance it needs, how it performs in your specific climate, and how much it costs to build or buy. Here's an honest breakdown.
| Material | Best For | Durability | Maintenance | Typical Cost | Weather Notes |
|---|---|---|---|---|---|
| Wood (cedar, redwood, pressure-treated pine) | Aesthetics, custom builds, traditional homes | 15-30+ years with upkeep | High: seal or stain every 1-3 years | $$-$$$ | Excellent in dry climates; prone to rot/warp in humid or wet regions |
| Aluminum | Low maintenance, modern look, DIY kits | 30-50 years | Very low: rinse occasionally | $-$$$ | Handles rain, heat, humidity well; paintable; poor unaided insulation |
| Vinyl (PVC) | Budget-friendly, minimal upkeep | 20-30 years | Very low: wash with hose | $-$$ | Can warp or become brittle in extreme heat; great in mild to moderate climates |
| Polycarbonate panels | Rain protection with natural light | 10-20 years (UV-coated) | Low: clean panels annually | $-$$ | Diffuses light while blocking rain; yellows over time without UV coating; best as roofing infill over a frame |
| Insulated aluminum (patio room panels) | Year-round comfort, solid roof | 40+ years | Very low | $$$-$$$$ | Best thermal performance; looks most like a permanent home addition |
If I had to pick one material combination for most homeowners, it would be an aluminum frame with polycarbonate or insulated aluminum roof panels. You get the low maintenance of metal, real rain protection, and a clean look without the rot risk of wood or the brittleness concerns of vinyl in extreme climates. That said, if appearance is your top priority and you're in a drier region, cedar or redwood looks stunning and holds up well when properly maintained. The best material for your patio cover really depends on your climate and maintenance tolerance, so it's worth thinking through both together.
Design details that separate a good patio cover from a frustrating one
This is where a lot of DIY and budget builds go wrong. The design decisions that seem minor on paper end up being the ones you notice every time it rains or the wind picks up.
Roof pitch and drainage
Flat roofs on patio covers are a mistake in almost every climate. Even a 2:12 pitch (2 inches of rise per 12 inches of run) is enough to drain water off polycarbonate panels, but 3:12 or 4:12 is better if you have the clearance. If you're in a high-rainfall area, go steeper. Make sure the low end of the pitch drains away from the house foundation, not toward it. A simple gutter on the outer edge with a downspout solves most water management issues and costs very little compared to the problems it prevents.
Wind resistance and structural load
This is where building code matters in a practical sense, not just a legal one. Under the International Building Code, patio covers must be designed to handle a [minimum vertical live load of 10 pounds per square foot](https://www. iccsafe. org/wp-content/uploads/IBC-G1.
pdf), plus dead load, plus regional wind loads. Wind design speeds vary significantly by location: roughly 85 mph in low-hazard inland areas and up to 180 mph in high-wind coastal Florida zones. If you're in a hurricane zone, a Gulf Coast city, or anywhere with strong seasonal winds, this isn't abstract code language. It means your post footings, beam connections, and roofing fasteners all need to be engineered for your actual local conditions, not just slapped together.
A cover that lifts off the house in a storm causes serious damage.
Attachment and fastening to the house
For attached covers, the ledger board connection to the house is the most critical structural point. It needs to go into structural framing, not just siding or sheathing. This connection point is also a common source of water intrusion if not properly flashed. Use the right lag bolts at the right spacing, flash the top of the ledger with metal or a quality membrane, and seal every penetration. This is the step where many DIY builders cut corners and pay for it two years later with rot or a detached roof.
Post footings and anchoring
Posts need proper footings, not just concrete poured into a hole. Most codes require footings to go below the frost line, which varies by region (typically 12 inches in warmer states, 36-48 inches in cold-climate states like Minnesota or Wisconsin). Using post bases that keep the post off the concrete surface extends post life dramatically, especially for wood. For freestanding covers in windy areas, over-engineer the footings. For patio covers in windy areas, focus on proper engineering, secure anchoring, and wind-rated roofing components. A bigger footing costs $20 more in concrete. Dealing with a leaning or shifting structure costs a lot more than that.
Snow load (if applicable)
If you're in the Midwest, Northeast, or mountain West, snow load is a real structural consideration. The IBC specifies that snow loads should be used when they exceed the minimum live load, which in heavy snow areas can be 40-50 psf or more. If you're in these regions and you're buying a prefab kit, verify that it's rated for your area's ground snow load, not just a standard 10 psf. Polycarbonate panels will crack and aluminum framing can deflect and fail under a surprise wet snow event if the structure isn't rated for it.
Add-ons that actually make a patio cover more comfortable
The cover itself is just the starting point. These additions are what turn a covered patio into a space you actually use every day.
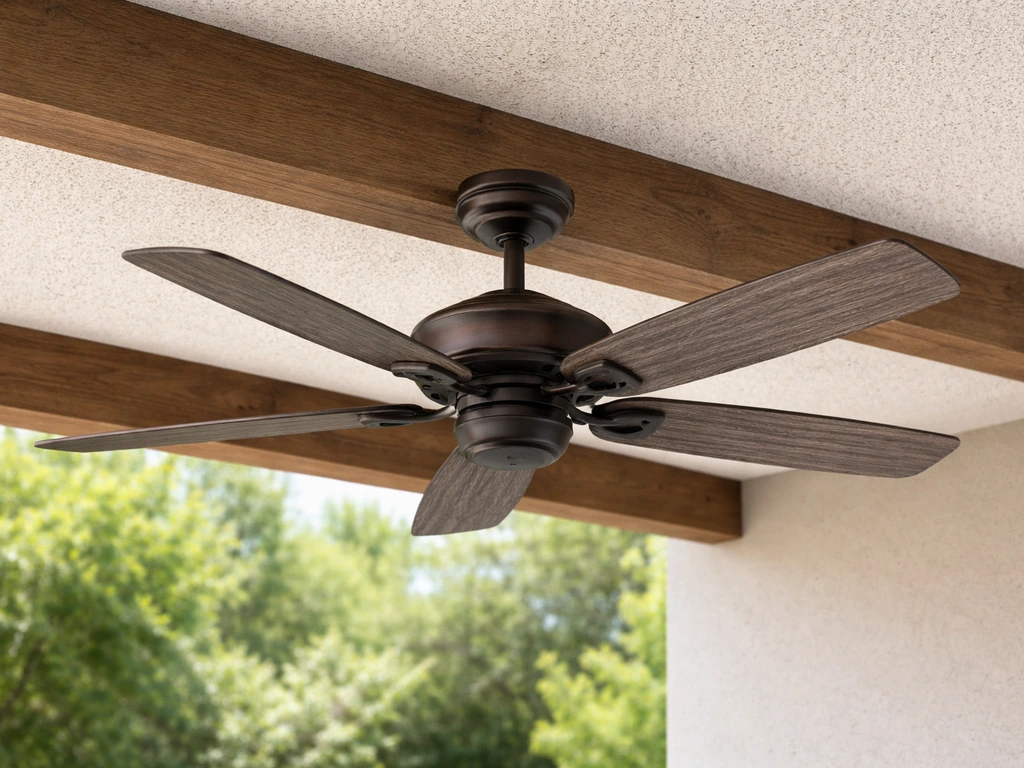
Ceiling fans
A damp-rated or wet-rated outdoor ceiling fan is one of the most impactful comfort upgrades you can add. On a hot day, moving air can make a 95-degree patio feel 10-15 degrees cooler without changing the actual temperature. Mount it at the center of your covered area, sized appropriately (a 52-inch fan for spaces up to about 225 square feet, larger for bigger patios). Make sure your ceiling structure has a fan-rated electrical box before you buy.
Misting systems
High-pressure misting systems are extremely popular in hot, dry climates like Arizona, Nevada, and Southern California. They work by forcing water through very small nozzles at 1,000 psi or higher, which evaporates the water almost instantly and drops the ambient temperature by 10-20 degrees Fahrenheit. In humid climates like the Gulf Coast or Florida, they're less effective because the air is already saturated and the mist won't evaporate quickly. A basic DIY misting kit runs $50-200; a permanent high-pressure system installed by a professional runs $500-2,000 depending on size.
Screens and enclosures
Insect screens on the sides of a covered patio are one of the most-requested upgrades in humid and buggy climates. You can do fixed screen panels, retractable screen systems, or a full screen room enclosure. Fixed aluminum screen frames are the most durable and cost-effective. Retractable screens are convenient but cost more and require more maintenance. A full screen enclosure turns your covered patio into a three-season room and in some climates, almost a four-season one. If you're considering this path, plan the roof and post structure for it from the start, because retrofitting a screen enclosure onto a pergola that wasn't designed for it is messy and expensive.
Outdoor lighting
String lights, recessed LED ceiling fixtures, and wall sconces all serve different purposes. String lights give a warm, casual ambiance but aren't great task lighting. Recessed LED fixtures built into a solid roof cover are the cleanest look and most functional for evening use. If you're adding a fan, most ceiling fan models have a light kit option that handles two functions with one electrical run. Consider adding a dimmer circuit so you can go from bright dining light to soft evening ambiance without switching fixtures.
Shade sails and side panels
Even with a solid roof, afternoon sun coming in from the west side of a patio can make it unusable. Adding a shade sail on a diagonal or hanging a drop shade panel on the exposed sides solves this without a full enclosure. These work well as a low-cost add-on to an existing covered structure and can be removed seasonally.
DIY vs hiring a contractor: what actually affects your decision
This is where most homeowners get stuck, and the honest answer is that it depends on the complexity of your structure and your local permitting requirements more than it depends on your skill level.
When DIY makes sense
Freestanding pergolas and shade sail setups are very DIY-friendly. Pre-engineered aluminum patio cover kits are also designed for homeowner installation and come with detailed instructions, pre-cut components, and hardware. If your patio is a simple rectangle, you're doing a freestanding structure, and you're comfortable with basic post setting and framing, a quality kit can be installed in a weekend or two for $1,500-5,000 in materials. That same structure would cost $6,000-15,000 installed by a contractor. That's a real savings, and many homeowners pull it off successfully every year.
When you should hire a contractor
Hire a licensed contractor when: you're attaching to the house (ledger work and flashing require experience), your structure is large or complex, you're in a high-wind or heavy-snow zone where structural engineering matters, or you're planning a full enclosure or patio room addition. Custom wood builds also generally benefit from professional carpentry. The liability risk of a structural failure isn't worth the savings if you're not confident in what you're doing.
Permits: don't skip this step
Attached patio covers almost always require a building permit. Ventura County, for example, explicitly requires planning and building safety approvals for residential attached patio covers. Milpitas and many similar jurisdictions require a permit for any cover attached to the main structure. Milpitas also indicates that a building permit is required for a patio cover attached to the main structure and for sunroom additions [Milpitas and many similar jurisdictions require a permit for any cover attached to the main structure](https://www.
milpitas. gov/DocumentCenter/View/1075/Patio-Cover-Enclosure-PDF). The risk of skipping this isn't just a fine: unpermitted structures can create problems when you sell your home, may not be covered by homeowner's insurance if something fails, and can require costly removal or retroactive permitting. Budget 2-4 weeks for permit review in most jurisdictions; some faster, some slower.
Your contractor should pull the permit on your behalf. If they suggest skipping it, that's a red flag.
Cost ranges to plan around
- Shade sail or retractable awning (DIY): $200-2,500
- Freestanding pergola kit (DIY installed): $1,500-6,000
- Attached aluminum patio cover kit (DIY): $2,000-7,000 in materials
- Attached aluminum cover professionally installed: $6,000-18,000
- Custom wood attached cover (contractor): $10,000-25,000+
- Full solid-roof patio addition with enclosure: $20,000-50,000+
Maintenance over time
Whatever you build, factor in long-term maintenance before you commit. Wood requires the most attention: plan on cleaning and resealing every one to three years and inspecting for rot annually. Aluminum and vinyl are nearly maintenance-free beyond an occasional wash. Polycarbonate panels should be cleaned once or twice a year with mild soap (avoid abrasive cleaners that scratch the UV coating) and inspected for yellowing or cracking after about 10 years. Screens and awnings need occasional hardware lubrication and fabric inspections. The lower the maintenance demand of your cover, the longer you'll actually enjoy it.
A quick checklist before you commit to a design
Use this to gut-check your plan before you spend any money.
- Define your primary goal: shade, rain protection, year-round use, or low maintenance. Rank them.
- Measure your patio footprint and note the sun direction (which side gets afternoon sun).
- Identify your climate category: hot/dry, hot/humid, mild, high-wind coastal, or cold/snowy. This narrows your material and structural choices fast.
- Decide on attachment: attached to the house or freestanding. This affects permits and cost significantly.
- Choose a roofing approach: open (pergola), translucent (polycarbonate), or solid (insulated panels or wood planking).
- Check local permit requirements before you order anything. Call your local building department or check their website. One conversation can save you from a costly mistake.
- Get at least two contractor quotes if you're not DIYing, and confirm they're licensed and will pull permits.
- Plan for add-ons from the start: run electrical conduit before the ceiling is closed, plan for gutter placement, and decide on screens before you set post spacing.
The best patio cover isn't the most expensive one or the one that photographs the best. If you want a quick shortcut, start by comparing the best patio covering options for your needs and climate. It's the one that matches your climate, fits your maintenance tolerance, and solves the specific problem you actually have, whether that's a Texas afternoon sun problem, a Pacific Northwest rain problem, or a Midwest year-round usability problem. If you're comparing options, the best cover for patio is the one that balances weather protection, maintenance, and fit for your space matches your climate. Get those fundamentals right and the design details will fall into place.
FAQ
How do I choose the right roof pitch for a patio cover if I’m using polycarbonate panels?
Aim for steeper drainage than the minimum, especially if you live somewhere with frequent rain or heavy dew. Even if 2:12 drains polycarbonate, 3:12 to 4:12 reduces standing water risk and helps prevent streaking. Also confirm the low edge drains away from the foundation, then add a gutter-and-downspout on the outer beam to keep water from running down the posts.
Do I need gutters on every patio cover, or only on solid roofs?
In most real installs, you should plan for a gutter on any cover where runoff would otherwise fall near walkways, landscaping, or house siding. A simple edge gutter is often cheaper than repairing stained stucco, rotted trim, or soil erosion around footings. If your design already routes runoff to a safe splash area, you may be able to reduce or simplify guttering.
What’s the biggest mistake people make with attached covers to the house?
Treat ledger attachment and flashing as structural and waterproofing-critical, not cosmetic. The common failure pattern is fastening into siding or sheathing instead of structural framing, or using improper flashing that traps water at the ledger. If you see a plan that skips flashing details or sealing penetrations, that’s a red flag before you buy materials.
Can I mount a ceiling fan or lights under an aluminum pergola or shade sail?
You generally need a real, continuous overhead ceiling structure and an approved electrical box, especially for fans. Open pergolas and many shade sail setups do not provide the right fastening surface or safe wiring path. If you want fans or recessed lighting, design the wiring route and overhead support from the start, so you are not retrofitting into beams that are not fan-rated.
Are shade sails safe in high winds, and when should I take them down?
Shade sails are best treated as seasonal or adjustable, not storm-proof. In regions with strong gusts, plan for fast removal or a retraction strategy, and use manufacturer wind guidance for your sail size and fabric type. If you routinely get winter storms or hurricane-force events, a sail alone is usually not an all-weather solution.
What should I verify about snow load if I’m buying a prefab kit?
Check that the kit is rated for your local ground snow load, not just a generic minimum. Confirm the roof span limits, allowable panel type, and whether the aluminum framing is engineered for the expected snow plus potential drift loads. Also plan for how you will manage wet snow conditions, since polycarbonate and lightweight frames can fail if they are not designed for that scenario.
Will high-pressure misting work if my area is humid?
Often it won’t perform as well in humid climates because the mist evaporates more slowly, so you get less cooling and more dampness. If humidity is regularly high, consider smaller zones, shorter run times, and test it before committing to whole-area coverage. You may be better served by fans plus passive shade, since airflow reduces perceived temperature without adding moisture.
If I want insect screens later, can I start with a pergola and retrofit screens?
You can sometimes add screens later, but it is frequently messy and expensive if the pergola was not designed for side loads and a full screening system. If screen enclosure is part of the plan, plan roof and post structure for it from day one, including reinforcements for rails and hardware. Retrofitting is especially difficult when the roof framing spacing or beam size was chosen for shade only.
How do I estimate the total cost beyond the initial patio cover price?
Budget for site conditions and the “extras” that affect usability and weatherproofing, like gutters and downspouts, fan electrical work, lighting, permitted engineering if required, and upgraded fasteners or wind-rated components. For attached structures, flashing and ledger details often add cost but prevent the most common long-term leaks. If your plan requires deeper footings or frost-line excavation, that can be a major cost driver.
Do pergolas with polycarbonate panels still count as a full roof for permitting and performance?
Often they do for practical reasons, because once you add panels or louvered systems that block rain and sun, you are no longer providing an “open” structure. Many jurisdictions look at how enclosed and weatherproof the cover is when deciding permit requirements. Before you buy, confirm with your local permitting office or contractor whether your exact roof configuration triggers a full structural review.
Next Articles
Best Material for Patio Covers: Wood, Aluminum, Vinyl
Compare wood, aluminum, vinyl and more for patio covers by durability, maintenance, wind, shade, light, insulation, and
Best Cover for Patio: Compare Types, Costs, and How to Choose
Compare patio cover types, costs, sizing, and climate fit to choose the best option for shade, rain, and longevity.
Best Patio Covering Guide: Choose the Right Option for Your Space
Choose the best patio covering by climate, coverage, materials, costs, installation tips, and add-ons for comfort.