
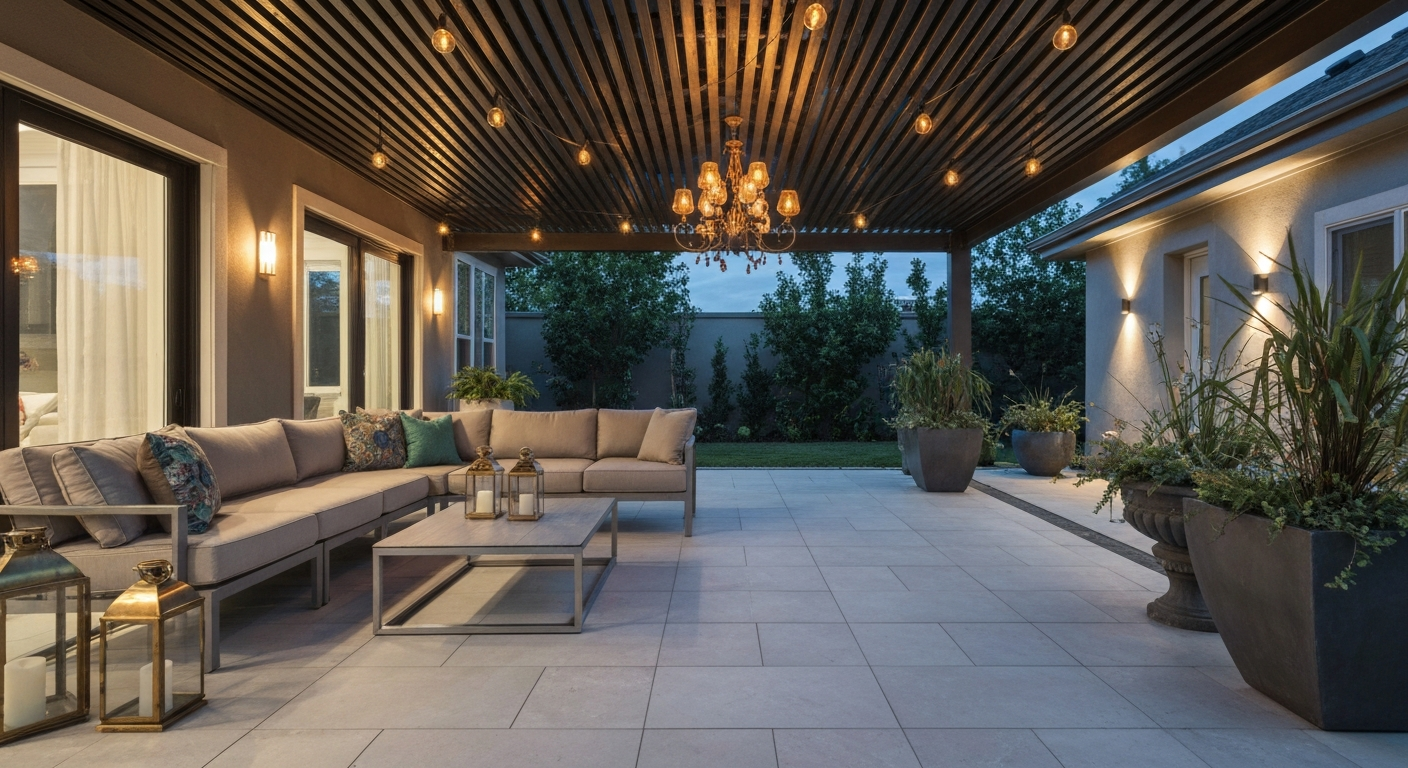
You can turn almost any patio into something genuinely glamorous without hiring an interior designer or spending a fortune. The formula comes down to four things working together: a clear style direction, materials that photograph well and hold up outdoors, layered lighting, and furniture scaled to your actual space. Get those four right and the rest, planters, fabrics, accessories, falls into place naturally.
How to Decorate a Glamorous Patio: Design, Materials & Tips

Phoebe Foster
8 Aug 2026
Who this guide is for and how to use it
This guide is written for homeowners at any stage: maybe you have a bare concrete slab and a budget, or maybe you have a finished patio that just feels flat and you want to push it somewhere more elevated. Either way, the advice here is practical and sequential. Start at the beginning if you are planning from scratch. Jump to the lighting, furniture, or flooring sections if you are upgrading something already in place. Cost ranges are included throughout so you can reality-check each decision before you commit. DIY alternatives are flagged wherever they genuinely save money without sacrificing the look. By the end you will have a clear picture of what a glamorous patio actually requires, what it costs, and how to phase it if your budget is not unlimited.
Nail your glam goals before you buy anything
Before you look at a single product, spend ten minutes answering three questions: Is this patio primarily for entertaining groups, for quiet personal relaxation, or does it need to look stunning in photos (for resale or just personal satisfaction)? Your honest answer shapes every decision that follows. An entertaining patio needs durable surfaces, ample seating, and strong ambient lighting. A relaxation-first patio benefits from privacy elements, softer lighting, and lush planting. A photo-ready patio rewards high-contrast materials, metallics, and a clear visual focal point.
Popular glam styles worth knowing
There are four glam directions that consistently show up in high-end outdoor design, and they are distinct enough that mixing them without intention tends to produce visual noise. Pick the one that matches how you actually live, not just what looks good in a magazine photo.
- Hollywood glam: deep jewel tones (emerald, navy, black), polished metals (brass, chrome, black steel), mirrored or lacquered surfaces, velvet-look performance fabrics, statement chandeliers. High contrast is the whole point.
- Modern luxe: neutral palette (white, warm grey, greige, charcoal), clean-lined furniture, large-format porcelain or concrete pavers, minimal accessories, sculptural planters. Restraint is what makes it look expensive.
- Boho-glam: natural materials (rattan, teak, linen-look fabrics) layered with metallic accents (hammered brass, aged gold lanterns), patterned outdoor rugs, trailing plants, macrame or textile panels. It feels relaxed but intentional.
- Mediterranean glam: terracotta or travertine stone, whitewashed walls, wrought-iron details, terracotta or glazed ceramic planters, olive or citrus trees, mosaic tile accents, warm amber lighting. Works especially well in dry, sunny climates.
Site assessment and planning before anything goes down
I have seen homeowners skip this step, order furniture, and then realize the sofa they bought blocks the only door to the yard. Measure everything: the patio perimeter, door and window openings, any overhead utilities, and the distance from any gas or electrical access points. Then spend a day watching where the sun hits. Morning shade and afternoon sun on a Texas patio is a completely different problem than a north-facing patio in Michigan that barely sees direct light. Your shade structure decision hinges on this mapping. Also check whether your local building department requires a permit for your planned structure. Most U.S. jurisdictions follow International Residential Code language that exempts detached shade structures under roughly 200 square feet and under 30 inches above grade from a building permit, but local amendments vary significantly, so call your local authority having jurisdiction (AHJ) before you start anything structural.
Pre-project planning checklist
- Measure the full patio footprint (length x width) and record door/window swing clearances.
- Photograph the space at 8 a.m., noon, and 4 p.m. to map sun and shade patterns across the day.
- Locate all utility lines (gas, electrical, irrigation, drainage) before any digging or surface work.
- Set a realistic total budget and split it: roughly 40% structural/flooring, 30% furniture, 20% lighting and accessories, 10% planting.
- Call your local building department to confirm permit requirements for any covered, roofed, or elevated structure.
- Check your HOA rules if applicable, specifically for height, color, and structural restrictions.
- Note your USDA Plant Hardiness Zone (the 2023 updated map is the current reference) for plant selection later.
- Identify the primary use: entertaining, relaxing, or visual/photo-ready, and write it down to reference when decisions get hard.
Layout and flow: how to arrange a patio that actually works
The single biggest layout mistake I see is cramming too much furniture into a space and leaving no clear path through it. A glamorous patio feels generous, even if it is not large. The general rule is to keep primary traffic paths at least 36 inches wide, and ideally 48 inches in high-use routes between doors and seating. Define zones first: a dining zone, a lounge zone, and if space allows, a transition or bar zone. Each zone should have a visual anchor, whether that is a fire pit, a rug, a pendant light, or a statement plant, that tells the eye where that zone begins and ends.
Step-by-step layout planning
- Sketch the patio to scale on paper (1 inch = 2 feet works well for most residential patios).
- Mark all fixed elements: doors, steps, utility boxes, existing trees or posts.
- Draw in traffic paths first (minimum 36 inches) before placing any furniture.
- Place the largest furniture piece (usually a sectional or dining table) as the zone anchor. A 6-person dining table typically needs a footprint of at least 10 x 12 feet including chair pull-out space.
- Add secondary seating at least 18 inches away from primary pieces to allow movement.
- Position the focal point (fire pit, fountain, statement planter, overhead fixture) so it is visible from the primary seating area.
- Leave a clear sightline from the main indoor door to the focal point — this is what creates that 'wow' moment when guests step outside.
- Test the layout with outdoor furniture placeholders (cardboard boxes or chalk outlines) before ordering anything.
Sample dimensions to work with: a 12 x 16 foot patio (192 sq ft) can comfortably hold a 4-person bistro dining set plus two lounge chairs with a small side table. A 20 x 24 foot patio (480 sq ft) allows a full 6-person dining zone, a separate lounge sectional zone, and a small bar or accent zone. Anything over 600 square feet gives you genuine flexibility to layer multiple seating areas the way you see in upscale design examples.
Flooring and finishes: the foundation of the glam look
The floor is the single largest visual surface on your patio, and it is the one element you cannot easily change later without significant cost. Spend more time and budget here than anywhere else. Here is an honest comparison of the main options, with real installed cost ranges based on 2026 consumer estimates for typical U.S. regions.
| Material | Typical Installed Cost (per sq ft) | Pros | Cons | Best For |
|---|---|---|---|---|
| Concrete pavers | $8–$25 | Durable, repairable, wide style range, DIY-friendly | Requires proper base prep; weeds in joints over time | Budget-conscious glam; Mediterranean or modern styles |
| Porcelain tile | $15–$45 | Large-format slabs look ultra-luxe; low maintenance; water-resistant (≤0.5% absorption per ANSI A137.1) | Must verify DCOF slip rating for outdoor horizontal use; pro installation strongly recommended; grout upkeep | Hollywood glam, modern luxe; dry climates or covered patios |
| Natural stone (travertine, slate, bluestone) | $20–$50 | Unique, high-end appearance; ages beautifully | Requires sealing; irregular surfaces; freeze-thaw risk with some stones | Mediterranean glam, boho-glam; warm climates |
| Composite decking | $15–$40 | Consistent appearance; 25–50 year warranties on premium lines; splinter-free | Higher upfront cost than wood; can feel warmer underfoot in sun | Modern luxe, boho-glam; elevated deck patios |
| Hardwood decking (teak, ipe, cedar) | $20–$55 | Warm, natural beauty; teak and ipe extremely durable | Requires annual sealing; higher maintenance; ipe is very hard to cut | Boho-glam, Hollywood glam; covered or partially shaded patios |
| Outdoor area rugs | $2–$8 (add-on) | Instant style upgrade; defines zones; DIY; easy to swap | Not a primary surface; wears faster in direct weather; must be shaken/dried | Any style, layered over hard flooring for warmth and color |
A quick note on porcelain tile outdoors: it is one of the best-looking options and genuinely holds up well if you buy the right product. The key is to verify two things before purchasing. First, confirm the tile meets ANSI A137.1 water-absorption requirements (≤0.5%, which qualifies it as true porcelain/impervious). The Tile Council of North America (TCNA) / ANSI A137.1 defines porcelain (impervious) as having water absorption ≤0.5% (ASTM C373), and such tiles are typically suitable for freeze‑thaw applications though manufacturers’ frost‑resistance and slip‑resistance test data should still be checked for outdoor horizontal use The Tile Council of North America (TCNA) / ANSI A137.1 defines porcelain (impervious) as having water absorption ≤0.5% (ASTM C373), and such tiles are typically suitable for freeze‑thaw applications though manufacturers’ frost‑resistance and slip‑resistance test data should still be checked for outdoor horizontal use.. Second, check that the manufacturer publishes a DCOF (dynamic coefficient of friction) rating suitable for outdoor horizontal use. Do not trust marketing language like 'outdoor safe' without seeing the actual slip-resistance data. In freeze-thaw climates, also confirm the tile is specifically rated frost-resistant by the manufacturer.
For a DIY budget approach, large-format concrete pavers on a properly compacted gravel and sand base can look genuinely impressive, especially in a light grey or sandstone tone that reads as stone from a distance. The base prep is the part people cut corners on and regret: at minimum, you need 4 inches of compacted gravel and 1 inch of bedding sand for residential foot-traffic applications.
Structural covers and shade: pergolas, awnings, and roofs
Shade structures transform a patio from a surface into a room. They also represent the largest single investment and the area where permitting, engineering, and installation quality matter most. Here is what I have learned from comparing options across different climate zones.
| Structure Type | Typical Installed Cost | Weather Protection | Durability | Permit Likely Needed? | Best For |
|---|---|---|---|---|---|
| Wood or aluminum pergola (open-top) | $3,000–$12,000 | Partial (shade only, no rain protection) | 15–30+ years with maintenance | Often not if under 200 sq ft and detached (verify locally) | Any glam style; DIY-friendly kits available |
| Motorized louvered pergola | $15,000–$50,000+ | Good (adjustable rain and sun control) | 20–30+ years; engineered systems more durable in wind/snow | Usually yes, especially for larger or attached systems | Modern luxe, Hollywood glam; high-end entertainment patios |
| Retractable awning (manual or motorized) | $2,000–$8,000 | Good for rain and sun when deployed | 10–15 years on fabric; frame longer | Rarely required for wall-mounted awnings | All styles; practical choice for smaller patios |
| Solid roof (attached or detached) | $10,000–$40,000+ | Full protection year-round | Permanent; 20–50+ years depending on material | Yes, almost always; may require engineered drawings | All glam styles; best for year-round use climates |
| Shade sail / tensile canopy | $500–$5,000 (installed) | Moderate (sun, light rain at angle) | 5–10 years on fabric; hardware longer | Rarely required for residential sails | Boho-glam, Mediterranean; budget-friendly visual drama |
On motorized louvered pergolas specifically: these have become a go-to for the glamorous patio look, and they genuinely deliver. But the market has fragmented significantly. Premium engineered systems from established makers go through ICC/ES evaluation or project-specific structural engineering and are priced accordingly, often $40,000 or more installed for larger spans. Direct-to-consumer louvered kits sit in a much lower price band but may not carry the same structural documentation, which matters in high-wind or snow-load regions. If you are going this route in a climate with winter snow loads or frequent strong winds, ask the manufacturer for their structural report or engineering data, not just marketing specifications.
The permit question comes up constantly. The IRC threshold that most jurisdictions reference is roughly 200 square feet and 30 inches above grade for detached unroofed structures. The moment you add a solid roof, attach the structure to your house, or exceed that footprint, a permit is almost always required. This is not optional: an unpermitted structure can cause problems when you sell your home and may not be covered by homeowner's insurance if something fails. Call your local building department. It takes ten minutes and saves real headaches.
Furniture selection and luxe layouts
Glamorous outdoor furniture is not just about appearance. It has to survive the outdoors while looking like it belongs inside a well-designed home. The material you choose determines how much maintenance you take on and how long the piece stays looking good.
Best materials for glam outdoor furniture
- Powder-coated aluminum: lightweight, rust-proof, holds paint finish well, wide style range. Best for most glam styles. Look for 1.5mm+ wall thickness for structural frames.
- Stainless steel (grade 316 for coastal areas): heavier, very durable, sleek appearance. Higher cost but genuinely holds up in salt air and humidity.
- Teak: dense, naturally oil-rich hardwood that resists rot and insects without treatment. Ages to silver-grey if left unsealed or maintains warm honey tones with annual oiling. High cost but generational lifespan.
- All-weather wicker (resin/HDPE): the glam alternative to natural rattan. Good options look almost indistinguishable from natural wicker but resist UV fading and moisture. Check frame quality: aluminum frames outlast steel in humid climates.
- Concrete and cast stone: used for dining tables and accent pieces, not seating frames. Extremely durable, excellent for Mediterranean and modern luxe. Heavy, so place before you decide the layout is final.
Seating types and layout examples
Sectionals deliver the most luxurious visual impact per dollar for larger patios. A deep-seat L-shape or U-shape sectional in a neutral base fabric with metallic or jewel-tone accent cushions immediately reads as high-end. Pair it with a powder-coated aluminum coffee table at 16 to 18 inches height (not the typical 18-inch indoor height, outdoor proportions sit slightly lower for comfort on deep chairs). For dining zones, a rectangular dining table seating six people should be at least 36 inches wide so place settings are not cramped. Lounge chairs work best in pairs flanking a fire element or fountain. Two lounge chairs with a shared side table is a classic glam vignette that photographs well and functions even better.
Scale is the thing most people get wrong. Outdoor furniture should feel slightly larger than its indoor equivalent because the visual scale of an open sky and a large floor plane demands more mass to look intentional. A sofa that looks substantial inside can look like a park bench outside. If in doubt, go up one size from what your instinct says.
Luxe fabrics and metallic accents
Outdoor fabrics have improved dramatically, and this is where you add the actual glamour on top of the structural framework. Solution-dyed acrylic fabrics like Sunbrella are the standard reference point for good reason: the color is locked into the fiber during manufacturing rather than printed on the surface, which means it genuinely resists UV fading and can be cleaned with diluted bleach without damage. Sunbrella publishes multi-year limited warranties and full technical data on UV resistance and mildew resistance, which is worth reviewing when comparing fabric options. For high-performance shade structures, tensile textile lines like Serge Ferrari's Batyline publish datasheets covering UV resistance, dimensional stability, and anti-microbial treatment, which matter more for tension canopies and shade sails that stay deployed in all weather.
For glam accents, metallics do the heavy lifting. Brass, aged gold, and black steel are the most versatile finishes across all four glam styles. You do not need a lot: a brass lantern cluster on a coffee table, black steel planter legs, or a gold-toned outdoor throw pillow piping reads as intentional without looking overdone. The rule I follow is to pick one metallic finish and use it consistently across every accessory, then let the fabric colors and plants provide the variety.
Lighting: the single highest-impact upgrade you can make
If I had to pick one element that separates a functional patio from a genuinely glamorous one, it is lighting. Specifically, layered lighting at three levels: overhead (ambient), mid-level (accent), and low-level (path and ground). All three working together at once is what creates that warm, dimensional glow that makes a patio feel like an event.
- Overhead: A chandelier or pendant cluster hung inside a pergola or under a solid roof is a signature glam move. For string lights, use commercial-grade Edison or globe strings with visible bulbs spaced 12 inches apart, run in parallel lines or a canopy grid pattern (not a single strand back and forth). String lights at 8 to 10 feet above ground feel festive without being blinding.
- Mid-level: Wall sconces on the house exterior or pergola posts add architectural light and frame the space. Look for fixtures with IP65 minimum ratings for exposed outdoor locations, or IP66/IP67 for coastal or particularly wet environments. The IP rating tells you the fixture is third-party tested against water and dust ingress, which 'weatherproof' in marketing copy does not guarantee.
- Low-level: In-ground path lights, stair lights, or low uplighting at planters add depth and safety. In-grade fixtures should be IP67 rated minimum given their exposure to standing water.
- Fire elements: An outdoor fireplace, fire pit, or even a tabletop fire bowl counts as a lighting layer and provides warmth. Gas fire pits offer cleaner burn and easier control; wood-burning pits offer more drama but require more maintenance and are restricted in some municipalities.
LED technology makes it practical to put all outdoor fixtures on smart dimmers or color-temperature controls. Warm white (2700K to 3000K) is almost always the right choice for evening atmosphere on a glam patio. Cooler light temperatures (4000K+) read as clinical outdoors at night. A dimmer on your string lights alone makes a noticeable difference in how the space feels after sunset.
Climate control: heaters, fans, and misting systems
A glamorous patio is only useful if you can actually be comfortable on it, and comfort depends almost entirely on your regional climate. This is where practical and aesthetic decisions have to work together.
Heaters
Infrared electric heaters from established brands publish coverage guidance and spec sheets that give you actual wattage and approximate heated coverage area. Common residential models in the 3 to 6 kW electric range cover roughly 100 to 200 square feet of effective heating area. Gas units in the 20,000 to 40,000 BTU range cover similar areas. For a covered patio, ceiling-mounted or wall-mounted infrared units are the cleanest aesthetic choice because they disappear into the structure and heat occupants directly rather than heating air (which escapes immediately outdoors). Budget around $500 to $1,500 per unit plus installation. For patios in the Midwest or Northeast where winter use is a priority, plan for one unit per 150 square feet of occupied seating area.
Misting systems
Misting systems are genuinely effective in hot, low-humidity climates like Phoenix, Las Vegas, or parts of Texas. Research on outdoor misting effectiveness shows that in favored conditions (low humidity, shade, proper nozzle spacing) evaporative misting can produce meaningful reductions in the thermal environment around occupants, with some studies measuring mean radiant temperature reductions of up to 15 degrees Celsius in well-configured installations. However, in humid climates like coastal Southeast or the Gulf Coast, misters add discomfort rather than relief because the evaporative effect barely functions when relative humidity is already high. If you are in Houston or Miami, invest in ceiling fans instead. If you are in Dallas, Tucson, or Sacramento, a properly sized misting system is one of the best upgrades you can make. High-pressure systems (800 to 1,000 PSI) produce a finer mist that evaporates before it wets furniture and surfaces. Low-pressure systems are cheaper but tend to drip and wet surfaces in humid conditions.
Ceiling and outdoor fans
For covered patios, a ceiling fan is one of the most cost-effective comfort and aesthetic upgrades you can add. Look for fans with a 'damp-rated' or 'wet-rated' designation (not just 'indoor/outdoor' marketing language). Wet-rated fans can handle direct rain and are appropriate for exposed areas. Damp-rated fans work for covered areas protected from direct moisture. Blade span of 52 to 60 inches works for most residential covered patios; larger spans (60 to 72 inches) move more air at lower speeds, which is quieter and more comfortable. Brushed nickel, matte black, or natural wood blades with a black or brass motor housing look intentional in a glam space.
Privacy, sound, and the details that complete the space
Privacy structures serve double duty on a glamorous patio: they block unwanted sightlines and they create the enclosed, room-like feeling that makes a patio feel like a designed space rather than a yard. Options range from solid privacy fencing (wood, composite, or aluminum slat panels) to living walls, to tall ornamental grasses or bamboo in large planters placed strategically. For acoustic privacy near busy roads, a solid barrier that breaks the direct line of sight between the noise source and the patio seating area can yield measurable noise reduction. FHWA noise-barrier guidance establishes that even a modest continuous solid barrier can produce around 5 dB of insertion loss in favorable geometry, and 10 dB is often cited as a design goal because it equates to roughly half as loud in human perception. A 6-foot solid fence or tall planting mass between your seating area and a road can make a meaningful difference.
Outdoor speakers mounted inconspicuously at pergola posts or in planters complete the sensory environment without cluttering the visual space. All-weather in-wall or outdoor speakers designed for UL damp or wet locations are available at a wide range of price points, from budget retrofit units around $150 per pair to high-end architectural audio brands used in hospitality design. The glamorous approach is to run wiring during any construction phase so speakers are hardwired and invisible rather than Bluetooth units sitting on a table.
Planting and planter styling for a glam patio
Plants are the element that softens everything and makes a designed patio feel inhabited rather than staged. The glamour is in the containers as much as the plants themselves. Oversized planters in concrete, glazed ceramic, or powder-coated metal in a single consistent finish read as intentional and upscale. Mix heights deliberately: one tall architectural plant (an olive tree, a standard topiary, a tall ornamental grass) with mid-height flowering or trailing plants beneath creates vertical interest. Cluster planters in odd numbers, three or five, for a natural-looking grouping.
For plant selection, always start with your USDA Plant Hardiness Zone. The 2023 updated USDA zone map reflects recent climate shifts and is the current reference for minimum-temperature tolerance. Pair that with your county extension service's recommended plant list for truly regional accuracy, since local microclimates, soil conditions, and water restrictions matter as much as temperature tolerance. In dry climates, lavender, rosemary, agave, and ornamental grasses are near-zero-maintenance and look intentional. In humid Southern climates, elephant ears, birds of paradise (where hardy), and bougainvillea add tropical drama without high maintenance.
DIY vs. hiring a contractor: an honest comparison
Not everything on a glamorous patio needs a professional, but some things absolutely do. Here is a straightforward breakdown of what is DIY-friendly and what is worth paying for.
| Task | DIY Viable? | Notes |
|---|---|---|
| Laying concrete pavers on sand/gravel base | Yes, with prep | Base compaction is the critical step; rent a plate compactor rather than hand-tamp |
| Installing a pergola kit | Yes for kits under ~12 ft span | Follow manufacturer instructions exactly; anchor posts in concrete per local frost-depth requirements |
| Mounting a retractable awning | Yes for experienced DIYers | Must anchor into wall studs or blocking; improper anchoring is a safety hazard in wind |
| Installing porcelain or stone tile | Not recommended | Outdoor tile failure (cracking, lifting) almost always traces to improper mortar bed or substrate; hire a tile setter with outdoor experience |
| Electrical: new circuits, ceiling fan wiring, lighting runs | No; licensed electrician required | Outdoor electrical work requires GFCI protection, weatherproof boxes, and permit in most jurisdictions |
| Gas fire pit or heater connections | No; licensed plumber/gas tech required | Gas connections must be inspected and permitted |
| Hanging string lights or installing low-voltage landscape lighting | Yes | Low-voltage landscape systems (typically 12V) are safe DIY; standard voltage fixtures require an electrician |
| Furniture assembly and arrangement | Yes | Follow scale and proportion guidelines above; use furniture sliders on tile or stone surfaces |
| Planting and container arrangement | Yes | Consult USDA zone map and local extension for plant selection |
Contractor hiring checklist
- Verify state contractor license and check it against your state licensing board database.
- Confirm general liability insurance and workers' compensation coverage; ask for certificates naming you as additionally insured.
- Get three written quotes for any job over $2,000; compare scope line by line, not just total price.
- Ask specifically who pulls the permits and who is responsible for passing inspections.
- Request at least two recent references for the same type of work (patio specifically, not just general construction).
- Confirm material warranties are passed through to you in writing, not just held by the contractor.
- Avoid paying more than 30% upfront; tie payment milestones to inspection sign-offs where possible.
- For any structural work, ask if the design has been reviewed by a licensed engineer, especially for roofed structures, large spans, or high-wind/snow-load regions.
Regional climate adjustments
A glamorous patio in Phoenix has almost nothing in common materially with one in Minneapolis or Charleston, even if the aesthetic goals are identical. Here are the key adjustments by climate type.
- Hot, dry climates (Southwest U.S.): Prioritize shade structures over everything else. Misting systems provide genuine comfort. Use light-colored flooring materials to reduce heat absorption (dark pavers in direct Arizona sun get dangerously hot). Choose drought-tolerant plants native to the region. UV degradation accelerates here, so verify fabric and finish UV ratings rather than assuming.
- Hot, humid climates (Gulf Coast, Southeast): Skip misting systems. Ceiling fans are your best friend. Choose teak, powder-coated aluminum, or marine-grade stainless for furniture; mild steel and untreated iron will rust noticeably within one season. Mildew-resistant fabrics and annual cleaning are non-negotiable.
- Cold-winter climates (Midwest, Northeast): Choose freeze-thaw rated flooring (verify with the manufacturer, not just by material category). Store cushions and fabric items in weatherproof bins through winter. Any structural cover must be designed for local snow load; check your jurisdiction's ground snow load requirement before ordering a pergola or awning.
- Coastal environments: Salt air accelerates corrosion on nearly every material. Grade 316 stainless steel for any metal hardware, marine-grade aluminum for frames, and HDPE or teak for any wood-look elements. Clean surfaces with fresh water monthly in salt-air proximity to extend finish life.
- Variable climates (mid-Atlantic, Pacific Northwest): Retractable systems (awnings, louvered pergolas) earn their cost here because you need both rain protection and sun control at different times. Invest in a quality all-weather cover for furniture or buy stackable pieces you can move inside during extended wet periods.
Budget strategies and phasing the project
A fully realized glamorous patio can cost anywhere from $8,000 to $80,000 or more depending on size, materials, and structure. But the good news is that it phases well. The structural elements (flooring, shade structure) need to be done first and done right, because changing them later is expensive. Everything else, furniture, lighting, accessories, plants, can be added over one or two seasons without touching the structure. For design inspiration and material comparisons, see our guide to the best backyard decks and patios (resource id ca8ba8f6-555d-4798-ac20-9a27320456da). A practical phasing approach: spend 60 to 70 percent of your total budget on the floor and any shade structure in year one. Add furniture and primary lighting in year one or early year two. Layer in accessories, upgraded fabrics, planters, and climate-control systems as budget allows.
For a genuinely budget-conscious approach, three high-impact upgrades consistently deliver the most glamour per dollar: a quality outdoor area rug (instant zone definition and color), layered string lights (transformative at night for well under $200), and two or three large statement planters with architectural plants (visual drama without structural cost). These three additions alone can take a plain concrete patio from forgettable to photographable while you save for the bigger investments. Browse our collection of top patio ideas for curated inspiration and product links. For more curated inspiration and layout examples, see our roundup of the best back patio ideas. If you are exploring broader inspiration before committing to a direction, looking at backyard patio examples across different styles and sizes can help you pressure-test your style goals against real-world results.
Maintenance and longevity: keeping it glamorous over time
A glamorous patio requires maintenance, and the amount depends almost entirely on the materials you chose. Stone and tile need sealing every one to three years. Hardwood decking needs cleaning and oiling or staining annually. Composite decking needs periodic washing but no sealing. Outdoor fabrics should be stored or covered through extended off-seasons. All metal hardware benefits from an annual inspection for early rust or finish failure, especially in coastal or humid climates. The routine that actually gets done is always better than the ideal routine that never does: build a simple spring and fall checklist that takes under two hours and covers cleaning, sealing, hardware inspection, and fabric storage. Patios that look great after five years are almost always the ones whose owners did modest maintenance consistently, not perfect maintenance occasionally.
FAQ
What primary research questions should guide content about glamorous patio design goals and styles?
Which 'glamorous' aesthetics (modern luxe, Hollywood Regency, Mediterranean, Art Deco, boho-glam) do homeowners search for? What visual motifs, color palettes, materials, and signature features define each style? What aspirational project examples (high-end installations and accessible interpretations) illustrate each style clearly?
What source categories help validate high-end visual motifs and trend direction?
Design magazines and curated galleries (Architectural Digest, Elle Decor), platform trend reports (Pinterest Predicts), and recent portfolio case studies from reputable designers — use these for visual motifs, image selection, and search‑friendly phrasing.
What technical questions are needed for flooring, decking, and pavers?
Which materials are appropriate for outdoor horizontal surfaces by climate (porcelain tile frost resistance, DCOF/slip ratings, paver base specs, composite decking ventilation)? What are typical installation standards and failure modes to warn readers about?
Which authoritative sources should be consulted for tile and outdoor-surface specs?
Standards and trade bodies (TCNA, ANSI A137.1), manufacturer tech sheets (Marazzi, major tile brands), and local installer/contractor guidance — to verify frost‑rating, water absorption, DCOF and recommended installation methods.
What questions and sources cover shade/cover systems and structural choices?
Which systems (pergola, motorized louvered roofs, retractable awnings, fixed roofs) are suited to different climates and loads? What are engineering/permitting differences and cost tiers? Consult manufacturer engineering reports (e.g., StruXure/Hansø), ICC/IRC code references, and case‑study installs.
What code and permitting research is required?
What trigger thresholds (area, attachment, roofed structure, height) require permits or engineered designs in the target region? Use the IRC, local building-department pages, and permit guidance summaries to ensure accurate homeowner advice and disclaimers to verify the AHJ.
Next Articles
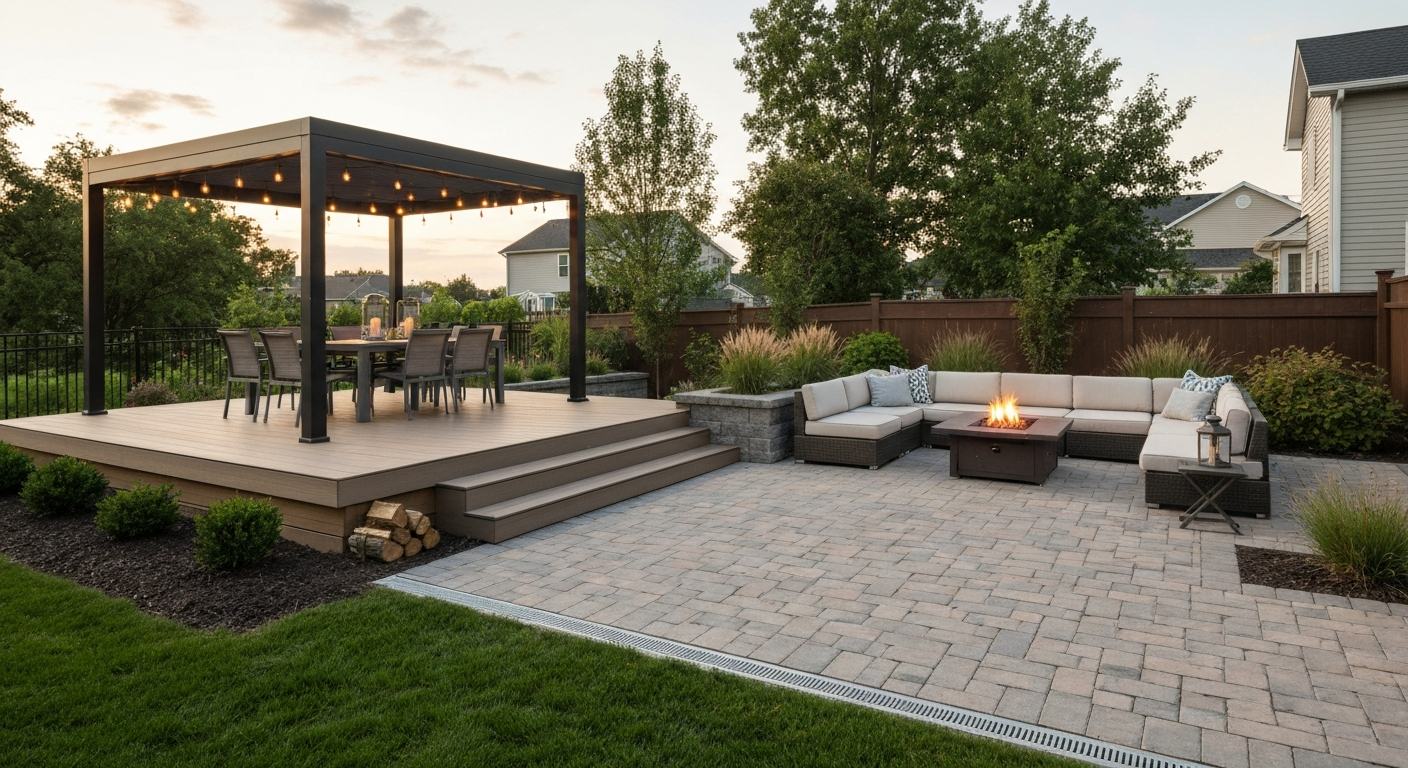
Best Backyard Decks and Patios: Design Ideas & Materials
Best backyard decks and patios: design ideas, material comparisons, costs, and DIY tips for every climate.
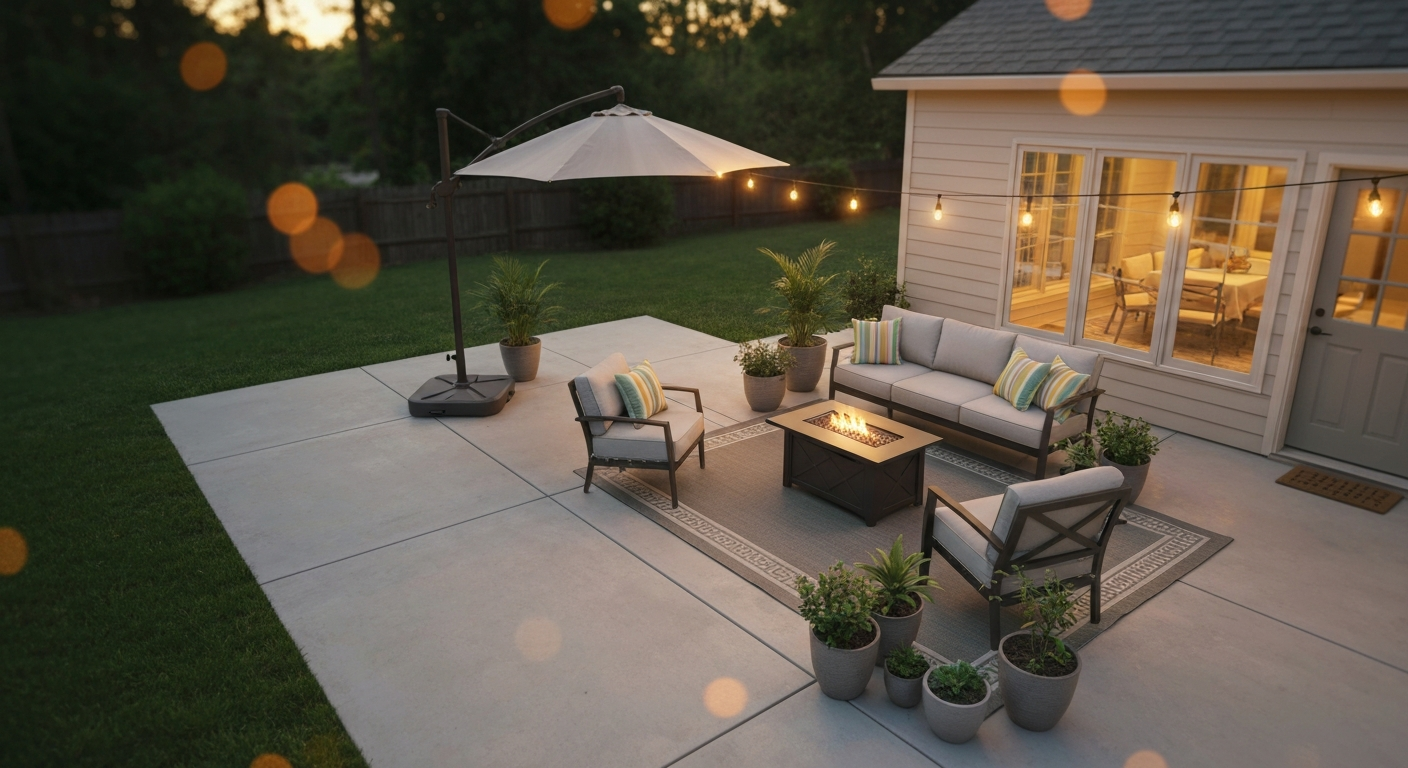
How to Make Patio More Inviting: Complete Homeowner Guide Tips
How to make patio more inviting: practical upgrades, layout, furniture, shade, lighting, budgets & DIY tips.
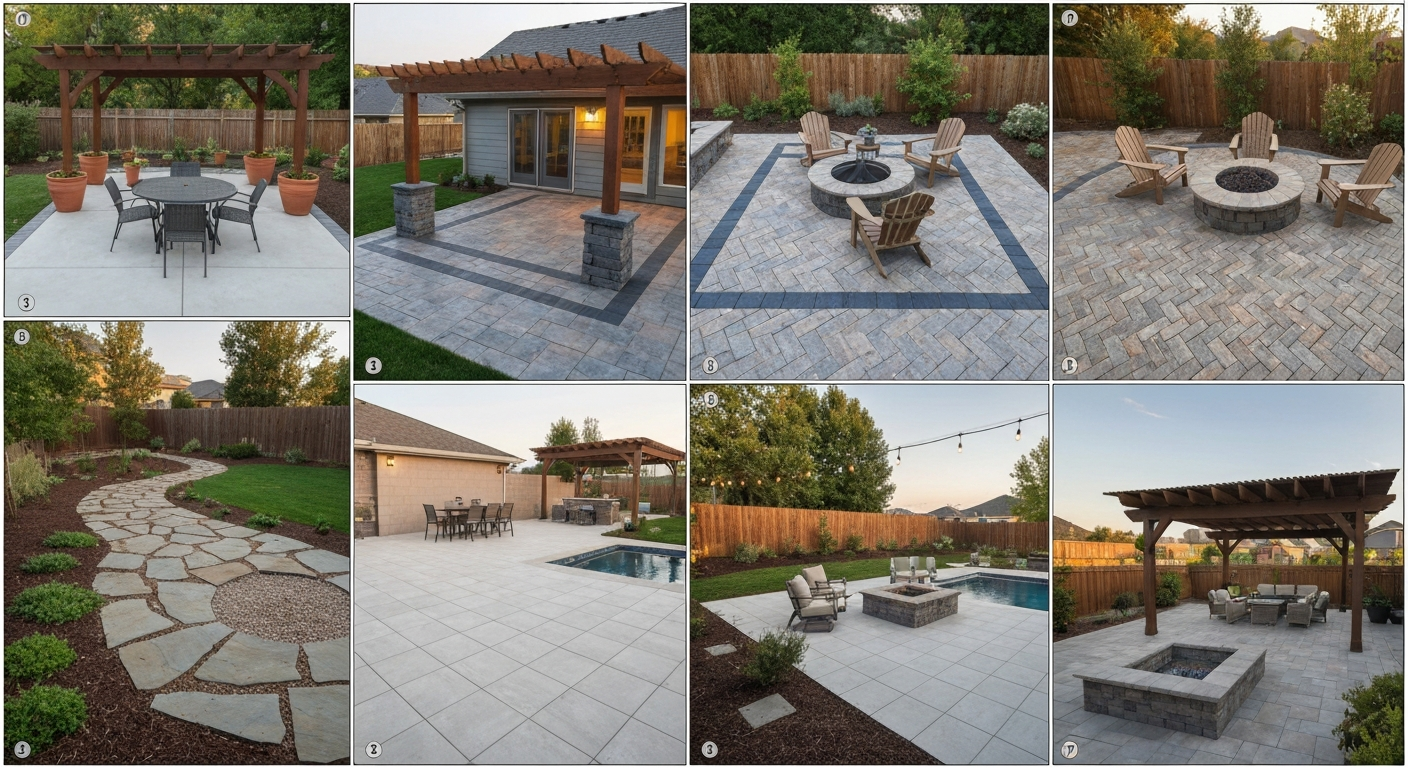
Backyard Patio Examples: Stylish Ideas, Plans & Materials
Backyard patio examples, layouts, materials, DIY budgets, decorating ideas and climate-smart plans for every homeowner.