
Backyard patio examples span everything from a simple 10x10 concrete slab with a couple of chairs to multi-zone outdoor living rooms with pergolas, kitchens, and string lights. The best one for your yard depends on your budget, your climate, how you actually use the space, and what's sitting under the ground before you dig. This guide walks through real-world styles and layouts, compares materials and features honestly, and gives you the planning steps to go from idea to finished project without costly surprises.
Backyard Patio Examples: Stylish Ideas, Plans & Materials

Phoebe Foster
17 Jul 2026
Who this guide is for and how to use it
Whether you're starting with a blank backyard, replacing a crumbling slab, or adding features to an existing space, this guide is designed to meet you where you are. If you're early in the process, start with the patios vs. decks comparison and the curated examples to narrow your style. If you already know what you want, jump to the materials table or the planning checklist. Budget-conscious readers will find DIY notes throughout, and anyone hiring out the work will find a contractor checklist near the end. The climate notes are especially worth reading if you're in a region with extreme heat, heavy rain, or hard freezes, because material and drainage choices that work in Southern California can fail badly in Minnesota or Houston.
Patios vs. decks: which one actually fits your yard?
This is the first decision most homeowners need to make, and it's more practical than aesthetic. A patio sits at or near ground level on a compacted base or slab. A deck is an elevated wood or composite platform attached to or freestanding from the house, requiring footings, framing, and a ledger connection if it's attached. Patios generally cost less per square foot to install and, when properly built, can last the lifetime of the home. Decks have an average lifespan closer to 20 years, require more frequent inspection and maintenance, and carry higher structural risk: ledger-to-house connections are one of the most common sources of deck failures, and they're a major focus of building permit plan checks. Patio vs. Deck, Fine Homebuilding (design/long‑term comparison) reports that patios are typically built at ground level on a compacted base or slab and need less structural maintenance over time, whereas decks are elevated wood or composite structures requiring footings, ledger connections, and more frequent inspection and maintenance, with average deck lifespans closer to about 20 years Patio vs. Deck — Fine Homebuilding (design/long‑term comparison).
That said, decks are sometimes the only practical option. If your yard slopes steeply away from the house, building a grade-level patio would require extensive fill or retaining work that costs more than just framing a deck. If you want a seamless transition from an elevated interior floor, a deck at the same height makes sense. The IRC requires guards (guardrails at least 36 inches high) on any open-sided walking surface 30 inches or more above grade, so factor that safety requirement into your deck cost estimate.
| Factor | Patio | Deck |
|---|---|---|
| Typical lifespan | Lifetime of home (well-built) | ~20 years (wood); 25–50 yrs (composite) |
| Cost range (installed) | $6–$25+ per sq ft | $15–$35+ per sq ft |
| Structural complexity | Low to moderate | Moderate to high |
| Permit requirements | Often required for covers; slab usually not | Almost always required |
| Maintenance | Reseal every 2–3 yrs (concrete); sand/clean (pavers) | Annual inspection; stain/seal wood every 1–3 yrs |
| Best for | Level yards, budget-conscious builds, long-term low maintenance | Sloped yards, elevated entry points, elevated outdoor rooms |
| Drainage concerns | Grading and slope critical at ground level | Water falls through; less drainage risk |
If you're comparing decks and patios and also thinking about multi-level or combined outdoor spaces, the topic of best backyard decks and patios covers those hybrid layouts in more depth. For detailed hybrid layouts and side-by-side comparisons, see the best backyard decks and patios guide. For more single-level patio layouts and detailed inspiration, see our best back patio ideas.
Curated backyard patio examples by style
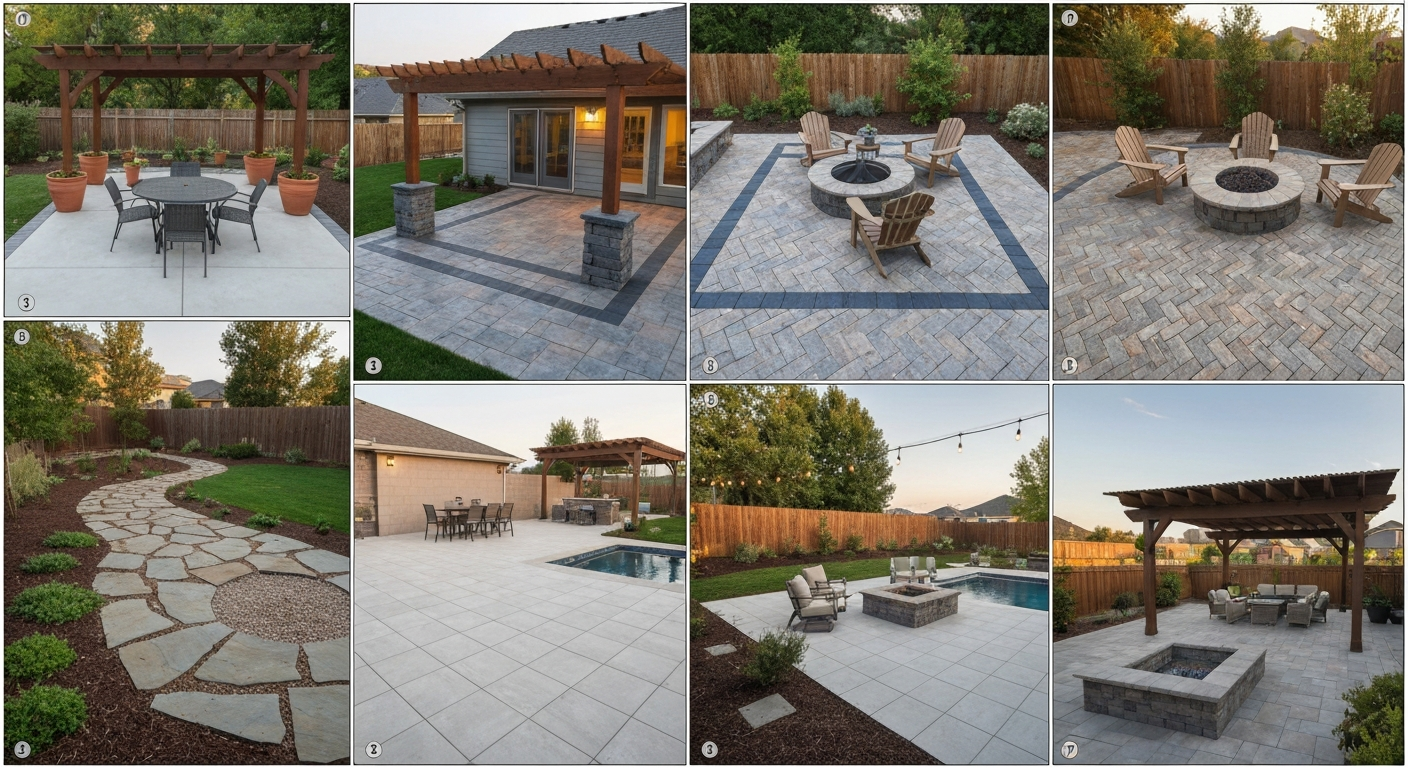
Looking at real-world examples is the fastest way to figure out what you actually want. Here are eight styles I've seen work well across different budgets, yard sizes, and climates, along with what makes each one tick. For more inspiration, see our collection of top patio ideas.
1. The simple concrete slab patio
A 12x16 brushed concrete slab with a small table set and a couple of planters is still the most common backyard patio in America, and for good reason. It's durable, low-maintenance, and costs between $6 and $10 per square foot installed for a basic finish. Dress it up with an outdoor rug, potted herbs, and a string light canopy overhead and it punches well above its price point. Image suggestion: overhead shot of a gray brushed-concrete slab with a round table, four chairs, and terra cotta pots along one edge.
2. Stamped concrete with decorative borders
Stamped concrete mimics the look of stone, brick, or wood at a fraction of the material cost. A 200 sq ft stamped patio with a contrasting border typically runs $12–$17 per sq ft installed. The catch: it needs to be resealed every 2 to 3 years or the color and texture degrade noticeably. In freeze-thaw climates, sealing is non-negotiable. Image suggestion: a slate-pattern stamped concrete patio in warm gray with a charcoal border, shown with outdoor furniture and a pergola overhead.
3. Concrete paver patio
Concrete pavers in a herringbone or running bond pattern cost $8–$18 per sq ft installed and are one of the most flexible options available. Individual pavers can be pulled up and replaced if a utility needs access or if one cracks. Labor accounts for 50 to 80 percent of total paver cost because the base prep and individual unit placement are time-intensive, so this is a place where DIY experience genuinely pays off if you're willing to do the work. Image suggestion: a warm-toned concrete paver patio in a herringbone pattern with a built-in fire pit at the center and Adirondack chairs.
4. Natural stone (flagstone or bluestone)
Flagstone set in a mortared or dry-laid pattern is the go-to for a high-end, organic look. Bluestone, travertine, and irregular flagstone all fall in this category. Installed costs run $15–$30+ per sq ft depending on stone type and whether it's mortared or set in sand. Natural stone is beautiful but requires more care in cold climates where freeze-thaw cycles can crack or heave mortared joints. Image suggestion: an irregular bluestone flagstone patio with low ground-cover plants filling the joints, surrounded by mature landscaping.
5. Pea gravel or decomposed granite
A gravel or decomposed granite patio framed by landscape edging is the most budget-friendly hardscape option, often costing $1–$4 per sq ft for materials. It drains naturally, which is a real advantage in rainy climates, but it shifts underfoot, tracks into the house, and isn't ideal for furniture that needs a stable surface. Best used as a secondary zone (around a fire pit, between planted beds) rather than a primary seating area. Image suggestion: a pea gravel patio enclosed by low steel edging, with a fire pit, Adirondack chairs, and string lights.
6. Porcelain tile on a concrete base
Large-format outdoor porcelain tile (24x24 or larger) has become popular because it's nearly impervious, holds color well, and looks genuinely upscale. It needs to be installed on a perfectly flat, crack-resistant concrete base and requires rated outdoor-grade, frost-proof tile in any climate with freezing temperatures. Installed cost runs $12–$22 per sq ft. Image suggestion: a large-format light gray porcelain tile patio adjacent to a pool, with minimal outdoor furniture and a stucco privacy wall.
7. The multi-zone entertaining patio
This is the layout most homeowners aspire to: a dining zone off the back door, a conversation pit or lounge zone further out, and maybe a cooking or bar station connecting the two. The key is defining each zone with changes in elevation, surface material, or overhead structure rather than just furniture placement. This style works best at 400 sq ft or more. Image suggestion: an aerial view of a backyard with a concrete dining area near the house, a paver lounge zone around a sunken fire pit, and a pergola-covered outdoor kitchen connecting them.
8. The poolside patio
Poolside patios have specific requirements: slip-resistant surfaces, materials that don't absorb heat excessively (travertine and light-colored concrete stay cooler than dark pavers in full sun), and drainage that keeps runoff away from the pool equipment. Permeable pavers work especially well here because they handle splash water naturally. Image suggestion: a travertine pool deck with a covered lounge area, outdoor shower, and landscaping beds bordering the coping.
Layout templates: from small slabs to multi-zone outdoor rooms
Sizing is where a lot of first-time patio projects go wrong. People either build too small (a 10x10 feels fine until you actually put a table and four chairs on it) or overscale the project relative to their yard and budget. Here are practical templates by use case.
Small patio (under 150 sq ft)
A 10x12 or 12x14 footprint is the minimum workable size for a two- to four-person seating area. Plan for at least 3 feet of clearance around furniture for comfortable movement. This size is ideal for urban lots, side yards, or a secondary seating area. Material choice matters more at this scale because the cost per sq ft of a premium material is spread over fewer total square feet. Image suggestion: a 12x14 stamped concrete patio with a bistro table for two, a small planter wall on one side, and wall-mounted lighting.
Medium patio (150–350 sq ft)
This is the sweet spot for most suburban backyards. A 14x20 layout comfortably fits a six-person dining set and still leaves room for a grill station or a couple of lounge chairs. At this size you can start incorporating a pergola or shade sail overhead without the structure feeling overwhelming. Image suggestion: a 16x20 paver patio with a pergola over the dining area, a freestanding grill cart to one side, and a low planter border.
Large patio (350–600 sq ft)
At 350 sq ft and above, you have enough room to create two distinct zones: dining and lounge, or cooking and conversation. A change in surface material or a step up or down between zones makes the layout feel intentional rather than just a large slab. A 20x24 or 18x30 footprint falls in this range. This is also the size where a built-in outdoor kitchen or fireplace starts making proportional sense. Image suggestion: an 18x28 concrete patio with a pergola-covered outdoor kitchen on one end and a sunken fire pit conversation area on the other, connected by a step.
Multi-zone patio (600+ sq ft)
Multi-zone patios work best when each zone has a defined purpose and a physical boundary. Use a pergola or covered structure over the dining area, a change of flooring material (concrete to pavers, for example) to define the lounge zone, and a fire feature or water feature as the anchor for a third zone. Plan for 3–4 feet of transition space between zones. Electrical, gas, and water rough-in should all be mapped before any concrete is poured. Image suggestion: a bird's-eye rendering of a 700+ sq ft multi-zone backyard with labeled dining, lounge, kitchen, and fire pit zones using different materials.
Poolside patio layout
Pool deck layouts need to accommodate safety clearances (typically 4–6 feet of deck around the pool edge), wet surfaces, and high foot traffic. Keep the furniture zone off the main traffic path between the pool and the house. Include a shade structure on the south or west side for afternoon coverage. Non-porous, slip-rated surfaces like travertine, brushed concrete, or textured porcelain are the safest choices here. Image suggestion: a pool deck plan diagram showing the pool perimeter clearance, a covered lounge zone on the west side, and a dining area near the house.
Materials and flooring: honest cost and durability comparison
No single patio material is best for every situation. The table below covers the most common options with realistic installed cost ranges (U.S., 2025–2026 data), durability expectations, maintenance requirements, and the conditions where each performs best. All cost figures assume professional installation; DIY can cut labor by 50 to 80 percent on paver and gravel projects.
| Material | Installed Cost (per sq ft) | Lifespan | Maintenance | Best For | Watch Out For |
|---|---|---|---|---|---|
| Poured concrete (basic) | $6–$10 | 30–50+ yrs | Reseal every 2–3 yrs | Budget builds, large slabs | Cracking without proper control joints |
| Stamped/decorative concrete | $10–$17 | 20–40 yrs | Reseal every 2–3 yrs; color fades without sealing | Mid-range aesthetics on a slab budget | Freeze-thaw damage if not sealed; surface can't be repaired patch-free |
| Concrete pavers | $8–$18 | Lifetime (replaceable) | Periodic sand/joint repair; pressure wash | Flexibility, repairability, DIY-friendly | Labor-intensive base prep; weeds in joints over time |
| Natural stone (flagstone/bluestone) | $15–$30+ | Lifetime if dry-laid; shorter if mortared in freeze-thaw climates | Re-point joints; periodic sealing on porous stone | High-end organic look, established gardens | Freeze-thaw cracks mortared joints; cost |
| Porcelain tile | $12–$22 | 25–40 yrs | Low; clean with water and mild detergent | Modern/contemporary look, pool surrounds | Must use frost-proof tile; needs perfectly flat substrate |
| Travertine | $15–$25 | Lifetime if sealed | Seal annually in wet climates; fill pits | Pool decks, warm climates, upscale aesthetics | Porous without sealing; pitting traps dirt |
| Pea gravel / DG | $1–$4 | Indefinite (refresh as needed) | Rake level; top up as needed | Secondary zones, fire pit areas, budget spaces | Shifts underfoot; tracks indoors; unstable for furniture |
| Brick pavers | $10–$20 | Lifetime (replaceable) | Reseal joints; clean moss/algae | Traditional/Colonial styles, DIY-friendly | Can become uneven over time; moss in shaded areas |
A note on permeable options: pervious concrete, porous asphalt, and permeable interlocking pavers are all recognized by the U.S. EPA as accepted stormwater management practices. In some municipalities, installing permeable pavement can earn stormwater-credit or qualify for local LID incentive programs. These materials require an open-graded stone subbase for storage and infiltration and should be installed by certified contractors (the Concrete Masonry and Hardscapes Association publishes installer certification guidance). If you're in a jurisdiction with stormwater fees or runoff restrictions, it's worth asking your building department about credits before choosing your surface.
Features that make or break a patio: covers, shade, cooling, lighting, and heat
The surface is only the beginning. What really determines whether you actually use your patio is the combination of overhead cover, temperature management, and lighting. Here's how the main options compare on installation complexity, operating cost, and practical usefulness by climate.
Covers and overhead structures
A pergola is the most popular choice because it's relatively affordable ($3,000–$12,000 installed for a basic wood or aluminum kit), adds vertical structure, and can support climbing plants, string lights, and a retractable canopy. It doesn't block rain on its own, but a polycarbonate roof panel or shade sail adds weather protection without the cost of a full patio cover. A solid patio cover (attached roof extension) offers full rain and sun protection and runs $8,000–$30,000+ depending on size and construction. Retractable awnings fall between: they extend for shade and retract in wind or rain, typically costing $1,500–$5,000 for a motorized 12-foot unit. Most municipalities require a permit for any attached patio cover or awning, so budget a few hundred dollars and 4–8 weeks for permit review before you order materials. Always check with your local building department first.
Misters and evaporative cooling
Patio misting systems are a game-changer in dry climates like Arizona, Nevada, and inland Texas where humidity is low. High-pressure systems (800–1,000 PSI) produce an ultra-fine fog that evaporates almost instantly and can drop ambient temperatures by 10–25°F without getting furniture wet. Low-pressure systems (line pressure, 40–60 PSI) use larger droplets and work in drier areas, but they drip more and are less effective in humid regions. Individual nozzle flow rates are surprisingly low, typically 0.1 to 1.0 gallons per hour depending on orifice size and pressure, so a 10-nozzle system might use under 10 gallons per hour. Any misting system connected to potable water requires appropriate backflow prevention (vacuum breaker or reduced-pressure assembly) under the Uniform Plumbing Code and most municipal codes. Budget $500–$2,500 for a quality high-pressure system installed.
Outdoor fans
A ceiling-mounted outdoor fan under a covered patio is one of the highest-value additions you can make, costing $150–$600 for a quality wet-rated or damp-rated unit plus installation. Fans extend usable hours in humid climates by moving air and disrupting mosquito flight patterns. In hot, dry climates they work well in combination with a misting system. Choose a wet-rated fan for any uncovered or partially covered location where it can be rained on directly.
Lighting
Lighting is what separates a patio that gets used in the evening from one that doesn't. String lights (café lights) are the easiest and most cost-effective option at $30–$150 for a 50-foot run, and they create a warm, inviting atmosphere that almost no other lighting type matches for the money. Layer them with path lighting ($15–$40 per fixture), step lights built into risers, and downlights from a pergola or cover for a complete scheme. Low-voltage LED landscape systems are DIY-friendly and cost $200–$800 for a full kit. Hardwired fixtures need an electrician but look cleaner and are more reliable long-term. In climates with ice storms or high winds, secure string lights to a cable guide wire rather than just looping them between posts.
Patio heaters
Heaters extend the usable season significantly in climates with cool evenings (much of the country outside the Deep South and Southwest). Freestanding propane heaters ($100–$300) are the most flexible option and require no installation, but they use a 20-pound tank every 8–10 hours at full output. Natural gas heaters plumbed to an existing gas line cost $400–$1,200 installed but have no tank refill hassle. Electric infrared heaters ($200–$600) are the cleanest option and heat objects directly rather than the air, making them efficient in breezy conditions. Wall- or ceiling-mounted electric infrared units are popular under pergolas and covered patios because they're out of the way and aesthetically clean.
| Feature | Typical Cost | Best Climate | Permit Needed? | DIY Feasible? |
|---|---|---|---|---|
| Pergola (wood or aluminum kit) | $3,000–$12,000 installed | All climates | Often yes (attached) | Moderate difficulty |
| Solid patio cover (attached) | $8,000–$30,000+ | Rainy or hot-sun climates | Yes, almost always | Not recommended |
| Retractable awning (motorized) | $1,500–$5,000 | Mixed sun/rain climates | Often yes (attached) | Possible with support |
| Shade sail | $100–$600 DIY | Sun-heavy climates | Usually no | Yes |
| High-pressure misting system | $500–$2,500 installed | Hot, dry climates | Usually no | Possible |
| Outdoor ceiling fan (wet-rated) | $150–$600 + install | Humid or warm climates | No (existing circuit) | Yes if circuit exists |
| String lights | $30–$150 per run | All climates | No | Yes |
| Low-voltage LED path/step lights | $200–$800 kit | All climates | No | Yes |
| Freestanding propane heater | $100–$300 | Cool evenings, any region | No | Yes |
| Wall/ceiling electric infrared heater | $200–$600 + install | Cool, breezy climates | No (existing circuit) | Possible |
Planning checklist: what to work out before you build anything
I've watched more than a few patio projects go sideways because someone skipped the planning phase and started building. A cracked slab from poor drainage, a cover that violates setback rules, or a gas line that ends up under three inches of concrete, all of these are avoidable. Work through this checklist before you commit to a design or sign a contract.
Site assessment
- Mark the location of all underground utilities (call 811 in the U.S. at least 3 business days before any digging)
- Identify the slope direction of your yard and any low spots where water pools after rain
- Note the sun path: where does shade fall in the morning, afternoon, and evening at your latitude?
- Assess soil type: clay soils drain slowly and require more aggressive drainage solutions; sandy soils drain fast but may need stabilization
- Check for tree roots that could heave a slab or clog a French drain over time
- Measure the distance from the proposed patio edge to the house foundation, property lines, and any existing structures
Sizing and layout
- Use tape or spray paint to mark the footprint before finalizing size; most people underestimate how much space furniture takes
- Plan for 3 feet of clearance around all furniture and 4 feet for main traffic paths
- Decide on zones: dining, lounge, cooking, fire feature? Each zone needs its own space budget
- Consider future additions: rough-in conduit or gas lines now rather than cutting through hardscape later
Zoning, setbacks, and permits
- Check your local zoning code for rear and side setbacks for accessory structures and hardscape
- Confirm whether your municipality requires a permit for a concrete slab, a paver patio, a patio cover, or an awning (many do, especially for attached structures)
- HOA rules may impose additional restrictions on height, materials, or footprint; review your CC&Rs before designing
- Budget 4–12 weeks for permit review on covered or attached structures
- Ask about stormwater requirements: some jurisdictions require a certain percentage of permeable surface in the backyard
Utilities and drainage planning
- Map any existing irrigation, gas, electrical, or drain lines before finalizing the patio footprint
- Plan electrical rough-in for lighting, fan, heater, and outdoor outlet locations before any concrete is poured
- If adding a gas grill or heater, have a licensed plumber or gas fitter extend the gas line before the slab is poured
- Design drainage so all surface water moves away from the house foundation, not toward it
- If you're building over or near a septic system, get the tank and leach field locations surveyed first
Site preparation and drainage: the work that makes or breaks the finished product
Every patio surface failure I've seen, whether it's cracking, heaving, pooling, or sinking, traces back to inadequate site preparation or drainage. This is the part of the project that's buried under the finished surface, so it's easy to cut corners. Don't.
Grading requirements
The 2024 International Residential Code (IRC R401.3) requires that the grade fall at least 6 inches within the first 10 feet from the foundation, and any impervious surface within 10 feet of the foundation must slope at least 2% away from the building. In practical terms, that means a 10-foot-wide patio slab adjacent to your house needs to drop at least 2.4 inches from the house edge to the outer edge. If your existing yard is flat or slopes toward the house, you'll need to correct that before pouring any concrete. Ignoring this causes water to work back against the foundation over time.
Subbase preparation
For a concrete slab, the standard subbase is 4 inches of compacted crushed stone or gravel over undisturbed or well-compacted subgrade. For paver patios, the base is typically 6–8 inches of compacted crushed stone with a 1-inch bedding layer of coarse sand or stone dust. The base must be mechanically compacted in lifts, not just dumped and raked. A plate compactor is the right tool; hand tamping a 6-inch base is not adequate for a permanent patio. Permeable paver systems require an open-graded (no fine particles) stone subbase specifically sized for water storage and infiltration, not standard dense-graded base.
Water management: slopes, drains, and French drains
Beyond grading, large patios or patios that collect water from adjacent landscape areas often need supplemental drainage. A channel drain (trench drain) at the transition between the patio and a lawn or planting bed is one of the cleanest solutions. For more serious drainage problems, a French drain is the standard approach: a perforated 4-inch pipe wrapped in nonwoven geotextile fabric, surrounded by clean 3/4-inch crushed stone, and sloped to a positive outlet (daylight at a lawn edge, a dry well, or a storm drain connection where permitted). The Building America Solution Center recommends at least 18 inches of cover over French drain pipe and a consistent positive slope toward the outlet. On clay-heavy soils, size your stone reservoir generously because infiltration rates are slow.
Accessibility and ADA-inspired design
Even if you don't need to meet formal ADA requirements for a residential patio, designing for accessibility is worth doing: it benefits older family members, guests with mobility challenges, and ultimately your home's resale value. Keep transitions between surfaces flush or use beveled edging strips. Slope changes of more than 1/4 inch without a bevel and 1/2 inch with a bevel can create trip hazards. Avoid gravel or loose stone surfaces in primary traffic paths if accessibility is a concern. A 36-inch-wide minimum path between furniture and structures allows comfortable wheelchair access.
Decorating your patio: from basic to inviting to glamorous
Once the hardscape is in, the decorating choices determine whether the space feels like an outdoor living room or just a slab with some chairs on it. The upgrade from basic to genuinely inviting doesn't require a big budget. It requires layering: a defined rug to anchor the furniture arrangement, textiles (cushions, throw pillows) in a consistent color palette, overhead light at two or three levels, and at least one element of natural life (plants, a water feature, or a fire feature). For step-by-step tips and styling ideas on how to decorate a glamorous patio, see the guide on how to decorate a glamorous patio (d3473a54-9b12-46c3-aa45-e8a66c5550fa).
For a more intentional, glamorous feel, the layering goes further: an outdoor rug sized to fit all furniture legs, weather-resistant throw pillows in a two- or three-color palette with texture variation, dimmable LED string lights above and candles or lanterns at table level, a statement piece (a large ceramic planter, a sculptural fire table, a teak daybed), and curtain panels hung from a pergola or shade structure for enclosure and softness. White or neutral curtains with a natural texture (linen-look outdoor fabric) are the most versatile option across styles. Topics like how to decorate a glamorous patio and how to make a patio more inviting go deeper into specific furniture arrangements, color schemes, and before-and-after transformation ideas worth exploring.
DIY vs. hiring a contractor: a realistic breakdown
Labor is the largest cost variable in any patio project, typically accounting for 50 to 80 percent of the total on paver installations. DIY is genuinely viable for several parts of a patio project, but not all of them. Here's an honest assessment by task.
| Task | DIY Feasibility | Estimated DIY Savings | Difficulty | Notes |
|---|---|---|---|---|
| Paver patio (base + installation) | High | 40–60% of total cost | Moderate | Rent plate compactor; follow ICPI base specs |
| Gravel / DG patio | Very high | 70–80% of total cost | Easy | Edging installation is the key step |
| Concrete slab pour | Low | 20–30% of total cost | High | Forming, timing, and finishing require experience |
| Pergola kit assembly | Moderate | 30–50% of labor | Moderate | Follow manufacturer specs; anchor to concrete |
| Shade sail installation | High | Nearly full labor cost | Easy | Use proper anchor hardware; tension matters |
| String light installation | Very high | Full labor cost | Easy | Use a guide wire; weatherproof connections |
| Low-voltage landscape lighting | High | Full labor cost | Easy | Use a quality transformer with timer |
| Outdoor fan installation | Moderate | Electrician cost | Moderate | Needs existing circuit; wet-rated unit required |
| Gas line extension | Not recommended | N/A | Professional only | Requires licensed gas fitter in most jurisdictions |
| French drain installation | Moderate | 30–50% | Moderate | Proper slope and outlet are critical |
Contractor hiring checklist
- Verify contractor licensing and insurance for your state (general liability and workers' comp at minimum)
- Get at least three itemized bids; compare base prep specs, not just final price
- Ask for local references and look at completed projects in person if possible
- Confirm who pulls the permit: the contractor should pull it, not ask you to do it
- Get a written contract specifying materials by grade and thickness, drainage specs, start date, payment schedule, and warranty terms
- Never pay more than 10–30% upfront; tie payments to milestones
- Ask how they handle base preparation specifically: what compaction equipment do they use and what thickness of base material?
Climate-specific recommendations and maintenance
Material and feature choices that work well in one climate can fail in another. Here are the most important region-specific considerations I'd pass along to a friend.
Hot and dry (Southwest, inland Texas, Southern Nevada)
Light-colored surfaces (light concrete, travertine, light pavers) are essential; dark surfaces absorb heat and become painful underfoot in summer. A misting system is worth every penny. A shade structure (pergola with shade cloth or a solid cover on the south and west sides) extends usable hours dramatically. Concrete and pavers both perform well without freeze-thaw stress. Seal concrete and travertine annually to protect against UV degradation and caliche staining.
Humid and hot (Gulf Coast, Southeast, Florida)
Mold, mildew, and algae growth are the primary surface maintenance challenges. Textured surfaces are better than smooth ones for slip resistance in a climate with frequent afternoon rain. Porcelain tile is the lowest-maintenance choice here because it doesn't support algae growth the way porous stone or concrete does. A fan is more effective than a mister in high-humidity conditions. Overhead cover is critical for afternoon thunderstorms. Annual pressure washing is a maintenance standard, not an option.
Cold climates with freeze-thaw cycles (Midwest, New England, Mountain West)
Freeze-thaw is the enemy of mortared joints, porous stone, and poorly sealed concrete. Dry-laid pavers handle freeze-thaw much better than mortared flagstone because they can flex slightly as the ground heaves. Any concrete should have control joints every 8–10 feet to manage cracking. Use frost-proof porcelain tile if you want a tile surface. Seal all concrete surfaces before winter and reseal every 2 years. Patio furniture and umbrellas need to come in or be covered during ice and snow season.
Rainy climates (Pacific Northwest, Southeast, Gulf Coast)
Drainage is the dominant concern. Grading away from the foundation is non-negotiable, and supplemental channel drains or French drains are often necessary. Permeable pavers are an excellent choice here because they handle high rainfall volumes naturally and may qualify for local stormwater credits. A covered patio (not just a pergola) makes the space genuinely usable in rainy weather. Non-slip surface ratings matter more here than anywhere else.
Ongoing maintenance by surface
- Poured and stamped concrete: reseal every 2–3 years; pressure wash annually; fill cracks before resealing
- Pavers: refill polymeric sand joints every 2–5 years; pressure wash and reseal pavers every 2–3 years; reset any sunken or heaved units
- Natural stone: reseal porous stones (travertine, limestone, sandstone) annually in wet climates; re-point mortar joints as needed
- Porcelain tile: clean with water and a mild pH-neutral cleaner; check grout joints annually and re-grout any cracked sections
- Gravel/DG: rake level seasonally; add fresh material every 1–2 years as it compacts and displaces
- All surfaces: clear debris and standing water promptly; inspect drainage outlets annually; trim vegetation away from patio edges
The most important maintenance habit is the most boring one: keep the drains and the slope working. A patio surface that sheds water properly will last decades with minimal intervention. One that pools water will fail no matter what it's made of. Whether you're starting with one of the simple examples above or planning a full outdoor room, getting the grade, the base, and the drainage right from day one is the single best investment you can make in the project.
FAQ
What are inspiring backyard patio examples I can use for planning?
Look for a curated gallery that shows multiple scales and styles: small urban patios with vertical planters, mid‑size backyard patios with dining and lounge zones, multi‑level patios with fire features, and integrated kitchen/BBQ patios. Include before/after sequences (cleared lawn → compacted base → finished paver/concrete/flooring), photo captions listing square footage, materials, and budget bands. Image suggestions: top‑down layout sketches, daytime/nighttime shots with lighting on, closeups of material joints, and staged furniture to show scale. For more feature examples see internal site pages: /covers, /misters, /fans, /flooring, /decor.
How do I choose between a patio and a deck?
Use this quick decision checklist: choose a patio if you want ground‑level permanence, lower long‑term maintenance, or permeable options to manage runoff. Choose a deck if your yard is sloped, you need elevation for views, or want a lightweight structure above grade. Consider cost (patios often cheaper per sq ft when site is flat), lifespan (well‑built patios can last decades), and code/structural work (decks need footings, ledger attachments, guardrails). If adding a cover to a deck, expect additional permitting and ledger/attachment inspection.
Which patio flooring materials are best for cost, durability, and maintenance?
Common materials and tradeoffs: poured concrete — low initial cost ($6–$17/ft² installed), durable, needs resealing/stain repair every few years; concrete pavers — mid to high cost ($8–$25+/ft²), very durable, modular (easy repairs) but labor intensive; natural stone — high upfront cost, excellent longevity, needs professional base prep; permeable pavers — better stormwater performance, may qualify for local credits, require open‑graded base and more careful installation; gravel — lowest cost, simple DIY, needs edging and occasional raking. Maintenance: concrete/pavers require periodic sealing/weed control; stone may need joint sand replacement; composite decking (if used for raised patios) reduces ongoing staining/painting but has higher upfront cost.
Can you give a short materials comparison (cost, durability, maintenance)?
Table summary: - Poured concrete: Cost low–mid, Durability high, Maintenance reseal 2–3 yrs, crack repair. - Concrete pavers: Cost mid–high, Durability very high, Maintenance joint sand/top‑ups, occasional leveling. - Natural stone: Cost high, Durability very high, Maintenance low–moderate (cleaning/seal). - Permeable pavers: Cost mid–high, Durability high, Maintenance sweeping/ vacuuming of joints and subbase inspection. - Gravel: Cost low, Durability moderate, Maintenance frequent raking/weed control. Remember labor often accounts for 50–80% of paver installation budgets; site prep and drainage can raise costs.
What are the trade‑offs for common patio features — covers, misters, fans, lighting, heaters?
Covers (permanent pergolas/roofed): high comfort/protection, require permits if attached, higher cost, long lifespan. Retractable awnings: lower cost, flexible, may need service. Misters: effective in hot, dry climates; require high‑pressure pumps and backflow prevention for potable connections (install vacuum breakers/reduced‑pressure devices). Fans: low energy, good air movement for insect deterrence; minimal permitting. Lighting: hardwired lighting requires wiring/permit; low‑voltage or solar options are easier DIY. Heaters (propane/electric/infrared): extend seasons, require ventilation/clearances; electric infrared has quick warmup and lower emissions; gas heaters require safe gas lines and possible permits. Consider operation cost, weather exposure, and maintenance when selecting features.
What permit, code, and safety items should I check before building a patio or deck?
Check local building department for requirements on patios, attached covers, and decks. Typical items: permits for attached patio covers and decks, guard/rail height requirements for drops ≥30 in (often 36 in min), grading and drainage obligations (grade away from foundation—commonly 6 in over 10 ft or 2% slope), backflow prevention for misters, and ledgers/flashing rules for attached decks. Contact your city or county early and ask for plan‑check checklists for 'patio cover' and 'deck attachment.'
Next Articles
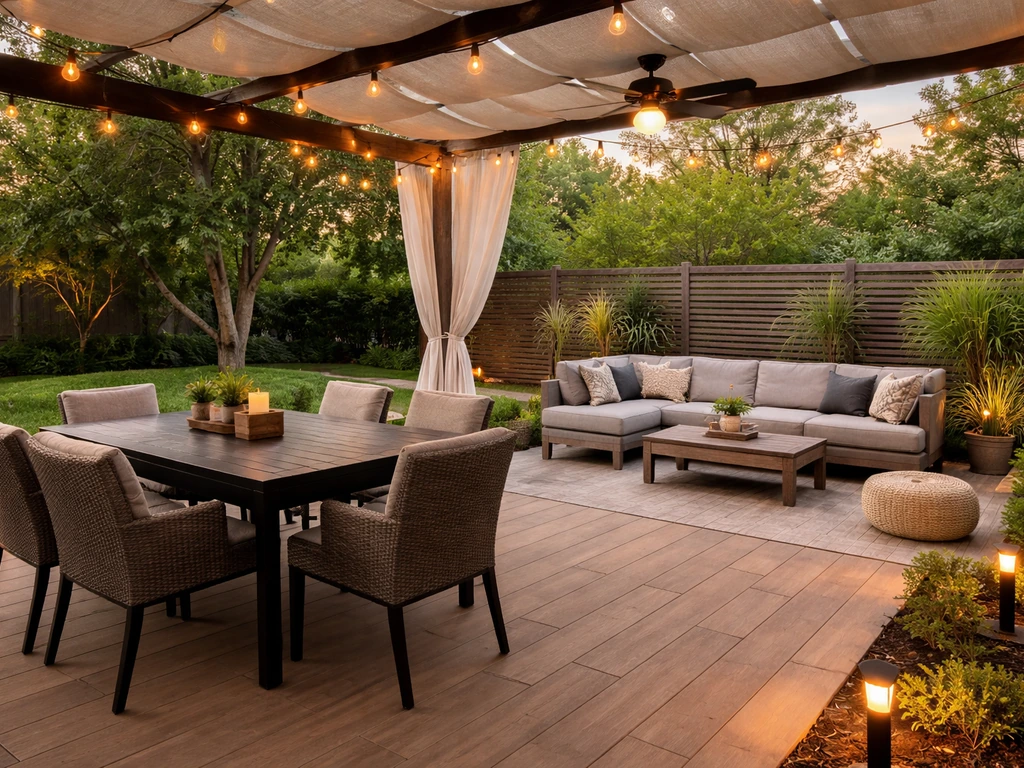
Best Back Patio Ideas: Layout, Upgrades, Costs, and DIY
Best back patio ideas with layouts, upgrades, costs, and DIY tips for flooring, shade, lighting, privacy, and hiring pro
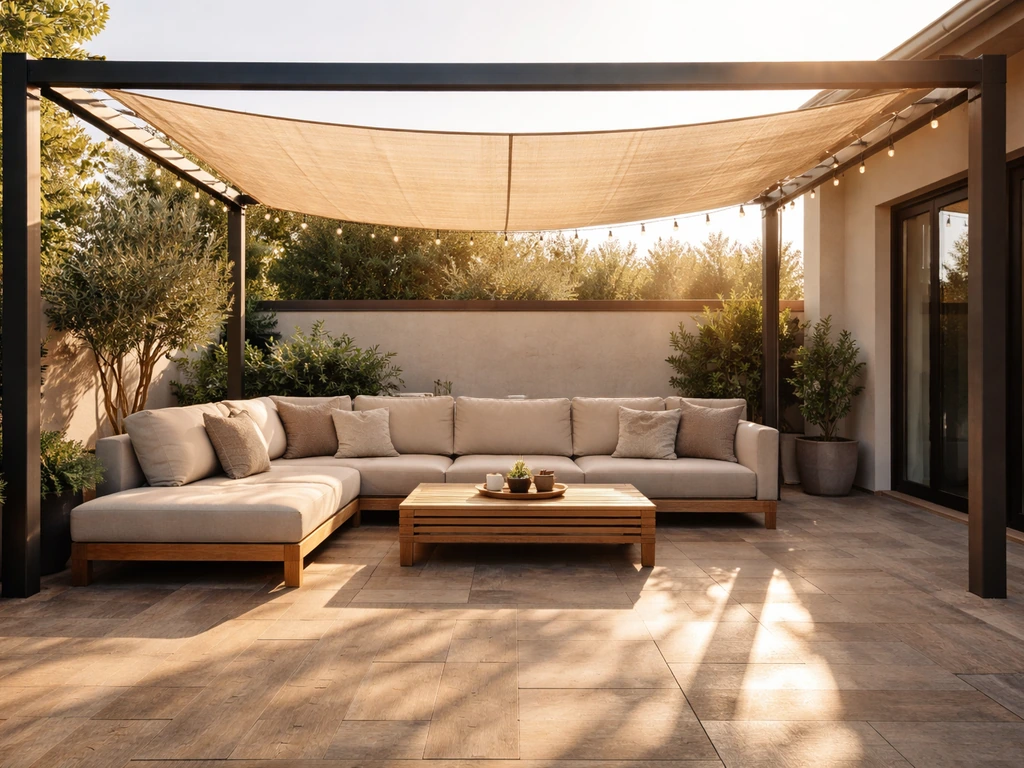
Top Patio Ideas: Covers, Layout, Materials, and Comfort Upgrades
Actionable top patio ideas: shade covers, layout, comfort upgrades, durable materials, and finish touches to plan fast.
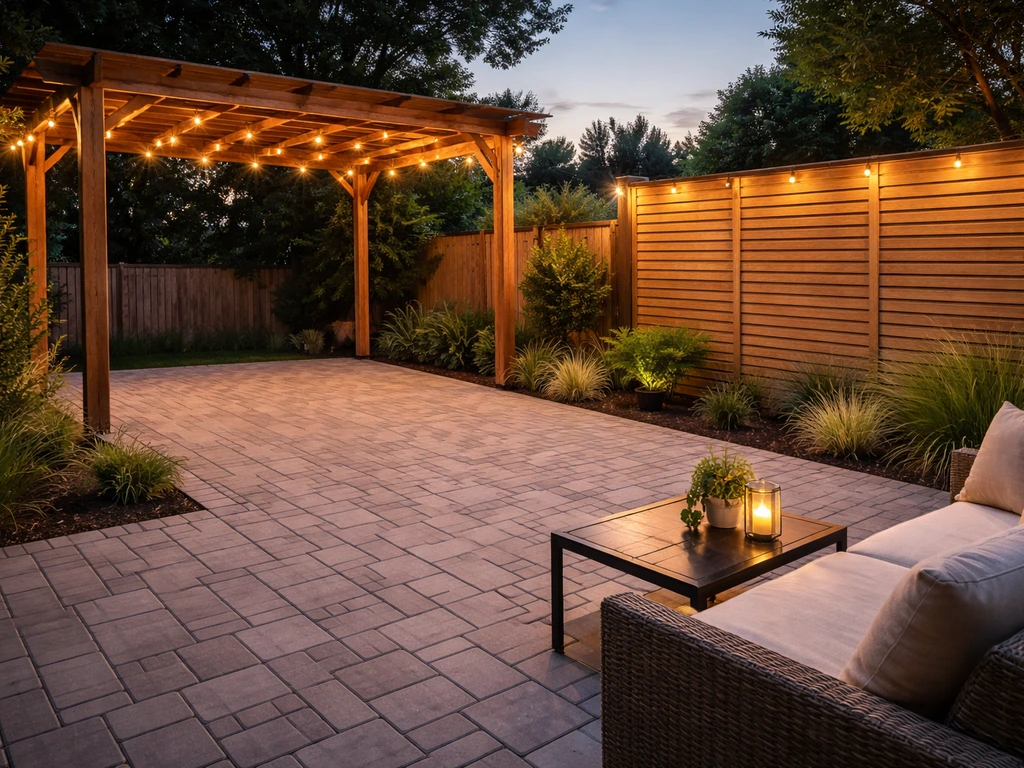
Do It Yourself Outdoor Patio Ideas: Build, Upgrade, Maintain
DIY outdoor patio ideas for planning, building, upgrading, and maintaining floors, shade, privacy, lighting, and decor.