The best back patio ideas start with your actual backyard, not a Pinterest board. If you know what you want to do out there (eat, hang out, cook, let the kids run), how much space you're working with, and what your climate throws at you, you can build a patio that gets used every single week. This guide walks you through layout, materials, shade, lighting, privacy, and costs so you can stop browsing and start planning.
Best Back Patio Ideas: Layout, Upgrades, Costs, and DIY

Phoebe Foster
5 Jul 2026
Start by sizing up your space and defining your goals
Before you look at a single material sample, spend 20 minutes standing in your backyard. Note where the back door lands, which direction the sun hammers down in the afternoon, whether the yard slopes, and where the grass naturally gets torn up by foot traffic. These details will shape every decision that follows.
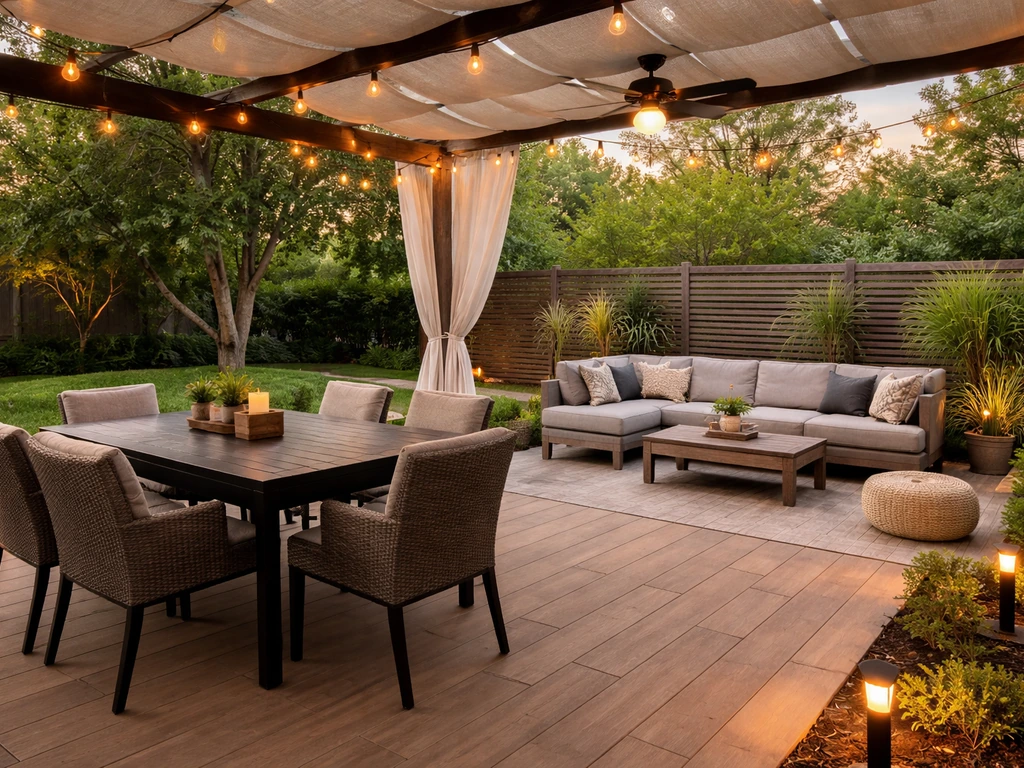
Then get clear on your primary use case. A patio optimized for weekend dinner parties looks completely different from one built for a morning coffee spot or a space where kids and dogs run wild. If you want inspiration before you plan the layout, backyard patio examples can help you picture how a dining setup and lounge space work together patio optimized for weekend dinner parties. Most homeowners are actually trying to do two or three things at once, which is fine, but you need to rank them. Ask yourself:
- Entertaining: Do you regularly host groups of 6 or more? You'll need generous table space and a clear traffic path from the house.
- Relaxing/lounging: Is this mostly a retreat for two or three people? A smaller, more intimate layout works better here.
- Outdoor cooking: A grill or outdoor kitchen needs its own dedicated zone with clearance from seating and proximity to the house for convenience.
- Kids and pets: You want a hard surface that's easy to hose off, with sight lines to the yard and minimal tripping hazards.
- Year-round use: If you want to use the space from spring through late fall (or all year in mild climates), shade and heating become critical from day one.
Also note your site constraints honestly. A 10x12 foot area outside a sliding glass door is a different project than a sprawling 400 square foot blank slate. If the yard slopes more than a few inches over the patio footprint, you'll need to factor in leveling or a raised deck alternative. Drainage matters more than most people realize: standing water on a finished patio almost always traces back to a base or grading problem that should have been addressed before a single paver or slab went down.
Think in zones, not just square footage
The single biggest upgrade you can make to any patio design is splitting it into two or more functional zones. A dining zone and a lounge zone, even if they share the same surface, feel intentional and finished. A single undivided slab with a table and some chairs just feels like furniture sitting on concrete.
Dining zone layout
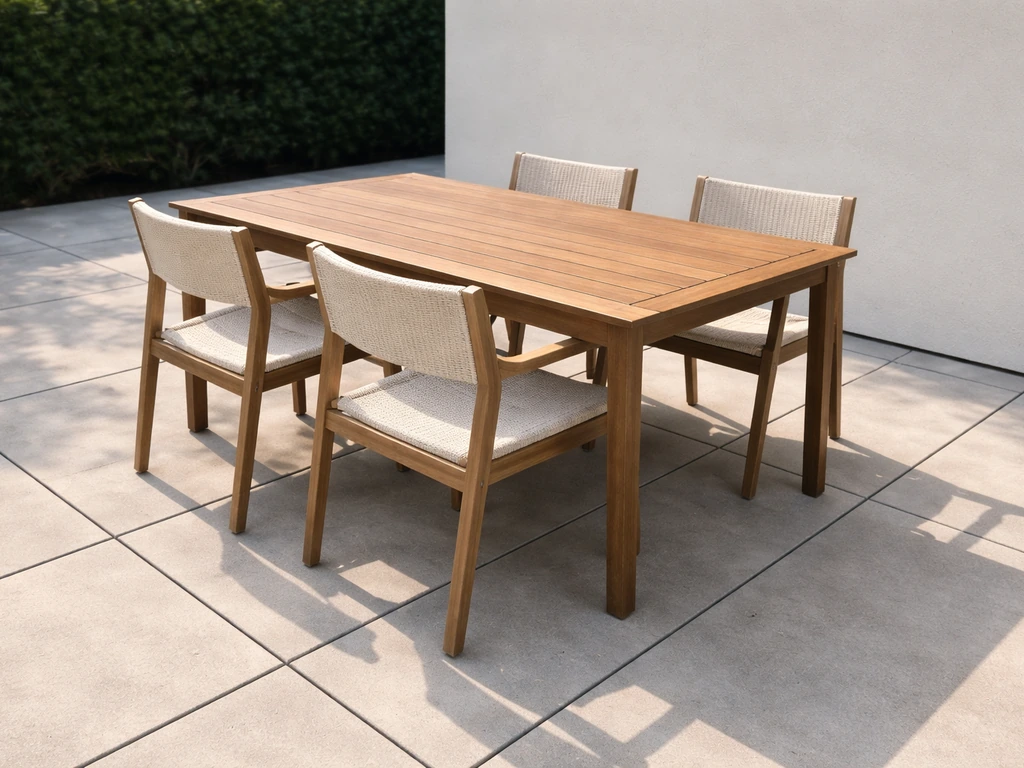
A dining table for four needs a minimum of 10x10 feet to allow comfortable chair pullout and a narrow walking path around the outside. For six people, bump that to at least 12x14 feet. Position the dining zone as close to the back door as practical so carrying food and drinks out is easy. If you have a grill or outdoor kitchen, keep it adjacent but not directly in the dining footprint so smoke and heat aren't blowing at guests while they eat.
Lounge and seating zone layout
A lounge area with a sofa, two chairs, and a coffee table comfortably fits in a 12x15 foot space. Anchor it with an outdoor rug to define the zone visually, even if the flooring is continuous. If you're working with a smaller overall patio, you can separate the zones using a low planter wall, a change in paver pattern or color, a pergola structure over just the dining area, or even just the placement of furniture. You don't need a hard barrier.
Traffic flow and access points
Leave at least 36 inches of clearance on the main path from the door to the yard. If you're planning a walkway to a fire pit, pool, or garden, route it along the edge of the patio so it doesn't cut through your seating area. This sounds obvious until you're looking at a layout and realize every path from the house to the yard runs through the middle of your coffee table arrangement.
Flooring and materials that actually hold up
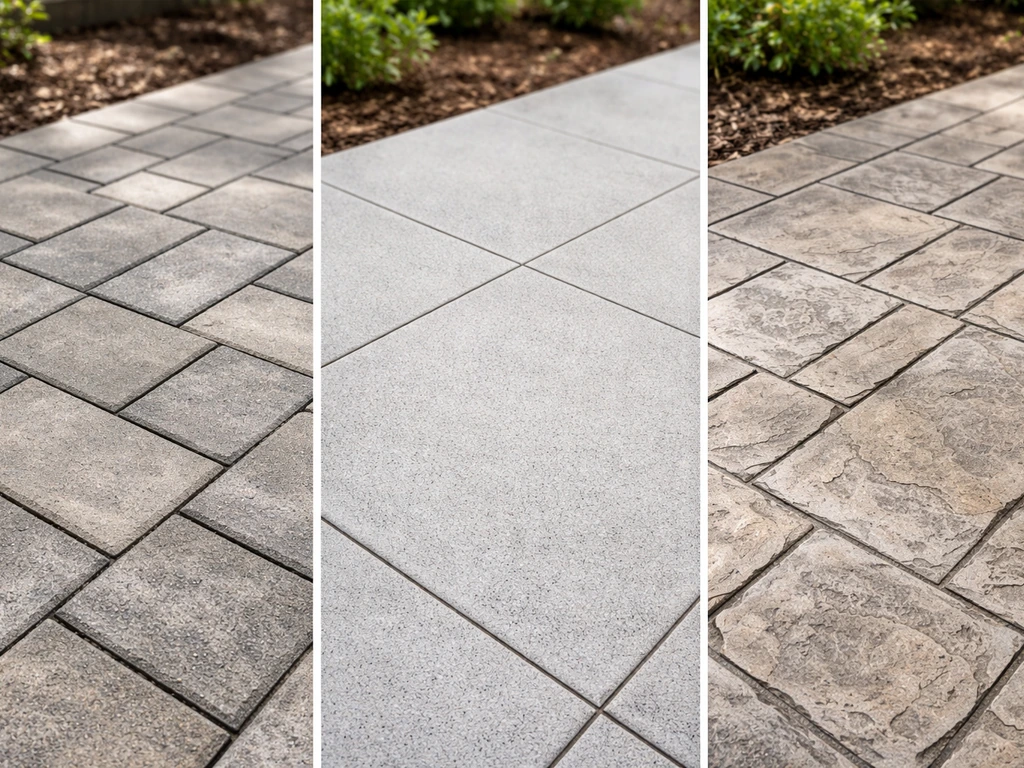
Your patio surface is where most of your budget goes, and it's the hardest thing to change later, so get this right. The best material depends on your climate, your soil conditions, your maintenance tolerance, and how much you want to spend upfront versus over time. Choosing the right deck or patio layout, materials, and comfort features helps you build some of the best backyard decks and patios for how you actually live.
| Material | Cost (installed, per sq ft) | Durability | Slip Resistance | Maintenance | Best For |
|---|---|---|---|---|---|
| Concrete pavers | $15–$30 | Excellent | Good (textured finish) | Low; resand joints every few years | Most climates, DIY-friendly |
| Poured concrete | $8–$18 | Good | Fair (add broom finish or sealer) | Low; may crack over time | Budget installs, simple layouts |
| Natural stone (flagstone, travertine) | $25–$50 | Excellent | Very good (natural texture) | Moderate; seal annually in some climates | Upscale looks, warm climates |
| Porcelain tile (outdoor-rated) | $20–$40 | Excellent | Good (rated R10/R11 for wet areas) | Very low; easy to clean | Mild climates, modern aesthetics |
| Composite/wood decking | $30–$60 | Good | Good (grooved surface) | Low-moderate; clean 1–2x per year | Raised patios, shade areas |
| Gravel or decomposed granite | $3–$8 | Moderate | Fair | Low; top off annually | Budget builds, casual spaces |
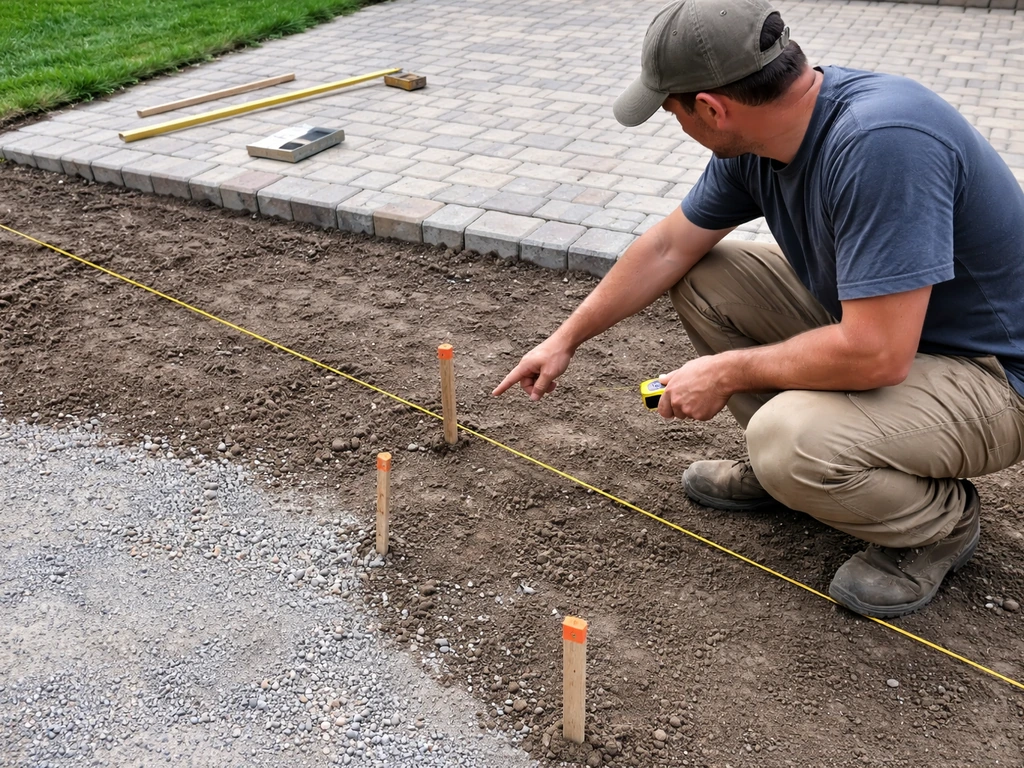
Concrete pavers are the most common recommendation for a reason: they're durable, relatively DIY-friendly, and individual pavers can be pulled and replaced if one cracks or a pipe needs access underneath. That said, a paver patio is only as good as its base. The surface you see is built on a multi-layer system: compacted gravel base, bedding sand, then the pavers themselves, finished with polymeric joint sand and edge restraints.
Skipping or skimping on any of those layers is how you end up with wobbly pavers and washed-out joints within a year or two. In freeze-thaw climates like the Midwest or Mountain West, the gravel base needs to be deeper (typically 6 to 8 inches) to resist frost heave. In warmer, stable-soil regions, 4 to 6 inches often suffices, but check local contractor recommendations for your specific soil type.
For slip resistance, avoid polished or glazed surfaces anywhere they'll get wet. Textured concrete pavers, natural flagstone, brushed concrete, and outdoor-rated porcelain with an R10 or higher slip rating all perform well. If you're in a region that gets rain or stays damp, this is not a place to compromise on aesthetics over safety.
Shade, comfort, and climate solutions worth the money
A beautiful patio that nobody uses because it's too hot, too exposed, or too cold for half the year is a wasted investment. Climate-specific comfort upgrades are the difference between a patio you use twice a summer and one that becomes a genuine outdoor room.
Shade options compared
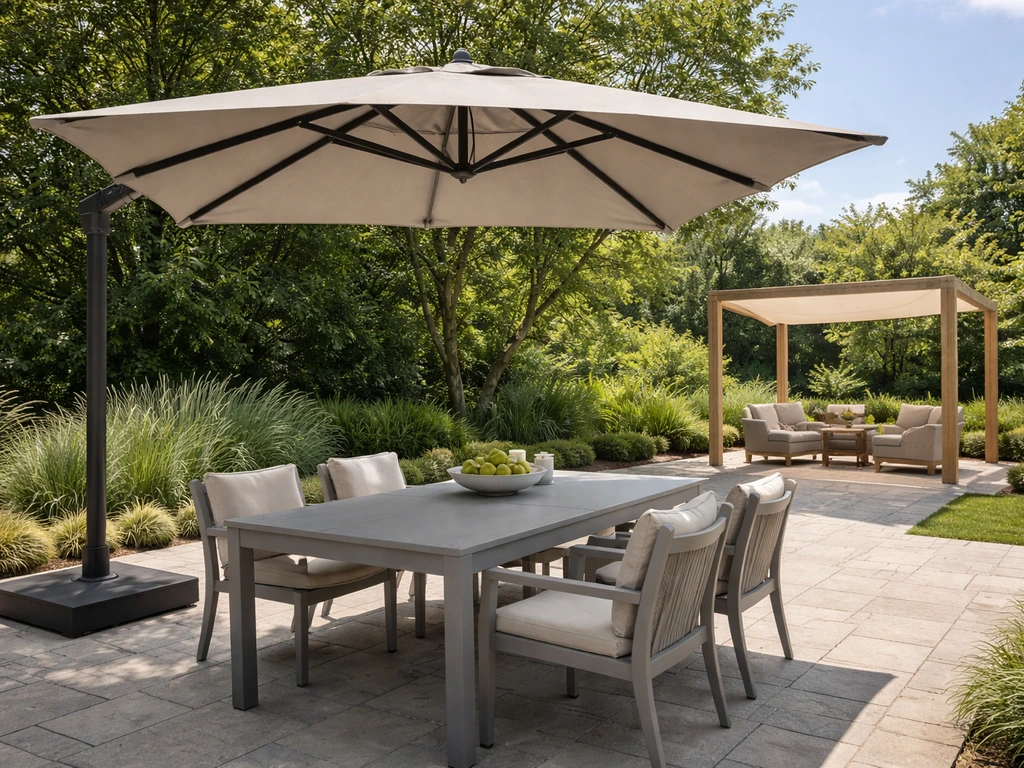
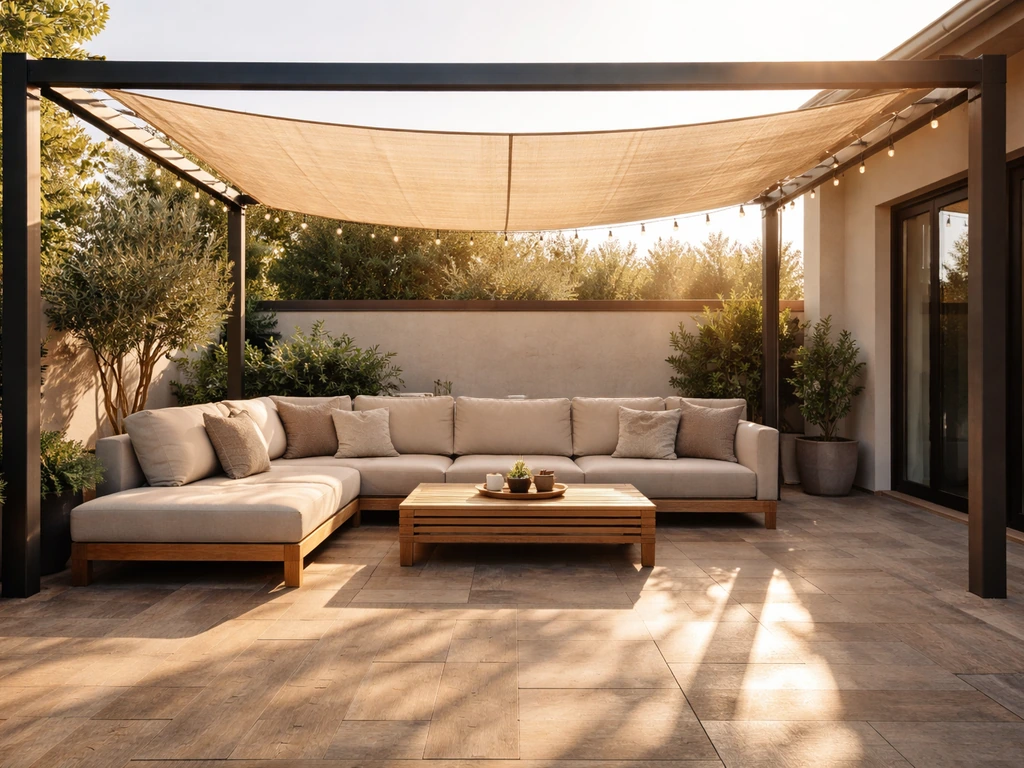
A large cantilever umbrella (9 to 11 feet) costs $150 to $500 and is the easiest entry point. It provides decent shade for a dining table but moves in wind and doesn't cover a lounge zone well. A pergola, either freestanding or attached to the house, is the upgrade most homeowners eventually wish they had started with.
A basic DIY kit pergola runs $1,500 to $4,000 in materials; a custom-built attached pergola with a louvered or solid roof can run $8,000 to $20,000 or more installed. If you're in a hot climate like Texas, Arizona, or the Southeast, a shade sail or a polycarbonate-roofed pergola with a ceiling fan drops the perceived temperature significantly.
In rainy Pacific Northwest or Midwest climates, a solid roof or motorized louvered panels are worth the premium because they extend your usable season dramatically.
Cooling: fans and misters
A hardwired outdoor ceiling fan under a pergola or covered patio typically costs $150 to $400 for the fan plus $100 to $200 for an electrician to wire it. In dry heat climates, a high-pressure misting system ($200 to $800 for a permanent setup) can drop temps by 20 to 30 degrees Fahrenheit and makes an otherwise brutal afternoon genuinely comfortable. In humid climates, misters add to the stickiness and aren't worth it. Portable misting fans ($80 to $200) offer a middle ground if you want to try before committing.
Heating for shoulder seasons
If you're in a climate where evenings cool off in spring and fall, a propane or natural gas patio heater ($150 to $400 for a freestanding unit, $500 to $2,000 for a wall-mounted or ceiling-mounted infrared heater) can add two to three months of usable time to your patio season. Infrared heaters mounted overhead are more efficient and less obtrusive than freestanding mushroom heaters. A fire pit, either gas or wood-burning, serves double duty as a heating source and a gathering focal point, and is one of the most consistently used patio additions homeowners report.
Lighting, privacy, and the design details that make it feel finished
Outdoor lighting layers
Good patio lighting uses three layers: ambient, task, and accent. Ambient lighting (string lights, overhead fixtures, lanterns) sets the mood and lets you use the space after dark without harsh glare. String lights strung across a pergola or between posts are inexpensive ($30 to $100 for a 48-foot strand), easy to DIY, and immediately transform the feel of a patio.
Task lighting goes where you actually need to see things clearly: over a grill, above a dining table (a dedicated outdoor pendant or a ceiling fan with a light kit), and near steps or level changes. Accent or path lighting at ground level defines edges, improves safety, and adds depth.
Solar-powered path lights are cheap and zero-effort but dim and unreliable; low-voltage LED landscape lighting wired to a transformer ($200 to $600 for a basic system) looks significantly better and lasts much longer.
Privacy solutions
Privacy is one of the most underestimated upgrades on a back patio. If you want that inviting feel, focus on the details that improve comfort, lighting, and privacy so people naturally want to stay outside how to make patio more inviting. If you feel like you're on display to neighbors every time you sit down, you won't use the space. Options range from quick and cheap to structural.
Tall outdoor curtain panels on a pergola or tension rod system ($50 to $200) give immediate privacy and a finished look. Privacy screens, either freestanding lattice panels or decorative metal screens ($100 to $500 each), define zones and block sightlines without the permanence of a fence. For a longer-term solution, fast-growing evergreen hedges like arborvitae or bamboo (in contained planters to prevent spreading) create a living privacy wall within two to four seasons.
A cedar or composite privacy fence section costs $25 to $50 per linear foot installed and is the most permanent fix.
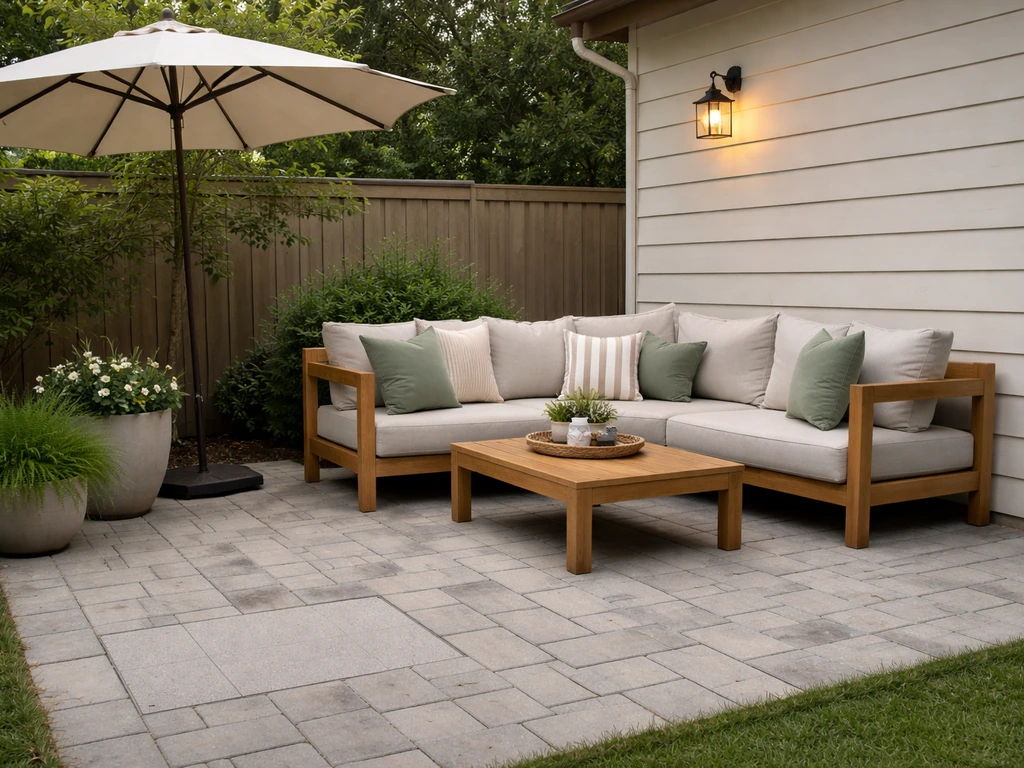
Decor and finishing touches
A patio looks unfinished when it's missing a few key visual anchors: a defined rug under the lounge furniture, consistently styled cushions, at least one large planter or potted tree, and wall art or a vertical element on any exposed wall or fence. You don't need to spend a fortune here, but cohesion matters more than price. Pick one material palette (say, natural wood tones with charcoal and white) and stick to it across furniture, cushions, and planters.
That consistency is what separates a space that looks put-together from one that looks like a random assortment of outdoor stuff. If you want to take the glamorous route further, layering textures, statement lighting, and bold planters can elevate the space significantly. If you want it to read as glamorous, focus on a cohesive palette, layered lighting, and statement planters rather than random upgrades glamorous patio.
What to DIY, what to hire out, and what it costs
The honest answer is that most patio projects sit in a middle zone: some parts are genuinely DIY-friendly and save real money, while others are worth paying a pro to avoid expensive mistakes.
| Task | DIY Feasibility | Avg DIY Cost | Avg Pro Cost | Notes |
|---|---|---|---|---|
| Paver patio installation (base + pavers) | Moderate (2–3 weekend days for 200 sq ft) | $1,500–$3,000 materials | $4,000–$10,000+ | Base prep is critical; errors compound |
| Poured concrete slab | Low (requires forms, finishing skill) | $1,000–$2,500 materials | $3,000–$8,000 | Hire a pro for most homeowners |
| Pergola (kit) | High (modular kits designed for DIY) | $1,500–$4,000 materials | $5,000–$12,000 | Good DIY value if you can follow instructions |
| String lights / basic lighting | High (no electrical needed) | $100–$300 | $300–$600 | Easy weekend project |
| Low-voltage landscape lighting | Moderate | $200–$600 materials | $500–$1,500 | DIY-friendly with a basic transformer kit |
| Ceiling fan (hardwired) | Low (requires electrical box and wiring) | $150–$400 fan | $300–$600 installed | Hire an electrician for safety |
| Privacy fence section | Moderate | $500–$1,500 materials | $1,500–$4,000 | DIY saves significantly here |
| Planting / landscaping | High | $200–$1,000 plants | $1,000–$5,000+ | DIY is very practical for most plantings |
If budget is tight, prioritize the surface and base first (it's the most expensive to redo), then add comfort and decor incrementally over time. A properly installed paver patio with simple furniture and string lights looks better than a poorly installed premium patio surrounded by expensive accessories. For most homeowners doing a full back patio build, a realistic all-in budget for a 300 to 400 square foot patio with basic furniture, a pergola kit, and lighting runs $8,000 to $20,000 DIY-assisted, or $15,000 to $40,000 hiring everything out, depending heavily on your region and material choices.
How to find a good contractor and plan your timeline
If you're hiring out the patio installation, the contractor you choose matters as much as the materials. A bad base install, poor drainage planning, or incorrectly placed edge restraints can result in a patio that needs repairs within one to two years, which wipes out any money you saved by going with the lowest bid. One contractor guide for paver patio repair also flags erosion of paver joint sand as a major cause of repairs, noting joint issues can show up within 1 to 2 years when a patio is installed or maintained poorly edge restraints, drainage planning, and base installation problems can lead to patio repairs within one to two years.
What to look for in a patio contractor
- Ask for photos of completed projects that are 3 to 5 years old, not just recent installs. Settled patios show whether the base work holds up.
- Request a written description of the base preparation: gravel depth, compaction method, drainage plan, and edge restraint type. A contractor who can't answer these questions specifically is a red flag.
- Get at least three bids. If one is significantly lower than the others, ask exactly where they're cutting cost (usually the base).
- Check for licensing and insurance in your state. Verify reviews on Google, Houzz, or Angi, looking specifically for comments about how the finished patio held up over time, not just the experience during the job.
- Ask whether they pull permits for structural work (pergolas, walls, electrical). Skipping permits can cause problems when you sell the house.
- Get a warranty in writing, specifically for base settling and joint failure, not just material defects.
Realistic project timeline
For a mid-size patio project, plan for more lead time than you'd expect. In most markets, reputable hardscape contractors book 6 to 12 weeks out during the busy spring and summer season. Permitting for structural elements like pergolas or retaining walls can add 2 to 6 weeks depending on your municipality. A realistic planning-to-completion timeline looks something like this:
- Weeks 1–2: Finalize your layout, get measurements, and define your goals and budget.
- Weeks 2–4: Request bids from three or more contractors; review proposals and check references.
- Weeks 4–6: Select your contractor, finalize material choices, and sign a contract with a clear scope of work.
- Weeks 6–10: Permit application and approval (if required).
- Weeks 10–14+: Installation. A 300–400 sq ft paver patio typically takes 3 to 5 days of actual work; pergola installation adds 1 to 2 days.
- After completion: Allow polymeric joint sand to cure fully (usually 24 to 72 hours) before heavy use. Add furniture, lighting, and decor as a final phase.
If you're planning for a summer entertaining season, start this process in late winter or early spring to avoid the mid-summer rush. And if you're in the middle of a project right now and just need quick wins while the bigger work is pending, start with string lights, a few large planters, and a quality outdoor rug. Those three changes alone can make a plain slab feel like an actual outdoor room while you plan the rest.
FAQ
How do I plan patio dimensions if I am not sure where furniture will go?
Measure from the back door threshold outward, then add the chair pullout distance to account for how far people actually move when they stand. For dining, that usually means building the dining zone first, then sizing the rest around it so you do not end up with a walkway that cuts through the center of the furniture layout.
What are common layout mistakes that cause patio problems later?
If you are installing pavers, plan joints and cuts so the full-size pavers do most of the work. Avoid ending up with narrow “sliver” strips along the house line, because those are harder to keep level and more likely to loosen at edges if the base settles.
Can I add weight features later, like a grill island, planters, or a fire pit?
Yes, but only if the underlying base is designed for it. A patio can tolerate some cracking or movement, but if you place heavy planters, a grill, or an outdoor kitchen on an area with inadequate base depth or poor compaction, you can get uneven settling and rocking.
Why does my patio get standing water even after grading seemed fine?
Start by checking how water leaves your property, not just the patio. If downspouts or roof runoff dump toward the patio, you may need to redirect them or create swales, otherwise the patio base can get saturated and the surface can heave or sink even with good pavers.
Are solar lights enough for a back patio?
Don’t rely on solar path lights for main safety needs. Use them only as decoration, then add low-voltage or exterior-rated hardwired lighting where people walk, especially along steps, level changes, and the path from the door to the yard.
How should I adjust a paver patio build for freeze-thaw climates?
If your freeze-thaw cycle includes frequent thawing, ensure you use polymeric joint sand and correct base depth for your region. Also keep edges constrained with proper restraints, because movement at the perimeter is a common cause of pavers shifting.
What maintenance should I expect with concrete pavers over 5 to 10 years?
For ongoing upkeep, budget time for joint sand re-leveling and occasional weed treatment. Polymeric sand can reduce weed growth, but it still needs correct installation and periodic inspection, especially after heavy rain seasons.
What is the best privacy approach if my neighbors can see from the side, not the back?
For privacy, consider viewing angles in different positions, not just whether neighbors can “see” you. Many people feel exposed from side angles or when standing at the grill, so screen placement should match where you spend time most.
Can I rely on an umbrella instead of building shade structures?
Yes, but choose based on your layout. If you plan a dedicated dining shade, a cantilever umbrella can work, but for a lounge zone you generally need a larger cover or a pergola with a roof option, otherwise the most-used seats stay unshaded.
How do I handle wind and smoke with the patio layout and shade?
Do a quick “wind test” before buying: in the afternoon, stand where the dining table will be and observe how umbrellas swing and how gusts push heat and smoke around. If your grill area is upwind, you can reduce guest discomfort by keeping cooking close but not directly under the shade cover.
What should I buy first if I want quick patio improvements on a limited budget?
The most budget-friendly upgrade with the biggest impact is defining zones with a rug and consistent furniture placement, then adding lighting that matches your pathways. Hardscaping upgrades like pergola roofs or raised decks tend to cost more and should come after you confirm your layout works.
Do I need permits for pergolas, privacy screens, or paver patios?
Check your local rules before ordering a pergola or privacy fence section, especially height, setbacks, and roof coverage. Even if the hardware is DIY-friendly, permitting timelines can affect your overall schedule, and some areas require setbacks along property lines.
What questions should I ask a patio contractor to avoid cheap-install problems?
If the contractor offers the lowest bid, ask specifically about base layer thickness, compaction method, drainage plan, and edge restraint type. A detailed written scope is the best defense, because “surface-level” quotes often ignore what actually prevents sinking and shifting.
Should I plan electrical and lighting wiring before the patio surface is installed?
Consider building the base correctly first, then add comfort later in stages. Plan for electrical routes early if you want lights, fans, or outlets, because retrofitting wiring after the finish surface goes down can be costly.
Can I start “living” on the patio before construction finishes?
In most cases, yes, especially if you already know where you want the dining zone and main path. You can use string lights, planters, and a rug for immediate cohesion while you wait for larger structural elements, but finalize the hardscape layout so furniture placement stays consistent when construction completes.
Next Articles
Top Patio Ideas: Covers, Layout, Materials, and Comfort Upgrades
Actionable top patio ideas: shade covers, layout, comfort upgrades, durable materials, and finish touches to plan fast.

Do It Yourself Outdoor Patio Ideas: Build, Upgrade, Maintain
DIY outdoor patio ideas for planning, building, upgrading, and maintaining floors, shade, privacy, lighting, and decor.
Quick Fix Patio Ideas for Instant Comfort and Style
Quick fix patio ideas for fast comfort and style: cleanups, repairs, shade, flooring tweaks, and safe upgrades on any bu