Western red cedar is the <a data-article-id="15E41854-EC57-41C5-9486-5880542A346C"><a data-article-id="DB59E4B9-BA69-484D-BF46-85996352A4F0">best all-around wood for an outdoor patio ceiling</a></a>. If you want the simplest answer, western red cedar is often considered the <a data-article-id="EA3DAD4F-C04E-40BA-903A-C4FAEF84ABDB">best lumber for patio cover</a> ceilings. It resists rot and insects naturally, stays dimensionally stable in humid conditions, takes finishes well, and is widely available at most lumber yards. Redwood and cypress are close alternatives if you can find them locally. For wet climates or coastal areas, tropical hardwoods like teak or ipe outperform them all on durability, but the cost jumps significantly. If budget is the main concern, pressure-treated pine (rated UC3B) finished with a quality penetrating oil is a solid, practical choice that most homeowners miss.
Best Wood for Outdoor Patio Ceiling: Picks, Pros, Installation

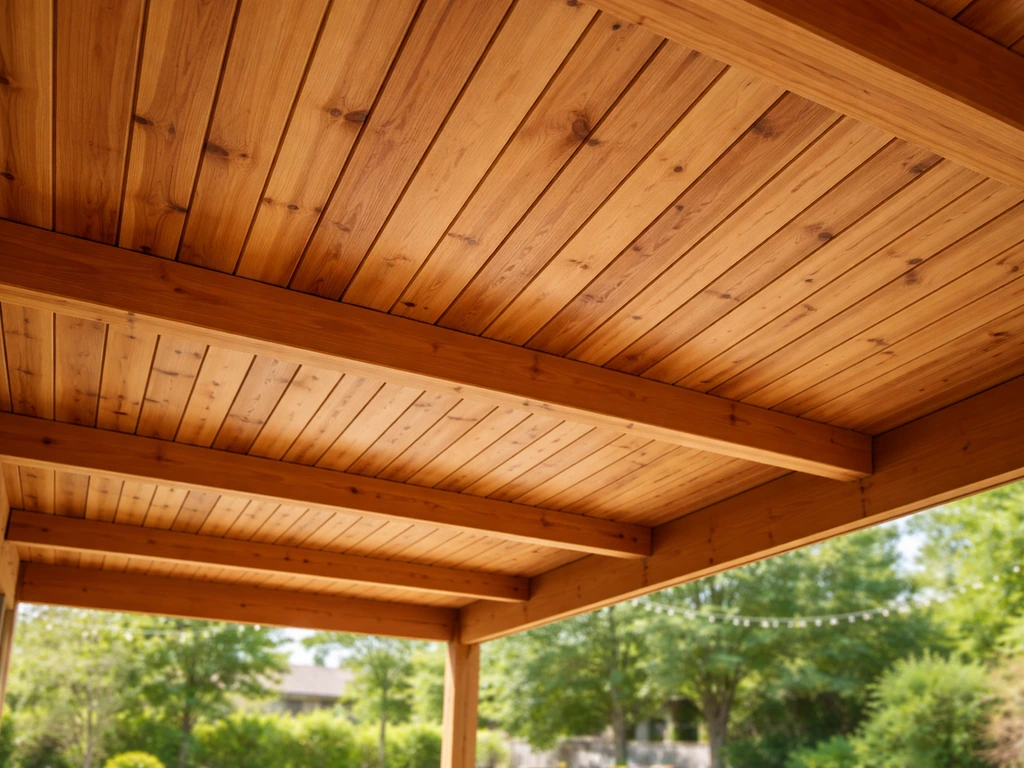
Best wood choices for outdoor patio ceilings

Patio ceilings are a unique challenge compared to decking or vertical siding. That same big-picture thinking is useful when choosing the best wood for patio deck, but decking faces different wear and moisture conditions than a ceiling. The surface faces upward or at a slight angle, which means it sheds water slowly, traps moisture in joints, and gets prolonged drying time after rain. That changes which species actually hold up. Wood that works great for a deck floor might cup, rot from above, or peel its finish within two seasons when used on a ceiling.
Western red cedar is the most popular choice for good reason. Its heartwood sits in the naturally durable category according to the USDA Forest Products Laboratory's Wood Handbook, meaning it resists fungal decay without any chemical treatment. It's also lightweight, easy to cut and fasten, and accepts stain or oil finishes evenly. You'll find it at most big-box stores and specialty lumber yards in tongue-and-groove profiles that work especially well for ceilings.
Redwood shares nearly all of cedar's qualities and actually edges it out slightly on stability in humid climates. The issue is availability. If you're outside the Pacific Northwest or California, getting clear-grade redwood can be expensive and involves shipping. Worth considering if it's accessible to you, but don't go out of your way to chase it.
Cypress, especially old-growth or heartwood-grade, is the go-to pick across the Gulf Coast and Southeast. It's incredibly rot-resistant because of naturally occurring cypressene oil, handles humidity exceptionally well, and is usually cheaper than cedar in those regions. If you're in Florida, Louisiana, or coastal Texas, cypress is often the smartest pick both on performance and price.
Teak and ipe are the premium tier. Both are tropical hardwoods with outstanding natural durability, extremely high density, and resistance to rot, insects, and UV degradation that outclasses domestic species. Ipe in particular is so dense it barely moves with moisture swings. The tradeoffs: cost is significantly higher (ipe runs $8 to $15+ per linear foot for 1x6 depending on grade and source), it requires carbide-tipped blades, and pre-drilling is mandatory or you'll split every board. Teak is slightly easier to work with and accepts oil finishes readily. Both are worth the investment on a high-end covered patio that you want to last 30+ years without replacing boards.
Pressure-treated pine is the budget workhorse. It won't win any beauty contests raw, but finished with a good penetrating oil and installed with proper ventilation gaps, it performs respectably for a ceiling. You need to specify UC3B treatment (above-ground, exposed to weather) when purchasing. Don't grab general framing lumber treated for ground contact, since that's overkill chemically and harder to work with.
Durability ratings and what affects lifespan
The USDA Forest Products Laboratory classifies wood heartwood into decay resistance categories ranging from very resistant down to non-resistant. For a patio ceiling, you want at least a 'moderately resistant' species or a pressure-treated option. The main threats to lifespan are moisture, rot fungi, insects, and UV degradation, and they rarely act alone.
| Wood Species | Decay Resistance | Insect Resistance | Dimensional Stability | Relative Durability |
|---|---|---|---|---|
| Western Red Cedar | High | Good | Good | Excellent |
| Redwood | High | Good | Very Good | Excellent |
| Cypress (heartwood) | High | Good | Good | Excellent |
| Ipe | Very High | Very High | Excellent | Superior |
| Teak | Very High | High | Excellent | Superior |
| PT Pine (UC3B) | High (treated) | Moderate | Fair | Good |
| Douglas Fir (untreated) | Low-Moderate | Low | Moderate | Poor-Fair |
Moisture is the main enemy
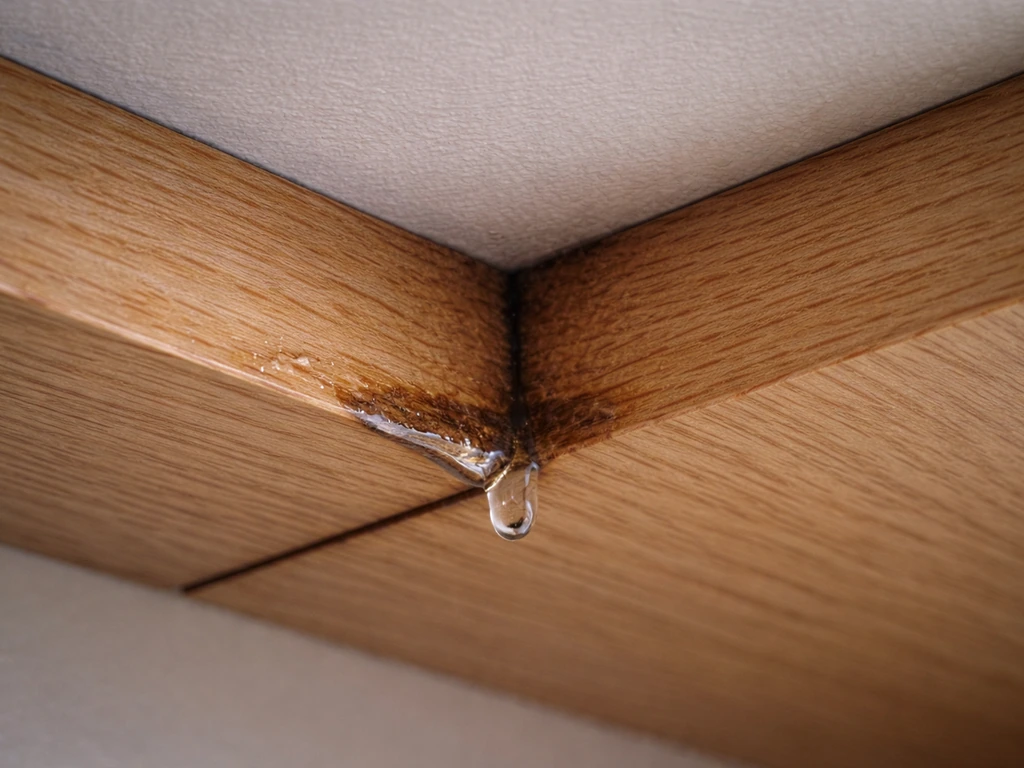
On a ceiling, water doesn't drain away quickly. It pools in joints, wicks up into end grain, and sits in any gap smaller than about 1/8 inch through capillary action. Building science research shows capillary transport in tight joints can pull water deep into assemblies, wetting surfaces that visually look protected. That's why joint design and spacing matter as much as species choice.
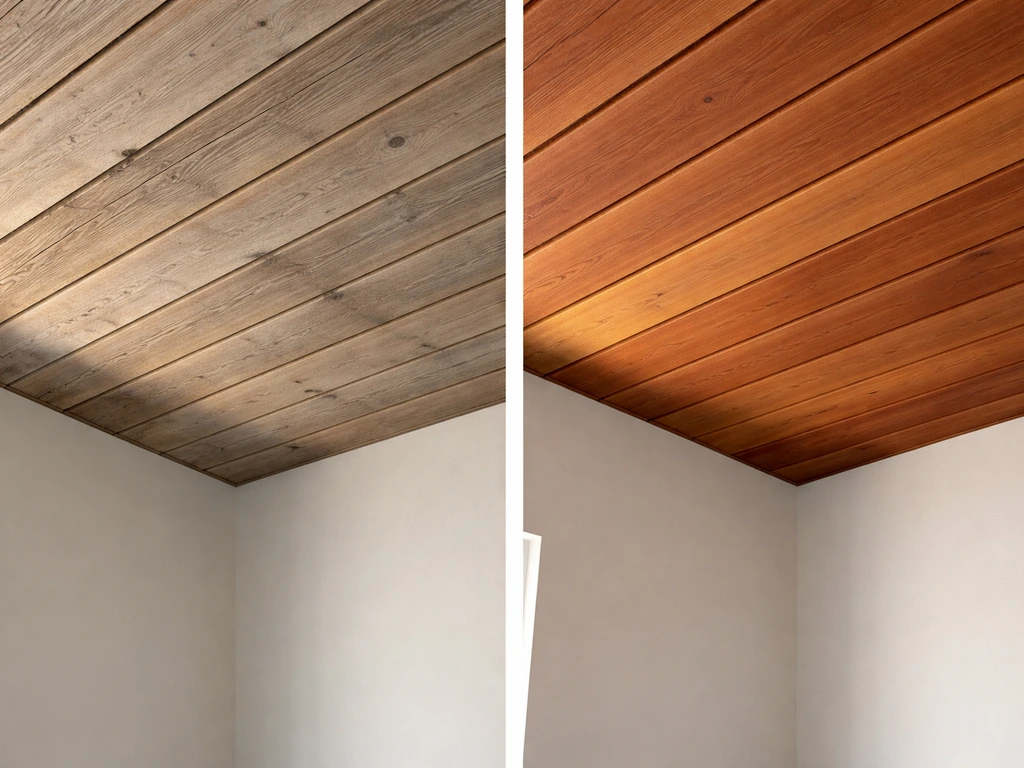
Rot, insects, and UV
Rot fungi need moisture above about 20% wood moisture content to get established. Once moisture traps behind boards with no airflow, even naturally durable species can start to degrade from the back face where you can't see it. Insects, particularly termites in warmer climates, will attack any species that isn't naturally resistant or chemically treated. UV degradation breaks down lignin on the surface, causing graying and surface checking that eventually opens pathways for moisture. A good UV-blocking finish slows this dramatically.
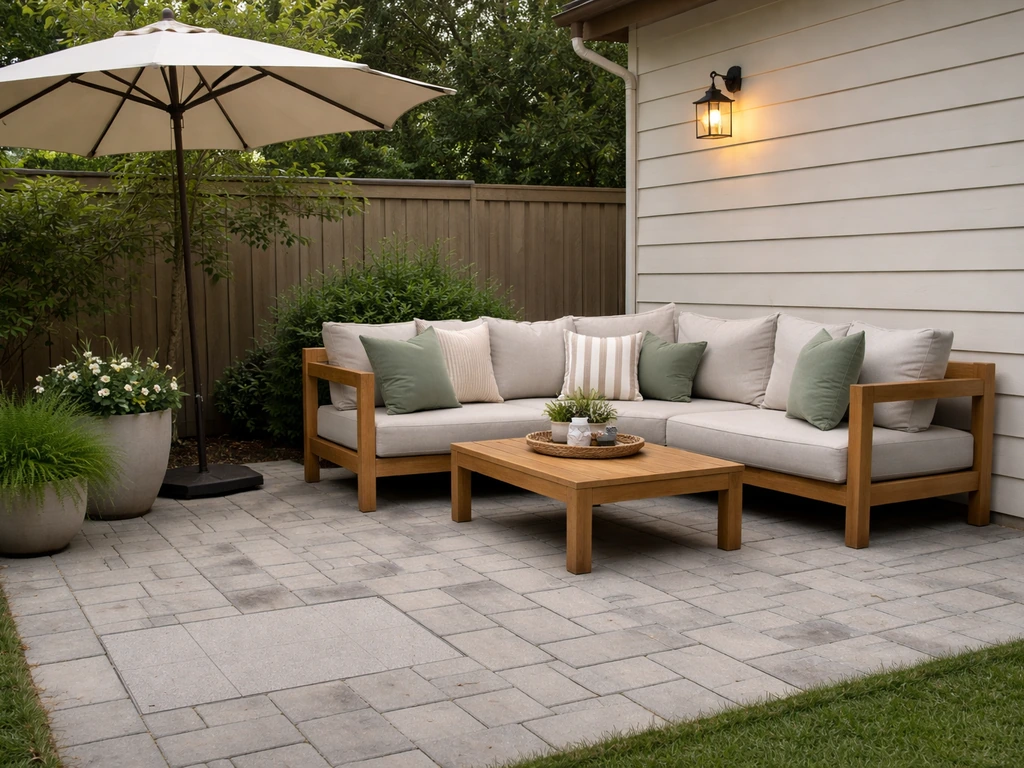
Best wood species by climate and ceiling exposure
The 'best' wood shifts depending on where you live and how exposed the ceiling actually is. A fully covered pergola ceiling in Phoenix has almost nothing in common with a partially exposed patio ceiling in coastal Georgia. Here's how to match species to your real conditions.
Hot and dry climates (Southwest, inland California, Texas summers)
UV is the biggest threat here, not moisture. Western red cedar handles UV well when finished, but any wood will gray and check if left unfinished in intense sun. In Phoenix or Las Vegas, even a 'covered' patio ceiling gets significant reflected UV and heat. Cedar or redwood with a quality UV-inhibiting penetrating oil finish is a strong choice. Re-apply the finish every 1 to 2 years. Pressure-treated pine works fine here too since rot pressure is lower, but it still needs finishing to prevent checking from the heat.
Humid climates (Southeast, Gulf Coast, Midwest summers)
Rot and mildew pressure are high. Cypress is the standout pick in the Southeast both on performance and value. Cedar works well everywhere in this region too. Pressure-treated pine is completely reasonable if budget is a concern, but finish it properly. Avoid untreated fir or pine entirely in high-humidity climates. This is also the zone where proper back-ventilation of the ceiling boards matters most.
Coastal and marine environments
Salt air accelerates both wood degradation and fastener corrosion. If you're within a mile or two of the ocean, step up to ipe, teak, or at minimum heartwood cypress. The finish needs a mildewcide package and re-application every year in heavy salt environments. Fastener selection becomes critical here, stainless steel only (more on that below). USDA FPL finishing guidance specifically notes marine-exposed wood needs more frequent maintenance than inland applications.
Covered vs. open-to-weather ceilings
A fully weatherproofed patio roof that prevents any rain contact changes the calculus. If you are building a complete roof system, also check what the best wood for patio roof framing is, since ceiling planks and the support structure often call for different choices. Under a solid roof that keeps the ceiling truly dry, you can use less inherently durable species because moisture exposure is minimal. Cedar or finished fir both work in this application. If the ceiling has any exposure to rain, direct or windblown, treat it like full outdoor service and choose accordingly.
Installation tips: sealing, fastening, ventilation, and flashing

Getting the species right is only half the job. Poor installation defeats expensive wood fast. These are the details that separate a ceiling that looks good for 20 years from one that starts cupping and peeling in three.
Prep and sealing before installation
Seal all four sides and both ends of every board before installing, especially the back face and end grain. End grain absorbs moisture many times faster than face grain, and once it's against a joist you can't reach it. A penetrating oil finish like FLOOD CWF-OIL or Owatrol Textrol applied to raw wood before install gives you protection on surfaces that will be permanently inaccessible. Film-forming finishes (paints and solid stains) on back faces trap moisture rather than letting it breathe, so avoid them on hidden surfaces.
Fasteners: don't cheap out here
Ceiling boards need corrosion-resistant fasteners. Period. For most species, hot-dip galvanized screws or stainless steel work well. For pressure-treated wood specifically, Simpson Strong-Tie and other fastener manufacturers are clear that hot-dip galvanized is the minimum, and stainless steel is the better option in wet or coastal conditions. Standard zinc-plated or electroplated screws will rust through within a few years in pressure-treated wood, leaving ugly streaks and structurally compromised connections. For tropical hardwoods like ipe, stainless is mandatory and pre-drilling every hole prevents splitting.
Ventilation gaps and board spacing
Leave a gap of at least 1/8 inch between boards. This does two things: it allows the wood to expand without buckling when humidity rises, and it prevents the tight-joint capillary wicking that pulls moisture deep into assemblies. Building science research shows that gaps smaller than 1/8 inch are where capillary transport becomes significant. An air space behind the boards (a standoff detail where boards attach to furring strips rather than directly to structure) takes this further by giving moisture a path to drain and dry rather than trapping behind the wood.
Flashing and water management
Anywhere a ceiling meets a wall, a post, or an overhang transition, water can run behind the wood and get trapped. Metal flashing at these intersections diverts water away before it contacts wood. This is especially critical at the house wall connection. A common failure I see is wood butted tight against stucco or siding with no flashing, the wall sheds water directly behind the first few ceiling boards, and that's where rot starts. Caulk alone is not a substitute for flashing, it shrinks and cracks within a couple of seasons.
Cost comparison and budget-friendly alternatives to solid wood
Solid wood isn't the only option. Composite materials and wood alternatives have improved significantly and deserve consideration if budget or maintenance time is a concern. Here's an honest comparison of what you're looking at in terms of material cost and long-term value.
| Material | Approx. Material Cost (per sq ft) | Maintenance Level | Expected Lifespan | Best For |
|---|---|---|---|---|
| Western Red Cedar | $3–$6 | Moderate (re-finish every 2–3 yrs) | 20–30 years | Most climates, balanced performance |
| Redwood | $4–$8 | Moderate | 25–35 years | West Coast, premium look |
| Cypress (heartwood) | $3–$6 | Moderate | 20–30 years | Southeast, Gulf Coast |
| Ipe | $8–$15+ | Low-Moderate (oil annually) | 40–50+ years | Coastal, premium builds |
| Teak | $10–$20+ | Low (oils naturally) | 40+ years | High-end covered patios |
| PT Pine (UC3B) | $1.50–$3 | Moderate (finish required) | 15–25 years | Budget builds, inland climates |
| PVC / Composite Soffit Panels | $2–$5 | Very Low (clean only) | 25–40 years | Zero-maintenance priority |
| Fiber Cement Panels | $2–$4 | Low (paint every 5–7 yrs) | 30+ years | Budget, no rot/insect concern |
PVC and composite soffit panels are worth a serious look if you hate maintenance. They don't rot, don't attract insects, don't need sealing, and won't warp. The tradeoff is that they don't look like real wood up close, and some cheaper options feel noticeably hollow or plastic. So, if you see videos or marketing that claim live edge wood patios are a no-problem solution, it helps to look at how that irregular slab is finished, sealed, and protected from moisture exposure. Mid-range composite products have gotten much better at mimicking wood grain, though. If you're covering a large ceiling and want it looking good with minimal upkeep, composite is legitimately the smart choice.
Fiber cement panels are another underrated option. They paint well, resist all biological threats, and hold up to moisture with no swelling or rot. The main drawbacks are weight (they need more structural support) and the fact that cut edges need to be sealed and painted before installation or they'll absorb moisture. For a covered patio ceiling where you want a painted finish anyway, fiber cement is often the most cost-effective long-term pick.
It's worth noting that the choices for a patio ceiling overlap with but differ from what you'd pick for a patio deck or patio cover framing. It's worth noting that the choices for a patio ceiling overlap with but differ from what you'd pick for a patio deck or patio cover framing, and if you want the practical starting point, see the best wood for patio cover guidance. Decking prioritizes traction and compressive strength under foot traffic. Patio cover framing (the structural beams and rafters) needs different strength grading. The ceiling is the aesthetic, finished layer, which is where species appearance, stability, and finish compatibility matter most.
Maintenance plan and how to spot problems early
Wood ceilings are not set-and-forget. But with a simple annual routine, you can extend the life of almost any species significantly and catch small problems before they become expensive repairs.
Annual maintenance schedule
- Spring inspection: Walk the ceiling with a flashlight and look at every board, joint, and flashing connection. You're looking for discoloration, soft spots, lifted edges, or mildew growth.
- Clean the surface: Wash with a diluted oxygen bleach solution (not chlorine bleach, which can damage wood fibers) to remove mildew, dirt, and tannin bleed. Rinse thoroughly and let dry completely (at least 48 to 72 hours) before any finishing.
- Check finish condition: If the wood is graying unevenly, showing surface checks, or water is no longer beading on the surface, it's time to reapply finish. Penetrating oil finishes typically need reapplication every 1 to 3 years depending on climate and UV exposure.
- Reapply penetrating oil or UV-blocking stain: Remove any loose or peeling previous finish before recoating. Film-forming finishes that are peeling must be stripped before re-application, otherwise the new coat will peel too, as USDA FPL finishing guidance notes.
- Check fasteners: Look for rust streaks running from screw heads across boards. This indicates fastener corrosion and needs addressing before water follows the rust track into the wood.
- Inspect flashing and caulk joints: Reapply exterior caulk at any wall-to-ceiling or post-to-ceiling transitions showing gaps or cracks.
Early warning signs you shouldn't ignore
- Cupping or warping boards: Usually means moisture is getting behind the boards unevenly, or the back face was never sealed. Persistent cupping means the moisture source needs to be addressed, not just the surface refinished.
- Soft or spongy spots when you press a fingernail into the wood: This is active rot. The affected boards need to come out. Probe with a screwdriver around any soft area to find the extent of damage.
- Dark staining or black mildew that returns quickly after cleaning: Indicates consistently high moisture in that area, often a ventilation or flashing issue.
- Peeling or bubbling finish: Film-forming finishes that peel mean moisture got behind them. Strip completely and switch to a penetrating oil finish that breathes rather than forms a film.
- Rust streaks from fastener locations: Fastener corrosion is happening under the surface too. In severe cases, corroded fasteners can fail structurally.
- Visible checking (deep surface cracks along the grain): Some minor surface checking is normal weathering, but deep checks that run through the board's thickness are moisture entry points that need to be addressed with finish or caulk.
DIY or hire out?
Cleaning and refinishing a patio ceiling is a reasonable DIY project if you're comfortable on a ladder and have a few hours. Installation of a new tongue-and-groove cedar ceiling is also within reach for someone with basic carpentry skills, especially on a simple rectangular patio. Where I'd recommend hiring out: flashing work at the house connection, any structural repairs if you find rot in joists or beams, and tropical hardwood installation (ipe in particular punishes inexperienced installers with split boards and stripped screws). A good carpenter can install a cedar ceiling in a day on a standard patio; get two or three quotes if you're unsure.
FAQ
What wood should I choose if my patio ceiling gets direct sun most of the day?
Prioritize UV-tough options and a UV-inhibiting penetrating oil finish. Western red cedar and redwood hold up well when finished and re-coated every 1 to 2 years, but if the ceiling is left unfinished or you use a film-forming coating on the back side only, the surface can gray and check faster. If your exposure is extreme, plan on tighter maintenance even with durable species.
Do I need to seal the back side and end grain of patio ceiling boards if the ceiling is already under a roof?
Yes. Even on partially covered patios, the back face and end grain stay wet longer and are often inaccessible after installation. Seal all four sides and both ends before you mount boards, especially where boards meet joists and at cut ends, because end grain wicks moisture and can trap water in hidden areas.
Can I use the same screws for all wood types, including pressure-treated pine and ipe?
Not safely. Pressure-treated wood needs hot-dip galvanized screws at minimum, stainless steel is better in wet or coastal settings, and zinc-plated screws can rust through and leave streaking in a few years. For ipe and other dense tropical hardwoods, use stainless steel and pre-drill every hole to prevent splitting.
How wide should I space tongue-and-groove boards on a ceiling?
Aim for at least a 1/8 inch gap overall between boards or at transitions, and follow the manufacturer’s guidance for your specific profile. The reason is practical, capillary wicking increases sharply when joints get too tight, and too-small gaps reduce room for movement during humidity swings.
Will caulk at the wall line replace flashing?
No. Caulk shrinks and cracks as materials move, it does not reliably block wind-driven water, and it can fail before the wood fails. Use metal flashing at all transitions, especially where the ceiling meets the house wall, then you can use selective sealants as secondary protection, not as the primary water stop.
What should I do if I find early cupping or peeling on a previously finished wood ceiling?
Stop adding finish layers on top of failing areas and identify the wetting source first (often missing flashing, no back ventilation, or tight joints). Dry the affected wood, then rework by sanding to sound material, re-sealing end grain and back faces where possible, and re-coating with a penetrating oil system compatible with the existing finish.
Is back-ventilation really required on a wood patio ceiling?
It is strongly recommended, especially in humid climates or where the ceiling is not fully sheltered from rain. An air gap behind the boards helps moisture drain and dry rather than being trapped. Without airflow, naturally durable woods can still degrade from the back face where you cannot see early rot.
What’s the best option for a ceiling near the ocean if I want minimal maintenance?
For salt exposure, step up to ipe or teak, or at minimum heartwood cypress, and use a finish strategy that includes a mildewcide package. Re-apply the finish on a tighter schedule, often yearly in heavy salt environments, and use stainless fasteners only so corrosion does not ruin the connections.
Can I paint or apply a solid stain to the back side of ceiling boards?
Avoid film-forming coatings on hidden back faces when possible. Paints and solid stains can trap moisture in areas that cannot dry out, which increases the risk of rot behind the boards. Penetrating oil systems are usually the safer choice for back faces and end grain.
Is pressure-treated pine always the cheapest way to build a long-lasting ceiling?
It can be the lowest upfront material cost, but longevity depends on correct specification and finish. Make sure you buy UC3B rated lumber for exposed, above-ground weather, then apply a quality penetrating oil. Skipping proper treatment or using the wrong fasteners can make the “cheap” option expensive after rust and early checking.
When is it worth hiring a pro instead of doing the whole ceiling DIY?
Consider hiring out for house-wall flashing work, any structural repairs after you discover rot in joists or beams, and tropical hardwood installation such as ipe where mistakes cause split boards and stripped fasteners. Basic tongue-and-groove installations with cedar on a simple rectangular patio are often manageable for experienced DIYers, but confirm you can safely handle ladder work and precise layout.
Quick fix patio ideas for fast comfort and style: cleanups, repairs, shade, flooring tweaks, and safe upgrades on any bu
Budget DIY patio ideas with step-by-step flooring, prep tips, cost ranges, upgrades, and safety mistakes to avoid.
Best DIY patio ideas plus a step-by-step build guide: materials, subbase, drainage, costs, tools, and maintenance tips.