For most patio covers, pressure-treated lumber (Southern Yellow Pine or Hem-Fir, rated UC3B for above-ground use) is the most practical and affordable choice. If you want a naturally rot-resistant option that looks better raw and takes stain well, western red cedar or redwood are the go-to species. For coastal, humid, or high-moisture climates where wood maintenance feels like a constant battle, engineered or composite options are worth a serious look. The right answer depends on your climate, your budget, your framing spans, and how much maintenance you want to deal with ten years from now.
Best Lumber for Patio Cover: What to Use and Sizing Tips

Phoebe Foster
29 Apr 2026
How to choose the right lumber before you buy anything

Before you walk into a lumber yard or start clicking around online, you need to nail down four things: your local loads, your spans, your climate, and whether the cover is attached to the house. Each one affects what species, grade, and size you actually need.
Load requirements: wind, snow, and live load
The IBC requires patio covers to be designed for all dead loads plus a minimum vertical live load of 10 psf. Snow loads apply wherever they exceed that 10 psf minimum, and the structure also has to meet minimum wind-load requirements from Table R301.2(1). That last point matters more than most DIYers expect. Wind uplift is a serious structural concern, and it directly affects what size lumber you need, what connectors you use, and how you tie everything back to the house. If you are in a hurricane zone, high-wind corridor, or high-snow area, the framing math changes significantly. Pull up your jurisdiction's code or ask your building department for the design loads before you size a single board.
Span length and spacing
Span length is the most practical driver of lumber size. The American Wood Council's prescriptive span tables (DCA 6) give you allowable spans organized by species/grade, member size, and spacing. A 2x6 rafter at 24 inches on center spans a very different distance than a 2x8 at 16 inches on center, even in the same species and grade. Measure your actual clear spans between support points, then cross-reference the span tables for the species you plan to use. Do not guess on this.
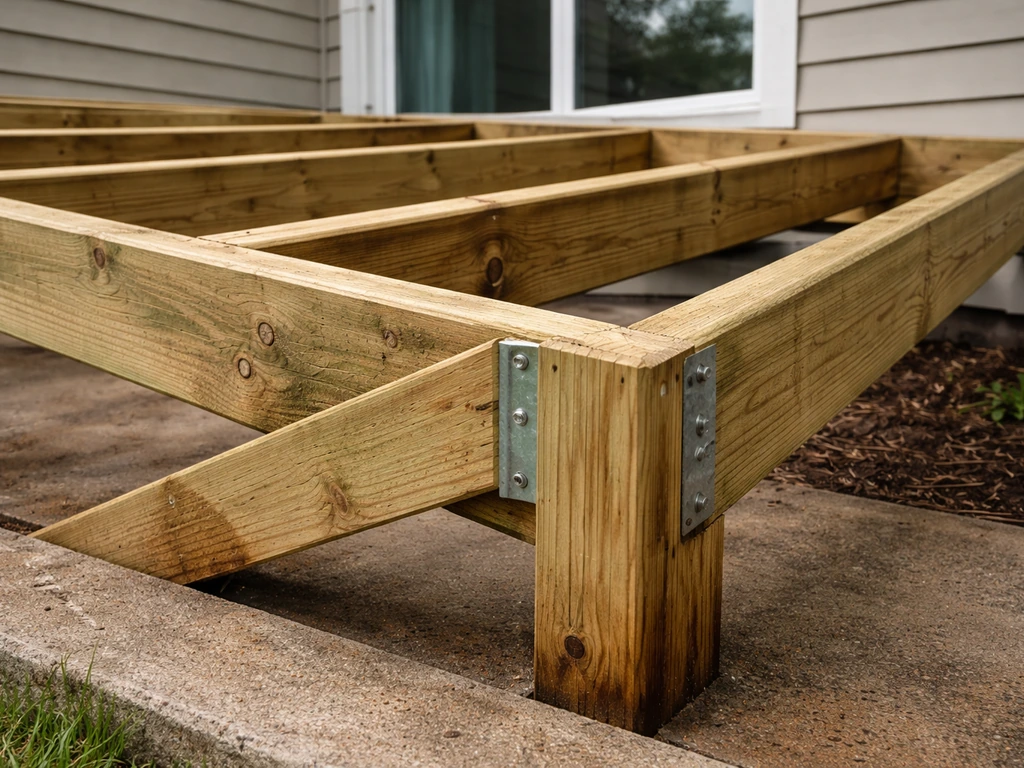
Attached vs freestanding cover
If your patio cover attaches to the house, the ledger connection becomes a critical structural detail, not just a cosmetic one. IRC R507.9 governs ledger attachment for lateral load paths, meaning you need to design for both vertical loads coming down and horizontal forces (wind) pushing the structure sideways. An attached cover also means flashing the ledger correctly to keep water out of the wall assembly, which we cover below. Freestanding covers skip the ledger issue but need posts and footings sized for the loads. Either way, most jurisdictions will want a permit for a covered structure.
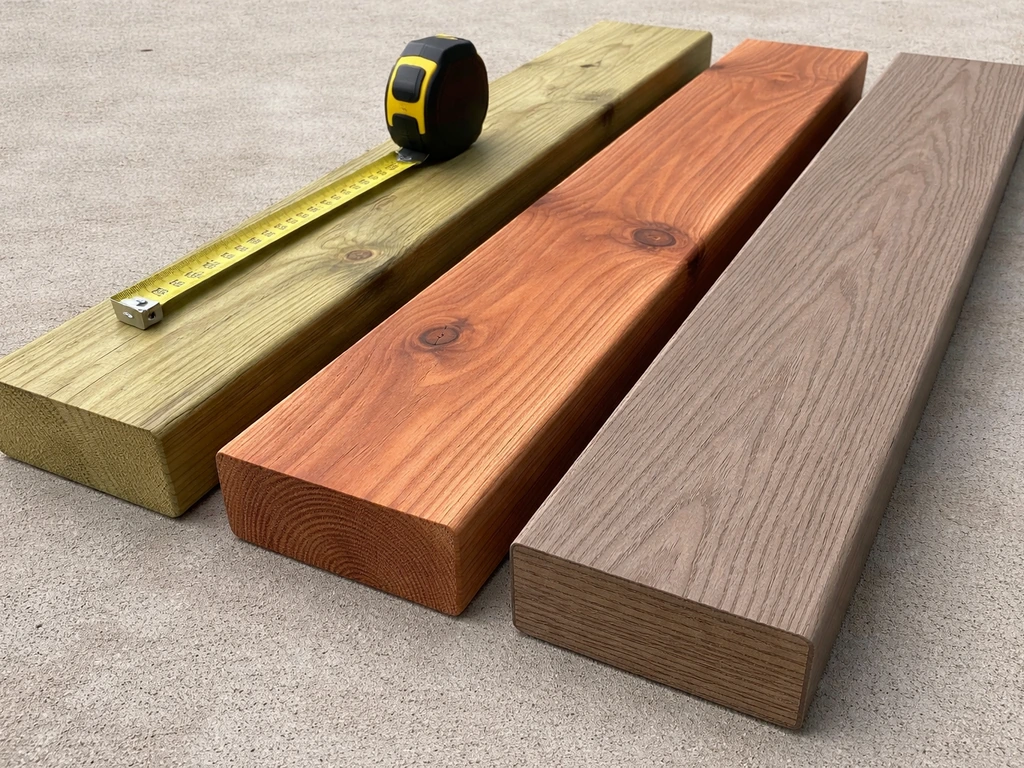
Best wood species for patio covers, by climate
Not every wood works equally well everywhere. Here is how the most common species stack up depending on where you live and how the structure is exposed.
| Species | Best Climate Fit | Rot Resistance | Typical Cost | Maintenance Needs |
|---|---|---|---|---|
| Pressure-Treated SYP | Everywhere, especially humid/wet climates | Excellent (chemical treatment) | Lowest | Periodic sealing, inspect fasteners annually |
| Western Red Cedar | Dry to moderately wet climates, PNW | Good (heartwood only) | Moderate | Seal or stain every 1–3 years |
| Redwood | Dry climates, California, Southwest | Excellent (old-growth heartwood) | Moderate to high | Occasional oil or sealer |
| Douglas Fir | Dry climates, best when painted or sealed | Low untreated | Low to moderate | Needs regular coating to survive outdoors |
| Hem-Fir (PT) | Everywhere, common on West Coast | Excellent (chemical treatment) | Low | Same as PT SYP |
| Engineered LVL/PSL | Any climate, large spans | Variable (needs protection) | Higher | Protect end grain; keep dry or wrap |
A few notes worth adding here. Cedar's rot resistance comes from the heartwood, which is the darker center material. Sapwood, which is lighter in color, does not have the same natural oils and will decay faster. When you buy cedar boards at a big-box store, you often get a mix of heartwood and sapwood depending on the grade. For structural framing, that matters. The same logic applies to redwood: the old-growth heartwood is highly rot-resistant, but modern farmed redwood sapwood is much less so. UMass Extension's research backs this up, noting that while cedars and old-growth redwood are on the decay-resistant list, grade and processing make a real difference in field performance.
Pressure-treated vs cedar/redwood vs composite: which one actually wins
This is the question I get asked most often, and the honest answer is that it depends on what you are optimizing for. Here is how I think about it.
Pressure-treated lumber
Pressure-treated lumber is the workhorse choice for a reason: it is widely available, affordable, and when treated to the right AWPA use category, it holds up for decades in wet and humid conditions. For above-ground patio cover framing (rafters, beams, ledger board), you want UC3B-rated material. If any member gets close to ground contact or sits in a situation where drainage is poor, step up to UC4A. The treatment chemical matters for fastener selection, which we cover below. One real downside: PT lumber is often wet when purchased, meaning it will shrink, twist, and warp as it dries. Let it acclimate, use screws over nails where possible, and check your connections after the first season.
Cedar and redwood
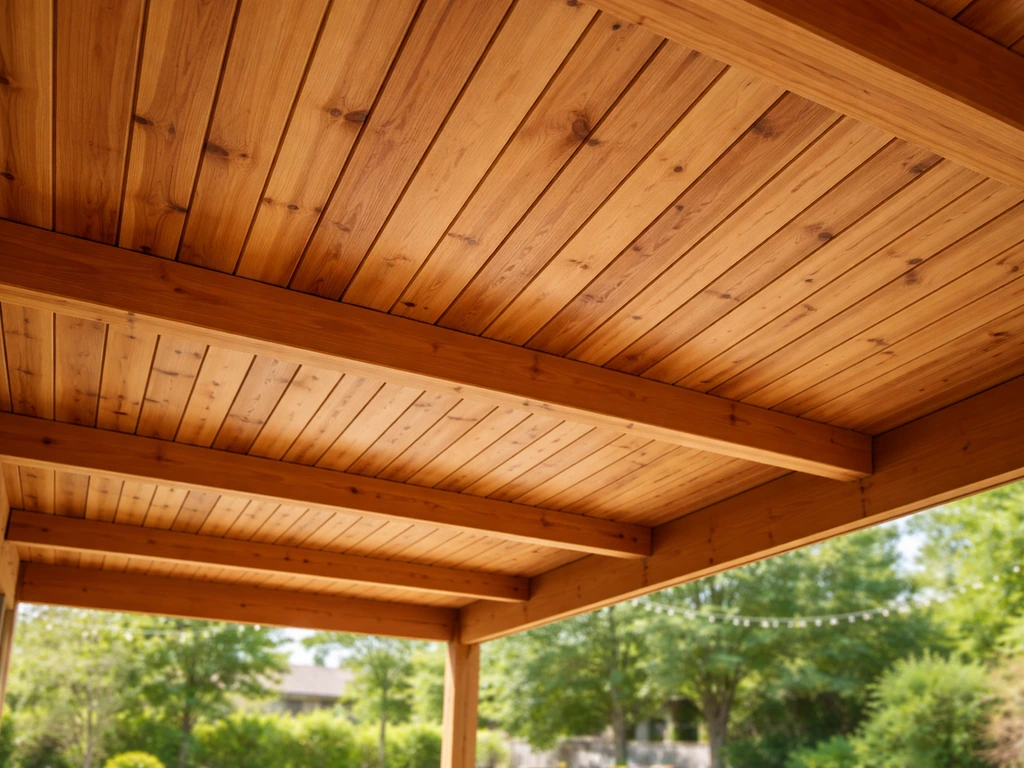
Cedar and redwood are the premium natural choices. They look better raw, take stain and finish well, and do not require you to worry as much about fastener corrosion since they are not chemically treated. The trade-off is cost: you will typically pay 30 to 60 percent more than comparable PT lumber, and availability varies by region. In the Pacific Northwest and California, these are easy to source. In the Southeast or Midwest, you may be ordering them. Cedar is also a popular choice if you are thinking about visible ceiling elements on the patio cover, and that topic gets its own treatment in the related guide on the best wood for outdoor patio ceilings.
Composite and engineered options
Engineered lumber like LVL (laminated veneer lumber) or PSL (parallel strand lumber) is not what most people think of for patio covers, but it is genuinely useful for longer spans where you need a deeper, stronger beam without going to a massive sawn timber. LVL beams can span 20 feet or more cleanly, while a comparable sawn timber would be heavy, expensive, and prone to checking. The catch: engineered lumber needs to stay dry or be properly protected, because the adhesives and veneers are vulnerable to sustained moisture. Wrapping exposed beams in cedar or composite fascia material, or sealing end grain aggressively, is not optional here.
Composite decking materials are sometimes used for patio cover ceiling or fascia applications, but they are not structural framing materials. The framing underneath still needs to be wood or steel. If you use composite fascia boards, the same rule applies as with any other assembly: flashing and ventilation still matter, and trapping moisture between composite surfaces and wood framing causes problems even when the surface material itself is rot-resistant.
Lumber sizes and framing layouts that actually work
Framing a patio cover is similar to framing a simple roof, but with different load assumptions and connection requirements. Here are the members you will be working with and typical sizing starting points.
| Framing Member | Typical Size Range | Notes |
|---|---|---|
| Ledger board | 2x8 to 2x12 | Matches or exceeds rafter depth; must be through-bolted to house framing, not just the sheathing |
| Rafters/joists | 2x6 to 2x10 at 16" or 24" o.c. | Size depends on span, species/grade, and spacing; confirm with AWC DCA 6 span tables |
| Beams | 4x8, 4x10, doubled 2x10/2x12, or LVL | Carries rafter loads to posts; span and tributary width drive the sizing |
| Posts | 4x4 to 6x6 | 4x4 OK for lower heights and light loads; 6x6 for taller posts or heavier structures |
| Ridge/purlin (open patio) | 2x6 to 2x8 | Used in open-lattice or exposed-rafter designs; size to match rafter loads |
For a typical attached patio cover with a 12-foot clear span and rafters at 24 inches on center, a 2x8 Southern Yellow Pine (No. 2 grade) rafter often works within code-allowable spans, but verify this against your local design loads since snow or wind factors can shorten allowable spans. Always confirm with your local building department or a structural engineer for anything beyond a simple, low-load cover in a mild climate.
Spacing matters a lot. Going from 24-inch to 16-inch on-center spacing reduces the span demand on each rafter, which can let you drop a size (say, from 2x10 to 2x8) and save money on material. Run the numbers both ways before you commit to a layout.
Weatherproofing the framing so it actually lasts
Getting the right species and size is only half the battle. How you detail the connections, protect the end grain, flash the ledger, and coat the wood is what separates a patio cover that looks rough after five years from one that still looks solid after twenty.
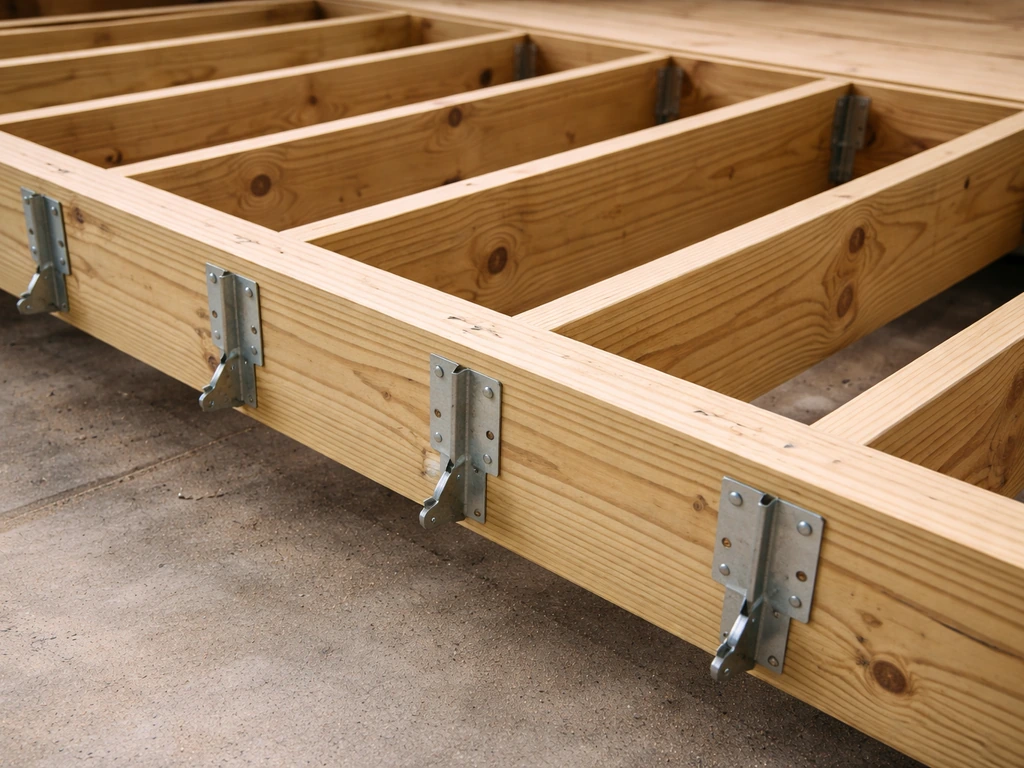
Fasteners and connectors: match them to the treatment chemical
This is where a lot of DIY builds go wrong. Modern pressure-treated lumber (ACQ, CA-B, CA-C, MCA formulations) is significantly more corrosive to standard hardware than the old CCA-treated wood was. IRC R317.3.1 requires fasteners and connectors for pressure-treated wood to meet specific corrosion-resistance standards, and Simpson Strong-Tie's own guidance ties connector requirements to the specific treatment chemical and retention level used. The minimum for most above-ground PT applications: hot-dipped galvanized (HDG) steel hardware. For high-moisture environments or any application near saltwater, stainless steel is the better choice. One thing to watch: do not mix dissimilar metals. Stainless steel fasteners should not contact galvanized hardware directly, because you can accelerate corrosion at the contact point through galvanic action. Keep the metal types consistent within a connection.
Flashing the ledger
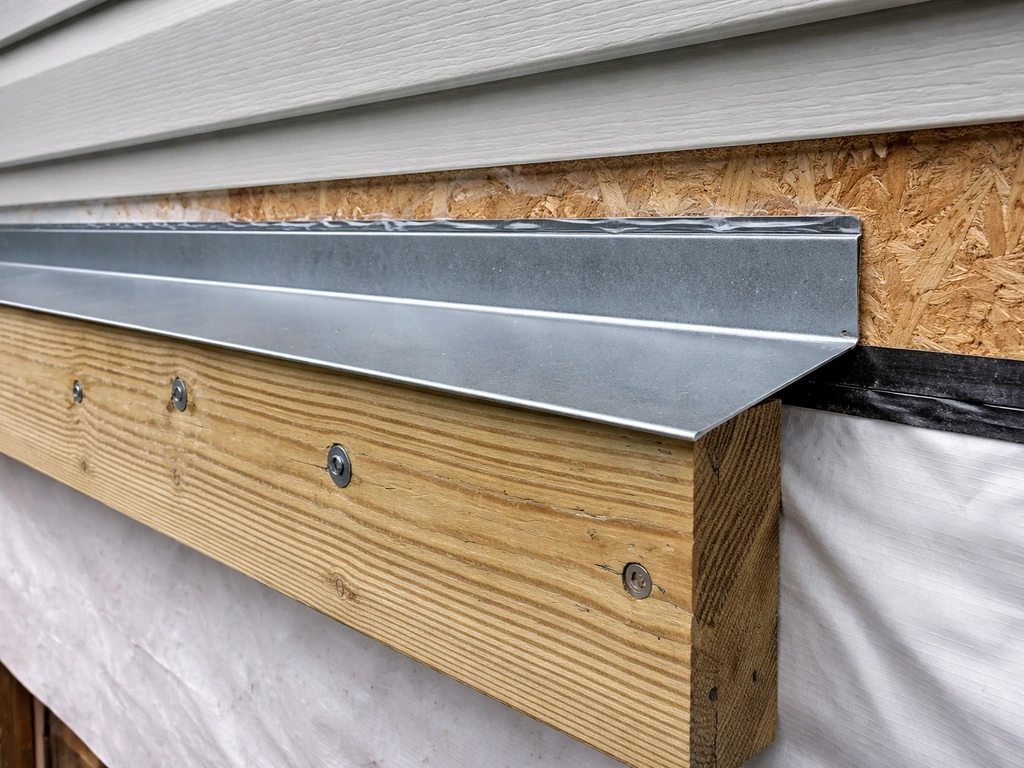
A ledger attached to the house without proper flashing is one of the most reliable ways to rot out a rim joist and damage your wall assembly over time. The flashing needs to direct water away from the wall, not trap it between the ledger and the house. Use a self-adhering membrane flashing behind the ledger before it goes up, then cap-flash the top edge. Many local inspectors will specifically check this detail. If you are in a stucco or EIFS-clad home, ledger attachment is even more complicated because you need to maintain drainage behind the cladding and not create a moisture bridge.
End grain protection
End grain absorbs water dramatically faster than face grain. USDA Forest Products Lab research confirms this, and field experience backs it up: end checks (cracks from repeated wetting and drying) start at the ends and work their way in. Any time you cut pressure-treated lumber on site, treat the cut end with an AWPA M4-compliant end-cut solution. For cedar or redwood, a penetrating oil or end-grain sealer slows the absorption cycle significantly. Do not skip this step on rafters or beams where the ends are exposed to rain.
Coatings and sealers: what works and what does not
Pressure-treated lumber that uses water-based preservatives (like copper azole) leaves a paintable, stainable surface once it dries. The key word is once: let PT lumber dry thoroughly before applying any finish. TWP 1500 Series and similar penetrating stains call for a minimum 48-hour dry time in good conditions, and freshly kilned or wet PT lumber may need significantly longer. Applying finish too early traps moisture and causes the finish to fail quickly.
For cedar, a water-repellent finish applied to clean, dry wood is the minimum. Expect a service life of one to two years for a basic water-repellent on exposed outdoor cedar, depending on exposure. A penetrating semi-transparent stain lasts longer (2 to 4 years) and is easier to re-coat than a film-forming finish. Avoid film-forming paints on horizontal surfaces like the tops of beams where standing water can get under the film edge and cause peeling. Penetrating finishes fail more gracefully and are much easier to maintain.
Clearance from soil and water
Wood-to-soil contact is a fast path to decay, even for pressure-treated lumber. Any wood member that touches or nearly touches soil should be rated for ground contact (UC4A minimum). Posts should sit on post bases with at least 1 inch of clearance above the slab or footing surface to allow drainage and airflow. If you are building in a region with heavy rainfall or poor drainage, raise that clearance further and slope the concrete away from the post base.
Budget vs long-term durability: how to make the call
Here is the honest framework I use when helping someone decide between PT lumber and a premium species: calculate the total cost including maintenance over 10 years, not just the upfront material cost.
- Pressure-treated lumber: lowest upfront cost, excellent durability when correctly detailed, but requires annual inspection and periodic sealing if you want it to look decent. Functional life of 20 to 40 years in the framing is realistic.
- Western red cedar: 30 to 60 percent more expensive upfront than PT lumber, but it looks significantly better raw or stained, smells great during construction, and is easier to work with (lighter, less warping). Needs re-coating every 1 to 3 years on exposed surfaces. Total 10-year cost often ends up close to PT when you factor in finish costs.
- Redwood: similar story to cedar but even pricier and harder to source outside California and the Southwest. Worth it if aesthetics are a priority and you have access to clear heartwood grades.
- Engineered lumber (LVL/PSL): higher material cost but lets you hit long spans cleanly without a massive timber. Best value when the span genuinely requires it, not as a default choice.
- Composite fascia/trim: not structural, but adds a low-maintenance finished look to exposed framing edges. Adds cost but reduces long-term painting and rot maintenance on visible surfaces.
If you are building in a wet, humid climate (think Southeast, Gulf Coast, Pacific Northwest), pressure-treated lumber for the structural framing is almost always the right call. The same climate logic also helps you choose the best wood for a patio deck, since deck boards face constant wetting and foot traffic best wood for patio deck. In a dry climate like the Southwest or inland California, cedar or redwood is a genuinely competitive choice when aesthetics matter. In a high-wind or snow-load zone, the structural engineering requirements start to outweigh species preference, and you should be working from engineered plans regardless of what wood you choose.
DIY vs hiring a pro: what to check before you buy a single board
A patio cover is one of those projects that looks straightforward until you start pulling permits and realize there is more to it than you thought. Here is a realistic checklist before you decide whether to DIY or hire out.
- Check whether a permit is required in your jurisdiction. Most attached patio covers need one, and many freestanding covers do too once they exceed a certain size. Building without a permit can create real problems when you sell the house.
- Confirm your local design loads: ground snow load, basic wind speed, and whether the site has any special exposure categories (open terrain, coastal, etc.). This determines whether prescriptive framing tables apply or whether you need an engineered design.
- Measure your spans accurately. Rough framing dimensions are not close enough for span table lookups. Know the clear distance between support points for every member.
- Identify your ledger attachment situation if the cover is attached to the house. Determine what is behind the wall (wood framing, masonry, steel), and whether your wall cladding requires special detailing to maintain its weather resistance.
- Decide on your lumber species and treatment rating before pricing. Compare PT lumber (UC3B above-ground) against cedar or redwood for your specific climate and budget. Get quotes on both.
- Price out the hardware at the same time as the lumber. Hot-dipped galvanized or stainless steel post bases, joist hangers, hurricane ties, and through-bolts are a real line item, especially on a larger structure.
- Evaluate whether the structural complexity is within your DIY skill set. Simple freestanding covers with clear prescriptive framing paths are reasonable DIY projects. Anything involving complex ledger attachment, long engineered spans, or high-wind/snow design loads is worth paying for a structural engineer's drawings and potentially a contractor to execute.
- Get at least two contractor bids if you go that route, and ask specifically whether the quote includes permit pulling, inspections, and ledger flashing details. Those are the parts most likely to be cut from a low bid.
If you are comparing lumber choices for other outdoor projects beyond the patio cover structure itself, the related guides on the best wood for patio decks and the best wood for patio roofs go deeper on species selection and detailing for those specific applications. If you are specifically comparing the best wood for a patio roof, pay close attention to rot resistance and how you weatherproof the ledger and end grain best wood for patio roofs. The framing principles overlap significantly, but the load assumptions and finish requirements differ in ways that are worth understanding separately.
Bottom line: buy the right lumber for your climate and your spans, detail the connections and flashing correctly, protect end grain on every cut, and match your fastener corrosion resistance to the treatment type. For the best wood for an outdoor patio ceiling, focus on rot resistance, correct framing spacing, and finishing details that hold up to your local moisture levels best wood for outdoor patio ceiling. To pick the best patio wood for your setup, match the species to your moisture exposure and how much maintenance you are willing to do. Do that, and whatever species you choose will last for decades. Live edge wood patios can look great, but whether they are a practical choice depends on moisture exposure, sealing, and ongoing maintenance.
FAQ
Can I use pressure-treated lumber for everything on the patio cover, including fascia, trim, and ceiling framing?
Not necessarily. “Outdoor” and “pressure-treated” labels do not guarantee the right retention for your exposure. For patio cover framing above ground you typically want UC3B, and if parts are near splash zones, poor drainage, or can occasionally get wet longer, step up to UC4A. Confirm the treatment rating and retention on the board stamp before buying hardware and building.
Is cedar or redwood acceptable for structural rafters, not just decorative elements?
Yes, but the key is protecting end grain and joints. If the member is truly structural it must be rated for use, but for appearance you should still use a proper finish strategy. Cedar or redwood can work for visible rafters, beams, or fascia, but any cut ends must be sealed, and any water trap details (tight overlaps, unflashed seams) should be avoided.
What fasteners should I buy if I choose pressure-treated lumber, and can I mix hardware types?
Use connectors and fasteners rated for the specific pressure-treating chemistry and retention level, not generic “outdoor” hardware. Modern PT is more corrosive to standard steel, so the safe default for above-ground is hot-dipped galvanized, and stainless is preferred for high-moisture or near-salt locations. Also, keep metals consistent within each connection to prevent galvanic corrosion at the contact point.
If composite boards resist rot, can I skip flashing and ventilation details?
Yes. Even when the wood is rot-resistant, trapped moisture can still cause failure at flashing interfaces and in seams. If you add composite fascia or ceiling materials over or against wood framing, you still need correct ventilation space, proper flashing, and water shedding details so water cannot get between surfaces and stay wet.
Why can my lumber span tables suggest one size, but my design still fails inspection?
Often you cannot use a species “rule of thumb” because allowable spans depend on species, grade, member size, and spacing. If you have a 2x6 or 2x8 choice, you must verify clear span between support points and then compare to span tables for your exact configuration. Snow and wind design loads can also shorten allowable spans even when the span table looks acceptable.
Do I really need to worry about wind if the patio cover is only a small structure?
Because patio covers are usually designed for uplift and lateral loads, the ledger, connectors, and anchorage matter as much as rafter size. If you are in a high-wind or hurricane-prone area, oversizing lumber may not fix the real issue, you may need specific uplift-rated straps, larger or more anchor bolts, and a proper load path back to the house structure.
Should I measure between post centers or between the actual support faces for span sizing?
Check both. The “clear span” for roof member sizing is the distance between the actual points where the member bears or is supported. The overall distance between post centers is not always the same, especially with beam overhangs or ledger offsets, so measure where the member truly spans.
What’s the best way to handle warping and shrinkage when my pressure-treated lumber arrives wet?
Yes, and it is a common failure. PT boards purchased wet can shrink and twist, which may loosen roof/ledger connections or open small gaps. Let PT lumber acclimate, use screws instead of nails where appropriate for tighter pull-in, and re-check critical connections after the first dry season.
Do I need to treat cut ends if the lumber was already pressure-treated?
Yes, but do it intentionally. End-cut treatment is not the same as painting the faces, because end grain wicks water quickly. When you cut boards on site, apply an AWPA M4-compliant end-cut preservative to the fresh ends before installation or immediately after cutting, and do not rely on deck stains alone to protect those ends.
How do I know when pressure-treated lumber is dry enough to stain or paint?
Verify dry time based on moisture conditions and the finish product requirements. Water-based PT preservatives still need time to dry fully before staining or painting, and in cool or humid weather it can take longer than the minimum stated in label guidance. If the surface feels cool, damp, or looks blotchy after test staining, give it more time.
When is a patio cover permit required, and what parts are most likely to get scrutinized?
A permit is often required for covered structures, but the triggering details vary by jurisdiction and the cover’s size, attachment, height, and whether it changes roof loading. Even when a full permit is not required, you may still need plan review for structural and safety elements like wind uplift and ledger attachment.
Which finish is better for beams or horizontal members that can collect water, paint or stain?
Yes. If your design includes a low-slope roof surface or areas that can hold water, avoid film-forming finishes on horizontal surfaces like beam tops. Standing water can get under film edges and lead to peeling, so use penetrating stains or water-repellent systems appropriate for the surface orientation and exposure.
How high should posts sit above concrete, and does that change in rainy climates?
In many climates, raising posts and using post bases with at least about 1 inch of clearance above the slab or footing helps drainage and airflow. In heavy-rain areas, increase that clearance and avoid tight soil contact, because repeated wetting near grade is a fast route to decay even with PT.
Next Articles
Best Wood for Outdoor Patio Ceiling: Picks, Pros, Installation
Best wood for outdoor patio ceiling by climate and coverage, with species picks, finishes, proper fastening, and mainten
Quick Fix Patio Ideas for Instant Comfort and Style
Quick fix patio ideas for fast comfort and style: cleanups, repairs, shade, flooring tweaks, and safe upgrades on any bu
Cheap Do It Yourself Patio Ideas: Budget Build Guide
Budget DIY patio ideas with step-by-step flooring, prep tips, cost ranges, upgrades, and safety mistakes to avoid.