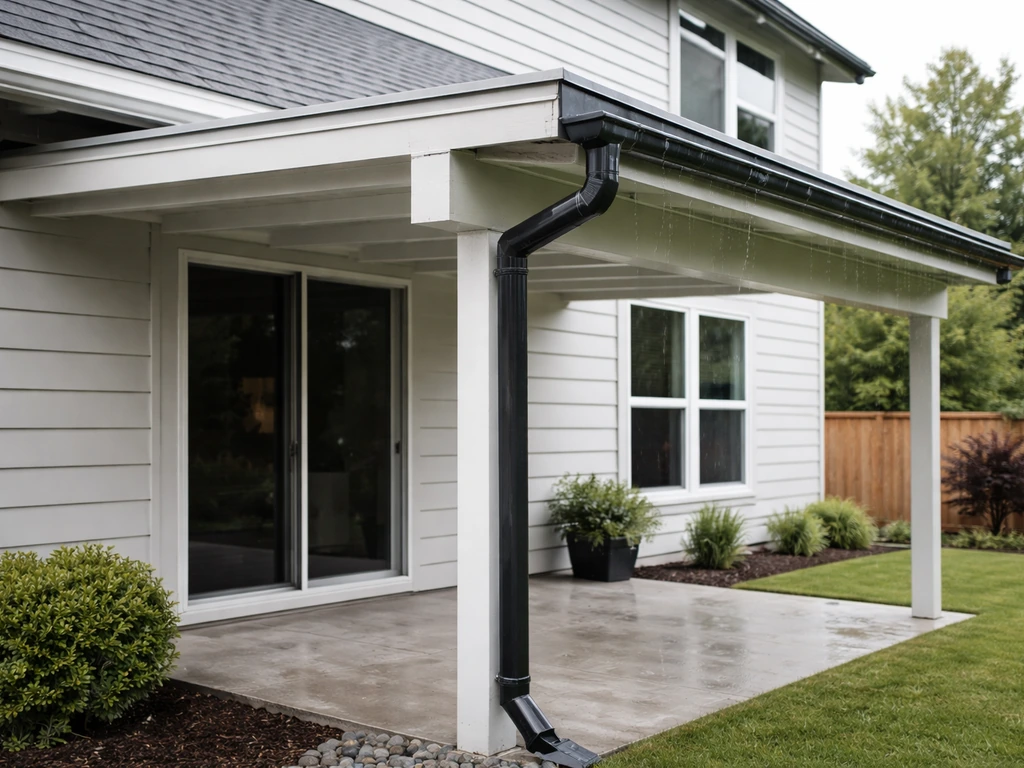
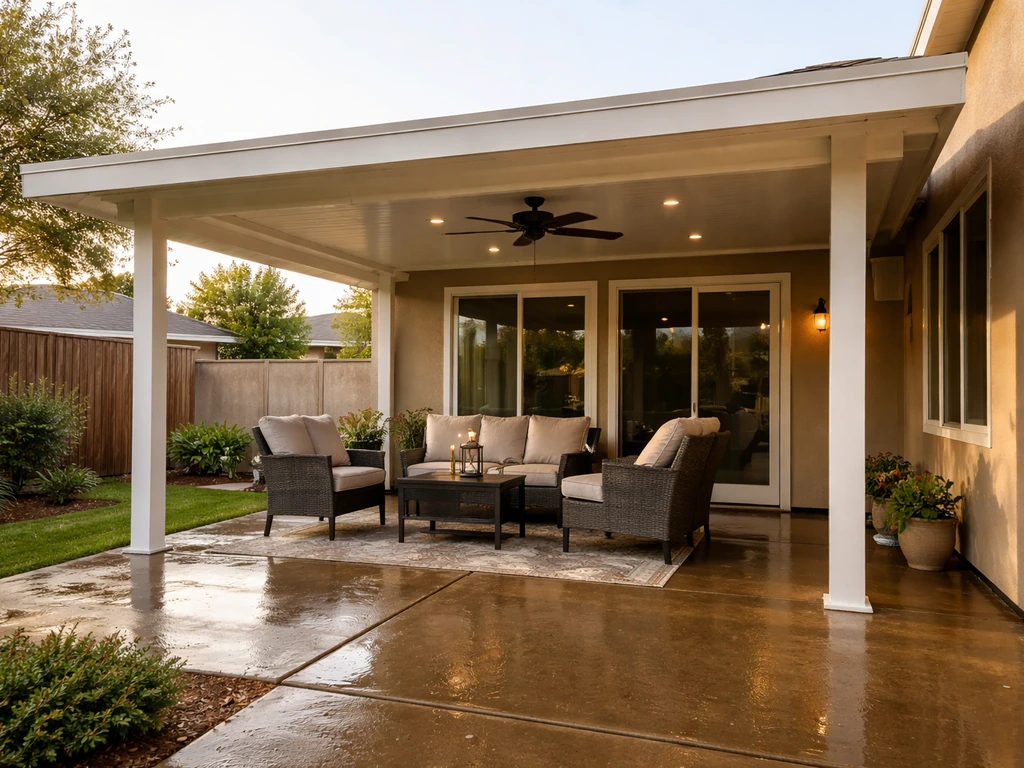
A quality patio cover keeps your outdoor space usable through rain, wind, and blazing sun, and a seamless rain gutter system is what keeps that water moving away from your foundation, slab, and fascia instead of pooling where you stand. When you design both together as one coordinated system, you get a patio that stays dry, drains properly, and holds up for 20-plus years without constant maintenance. When you treat them as separate projects, you almost always end up with splash-back, overflow corners, or water working its way under the cover during a hard rain.
Quality Patio Covers and Seamless Rain Gutters Guide

Phoebe Foster
13 Jun 2026
What 'quality' actually means for patio covers
The word quality gets thrown around a lot in contractor bids and product listings, so let's make it measurable. A genuinely quality patio cover hits specific performance thresholds you can verify before you sign anything.
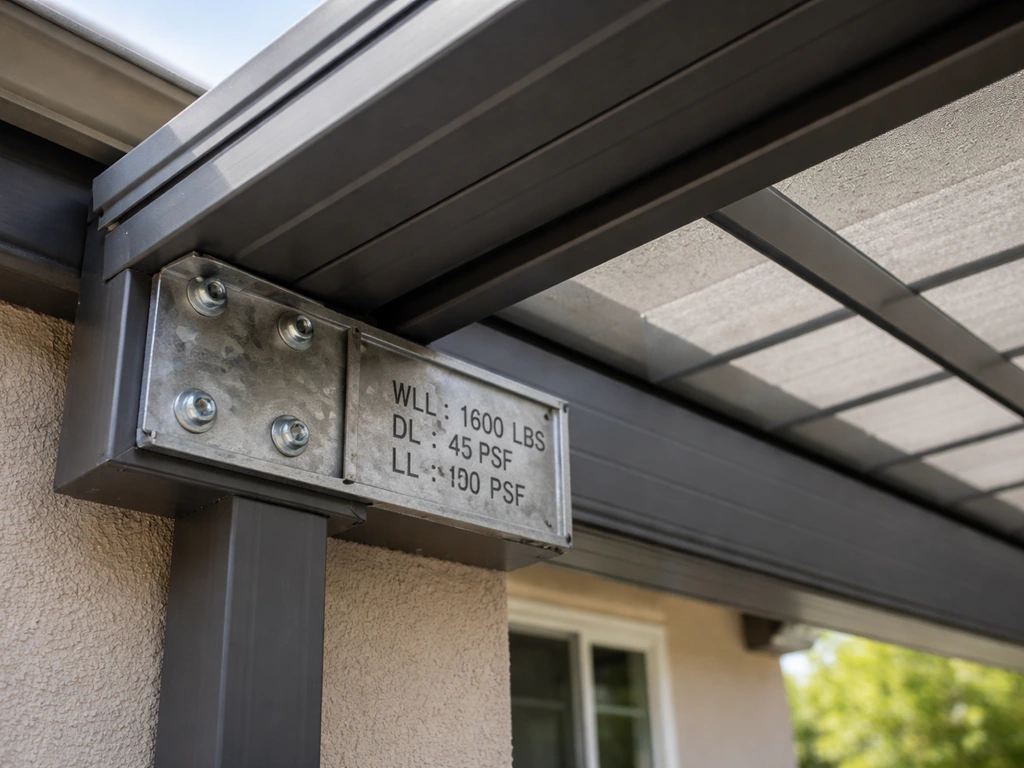
Structural load ratings are the starting point. The International Residential Code (IRC) Appendix H sets a minimum vertical live load of 10 psf (pounds per square foot) for patio covers, and snow loads take over in regions where they exceed that floor. Wind loads are tied to your local ultimate design wind speed (Vult) and exposure category, which vary significantly by region. If you're in coastal Texas, the Florida panhandle, or the Great Plains, this number matters a lot. Ask any contractor for the engineering packet and verify it matches your local wind zone.
ICC-ES evaluation reports are another real quality signal. These reports (filed under ICC-ES Acceptance Criteria AC340 for patio covers) mean the system has been independently tested and documented against code-based performance criteria. A quality cover product should come with one. Equally important, attached patio cover systems evaluated under AC340 are required to carry a permanent decal or tag listing the allowable roof live and snow load, the design wind speed and exposure, and the manufacturer's name. If you're buying a product and there's no tag, that's a red flag.
Beyond the structural specs, quality shows up in hardware, finish, and drainage execution. Look for hot-dipped galvanized or stainless fasteners, not zinc-coated ones that rust in two seasons. Powder-coated finishes on aluminum should be at least 70% PVDF (Kynar-based) for real UV resistance, especially in sun-heavy climates like the Southwest or South Texas. Pitch matters too: a correctly pitched cover sheds rain cleanly, but a low-pitch installation creates splash-back and seepage risk right at the ledger board where the cover meets your house. Finally, check the warranty: a meaningful product warranty covers finish fading and structural integrity for at least 10 years, and some aluminum systems offer lifetime limited coverage.
Patio cover materials compared: wood, aluminum, vinyl, and composite
Each material has a real use case. The right choice depends on your climate, budget, and how much upkeep you're willing to do.
| Material | Best climate fit | Typical lifespan | Maintenance | Relative cost | Key weakness |
|---|---|---|---|---|---|
| Wood | Mild, low-humidity climates | 15-30 yrs with upkeep | High (stain/seal every 2-3 yrs) | Mid to high | Rot, warp, insects |
| Aluminum | Any climate, especially hot/humid/coastal | 30-50+ yrs | Very low | Mid | Dents, expansion noise |
| Vinyl (PVC) | Mild to moderate climates | 15-25 yrs | Low | Low to mid | UV brittleness, color fade, lower load rating |
| Composite | Moderate to humid climates | 25-35 yrs | Low to mid | Mid to high | Heavier, higher install cost |
Wood
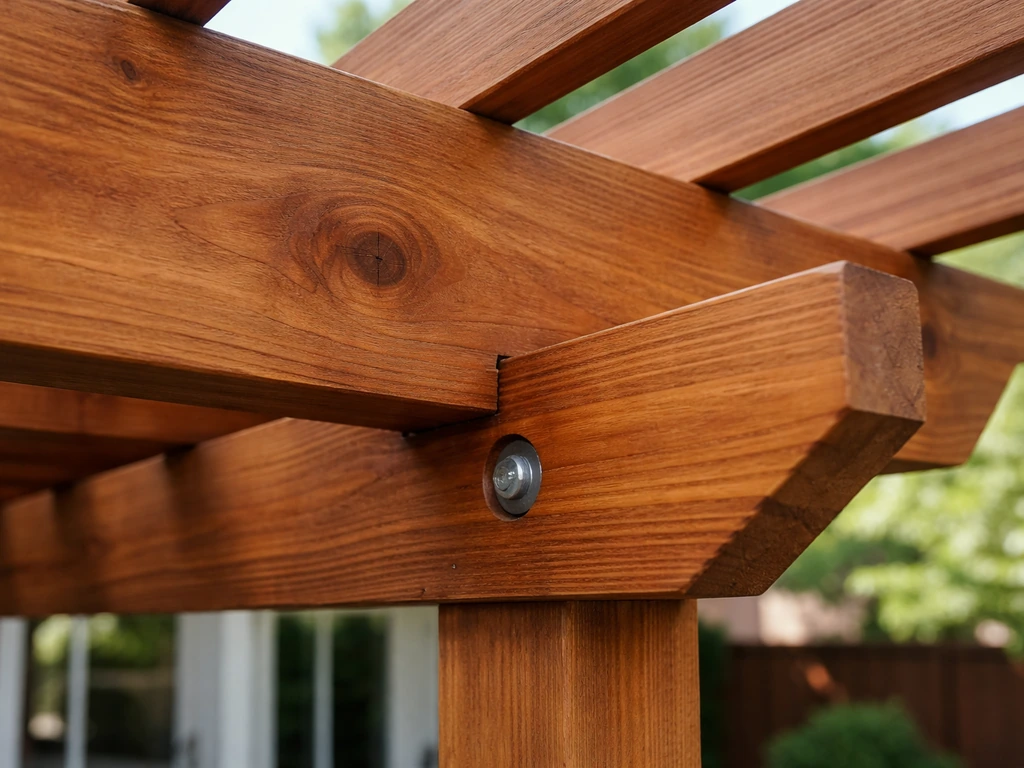
Wood is beautiful and customizable, and a well-built cedar or redwood pergola-style cover can be a real focal point. The problem is maintenance. In humid Southern climates or anywhere with heavy seasonal rain, you're looking at regular sealing, potential rot at post bases, and ongoing vigilance for termites. Wood is genuinely a better fit in drier regions like the Southwest high desert, where it won't cycle through wet-dry seasons as aggressively. If you want wood and live somewhere wet, pressure-treated lumber for structural members with clear cedar or composite decking on top is a reasonable hybrid.
Aluminum
Aluminum is the most practical all-climate choice for a solid, weather-proof patio cover. Insulated aluminum panel systems (like Alumawood-style products) have a foam core that reduces heat transfer, which matters enormously in Texas summers or anywhere that gets 90-plus degree afternoons. The engineering packets for these systems document wind speed design loads by product thickness, so thicker profiles handle higher wind zones. Aluminum expands and contracts with temperature swings, which can create creaking noises during heat cycles, but this is mostly cosmetic. Sealing the ledger flashing correctly at the house connection is the most critical installation step.
Vinyl
Vinyl is the budget-friendly entry point and works fine in mild climates with moderate sun exposure. The trade-off is UV degradation over time, especially in intense sun markets. Cheaper vinyl systems can become brittle and crack within 10-15 years in Southern climates. If you go vinyl, look for products with UV stabilizers and thicker wall profiles. It's not a bad choice for a covered carport in a Pacific Northwest climate where UV is less punishing, but I wouldn't spec standard vinyl for an Arizona or Florida installation.
Composite
Composite covers (wood-plastic composite boards used in pergola or lattice-style structures) split the difference between wood aesthetics and lower maintenance. They resist rot and insects better than natural wood, hold paint or stain longer, and are dimensionally stable in wet climates. The downside is weight and cost: composite is heavier than aluminum or vinyl, which means more robust post and beam sizing and higher install labor. For a premium open-style pergola where you want the look of wood without the upkeep, composite is worth the premium.
Design details that actually improve shade, airflow, and rain protection
Material choice gets all the attention, but design details are where most patio covers succeed or fail at keeping you comfortable and dry.
Pitch is the single most important detail for rain shedding. A solid-panel patio cover needs enough slope to move water to the outer edge (or to an integrated gutter channel) without creating seepage at the house connection. Too flat and you get standing water, condensation pooling, and eventually water working behind the ledger flashing. A low pitch also means splash-back from the outer edge can reach the patio surface during hard rain. Even a modest pitch makes a significant difference in performance.
For louvered roof systems, louver direction controls where the water goes. This sounds obvious but gets overlooked constantly. If your louvers slope toward the house, you're directing every inch of rain toward your foundation. Louvers should slope outward toward the patio edge, where they'll drain into a gutter or away from the structure. Some louvered systems let you configure direction during installation, and some don't, so verify this before you order.
Airflow matters as much as shade in hot climates. A fully solid cover with no ventilation traps heat underneath and creates a cooking effect on summer afternoons. Lattice-style covers and louvered systems with adjustable louvers give you the flexibility to open for airflow or close for rain. In humid climates, you also want to blank" rel="noopener noreferrer">manage condensation: trapped moisture under a low-pitch solid cover with no ventilation can cause long-term damage to the fascia and the cover's attachment hardware.
Flashing at the ledger board (where the cover attaches to the house wall) deserves serious attention. This is where most patio cover leaks actually originate, not from the cover material itself. The flashing needs to be properly integrated with the house's existing water-resistive barrier, not just caulked over siding. In climates with hard, wind-driven rain, missing or incorrectly installed flashing will show up as water intrusion inside the wall or pooling on the patio floor behind the cover within a few seasons.
Seamless gutters: why the seams matter more than you think
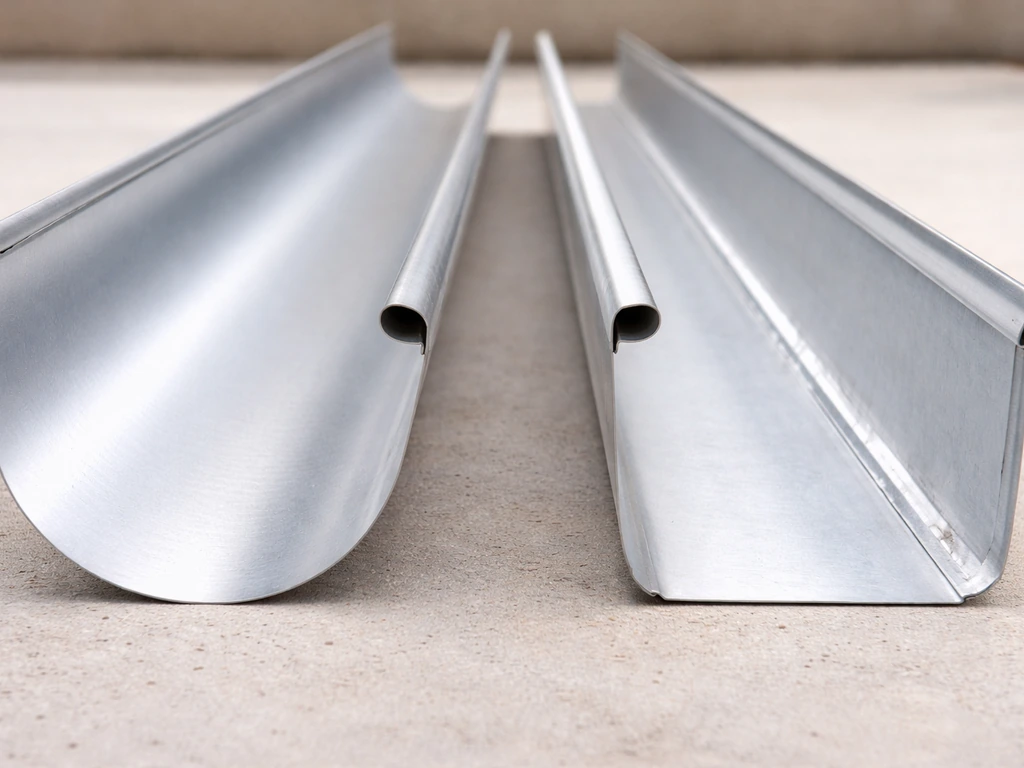
Standard sectional gutters come in pre-cut 10-foot lengths and are joined together on site with lap joints and sealant. Every one of those joints is a potential leak point. Over time, sealant dries, joints separate slightly, and you get drips, staining, and water at the foundation. Seamless gutters are custom-fabricated on-site from a continuous roll of aluminum (or other material), cut to the exact measurement of your roofline. The only joints are at inside/outside corners, outlets, and end caps. For a typical 40-foot gutter run, that's the difference between four potential leak points and zero mid-run seams.
Seamless systems also move water more smoothly because there are no raised joint lips inside the channel where debris can snag and begin to build up. This matters most in areas with heavy tree coverage or in markets with intense rainfall events (think Gulf Coast, Southeast, and anywhere that regularly sees multi-inch rain hours). If your patio is in one of those regions, a seamless system isn't optional, it's the practical choice.
Where seamless gutters matter most is anywhere with: heavy seasonal rainfall, complex rooflines with multiple valleys, long single gutter runs over 40 feet, or existing sectional gutter problems. If you're planning a patio cover upgrade in Louisiana, East Texas, or the Southeast, this is where seamless gutters pay for themselves in avoided maintenance and damage.
Projects like those in the Lafayette area, or covered patio installations in Fort Worth and Dallas, regularly combine quality cover systems with seamless gutters specifically to manage the intense summer storm events those regions see. If you’re looking for a better patio covers & gutters solution in Lafayette, focus on integrated drainage planning that matches your roofline and storm conditions a better patio covers & gutters in Lafayette.
For homeowners in Fort Worth, patio cover and gutter planning should account for intense summer storms and wind-driven rain fort worth patio covers.
Getting gutter sizing, slope, and routing right
Gutter sizing is one of the most consistently under-spec'd parts of a patio or home exterior project. Most homes get standard 5-inch K-style gutters because that's what's cheapest and easiest to install, not because the math says it's right for the roof area and local rainfall intensity.
The correct approach is to size based on drainage area (square footage of roof draining to that gutter run) multiplied by a pitch factor, and then match that to rainfall intensity for your location. SMACNA (the Sheet Metal and Air Conditioning Contractors' National Association) publishes a free gutter and downspout sizing calculator based on their Architectural Sheet Metal Manual that lets you input your rainfall intensity and roof area to get the right sizes.
SMACNA describes its rain and gutter sizing calculator as using Rainfall Wizard data based on its ASMM rain table methodology, including selectable rainfall intensity inputs SMACNA’s free gutter and downspout sizing calculator. For downspouts specifically, a useful rule of thumb: a 2x3 rectangular downspout handles roughly 600 square feet of drainage area per inch of rain, and a 3x4 handles about 1,200 square feet.
If you have a large patio cover adding to the runoff area, add that to your calculation.
Slope is critical and almost always wrong on DIY installations. The industry standard is 1/4 inch of drop for every 10 feet of gutter run, measured from the high end toward the downspout. A flat gutter holds standing water, which accelerates corrosion and adds weight load to the fascia over time. On long runs (over 40 feet), you either need a downspout at each end (sloping from the middle outward) or you accept that one end is going to drain slowly.
Hanger spacing affects both performance and longevity. For aluminum gutters, hidden hangers should be spaced no more than 24 inches apart in normal climates, and 18 inches or closer in areas with ice, snow, or heavy debris load. Loose gutters sag, lose slope, and pull away from the fascia. For a patio cover gutter, where the panel system may be creating a more concentrated runoff stream than a typical shingle roof, closer hanger spacing is worth the extra materials cost.
Downspout placement and discharge need as much thought as sizing. The EPA recommends discharging at least 5 feet from the foundation. A splash block alone often isn't enough to move water that far, especially during heavy events. Downspout extensions or underground discharge pipes that daylight into a lawn or garden area are more effective. If you're dealing with a sloped lot or limited yard space, consult a landscape contractor about French drain options before you pour money into a gutter system that still ends up dumping water at your foundation.
Common gutter installation errors to avoid
- Flat or reverse-sloped gutters that hold standing water instead of draining
- Too few downspouts for the roof drainage area (one downspout for a 60-foot run is almost always undersized)
- Downspouts discharging directly against the foundation or onto the patio slab
- Improper drip-edge flashing sequencing, which allows water to travel behind the gutter and rot the fascia
- Hanger screws driven into rotting fascia without replacing the board first
- Sealing gutter joints with silicone caulk instead of appropriate gutter sealant (silicone does not adhere well long-term inside a wet aluminum channel)
Designing the patio cover and gutter system together
This is where most projects either get it right or create years of frustration. A patio cover changes your roofline's drainage behavior. It adds surface area, concentrates runoff into specific edge points, and creates a new drainage path that may or may not line up with your existing gutter system.
The first question is where water leaves the patio cover. For a solid panel system, water moves to the outer edge or to an integrated gutter channel built into the fascia beam. For a louvered system, water moves in the direction of louver slope. In both cases, you need to know exactly where that water is going before you finalize the design. Routing it to a downspout that discharges 5-plus feet from the foundation is the goal. Routing it off the edge onto a concrete patio where it has nowhere to go is the common failure mode.
Many quality aluminum patio cover systems include a built-in gutter channel along the outer beam. This is an elegant solution because it captures runoff at the source and routes it to a downspout without any additional exposed gutter hardware. If you're choosing between system options, an integrated gutter channel is worth paying for, especially in heavy-rain climates. It also eliminates the aesthetic clutter of an add-on gutter along the edge of the cover.
If you're tying the patio cover's drainage into the home's existing seamless gutter system along the eave, verify the existing gutter is sized to handle the added surface area. Adding 200 square feet of patio cover to a gutter run already handling 800 square feet of roof may push it over capacity during a 2-inch-per-hour storm event. It's a simple calculation worth doing before you connect the systems.
Drip-edge flashing at the cover-to-house connection deserves a mention here too. Properly installed drip edge protects the sheathing edges from gutter splash-back and prevents water from wicking back under the cover material at the eave. This is a detail that gets skipped on rushed installations and costs real money in rot repair within 5-10 years.
For homeowners in Louisiana, Southeast Texas, or other high-rainfall markets, this system-level thinking is especially important. Contractors who specialize in combined patio cover and gutter work in those markets understand that every drainage path needs to be planned, not improvised. If you're looking at coverage options in markets like Lafayette, a contractor experienced in both elements will approach the project as a water-management system, not two separate jobs bolted together.
What it costs and whether it pays off
Cost ranges vary significantly by material, size, region, and whether you go contractor-installed or DIY. Here are realistic installed ranges to work from as of 2026.
| Project | DIY range (materials) | Installed range (contractor) |
|---|---|---|
| Wood pergola/cover (12x16 ft) | $1,500-$3,500 | $4,000-$9,000 |
| Aluminum panel cover (12x16 ft) | $2,500-$5,000 (kit) | $6,000-$14,000 |
| Vinyl cover (12x16 ft) | $1,200-$2,500 (kit) | $3,500-$7,000 |
| Louvered roof system (12x16 ft) | $4,000-$8,000 (kit) | $10,000-$22,000+ |
| Seamless gutters (per linear foot) | N/A (requires fabrication machine) | $6-$14 per linear foot installed |
| Gutter downspout additions | $50-$120 materials | $150-$350 per downspout installed |
ROI for patio covers and gutters is real but not dramatic on the resale side. Remodeling Magazine's Cost vs. Value data consistently shows outdoor living improvements returning 50-70% of cost at resale, but the functional value (protection of the house structure, foundation, and patio surface) often exceeds what shows up in a home valuation.
A quality patio cover that prevents wood rot on the fascia, reduces AC load by shading a south-facing wall, and keeps the patio surface from baking in direct sun has real operating savings attached to it. In markets where outdoor living is a major selling point (Texas, the Southeast, Southwest), a well-designed covered patio is a genuine marketing advantage.
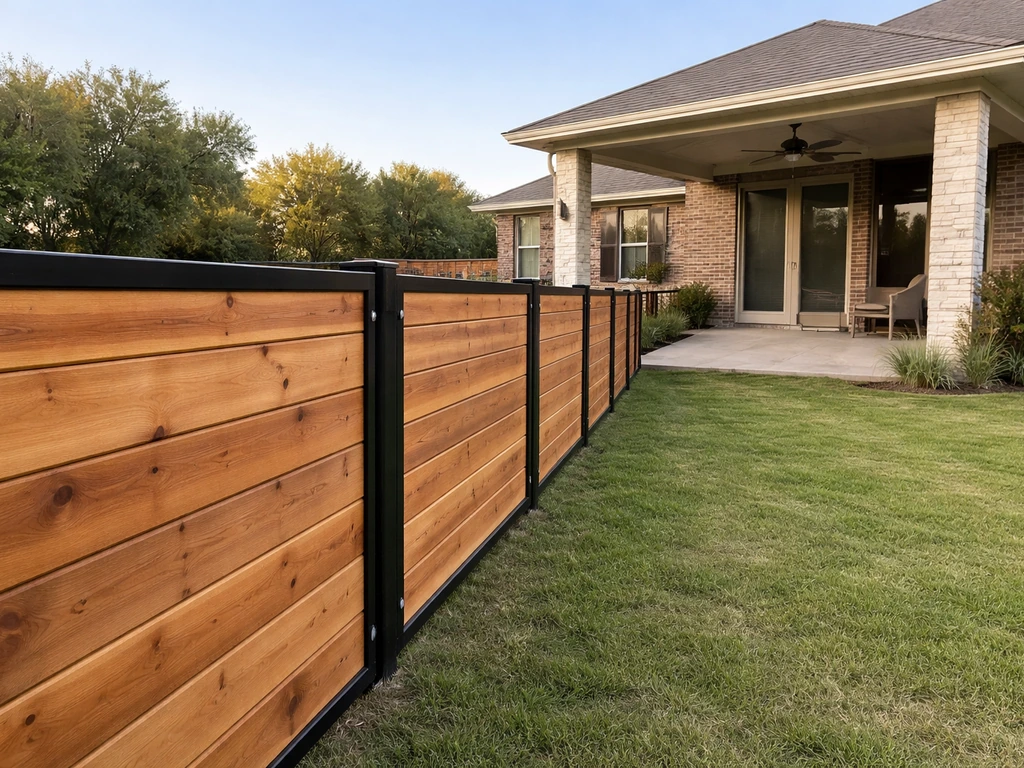
If you’re searching for Texas best fence & patio, focus on contractors who plan the entire exterior drainage setup, not just the cover or the gutter.
For gutters specifically, the ROI math is very clear. A $2,000 seamless gutter installation that prevents one foundation crack repair ($3,000-$8,000) or one fascia board replacement cycle ($500-$1,500) pays for itself on the first event it prevents. Gutters are one of the highest-ROI exterior investments you can make, and seamless over sectional is rarely a significant cost premium (usually 10-20% more) for a meaningfully better product.
What you can reasonably DIY
Patio cover kits (wood, aluminum, and vinyl) are available through big-box stores and specialty suppliers and are designed for homeowner installation. If you're comfortable with basic carpentry, a ledger board attachment, and post-setting in concrete, a pergola-style wood or composite cover is a realistic DIY project for a weekend-plus build. Solid aluminum panel systems are more complex because of the engineering connection at the house and the panel interlocking system, but most manufacturers provide detailed installation guides and tech support. Louvered systems are generally not DIY-friendly because of the motorized components, drainage channel precision, and structural requirements.
Seamless gutters are not DIY-friendly because the seamless fabrication requires a roll-forming machine that contractors own and homeowners don't. You can repair, re-slope, re-seal, and add downspout extensions yourself, but the fabrication and initial installation is contractor territory. This is genuinely one of the few outdoor projects where hiring out is both more economical and more practical than DIY.
How to find a good contractor and what to ask them
Finding a contractor who handles both patio covers and seamless gutters well is worth the effort. When planning the best patio and fence setup, it helps to coordinate the drainage and structural details so both systems work together instead of fighting the yard’s water flow. A single contractor who designs both systems together will produce better drainage coordination than two separate contractors who never talk to each other.
When you're interviewing contractors, these are the specific questions that separate quality operators from budget installers.
- Can you provide the ICC-ES evaluation report and engineering packet for the cover system you're proposing, including the design wind speed and live load ratings?
- What is the planned pitch of the cover, and where exactly does water exit the system?
- How will you flash the ledger board connection to the house wall?
- Will the gutter system be seamless aluminum fabricated on-site or sectional?
- What downspout sizing are you specifying and how did you calculate it for my drainage area and local rainfall intensity?
- Where will downspouts discharge, and will the discharge point be at least 5 feet from the foundation?
- What is the hanger spacing for the gutter installation?
- Do you pull permits, and will the installation be inspected?
A contractor who can answer all of those questions confidently and specifically is doing the job right. A contractor who deflects, says 'we always do it the standard way,' or can't explain the load ratings of the product they're proposing is a risk. Get at least three bids, ask for references from similar projects in your climate, and verify licensing and insurance before anyone starts work.
Your next steps checklist
- Measure your patio area and identify where the cover will attach to the house and where the outer posts will sit
- Note your local design wind speed (available from your county building department or on ASCE 7 hazard maps online)
- Decide on material based on your climate, maintenance tolerance, and budget using the table above
- Sketch or map where water currently leaves your roof and where it will exit the new patio cover
- Calculate your gutter drainage area (roof plus cover) and use SMACNA's free calculator to size gutters and downspouts for your local rainfall intensity
- Check if your local jurisdiction requires permits for attached patio covers (most do for structures over a certain square footage)
- Get three contractor bids with line-item breakdowns, and ask each one the specific questions listed above
- Verify the cover product has an ICC-ES evaluation report (look it up on the ICC-ES website using the product name or manufacturer)
- Confirm downspout discharge locations during design, before work begins, not after
- Review the warranty terms for both the cover system and the gutter product in writing before signing a contract
FAQ
Do I really need both a patio cover and seamless rain gutters, or is one enough?
One can help, but they solve different problems. A cover prevents direct rain on people and surfaces, while gutters control what runs off the roof and the cover edges. If you only add a cover, water still has to exit somewhere, and without seamless gutters you often end up with overflow stains, splash-back at corners, or water that pools where the cover meets the house. For high-rain or tree-heavy areas, the seamless gutter advantage is usually biggest because there are fewer mid-run joints to fail during storms.
How can I tell if my seamless gutter system is actually sized correctly before installation?
Ask for the drainage calculations they used, including roof area, added patio cover runoff, and downspout count. A good installer should discuss rainfall intensity assumptions, gutter cross-section choice, and where the downspouts will land. If they cannot show how the gutter and each downspout capacity matches the combined drainage area, treat that as a quality gap, especially if you are adding 200+ square feet of covered space.
What’s the most common way patio cover installations fail to keep the area dry?
Most failures start at the ledger flashing and connection to the house, not in the roof panels. Even if the cover looks solid, improper integration with the house water-resistive barrier, incorrect drip-edge details, or missing splash control can lead to wall intrusion and wet fascia over time. Ask how they will flash the connection, what layers they install in what order, and whether they plan for wind-driven rain.
Should the patio cover gutter be tied into my existing seamless gutters, or run separately?
It can be either, but the deciding factor is capacity. If you tie the cover drainage into an existing run, confirm the existing gutters and downspouts can handle the added square footage during peak storms. If they add your cover’s runoff to an undersized eave run, you can get backup and overflow even with seamless gutters.
Is a low-pitch cover always worse, or is there an acceptable range?
Lower pitch increases risk because it promotes splash-back, condensation pooling, and seepage near the house connection. The article notes pitch as critical, but in practice the “acceptable” pitch depends on whether you have a solid panel with an integrated drainage channel, how wind-driven the area is, and whether the cover is installed level or with designed slope. Ask for the planned slope measurement, not just a visual “good enough” pitch.
Can I reuse my existing gutters if I install a new patio cover?
Sometimes, but you must reassess capacity and slope. Adding a patio cover changes runoff quantity and where water concentrates, which can overload gutters that were fine under a normal roof-only flow. A quality installer will measure gutter pitch, inspect hangers, and verify downspout capacity before saying yes. If your existing system already shows sagging or overflow, reusing it is often a false economy.
What should I look for in fasteners and hardware beyond just “galvanized” or “stainless”?
Ask what exact fastener type they use and whether it is rated for exterior, high-corrosion exposure. The article emphasizes hot-dipped galvanized or stainless versus zinc-coated options, but you should also confirm they match fastener corrosion resistance to your local conditions (coastal salt, coastal humidity, heavy debris). For aluminum systems, also verify that ledger flashing fasteners are installed correctly and sealed as part of the water management system.
Do seamless gutters really prevent clogs better than sectional gutters?
They reduce joint-related leak points and internal snagging at raised lips, but they do not eliminate clogging. Debris can still collect at elbows, offsets, valleys, and the gutter-to-downspout transition. If you have heavy tree coverage, ask about gutter guard strategy and whether they plan downspout locations to reduce debris buildup. Maintenance still matters, just typically less frustrating maintenance than with more seam failures.
How close should downspouts discharge to the foundation, and what if my yard is tight?
The goal is to keep discharge at least several feet away from the foundation. If your yard space is limited or the lot slopes toward the house, splash blocks alone may not solve it. Ask whether they will use extensions and whether an underground discharge or French drain option makes sense. A landscape contractor consult can save money when surface discharge isn’t feasible.
What questions should I ask a contractor specifically about wind and snow loads?
Request the engineering packet for your cover model and ask them to state the design wind speed, exposure category, and the allowable roof live and snow load listed on the product tag. A quality operator should explain how those values match your location and your cover layout. If they cannot provide the documentation, or they treat wind/snow numbers as optional, that is a major red flag.
Are patio cover kits from big-box stores a safe option for quality and drainage?
They can be workable for simpler pergola-style builds, but kit success depends on correct attachment, flashing integration, and drainage routing. The kit may not fully account for your house water-resistive barrier details or the local wind zone engineering requirements. If your design is solid-panel or involves more complex louver drainage, consider that factory-engineered systems with an engineering packet are generally the safer path.
What’s the simplest way to reduce condensation damage under a solid patio cover?
Use ventilation and drainage planning that prevents moisture from being trapped at low pitch. The article highlights that a fully solid, low-pitch cover with no ventilation can lead to long-term fascia and attachment hardware issues. Ask whether the design includes airflow paths, whether louvers or lattice sections are used for airflow control, and how they will handle condensation at the ledger connection.
How do I confirm my cover drainage actually matches where my water must go?
Start with “first exit” mapping. Ask the contractor to show, for your exact layout, where runoff goes on the cover, how it enters any integrated gutter channel, where downspouts are placed, and where discharged water will land. The common failure mode is routing water onto the patio where it cannot escape. A clear water-management plan should be part of the proposal, not an afterthought.
Next Articles
Fort Worth Patio Covers: Types, Costs, Materials, and Setup Guide
Fort Worth patio covers guide: types, materials, costs, add-ons, and install steps for Fort Worth weather and permits.
Texas Best Fence & Patio Reviews and Photo Checklist
Use reviews and photo checklist to vet Texas Best Fence & Patio, compare quotes, confirm permits, and choose patio and f

Do It Yourself Outdoor Patio Ideas: Build, Upgrade, Maintain
DIY outdoor patio ideas for planning, building, upgrading, and maintaining floors, shade, privacy, lighting, and decor.