The best patio and fence combo for your backyard comes down to three things: how you actually use the space, what climate you're dealing with, and what you're willing to spend upfront versus over the next decade in maintenance. A concrete patio with a board-on-board wood fence is the most popular all-around choice for privacy-focused homeowners on a mid-range budget. But if you want low maintenance, a paver patio with a vinyl or metal fence wins. And if you're in Texas or another hot, high-wind region, those material choices shift again. This guide walks you through every piece of the decision so you leave with a clear plan, not just a list of options.
Best Patio and Fence Combo: Choose Materials, Layouts, Costs

Phoebe Foster
3 Jul 2026
Start here: clarify your goals before picking anything
Before you price a single material, answer four questions honestly. These will filter out half your options before you ever call a contractor.
- Privacy: Do you want full privacy (you can't see in, they can't see out) or semi-privacy (some light, breeze, and visibility)? Full privacy requires solid fence panels, 6-foot minimum height, and tighter spacing. Semi-privacy works with picket styles, lattice tops, or horizontal slat designs with gaps. The tradeoff is structural: solid panels act like a sail in wind, so full-privacy fences need stronger posts and closer post spacing or they lean within a few years.
- Style: Are you going for a clean modern look, a warm traditional feel, or something rustic? The patio surface and fence material need to speak the same visual language or the backyard feels disjointed. A polished concrete patio looks odd behind a split-rail fence. A flagstone patio looks odd behind a chain-link fence with plastic slats.
- Maintenance: Be honest about how much upkeep you'll actually do. Wood looks great on day one but needs sealing or staining every 1-3 years. Vinyl never needs painting but can crack in extreme cold. Concrete patios are nearly zero-maintenance if sealed at install; pavers are easy to spot-repair but need occasional re-sanding between joints.
- Budget: Split your budget into two buckets: install cost and 10-year ownership cost. A cheap wood fence installed at $18/linear foot can cost you more over a decade than a vinyl fence installed at $30/linear foot if you factor in staining, repairs, and replacement of rotted posts.
Best patio options: materials, real costs, and what they're actually like to live with
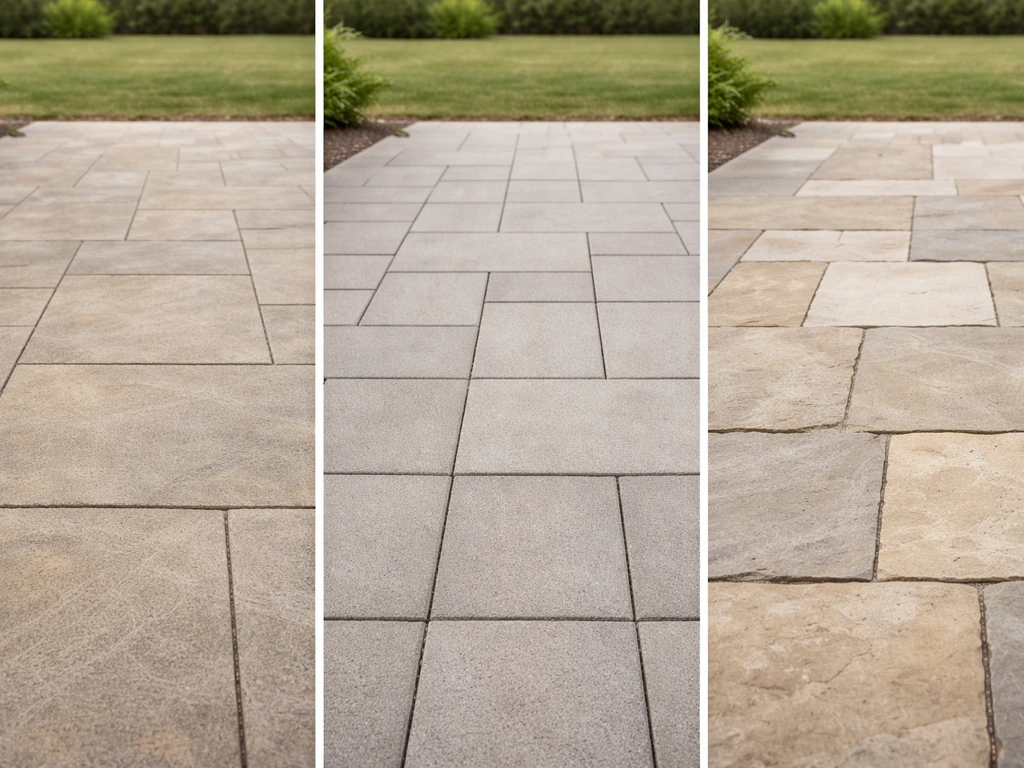
Every patio material has a personality. Some are forgiving. Some are beautiful but punishing. Here's an honest look at the main options and what they cost installed in 2026.
Stamped or brushed concrete
Concrete is the workhorse choice. Installed cost typically runs $8 to $18 per square foot for stamped concrete, depending on pattern complexity and your region. Plain brushed concrete comes in at the low end; elaborate stamped patterns with color push toward the top. It's durable, handles heavy furniture and high foot traffic well, and requires almost no maintenance beyond occasional resealing every 3-5 years. The downside: if it cracks (and it will eventually), repairs are visible because you can't patch concrete invisibly. It also gets very hot underfoot in direct sun, which matters a lot if you're in the Southwest or Texas.
Concrete pavers
Pavers run $15 to $30 per square foot installed, so they cost more upfront than concrete. But the repair story is different: if one paver cracks or shifts, you pull it out and swap it. That's genuinely useful in freeze-thaw climates where ground movement is real. Quality interlocking concrete pavers are spec'd to ASTM C936, which is a manufacturing and performance standard, so you can ask suppliers to confirm compliance. For cold climates especially, permeable interlocking concrete pavers (PICP) are also worth considering, though they need to be designed correctly to maintain infiltration over time and avoid clogging.
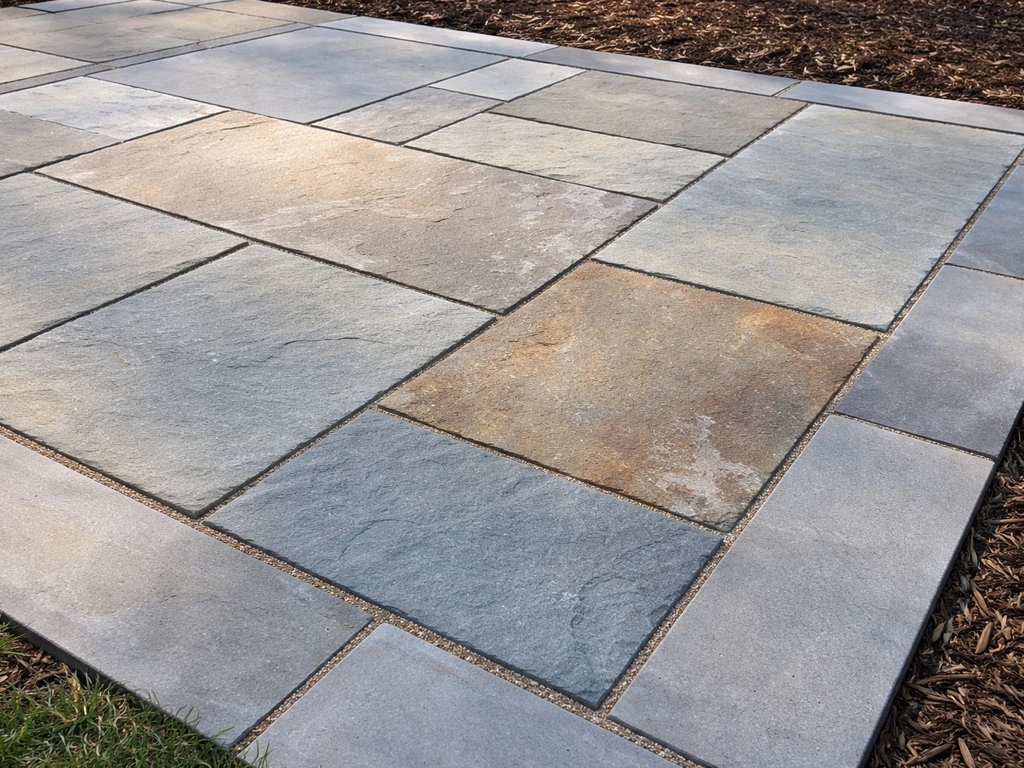
Natural stone
Flagstone, bluestone, travertine, and slate are beautiful and essentially last forever when installed correctly. Installed cost ranges from $15 to $30 per square foot and above for premium stones. The variation in cost depends heavily on availability in your region: stone that's common in the mid-Atlantic is expensive to ship to the Southwest. Stone can be slippery when wet, so check slip resistance ratings for your specific stone if the patio is near a pool or gets regular rain. Travertine stays cooler underfoot than concrete in summer heat, which is a real selling point in hot climates.
Wood decking
Wood decking (pressure-treated pine, cedar, redwood, or composite) is technically a deck rather than a ground-level patio, but many homeowners use it as the primary outdoor living surface. It's warmer underfoot and softer than concrete. The maintenance ask is higher: real wood needs sealing, staining, and periodic board replacement. Composite decking costs more upfront but cuts long-term maintenance dramatically. If you're pairing a wood deck with a fence, matching the wood tones creates a natural cohesion that's hard to achieve with other materials.
Gravel and permeable options
Crushed gravel or decomposed granite patios are the budget-friendly entry point, often running $2 to $6 per square foot including edging. They're permeable, which means rainwater drains through rather than running off, which helps with drainage around fence posts and adjacent landscaping. The downside: gravel shifts under furniture, migrates into the yard over time, and isn't comfortable barefoot. It works well as a secondary zone (a fire pit area, for example) rather than a primary seating surface.
| Material | Installed Cost (per sq ft) | Lifespan | Maintenance | Best For |
|---|---|---|---|---|
| Stamped Concrete | $8–$18 | 25–40 years | Low (reseal every 3-5 yrs) | Mid-budget, clean look, high traffic |
| Concrete Pavers | $15–$30 | 30+ years | Low-medium (re-sand joints) | Freeze-thaw climates, easy repair |
| Natural Stone | $15–$30+ | 50+ years | Low (occasional sealing) | Premium aesthetic, hot climates |
| Wood/Composite Decking | $15–$35 | 15–30 years (wood), 25–30 (composite) | High (wood), Low (composite) | Warm feel, elevated surfaces |
| Gravel/Decomposed Granite | $2–$6 | Ongoing refresh needed | Medium (replenish, edge) | Budget zones, fire pits, drainage areas |
Best fence options: privacy, durability, and what each material costs you over time
Fence choice is more consequential than most homeowners realize because it defines the whole feel of the backyard. Here are the main styles and materials, with honest notes on what works and what fails.
Wood: board-on-board and privacy panels
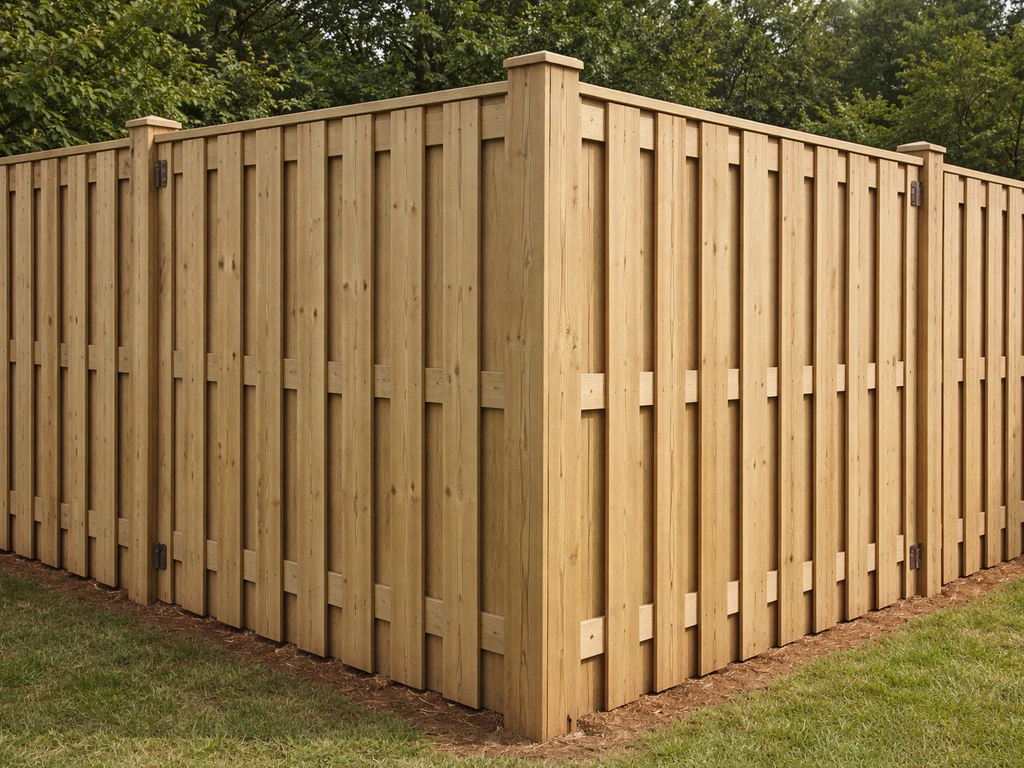
Board-on-board wood fencing is the classic full-privacy choice. Boards overlap so there are no gaps, and it looks good from both sides. Pressure-treated pine typically lasts 15 to 20 years; cedar or redwood gets you 20 to 30 years in normal conditions. Cost runs roughly $15 to $30 per linear foot installed. The biggest maintenance failure point is post rot at the base: water that pools around the base of posts (especially when concrete forms a collar or bowl shape around the post) accelerates decay and causes leaning. If you're getting wood fence posts installed, make sure the concrete is finished so water drains away from the post, not toward it. That one detail extends post life significantly.
Vinyl
Vinyl fencing installs at $20 to $40 per linear foot and needs virtually no maintenance. No painting, no staining, no rot. It can yellow slightly over many years and can crack in sustained deep cold, but in temperate and warm climates it's one of the best long-term value options. Style variety has improved substantially; you can get board-on-board privacy panels, picket styles, and horizontal slat designs in vinyl. The visual critique is that vinyl can look plasticky up close, especially on larger residential lots where wood's natural texture reads better.
Metal: wrought iron and aluminum
Wrought iron and aluminum fencing are the semi-privacy or decorative options, not full-privacy choices. They're built for style, security, and durability rather than blocking sightlines. Aluminum is essentially maintenance-free and doesn't rust. Wrought iron is heavier and more elegant but needs periodic repainting to prevent rust. Installed costs run $25 to $50 per linear foot. These pair well with formal or traditional home styles and work beautifully alongside flagstone or natural stone patios.
Chain link with privacy slats
Chain link is the most affordable fence at $10 to $20 per linear foot installed, and it's durable and low-maintenance. Adding privacy slats converts it to a semi-privacy or near-full-privacy structure at low cost. The important catch: privacy slats significantly increase wind load on the fence because they turn an open mesh structure into a solid panel that catches wind like a sail. That directly affects post spacing and post diameter requirements. If you're adding slats to existing chain link, ask whether the current post sizing can handle the increased wind load before you commit, or you'll be resetting leaning posts within a few years.
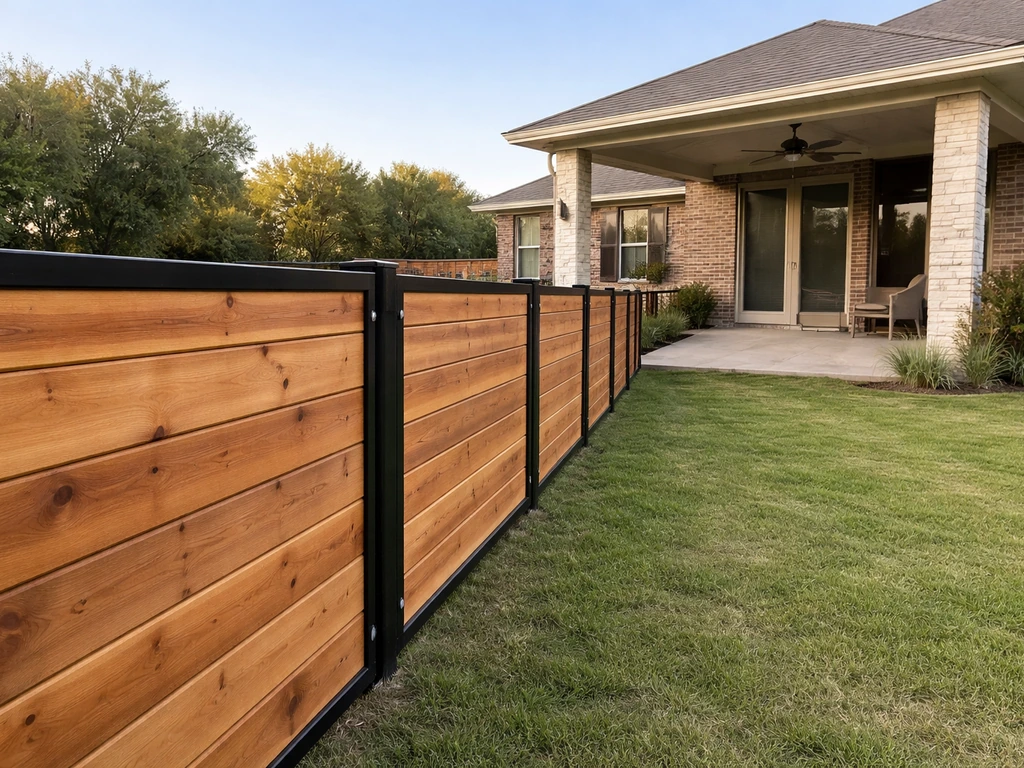
Horizontal slat and modern wood/composite panels
Horizontal wood or composite slat fencing has exploded in popularity because it looks modern and pairs well with contemporary patios. It can be built with tight spacing for full privacy or open spacing for a semi-privacy look that still allows breeze. Cedar horizontal slat fences are a natural complement to concrete paver patios and composite decking. Cost is similar to traditional board fence, roughly $20 to $35 per linear foot installed depending on spacing and material.
| Fence Type | Privacy Level | Installed Cost (per lin ft) | Lifespan | Maintenance |
|---|---|---|---|---|
| Board-on-Board Wood | Full | $15–$30 | 15–30 years | Medium (stain/seal, watch posts) |
| Vinyl Privacy | Full | $20–$40 | 25–40 years | Low |
| Horizontal Slat Wood/Composite | Full to Semi | $20–$35 | 15–30 years (wood), longer (composite) | Medium (wood), Low (composite) |
| Chain Link + Privacy Slats | Semi to Full | $10–$20 + slats | 20–30 years | Low (but check post sizing for wind load) |
| Wrought Iron / Aluminum | Low (decorative) | $25–$50 | 30–50+ years | Low–medium (iron needs repainting) |
| Picket (Wood or Vinyl) | Low to Semi | $15–$30 | 15–40 years | Low–medium |
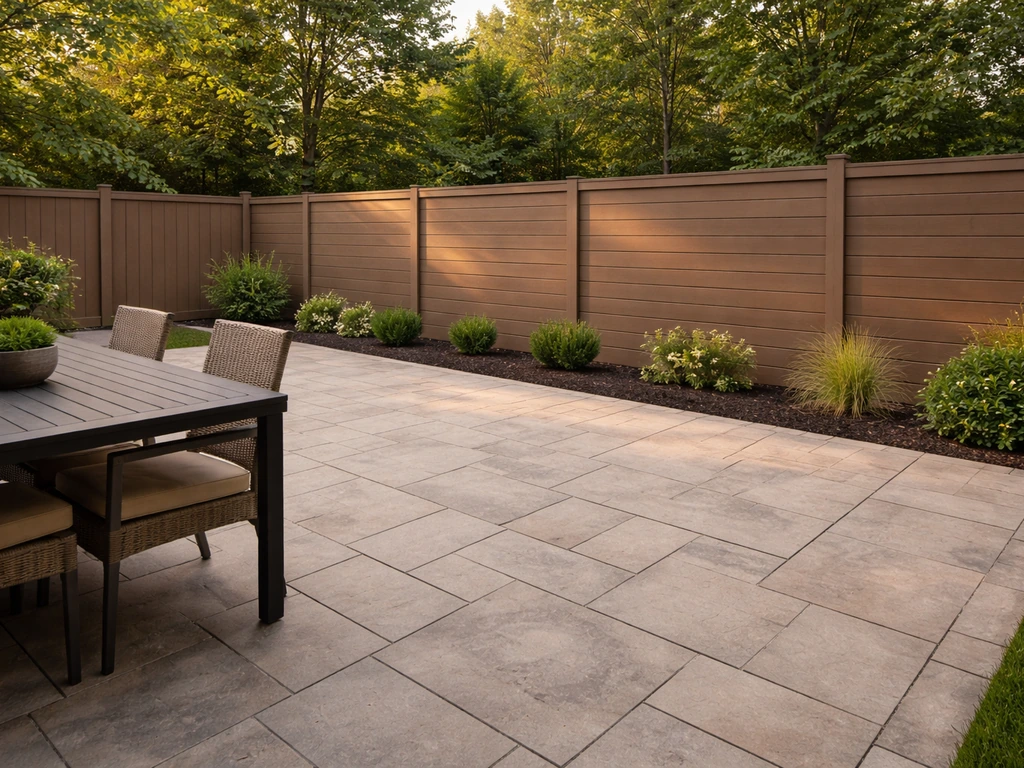
How to pair your patio and fence so they actually look like they belong together
The backyard looks finished when the patio and fence share a visual language, even if they're different materials. The easiest way to get there is to pick a design direction first and then choose materials that fit that direction.
- Modern/contemporary: Concrete or large-format pavers paired with horizontal slat fencing (wood, composite, or metal). Clean lines, minimal ornamentation. Stick to a muted color palette: grays, charcoals, warm whites.
- Traditional/classic: Flagstone or brick pavers paired with board-on-board cedar or a wrought iron fence with stone pillars. Warm tones and natural textures dominate.
- Rustic/farmhouse: Decomposed granite or irregular flagstone paired with a split-rail or horizontal cedar fence. Works well in wide-open lots where you want a boundary without feeling closed in.
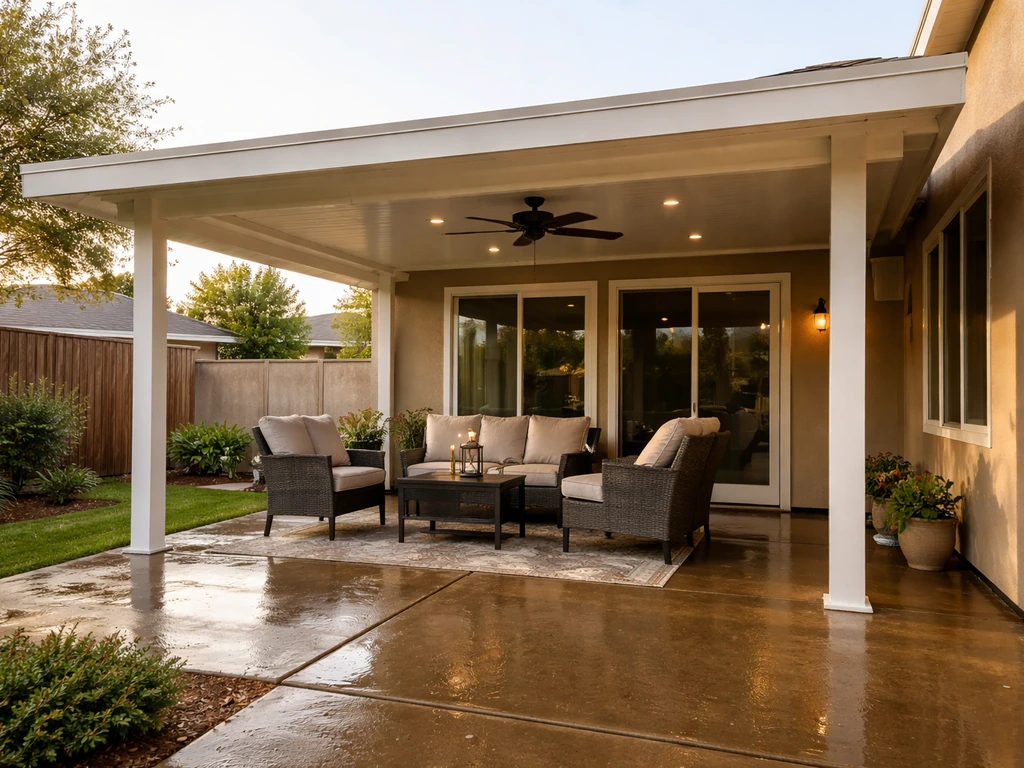
- Tropical/resort: Travertine or light-colored concrete pavers paired with composite horizontal fencing, bamboo screens, or vine-covered lattice panels. Works especially well in Florida, the Gulf Coast, and Southern California.
- Budget-conscious: Brushed concrete patio with a pressure-treated board fence stained to match. Not flashy, but cohesive and totally functional.
If you can't replace the existing fence but want the patio to look better, privacy screens (shade cloth, woven mesh, or bamboo roll) attached to the fence face are a practical shortcut. These block 85 to 95 percent of visibility depending on the product and material, and they can be installed in a weekend for a few hundred dollars. They're not a permanent solution, but they give you a cohesive look while you save for a full fence replacement. This kind of add-on is worth exploring if your situation is closer to Fort Worth patio cover projects or regional builds in the South where temporary shading and privacy screens are common interim solutions.
Planning the layout: measurements, sightlines, gate placement, and drainage
Good layout planning prevents the problems that are expensive to fix after the fact. Here's what to actually do before you start buying materials or calling contractors.
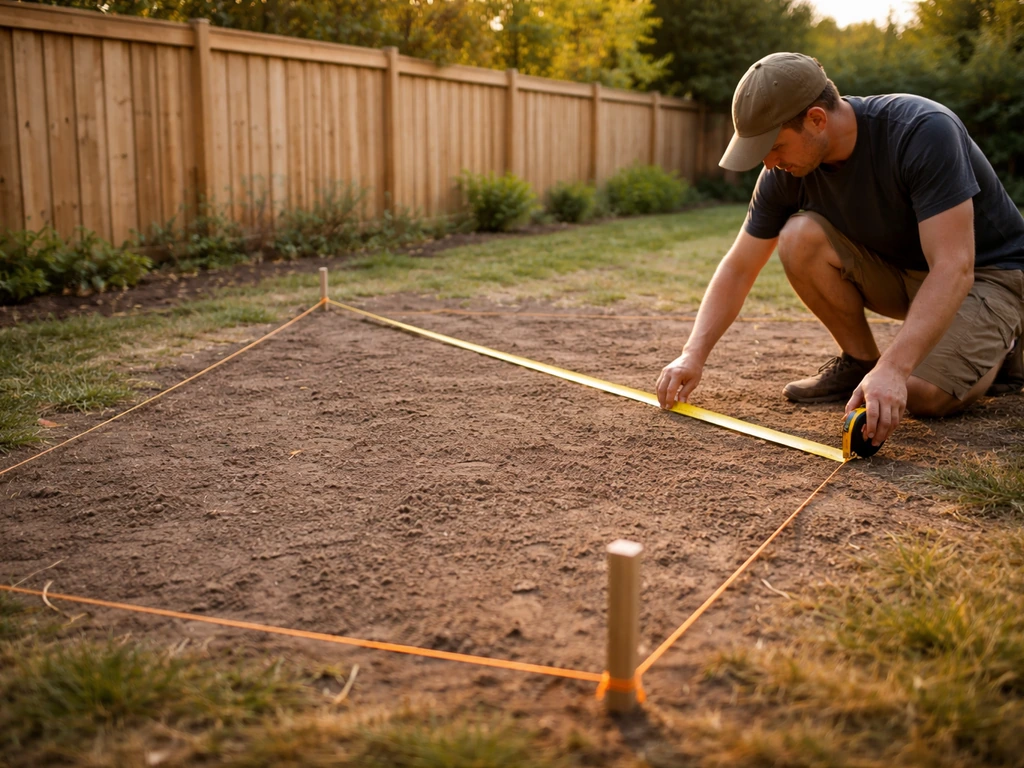
Measure and plot your space
Walk your property line and measure the full perimeter of the area you're fencing. Then measure the footprint of your intended patio (width and depth), noting where existing doors, windows, and landscaping features fall. Draw a simple overhead sketch, even on graph paper. Mark where the sun hits at different times of day if you have sun or shade constraints, which matters a lot if you're planning a patio cover later. A quality patio cover and seamless rain gutters can keep the patio dry and protect the fence and foundations from standing water. A 12x16-foot patio (192 square feet) is a comfortable starting point for a table-and-chairs setup; 16x20 or larger if you're adding a grill station or outdoor sofa.
Plan gate placement carefully
Gate placement is where a lot of homeowners make a frustrating mistake: they put the gate where it's structurally convenient rather than where it makes functional sense. Gates should align with how people actually move through the space, from the driveway to the backyard, from the side yard to the patio, and to the trash or utility area. A gate that routes guests through a narrow side path before they reach the patio creates a traffic pinch point. Also think about clearance: a standard 36-inch gate is fine for foot traffic, but if you need to bring furniture, a mower, or equipment through, you want at least 48 to 60 inches. On wind-loaded fences with privacy slats, gate framing needs to be beefier than the standard because the gate is the most vulnerable panel in a wind event.
Sightlines and fence line alignment
Run a string line along your planned fence path before you dig. Check whether the fence line will block any windows or natural light you want to keep, and whether it creates any awkward pockets in the yard that will become unusable dead zones. The fence line should feel like it encloses the space, not cuts it. Aligning one fence panel run with the back edge of the patio creates a natural visual anchor that makes both elements look intentional.
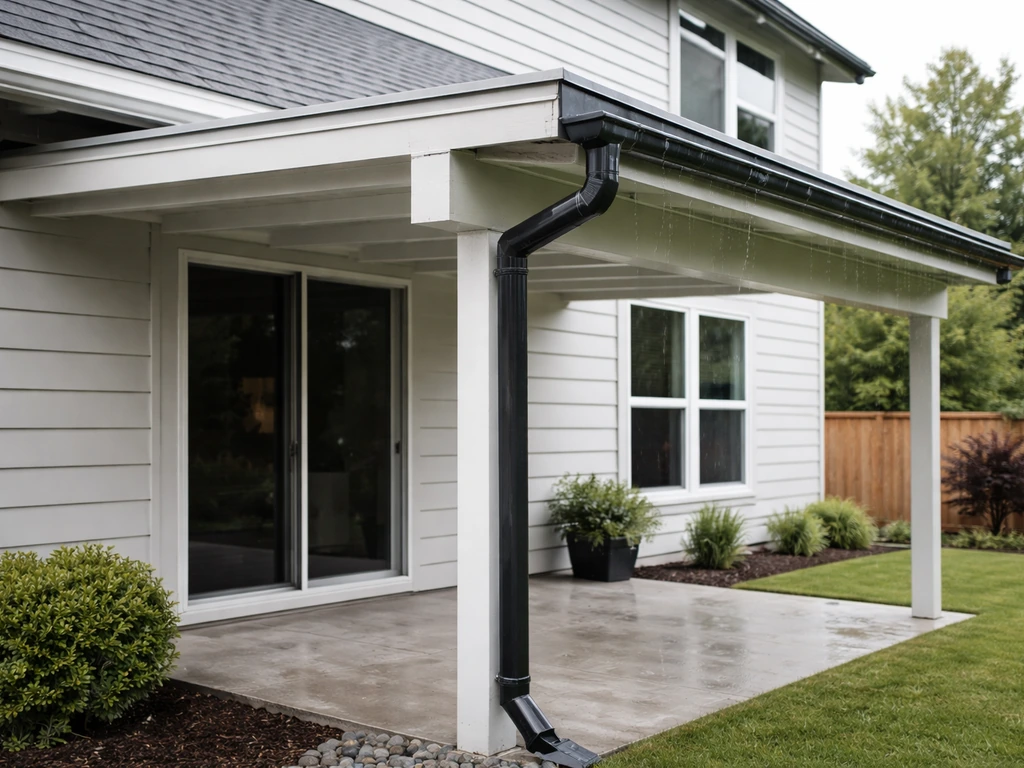
Drainage around patio edges and fence posts
Drainage is the most overlooked planning detail and one of the most expensive to fix after installation. For Lafayette homeowners looking for better patio covers and reliable gutter protection, it helps to plan the roofline and drainage together so water is managed from day one. Your patio should be graded so water drains away from the house at roughly a 1 to 2 percent slope (about 1/8 inch per foot). Fence posts need the same attention: the most common reason wooden fence posts fail early is water pooling around the base. If you're pouring concrete around posts, finish the top of the concrete so it crowns slightly and sheds water away from the post rather than creating a bowl or collar that holds water. Permeable patio surfaces (gravel, permeable pavers) help with overall yard drainage, but they need to be designed and installed correctly to avoid clogging over time.
Permits, HOA rules, and the code basics you need to know
Most homeowners skip this step and then have to tear out work. Don't. Here's what to check before you break ground. For example, Fairfax County’s residential code limits fence and wall height in the blank" rel="noopener noreferrer">front yard to four feet, with higher limits only for specific listed exceptions.
- Fence height limits: Most municipalities allow up to 6 feet in side and rear yards without a permit. Front yard fences are typically limited to 4 feet, with exceptions only in specific cases. Taller fences (7 feet or more in some jurisdictions) often trigger a permit requirement automatically.
- Setbacks: Some local codes require fences to be set back at least 6 inches from the property line. Others allow fences on the line. Pull your local zoning code or call your permit office before you assume.
- Permits: In many cities, a fence under 7 feet in height on private property doesn't require a permit as long as it meets height and setback rules. But this varies significantly. Some jurisdictions require permits for any fence; others only require them for pools or fences over a height threshold. Patios and hardscape over a certain square footage sometimes require a building permit as well.
- HOA rules: HOAs can be more restrictive than municipal codes. They may limit fence materials (no chain link visible from the street), fence colors, patio surface types, or even patio furniture. Review your CC&Rs before spending a dollar on materials.
- Opacity and screening rules: Some zoning codes regulate not just height but visual opacity. A solid privacy fence in a front yard may violate opacity rules even if it's within height limits.
The practical advice: call your local permit office and ask two questions. First, does a fence at my planned height require a permit? Philadelphia’s residential fence FAQ notes that zoning requirements for fence height and opacity and whether you need a zoning permit can depend on whether the proposed fence stays within allowable limits. Second, does a new patio or hardscape over X square feet require a permit? Those two calls take 15 minutes and could save you from a stop-work order. If you're building in a Texas metro area, requirements across cities like Fort Worth, Dallas, and San Antonio vary significantly, so don't assume what applied to your neighbor's project applies to yours.
Hiring contractors, comparing quotes, and deciding what to DIY
Once you know what you want and what's permitted, you're ready to start getting quotes. Here's how to do it without getting burned.
What to ask when you get quotes
Get at least three quotes for each trade (patio and fence separately, unless one contractor does both well). When comparing fence quotes, ask specifically how the contractor handles post depth, post sizing, and spacing for a privacy fence. A contractor who prices posts at 8-foot spacing for a solid privacy fence in a windy region is cutting corners. Standard spacing for full privacy wood or vinyl is typically 6 to 8 feet, but post diameter and embedment depth matter just as much. If you're adding privacy slats to chain link, ask directly whether the post sizing accounts for the increased wind load. That one question separates experienced installers from the ones who'll be back to reset leaning posts in three years.
- Ask for a written material spec: what brand and grade of lumber, concrete, or vinyl, not just 'standard materials.'
- Ask who does the work: subcontractors or the contractor's own crew. Subcontracted labor adds a quality-control variable.
- Ask how post holes are finished: gravel drainage base, concrete crown shape, or direct-burial. This directly affects longevity.
- Ask about drainage plan for the patio: what slope are they grading to, and where does water go?
- Ask what the warranty covers and for how long. Material warranty is different from workmanship warranty.
- For patios, ask whether expansion joints are included in the plan (concrete without proper joints cracks badly in freeze-thaw climates).
What's realistic to DIY
Gravel patios, simple paver patios on flat ground, and fence installation are all reasonable DIY projects for someone comfortable with basic construction work. Gravel is genuinely beginner-friendly. Concrete pavers on a well-prepared gravel base are moderately difficult but very doable over a weekend with rented equipment. Fence installation is physically demanding but straightforward: dig post holes to the right depth (typically 1/3 of the post length), set posts plumb, and attach rails and boards. Where DIY usually gets people in trouble is on drainage (grading errors that send water toward the house) and post setting (posts not plumb, or concrete finished wrong so water pools). Stamped concrete and natural stone mortar work should almost always go to a pro; the prep and finishing work is skilled labor that makes or breaks the result.
Budgeting a realistic combined project
A mid-range backyard project combining a 300-square-foot paver patio and 150 linear feet of board-on-board cedar fence might run $8,000 to $18,000 installed professionally depending on region, complexity, and material grades. A budget version (brushed concrete patio and pressure-treated wood fence, DIY labor) could come in under $4,000 in materials. A premium version (natural stone patio, cedar horizontal slat fence with steel post inserts) can easily exceed $25,000. Regional pricing matters enormously: the same project costs more in coastal California or the Northeast than in the Midwest or rural Texas. Getting multiple local quotes is the only reliable way to calibrate your budget. Projects in areas with strong outdoor living markets, like the ones you see in Texas patio and fence builds, often have more competitive contractor pricing simply because there's more volume and more specialists in the trade.
The bottom line is that a well-planned patio and fence combination is one of the highest-value outdoor upgrades you can make, both for daily quality of life and resale. The projects that go wrong almost always share two traits: skipping the planning stage and choosing the cheapest quote without asking the right questions. Spend a couple of weekends on layout and material research, make the permit calls, and get detailed written quotes. That prep work is the real difference between a backyard you love for 20 years and one you're repairing in three.
FAQ
Can I install the patio first, then build the fence without creating drainage or height problems?
Yes, but only if you design the fence line and the patio base together. For privacy and longevity, keep deck or patio grade from creating a low spot that holds water at the post line. In practice, that means planning drainage so surface water runs away from posts, and ensuring the patio base edge does not push water toward the fence. If you are using pavers or gravel, add a stable edge restraint and confirm the fence contractor understands where the finished patio height will land.
How do I choose correct post spacing and embedment for a privacy fence, especially in windier areas?
A common rule of thumb is to pour concrete footings for fence posts deeper in stable soil, but the right embedment depends on local frost depth and wind exposure. If you are adding privacy slats to chain link, do not rely on the original post sizing assumptions. Ask your installer to specify post diameter, embedment depth, and bracing for the finished wind load, not just for the original fence style.
What should I ask about concrete crack control when planning a stamped or brushed patio?
For most homeowners, the easiest way to prevent visible concrete patching is to plan for crack control, not just repairs. Ask about control joints and expansion joints before the pour, and request a written plan for placement and sealing schedule. If you want a concrete look but dislike heat buildup, consider shaded or oriented layouts, or choose travertine that stays cooler underfoot in summer sun.
If I choose permeable pavers or gravel, can I assume drainage problems are automatically solved?
Yes. Even if the patio is permeable, the fence post area can still trap water if the soil and base prep direct runoff toward the posts. Confirm the contractor grades the patio surface so runoff flows away from the home and does not collect near the fence line. If you use permeable pavers, verify the subbase design supports infiltration over time and includes a plan to avoid clogging.
Are privacy screens on an existing fence a good long-term solution, or only a short-term fix?
Consider temporary privacy screens only if you are okay with a short-term look and added wind considerations. Shade cloth and woven mesh vary in visibility reduction, but they can still act like sails in strong winds. If you use them, keep them tensioned, anchor them securely, and avoid attaching them in a way that stresses weak fence rails or gate frames.
Do privacy slats and semi-privacy panels change what I should require for gate construction?
Not always, because fence slats change how the structure behaves. A gate often becomes the weakest wind-facing panel, and a slat-heavy design can require thicker gate framing, different hinge selection, and stronger latch alignment. Ask for a gate design spec that accounts for wind load and for how the contractor prevents sagging at the bottom.
What gate width should I plan for if I want to move patio furniture and a mower through the side yard?
Measure twice, but also plan for how you will move furniture and equipment, not just people. If you expect to bring in a grill, grill cart, planters, or a mower through the opening, a 48 to 60 inch clear width is usually safer than a standard 36 inch gate. Also check the swing direction relative to patio corners so the gate does not scrape landscaping or block your seating circulation.
How do I make a patio and fence look cohesive when I use different materials?
Yes, and it can be the most noticeable reason the backyard looks “off.” You do not need identical materials, but you should match undertones and visual rhythm. Example: warmer wood tones (cedar or pressure-treated wood) usually pair best with concrete pavers that have a similar warm aggregate color, while cooler stones like slate or bluestone often look more cohesive with gray-toned fencing or metal rails. Pick a design direction first, then choose patio texture and fence color to echo each other.
What specific questions should I ask a fence contractor so my posts do not rot early?
If you are comparing contractors, ask whether post holes are excavated and set plumb to the specified embedment, then confirm how the concrete is finished. For wood fences, the finishing detail matters, you want concrete that sheds water away from the post, not a bowl shape that holds it. Get that explained in writing, especially if the contractor is proposing a collar or specific concrete form.
Is it better to install the fence before the patio or after, and why does the sequence matter?
Often yes, but the safest approach is to coordinate timing and sequence. If you are installing a fence on fresh patio work, plan the exact finished patio height before fence installation. Otherwise you can end up with an uneven transition, trapped water at the base, or a need to redo edging and base thickness. Ask the contractor which comes first in their standard workflow and how they handle final grade.
What line items should be included in my written quotes so I can compare patio and fence bids fairly?
One of the biggest budgeting mistakes is assuming “per square foot” includes the prep and long-term surface needs. For example, stamped concrete costs depend heavily on subbase preparation and color or pattern complexity, and natural stone costs can shift based on regional availability and travel. Request a line-item quote that includes base prep, edging, drainage work, and any sealing needs for stone or concrete.
Where is DIY most likely to fail for a patio and fence combo, and what parts are usually worth hiring out?
DIY can work for gravel, and it can work for pavers on a well-prepped base, but it is risky for stamped concrete and natural stone placements where finishing and tolerance matter. If you DIY fencing, confirm you can keep posts plumb and that you can grade correctly so water does not collect at the post bases. A practical decision aid is to DIY the pieces you can redo cheaply (gravel, edging, simple paver installs) and hire out the parts where mistakes are visible or require tearing up hardscape.
Next Articles
Quality Patio Covers and Seamless Rain Gutters Guide
Choose quality patio covers and seamless rain gutters, compare materials, specs, costs, and coordinate runoff for leak-f
Fort Worth Patio Covers: Types, Costs, Materials, and Setup Guide
Fort Worth patio covers guide: types, materials, costs, add-ons, and install steps for Fort Worth weather and permits.
Texas Best Fence & Patio Reviews and Photo Checklist
Use reviews and photo checklist to vet Texas Best Fence & Patio, compare quotes, confirm permits, and choose patio and f