
Patio top shades are coverings mounted above an outdoor patio to block sun, deflect rain, and make the space usable for more hours of the day. They range from permanent hard-top canopies and solid patio covers to fabric awnings, retractable systems, pergolas, shade sails, and replacement canopy tops. The right choice depends on your climate, how you use the space, what your budget looks like, and whether you want something you can install yourself or need a contractor. This guide walks through every major option with real cost ranges, material trade-offs, sizing rules, and a step-by-step selection process so you can make a confident decision before spending a dollar.
Patio Top Shades: Complete Guide to Types, Costs & Care Tips

Phoebe Foster
28 Jul 2026
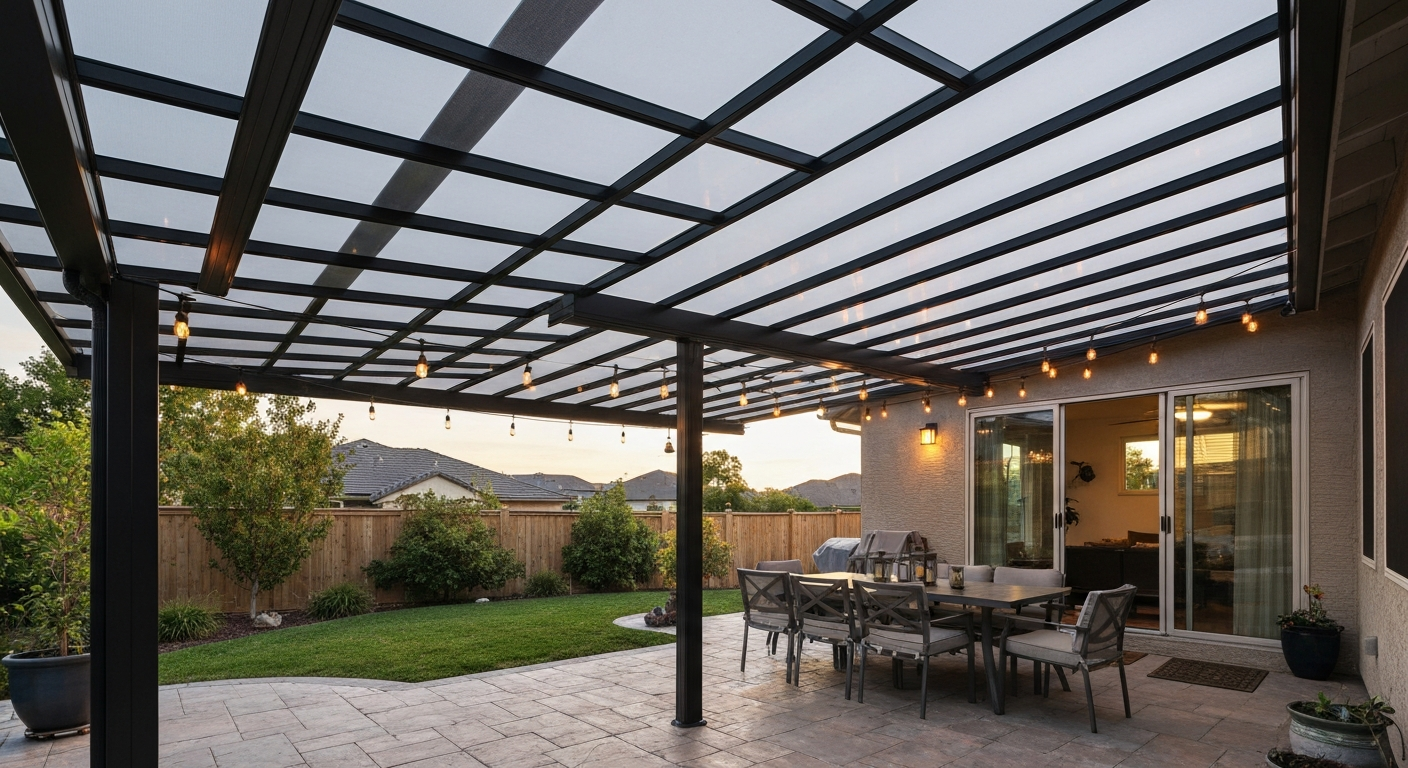
What are patio top shades? Purpose, common terms, and use cases
The phrase "patio top shades" is an umbrella term homeowners use to describe any overhead covering or shading structure placed above a patio. You'll also hear these called patio covers, canopy tops, shade covers, awning tops, or overhead shade structures. They all do roughly the same job: reduce direct sun exposure, provide some shelter from light rain, and extend the comfortable hours you can spend outside.
The use case shapes the right choice more than anything else. If you host dinners and need full rain protection, a solid hard-top cover makes sense. If you mainly want afternoon sun relief and like an open-air feel, a shade sail or pergola with lattice might be all you need. If you entertain occasionally but don't want a permanent structure, a retractable awning gives you flexibility. Replacement canopy tops are a separate, practical category for people who already have a canopy frame and just need a new fabric panel. Knowing which problem you're actually solving saves a lot of time and money.
Quick decision guide: pick the right style by site, use and budget
Before diving deep into every option, here is a fast filter. Answer these three questions and you'll land on one or two candidates worth exploring further.
- Do you need full rain protection, partial shade, or just sun relief? Full rain protection requires a solid-top cover (hard-top canopy, polycarbonate panels, solid aluminum patio cover). Partial shade suits pergolas, lattice tops, and shade sails. Sun relief only can be handled by any option including lightweight fabric.
- Is this permanent or flexible? If you own your home and plan to stay, a fixed structure adds value and requires minimal maintenance long-term. If you rent, plan to move, or want seasonal use, retractable tops, shade sails, or freestanding canopies are easier to remove.
- What is your total installed budget? Under $500 points to shade sails, DIY fabric canopy kits, or replacement canopy tops. $500–$3,000 covers retractable awnings and entry-level aluminum canopy kits. $3,000–$10,000+ is the range for custom hard-top patio covers, motorized retractable systems, and built pergolas.
If you're in a high-wind or heavy-snow region, scratch anything without engineered anchoring off your short list immediately. If you're coastal, eliminate anything with untreated steel hardware. Climate narrows the field faster than budget does.
Overview of patio top shade options
Here is a side-by-side look at the main patio top shade types before we go deeper into each one.
| Type | Rain Protection | Permanence | Typical DIY Feasibility | Typical Installed Cost |
|---|---|---|---|---|
| Hard-top canopy | Full | Semi-permanent to permanent | Kit models: moderate | $1,500–$8,000+ |
| Hard-top patio cover | Full | Permanent | Low (structural/permits) | $5,000–$20,000+ |
| Fabric shade / awning top | Light to moderate | Semi-permanent | High | $300–$2,500 |
| Replacement canopy top | Light to moderate | Replacement only | High | $50–$400 |
| Retractable top (manual) | Moderate (when closed) | Semi-permanent | Moderate | $800–$3,000 |
| Retractable top (motorized) | Moderate (when closed) | Semi-permanent | Low | $2,500–$7,000+ |
| Pergola / lattice top | Partial | Permanent | Moderate to low | $2,000–$15,000+ |
| Shade sail | Sun only | Seasonal/flexible | High | $100–$800 |
Hard-top canopies and patio covers: how they work, pros/cons, materials, durability and typical cost
Hard-top canopies and hard-top patio covers are solid-roof structures. A hard-top canopy typically comes as a freestanding kit with posts, a frame, and a solid panel roof made from aluminum, polycarbonate, or steel. A hard-top patio cover is usually attached to the house, built more like a permanent roof extension, and requires more serious structural work and often a permit. Both deliver complete rain protection and heavy-duty sun blocking.
Aluminum is the most popular material for manufactured hard-top systems because it doesn't rust, stays relatively light, and requires almost no maintenance. Polycarbonate panels, including multiwall systems like those made from SABIC LEXAN THERMOCLEAR sheet, are a common choice for the roof panel itself because they admit natural light while blocking UV. Technical guides for multiwall polycarbonate call for a minimum slope of about 5 degrees (roughly a 1:10 gradient) to ensure drainage and maximize service life. Steeper is better, especially in rainy climates. One leading manufacturer publishes a 20-year limited breakage and weathering warranty for specified polycarbonate grades, which gives you a useful benchmark when comparing products.
Hard-top pros and cons
| Pros | Cons |
|---|---|
| Full rain and sun protection | Higher upfront cost |
| Long lifespan (15–25+ years for aluminum) | Permit usually required for attached covers |
| Adds resale value | Professional installation often needed |
| Low ongoing maintenance (aluminum) | Fixed structure limits future changes |
| Wide wind and snow load ratings available | Polycarbonate panels can yellow over 10–15 years if low-grade |
Installed cost for a hard-top canopy kit in the 10x12 to 12x16 foot range typically runs $1,500–$5,000 including basic installation. A custom attached hard-top patio cover starts around $5,000 for basic aluminum and can reach $20,000 or more for premium materials, complex rooflines, integrated gutters, and insulated panels. If you're comparing those options in more detail, hard top canopy for patio and hard top patio cover each have their own deeper discussion worth reading alongside this guide.
Fabric shades and replacement canopy tops: design variations, pros/cons, materials, durability and typical cost
Fabric shade tops include everything from attached house awnings to freestanding canopy tent covers to standalone sail shades made of woven cloth. The defining characteristic is a flexible textile rather than a rigid panel. ASTM D4847 is the standard specification for woven awning and canopy fabrics, covering breaking strength, water resistance, lightfastness, and tear resistance. When you see a fabric marketed as meeting ASTM D4847, it means it has been tested against those specific performance benchmarks, not just described with marketing language.
Solution-dyed acrylic fabrics (Sunbrella is the most recognized example, though there are comparable options from other brands) are the gold standard for durability and color retention. These fabrics resist UV degradation far better than cheaper polyester covers and carry the strongest warranties, typically 5–10 years on the fabric itself. Budget polyester canopy tops often last only 2–4 seasons before fading, tearing, or developing mold. If you already have a frame in good shape, swapping in a quality replacement canopy top is one of the best dollar-for-dollar upgrades you can make. That specific topic is covered in more depth in the patio replacement canopy top guide. For buying, measuring, and installation tips, see the patio replacement canopy top guide.
Fabric shade pros and cons
| Pros | Cons |
|---|---|
| Low entry cost ($50–$400 for replacement tops) | No rain protection in heavy downpours |
| Wide color and design choices | UV degradation over time, especially polyester |
| Easy DIY installation and replacement | Requires seasonal storage in harsh climates |
| Lightweight, minimal structural demand | Lower wind resistance than hard tops |
| Flexible: can be removed or changed | Top-tier fabrics add cost |
Sunbrella's published cleaning instructions recommend spot cleaning with mild soap and water, periodic rinsing, and avoiding harsh solvents. Sunbrella, Fabric Cleaning & Care Guidance (via fabric suppliers) provides cleaning and maintenance instructions recommending spot cleaning with mild soap and water, periodic rinsing, avoidance of harsh solvents, and routine cleaning plus seasonal storage or covering to maximize the lifespan of solution‑dyed acrylic canopy fabrics Sunbrella — Fabric Cleaning & Care Guidance (via fabric suppliers). If you follow those steps and bring the fabric in during heavy winter weather, a quality solution-dyed acrylic canopy top can realistically last 8–12 years. Budget covers that stay up year-round often need replacement every 2–3 years.
Retractable patio tops: manual vs. motorized, benefits, limitations, materials, durability and typical cost
Retractable patio tops give you the option to have shade when you want it and open sky when you don't. Manual systems use a hand crank to extend and retract the fabric arm. Motorized systems add an electric motor, and higher-end models integrate wind sensors that retract the awning automatically in a gust. This is a meaningful safety feature because open retractable awnings exposed to unexpected high winds are one of the most common causes of expensive damage to these systems.
Installation manuals from major manufacturers specify at least two competent installers for mounting, call for proper wall or fascia anchoring, and list annual inspection and lubrication as part of scheduled maintenance. The fabric on retractable awnings is typically solution-dyed acrylic and can last 8–15 years with good care. The mechanical components are the more vulnerable part: motors and torsion springs tend to need service or replacement around the 8–12 year mark depending on use frequency and exposure.
| Feature | Manual Retractable | Motorized Retractable |
|---|---|---|
| Typical cost (installed) | $800–$3,000 | $2,500–$7,000+ |
| Operation | Hand crank | Remote, wall switch, or app |
| Wind protection | Manual retraction required | Auto-retract sensor available |
| DIY feasibility | Moderate (two people needed) | Low (electrical tie-in required) |
| Maintenance | Annual lubrication and check | Annual lubrication plus motor service |
| Best for | Occasional use, budget buyers | Frequent use, convenience seekers |
Pergolas and lattice tops: design options, pros/cons, materials, durability and typical cost
A pergola is an open-beam overhead structure that provides partial shade through its lattice or spaced rafters. It does not block rain on its own, but many homeowners add shade cloth, polycarbonate panels, a retractable canopy insert, or climbing plants to increase coverage. Pergolas are among the most popular patio upgrades because they define outdoor space, look great, and add genuine real estate value, but they require the most upfront investment and usually the most planning.
Material options span wood, aluminum, vinyl, and steel. Cedar and redwood are traditional choices with natural rot resistance, but they require staining or sealing every 2–3 years to maintain appearance and prevent cracking. Pressure-treated pine is less expensive but needs proper finish and treatment. Aluminum pergola kits have become extremely competitive: they resist rust and rot, need almost no maintenance, and now come in attractive powder-coated finishes that mimic wood grain. Vinyl is low-maintenance but can look plasticky and discolor in intense UV over a decade or more. Installed costs based on consumer marketplace data typically run $2,000–$6,500 for a 100-square-foot pergola, with wide variation by material, region, and custom work. A high-end custom cedar or steel pergola with covers and integrated lighting can reach $15,000+.
| Pros | Cons |
|---|---|
| Adds significant curb appeal and value | No rain protection without add-on cover |
| Works with climbing plants and shade additions | Higher cost than most fabric alternatives |
| Long lifespan with right material (aluminum: 25+ years) | Wood requires ongoing maintenance |
| Wide design flexibility | Usually requires permit for attached structures |
| Can anchor fans, lights, and screens | Complex builds need professional installation |
If you want a more structured comparison of pergola-style overhead options alongside hard covers, the patio top cover ideas article explores design combinations and aesthetic trade-offs in more depth.
Shade sails: when they make sense, pros/cons, materials, durability and typical cost
Shade sails are tensioned fabric panels anchored between posts or fixed points to create a taut canopy overhead. They're popular in dry, sunny climates like the Southwest and California because they block direct UV effectively, look modern, and cost very little compared to any structural option. A quality shade sail with UV-stabilized HDPE fabric runs $100–$400 for the sail itself, plus hardware and any post installation you need.
The limitations are real: shade sails provide no rain protection, they need to be removed in high winds and stored in winter climates, and the tensioned anchoring requires solid attachment points (wall anchors, structural posts, or trees with adequate root systems). In humid climates, low-quality shade sails trap moisture and develop mold within a season or two. Spend the extra money on a shade sail rated for outdoor UV exposure with reinforced corners and stainless hardware, and inspect tension and hardware each spring.
| Pros | Cons |
|---|---|
| Very low cost ($100–$800 installed) | No rain protection whatsoever |
| Easy seasonal removal and storage | Must be removed in high winds |
| Modern aesthetic | Requires solid anchor points |
| Good UV blocking with quality fabric | Short lifespan if not stored seasonally |
| No permits typically required | Not suitable for snow climates year-round |
Materials explained: wood, aluminum, steel, polycarbonate and fabrics
The material you choose determines almost everything about long-term cost, maintenance, and how well the structure holds up in your specific climate. Here's how the main options compare across the factors that matter most.
| Material | Strength | Corrosion Resistance | Maintenance | Typical Lifespan |
|---|---|---|---|---|
| Cedar / Redwood | Good | Moderate (natural resins) | Stain/seal every 2–3 years | 15–30 years with care |
| Pressure-treated pine | Good | Moderate (chemical treatment) | Stain/seal every 2–3 years | 10–20 years |
| Aluminum (powder-coated) | Good | Excellent | Rinse annually, recoat if scratched | 25–40+ years |
| Steel (galvanized or painted) | Excellent | Moderate to good | Inspect and touch up paint every few years | 15–30 years |
| Polycarbonate panels | Very good (impact resistant) | Excellent (UV-stabilized grades) | Annual cleaning, avoid abrasives | 15–20 years (quality grades) |
| Solution-dyed acrylic fabric | Good (per ASTM D4847) | Good (UV and mildew resistant) | Spot clean, rinse, seasonal storage | 8–15 years |
| Polyester fabric | Moderate | Fair (fades faster) | Regular cleaning | 3–6 years |
In coastal environments, standard galvanized fasteners are not enough. ASTM A153 governs hot-dip zinc coatings, but for salt air exposure you need to specify marine-grade 316 stainless steel fasteners or proven zinc-flake coatings, and you need to isolate dissimilar metals to prevent galvanic corrosion. Aluminum frames paired with stainless fasteners are the lowest-headache combination at the coast. Wood and steel both require far more vigilance within a mile of the ocean.
Climate-specific recommendations and trade-offs
One of the biggest mistakes homeowners make is buying a shade structure based on what looks good at a showroom or online, without accounting for their actual climate. I've seen shade sails destroyed by a single Gulf Coast thunderstorm and wood pergolas reduced to rot in three years in humid Southeast summers. Use NOAA's climate normals (1991–2020 station data is publicly available) to get a realistic picture of your local rainfall, snowfall, and temperature ranges before committing to any structure.
| Climate Challenge | Best Options | Avoid | Key Consideration |
|---|---|---|---|
| Intense sun (Southwest, Texas) | Shade sails, solid aluminum canopy, polycarbonate roof | Dark-colored fabrics (heat trap) | UV-stabilized materials only; ventilation under cover |
| Heavy rain (Southeast, Pacific Northwest) | Hard-top canopy or cover, pitched polycarbonate | Shade sails, flat fabric tops | Minimum 5° roof slope for drainage; guttering required |
| High wind (Great Plains, coastal) | Engineered hard-top with wind rating, retractable with auto-sensor | Freestanding fabric canopy, untensioned shade sails | Check ASCE 7 design wind speed for your zip code |
| Snow load (Midwest, Northeast, Mountain West) | Solid hard-top rated for snow load, steep-pitch pergola | Fabric tops left up all winter, flat polycarbonate | IBC Appendix I minimum 10 psf live load; use mapped snow loads if higher |
| Coastal salt air | Powder-coated aluminum frame, 316 SS fasteners | Untreated steel, low-grade galvanized hardware | Annual rinse; inspect fasteners each spring |
| High humidity (Gulf Coast, Florida) | Aluminum or composite materials, solution-dyed acrylic fabric | Untreated wood, polyester fabric | Mold prevention via slope and air circulation |
The 2024 International Building Code (Appendix I) requires patio covers to be designed for dead loads plus a minimum 10 psf vertical live load, with mapped snow loads applied wherever they exceed that. ASCE 7 wind and snow maps provide the site-specific design values your structure needs to be engineered for. If you're in a hurricane-prone area or a mountain location with significant snowfall, do not skip this step. A structure that fails under load is dangerous, not just expensive.
Sizing, orientation and drainage rules
Getting the size right matters more than most people expect. A shade that's too small leaves half your patio exposed during peak afternoon sun. One that's too large creates drainage problems, blocks window light, or triggers structural requirements you weren't planning for.
- Cover at least the area where you place furniture and dining tables. Add 2–3 feet of overhang beyond the edge of your furniture footprint on the sun-facing side.
- For attached covers, check your home's fascia or wall structure before specifying span. Most aluminum patio cover kits are designed for spans up to 12–16 feet between posts without intermediate support; longer spans need engineered beams.
- Roof slope: multiwall polycarbonate technical guides call for a minimum 5-degree slope (approximately 1:10 gradient) for drainage and longevity. A 1:12 pitch (about 4.8 degrees) is the practical minimum for any solid-panel roof over a patio.
- Drainage: any hard-top cover over roughly 100 square feet should have a gutter system at the low edge to direct runoff away from the patio and foundation. Direct roof water away from the house footing.
- Orientation: in hot climates, prioritize shading the west and southwest elevations, which receive the most intense afternoon sun. A south-facing cover provides more all-day shade in summer.
- Roof tie-in: if attaching to the house, the ledger board must be bolted into structural framing (studs or rim joist), not just the fascia. Use flashing at the wall connection to prevent water intrusion.
- Freestanding structures need footings sized to local frost depth. In cold climates, concrete piers must extend below the frost line, which ranges from a few inches in Florida to 4–5 feet in parts of Minnesota.
Cost breakdown and budgeting tips
Costs vary significantly by region, material, and whether you do any of the work yourself. RSMeans data (updated annually by Gordian) is the industry standard for regional construction cost benchmarks, and local contractor bids can run 20–40% higher or lower than national averages depending on your market. The sample budgets below are based on a typical 12x16-foot (192 sq ft) patio in a mid-cost U.S. market.
| Project Tier | Description | Estimated Installed Cost | What's Included |
|---|---|---|---|
| Basic | Shade sail or fabric canopy kit, DIY installed | $150–$600 | Materials only; hardware; no permit typically required |
| Mid-range | Aluminum hard-top canopy kit, semi-DIY or contractor installed | $2,500–$6,000 | Materials, basic installation, gutters; may need permit |
| Premium | Custom attached hard-top patio cover with insulated panels, gutters, electrical | $8,000–$20,000+ | Engineered design, permit, licensed contractor, electrical rough-in, gutters, finishing |
Labor typically runs 30–50% of total installed cost for mid-range and premium projects. Permits add $150–$600 in most jurisdictions for patio structures. Electrical rough-in for lighting and fans adds $500–$1,500 depending on distance from the panel and local labor rates. Gutters and drainage are often overlooked in initial budgets and can add $300–$800. Always get three bids and ask each contractor to break out material and labor costs separately so you can compare apples to apples.
Installation choices: realistic DIY scope, step-by-step checklist, tools and time estimates
A surprising number of patio top shade projects are legitimate DIY jobs for a reasonably handy homeowner with a helper. Shade sails, replacement canopy tops, freestanding canopy kits, and smaller retractable awnings all fall within reach. Attached hard-top covers with structural connections, electrical, or complex drainage are a different story and usually warrant professional help.
DIY installation checklist for a freestanding canopy or shade kit
- Measure and mark the footprint, confirming clearance from structures and overhead obstacles.
- Verify soil conditions: test for buried utilities (call 811 in the U.S. before digging).
- Dig post holes to the required depth for your frost zone or per the kit's instructions.
- Set posts in concrete; verify plumb in two directions and allow 24–48 hours to cure.
- Assemble frame components per manufacturer sequence; use a torque spec if provided for bolt tightening.
- Install roof panels or fabric from one end to the other, overlapping or connecting per instructions.
- For fabric tops: tension evenly and confirm there are no low spots that will pool water.
- For polycarbonate panels: tape open ends with UV-rated closure tape; seal ribs at the top edge.
- Install any gutters or downspouts at the low end; direct water away from the foundation.
- Final inspection: check all fasteners, confirm drainage slope with a level, test fabric tension.
Tools you'll likely need: post-hole digger or auger, level, cordless drill and bits, socket set, tape measure, ladder, and a helper for panel or frame lifting. Budget 1–2 days for a freestanding kit on your first attempt, less for a shade sail. A retractable awning requires two people for the mounting step and a half-day for most homeowners comfortable with basic wall work.
When to hire a contractor: red flags and how to evaluate bids
Some projects have warning signs that make professional installation the right call regardless of your skill level. If any of the following apply to your project, budget for a licensed contractor.
- The cover attaches to the house and requires a ledger board bolted into structural framing.
- Your local jurisdiction requires a licensed contractor to pull the permit.
- The design includes electrical work (lighting, fans, motorized systems): NEC and local codes require GFCI protection for outdoor receptacles and fixtures listed for damp or wet locations.
- The project involves complex drainage or must tie into an existing gutter or roof system.
- You're in a high-wind or heavy-snow zone and the structure needs to be engineered.
- The site involves slopes, retaining walls, or unusual soil conditions.
When evaluating bids, ask each contractor for their license number and verify it with your state's licensing board. Ask specifically whether they will pull the permit in their name. Request an itemized breakdown of material versus labor costs, and ask which specific products (brand, model, thickness) they plan to use so you can verify ratings. ICC-ES evaluation reports for prefabricated patio cover systems are publicly searchable and tell you the wind and snow ratings the system has been certified to achieve. If a contractor is proposing a specific system, confirm it carries an ICC-ES evaluation report (ESR) acceptable to your building department.
Permits and inspection checklist
Permit requirements vary by jurisdiction, but certain triggers are nearly universal in the U.S. Understanding them before you start planning saves you the frustration of building something you may be required to tear down or modify.
| Trigger | Typical Requirement |
|---|---|
| Attached patio cover (any solid roof attached to house) | Building permit; structural plan showing ledger connection and load path |
| Freestanding structure over a certain area (often 200 sq ft) | Building permit; site plan; footing depth verification |
| Electrical work (lighting, fans, outlets) | Electrical permit; GFCI protection on outdoor circuits; fixtures listed for wet/damp location per NEC |
| Misting systems connected to potable water supply | Plumbing permit; backflow prevention device required per local plumbing code |
| HOA community | HOA architectural review approval before permit application |
| Historic district or coastal overlay zone | Additional design review; material restrictions may apply |
For the electrical side, the National Electrical Code (NFPA 70) governs outdoor installations. Outdoor receptacles require GFCI protection, and ceiling fans and light fixtures must be rated for damp or wet locations depending on their exposure. This is not optional or something to work around: an unlicensed or uninspected electrical installation can void homeowner's insurance coverage in a loss claim.
If your project includes a misting system, note that Maricopa County and many other jurisdictions require a certified backflow prevention device on any potable-water-connected misting installation. Inspectors specifically flag missing backflow prevention, so include it from the start rather than adding it after a failed inspection.
Accessories and integrations: making your patio top shade work harder
A patio top shade is the foundation, but what goes with it determines how comfortable the space actually is. The right accessories turn a shaded slab into a genuinely livable outdoor room.
- Ceiling fans: install a fan rated for damp or wet locations (whichever applies to your cover type). A 52-inch fan can drop perceived temperature by 4–8°F through evaporative cooling effect. Mount at 8–9 feet above floor for best airflow.
- Misting systems: most effective in low-humidity climates (Southwest, Texas). In humid climates they add little comfort. Require backflow prevention on potable water connections.
- Lighting: LED string lights work for ambiance but install a proper outdoor-rated fixture for task lighting over dining areas. Tie into a GFCI circuit and use fixtures rated for your exposure level.
- Gutter systems: essential for any hard-top cover. Direct water to a downspout that discharges away from the foundation. A 12x16 roof in a moderate rain climate can shed hundreds of gallons in a storm.
- Screens or privacy curtains: outdoor curtain panels on track systems or roll-down insect screens can be installed along the perimeter of a patio cover to block bugs, wind, and neighbors. Look for UV-stabilized fabrics.
- Heaters: infrared electric or natural gas heaters extend use into cooler months. Wall or ceiling-mounted units require secure structural attachment and, for gas, a licensed plumber.
- Flooring coordination: your shade structure should be designed with the final flooring surface in mind. Post footings need to clear pavers or concrete slabs, and drainage slope should complement (not fight) your flooring pitch.
Maintenance, expected lifespan, warranties and signs it's time to repair or replace
Every patio top shade type needs some maintenance to reach its expected lifespan. The gap between a structure that lasts 8 years and one that lasts 20 is almost always maintenance, not original quality.
| Type | Annual Maintenance | Expected Lifespan | Replacement Sign |
|---|---|---|---|
| Aluminum hard-top | Rinse; inspect fasteners; clean gutters | 25–40+ years | Frame corrosion, panel yellowing, hail damage |
| Polycarbonate panels | Clean with mild soap; inspect end seals | 15–20 years | Yellowing, cracking, delamination of layers |
| Cedar/wood pergola | Inspect for rot; re-stain or re-seal | 15–30 years with care | Soft spots, cracking, gray unpainted wood |
| Solution-dyed acrylic fabric | Spot clean; rinse; seasonal storage in harsh climates | 8–15 years | Fading, tears, mold that won't clean out |
| Polyester replacement canopy | Clean; re-waterproof spray if needed | 3–6 years | Rapid fading, seam separation, pooling water |
| Retractable awning fabric | Annual lubrication of arms; inspect motor and spring | 8–15 years (fabric) | Torn fabric, failed motor, arms that won't extend fully |
| Shade sail | Remove and store seasonally; inspect hardware | 4–10 years | Fraying edges, mold, failed corner hardware |
When reading warranties, distinguish between a fabric warranty and a structural warranty. A 10-year fabric warranty on a canopy top is meaningful. A 10-year warranty that excludes fading, wind damage, and installation errors covers almost nothing in practice. Ask the manufacturer or retailer to specify what failure modes are actually covered before using warranty length as a decision factor.
Practical buying and contractor-comparison checklist
Use this checklist when comparing products or contractor proposals. It takes about 20 minutes per bid and will catch most of the common issues that lead to regret later.
- Confirm the structural material (aluminum grade, wood species, steel gauge) and finish (powder coat thickness, galvanization spec).
- Ask for the wind speed rating and snow load rating of the system. Request the ICC-ES evaluation report number if it's a prefabricated system.
- Verify the roof slope in the design drawing: confirm it meets the minimum 5-degree slope for polycarbonate or a pitched equivalent for solid panels.
- Confirm fastener specification: hot-dip galvanized per ASTM A153 minimum; marine-grade 316 stainless for coastal locations.
- Ask what warranty covers the structure versus the fabric or panels, and read the exclusions.
- Confirm the contractor holds a valid state contractor license and will pull the permit in their name.
- Request an itemized bid with materials and labor listed separately; ask what allowances are included for gutters, footings, and electrical.
- Ask whether the system requires a custom engineer's stamp or if the ICC-ES report satisfies the building department.
- Confirm the installation timeline and ask who is responsible for site cleanup and debris removal.
- Check references from at least two recent completed projects of similar scope and material.
Actionable selection workflow: from site survey to installation
Here is the step-by-step process I'd walk any homeowner through before making a final decision on a patio top shade.
- Site survey: measure the patio footprint, note sun angles at peak hours, identify attachment points on the house (or determine if freestanding is required), and look for drainage opportunities.
- Climate check: look up your NOAA climate normal for annual rainfall, snowfall, and peak wind speed. Cross-reference your zip code with ASCE 7 maps for design ground snow load and design wind speed.
- Use-case clarification: define your primary need (rain protection, sun relief, both) and how often you expect to use the space. Frequent use in variable weather = invest more in the structure.
- Budget confirmation: set a total budget including permits, contractor margin, and a 10–15% contingency for surprises. Don't budget for materials alone.
- Option shortlist: use the quick decision guide earlier in this article to narrow to two or three types that fit your climate, use case, and budget.
- Product and contractor research: for hard-top systems, request ICC-ES report numbers. For fabric, check ASTM D4847 compliance or manufacturer certification. Get three quotes for any installed project over $1,500.
- Permit pre-check: call or visit your building department to confirm what permits are required before signing a contract. Some jurisdictions have an online permit portal with checklists.
- HOA check: if applicable, submit design drawings to your HOA architectural review committee before ordering materials.
- Place the order or sign the contract, confirming delivery timeline, permit submission schedule, and installation start date.
- Installation inspection and punch list: do a walkthrough the day of completion. Check drainage slope, all fasteners, panel seals, gutter function, and that all permit inspection tags are posted.
How your patio top shade fits into the bigger outdoor patio picture
A patio top shade is rarely the only decision in an outdoor project. Once the overhead structure is settled, the next layer of decisions is usually flooring (does your existing surface drain properly under the new cover?), drainage (does the new roof direct water toward the foundation or garden beds?), planting (will climbers or planters work with the structure?), and climate-specific accessories like misters for the desert Southwest or heaters for the upper Midwest shoulder seasons.
If you're comparing solid roof options specifically, the hard top canopy for patio and hard top patio cover guides go deeper on structural connection details and material specs. If you need a new fabric for an existing frame, the patio replacement canopy top article covers fit and compatibility in detail. For visual inspiration and design combinations, the patio top cover ideas section explores how homeowners mix pergola structures, retractable inserts, and shade panels in the same space.
The broader point is that the shade structure anchors the whole outdoor room. Get that right and the rest of the decisions, flooring, furniture arrangement, lighting, planting, become much easier to layer in over time. Take the time to survey your site, understand your climate, and price out real options before committing. It's a project you'll live with for 10 to 30 years depending on what you choose, and the homeowners I've seen most satisfied with their patios are the ones who slowed down and made the right call the first time.
FAQ
What are “patio top shades” and what common types should homeowners consider?
Patio top shades are structures or fabric systems that cover a patio to provide sun, rain, or wind protection and can be permanent or temporary. Common types: hard‑top canopy / hard‑top patio cover (solid roofing: metal, wood, polycarbonate); fabric shades (fixed canopy tops/awnings made from woven fabrics); retractable tops/awnings (motorized or manual roll‑out fabric); pergolas (open‑lattice wood or metal with optional infill); shade sails (tensioned fabric panels anchored to posts or walls); and replacement canopy tops (fabric or polycarbonate panels sized to fit existing frames). Each uses different materials, installation methods, and maintenance needs.
How do I choose between hard‑top covers, fabric shades, retractables, pergolas, and shade sails?
Decide by primary use, site constraints, climate, budget and aesthetics. Quick steps: 1) Define use: full weather protection (hard‑top or polycarbonate), variable shade (retractable), filtered light with airflow (pergola), low cost & flexible geometry (shade sail), or temporary/replaceable fabric (replacement canopy). 2) Check climate: frequent rain/snow → solid roof with drainage; high sun only → fabric or pergola; high winds/coastal salt → metal or corrosion‑resistant hardware. 3) Set budget: shade sails and fabric are lowest upfront; custom hard‑tops and pergolas with upgrades cost more. 4) Site constraints: wall attachments make retractables or attached covers easier; open yards suit sails or freestanding pergolas. 5) Maintenance tolerance: low maintenance → aluminum/steel with powder coat and engineered roofing; higher maintenance → wood and fabrics. Use these steps to short‑list options and then compare pros/cons, materials and durability.
What are the pros and cons of each patio top shade option?
Hard‑top (wood/aluminum/steel/polycarbonate): Pros—full weather protection, longer lifespan, good resale value; Cons—higher cost, heavier structure, may need permits. Fabric shades/canopies: Pros—lower cost, easy replacement, lighter; Cons—shorter life in sun, requires cleaning and periodic replacement. Retractable tops: Pros—flexibility to open/close, sun control; Cons—more mechanical parts to maintain, higher cost than fixed fabric. Pergolas: Pros—architectural appeal, airflow, can add vines/cover; Cons—limited rain protection unless infilled, higher customization cost. Shade sails: Pros—affordable, modern look, quick install; Cons—can sag, need tensioning and robust anchors, less rain protection. Replacement canopy tops: Pros—refresh existing frame at low cost; Cons—must fit precisely, fabric lifespan varies.
Which materials are best and how do they compare for durability and maintenance?
Wood (cedar, redwood, treated lumber): warm look, good strength; needs staining/sealing every 2–5 years; susceptible to rot/insects if not maintained. Aluminum: lightweight, low maintenance, corrosion‑resistant with powder coat; ideal for coastal if marine‑grade finishes used. Steel (galvanized or painted): strong, slim profiles; requires corrosion protection (hot‑dip galvanizing, heavy paint, or zinc coatings). Polycarbonate (multiwall): lightweight, translucent, good UV protection if specified; needs minimum slope (≈5°) and proper edge flashings; some manufacturers offer 10–20 year limited warranties. Fabrics (solution‑dyed acrylic like Sunbrella, polyester with PVC): breathable and colorful; ASTM D4847 defines performance standards—look for UV/lightfastness, water resistance and tear strength; expect 5–15 year life depending on exposure and care. Fasteners: coastal areas require 316 stainless or proven coated fasteners (ASTM A153 guidance). Choose materials that balance expected longevity, maintenance willingness and local exposure.
How should climate (sun, rain, wind, snow, coastal salt air) affect my choice?
Sun‑dominant: fabrics or pergolas with slats provide shade; use high UV‑resistant fabrics. Rain‑dominant: choose solid roofing with slope and drainage (hard‑top or properly detailed polycarbonate); avoid flat fabric unless highly waterproof and tensioned. Windy sites: prefer rigid, engineered systems with rated anchorage; avoid large unsupported fabric sails unless engineered for gusts; consult ASCE 7 wind maps for design speeds. Snow loads: use hard‑top sized for local ground‑snow per ASCE 7 or at least 10 psf minimum in IBC Appendix I; use steeper slopes and load‑rated framing. Coastal salt air: choose 316 stainless fasteners, marine powder coats, aluminum, or treated wood; isolate dissimilar metals to avoid galvanic corrosion. Use NOAA climate normals and local building department design load requirements to validate choices.
What sizing, orientation and drainage rules should I follow?
Sizing: make coverage fit intended use—seating area, circulation, and furniture clearance; measure usable patio footprint and add 1–2 ft clearance around edges. Orientation: align roof slope or louver direction to deflect prevailing summer sun (south‑west sun often needs more shade); orient openings for desirable breezes. Drainage: solid roofs need a positive slope (minimums depend on material—multiwall polycarbonate often needs ≈5° or ~1:10); provide gutters/downspouts or internal rain channels; avoid collecting water on fabric/sail panels—tension and slope to high point to low point for runoff. For snow, provide slope and framing to shed loads to supports and foundation; use ASCE/IBC snow load maps to size framing.
Next Articles
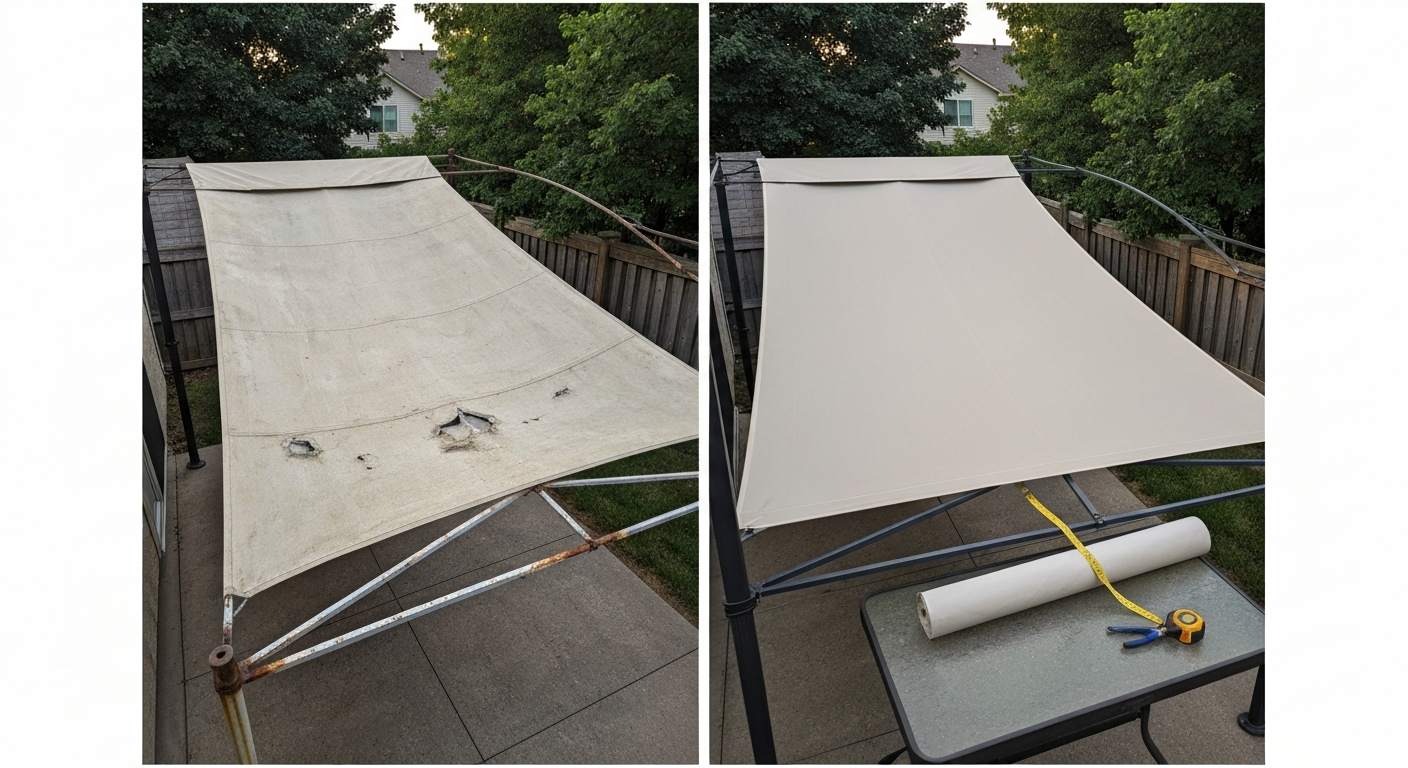
Patio Replacement Canopy Top Guide: Materials, Costs & DIY
Patio replacement canopy top guide: compare materials, costs, DIY steps, installation, and buyer’s checklist
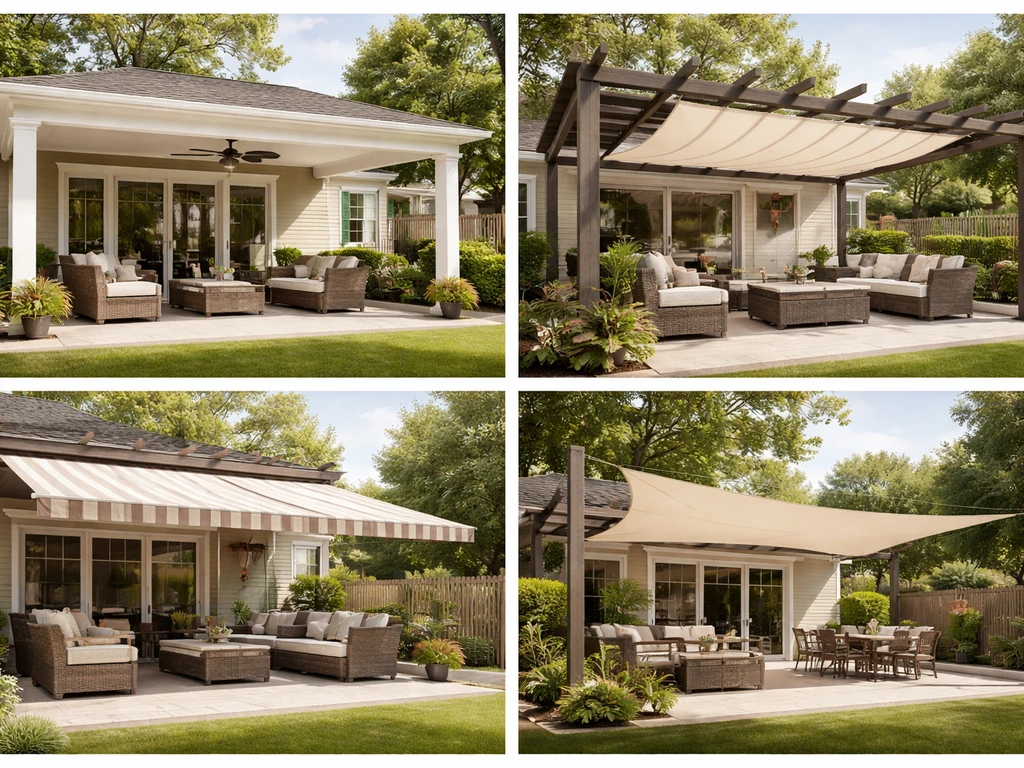
Patio Top Cover Ideas: Compare Styles, Materials, Costs
Compare patio top cover ideas by style, materials, costs, and climate fit, with planning steps and add-on upgrades.
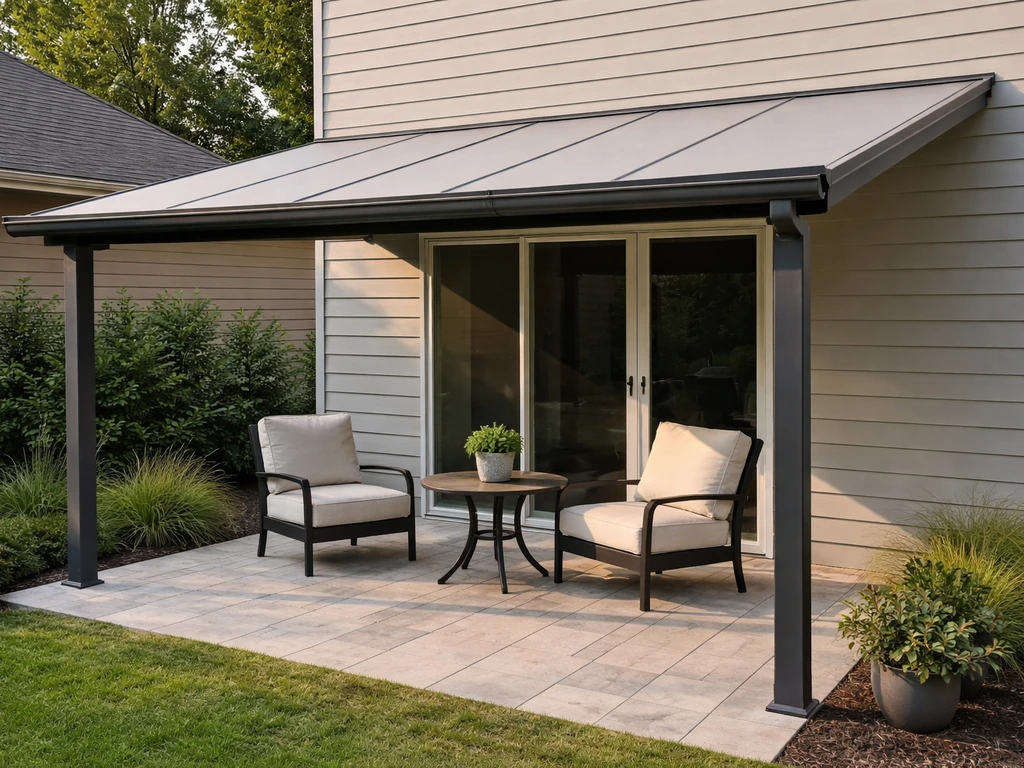
Hard Top Canopy for Patio: Selection, Fit, and Install Guide
Choose, size, and install a hard top canopy for patio. Compare materials, weatherproofing, DIY vs pro, costs and mainten