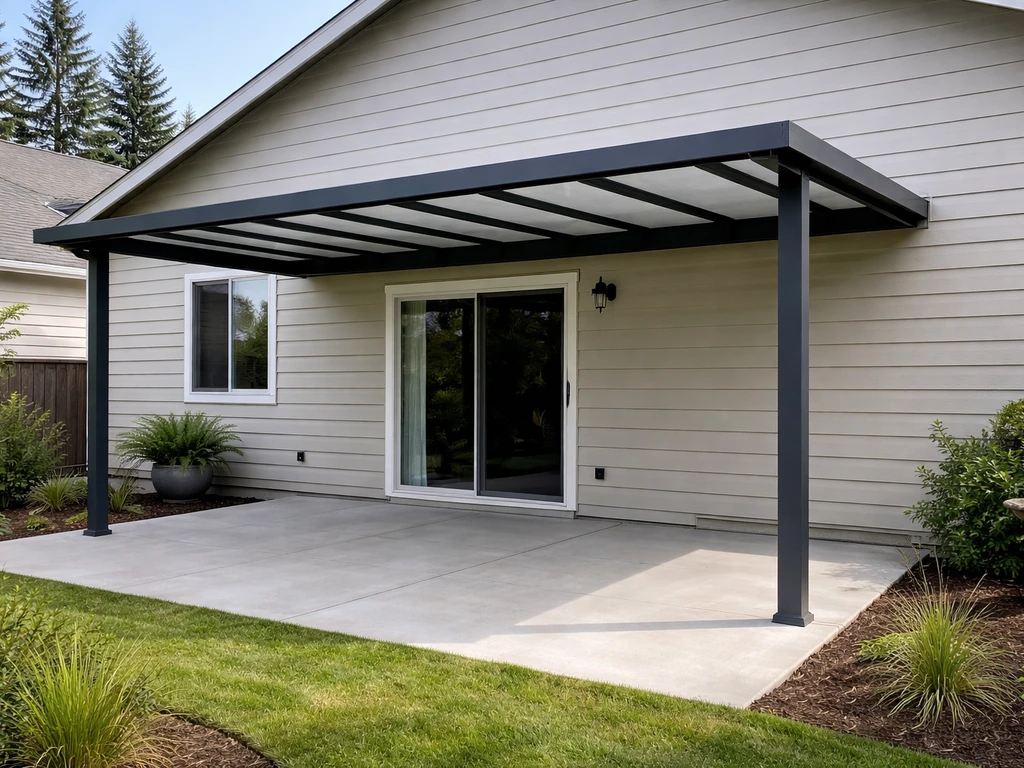
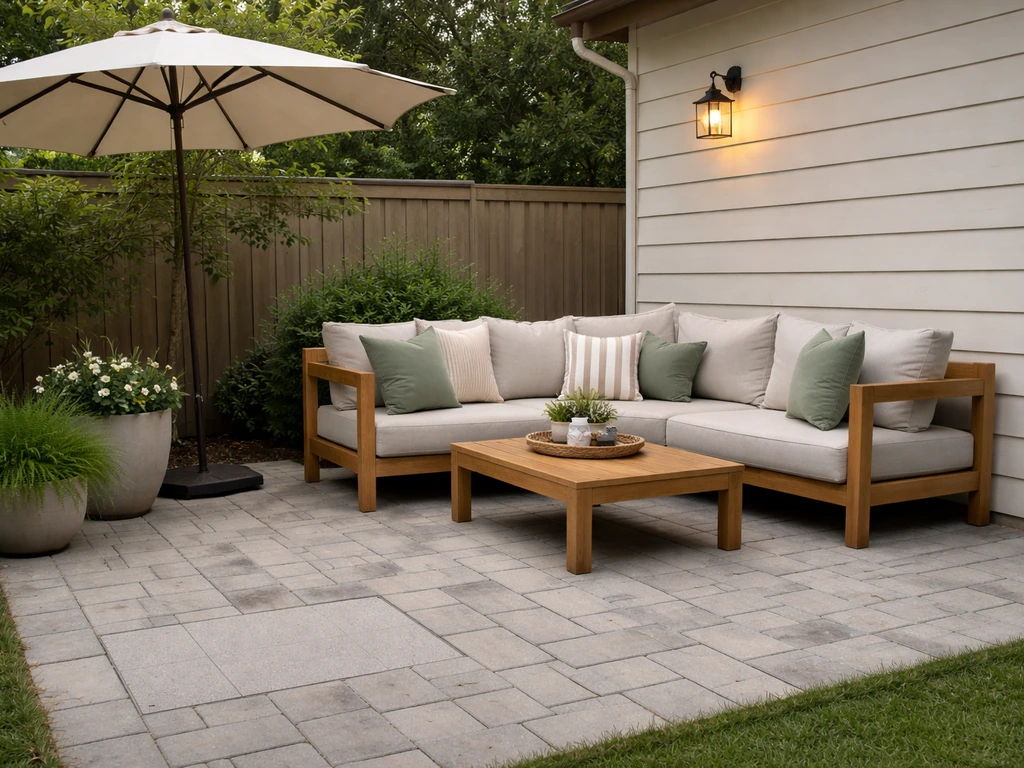
A hard top patio cover is a permanent, solid-roof structure built over your patio that actually keeps you dry and protected year-round. Unlike a pergola (which has spaced slats that let rain and sun through) or a retractable fabric canopy (which needs to be rolled in before storms and eventually wears out), a hard top cover uses rigid materials like aluminum, steel, polycarbonate, vinyl, or wood to create a true weatherproof roof. If you want a space you can use in a downpour or a Texas summer, this is the solution worth investing in.
Hard Top Patio Cover Guide: Materials, Sizing, Cost, Install

Phoebe Foster
6 May 2026
What a hard top patio cover actually is (and what it isn't)
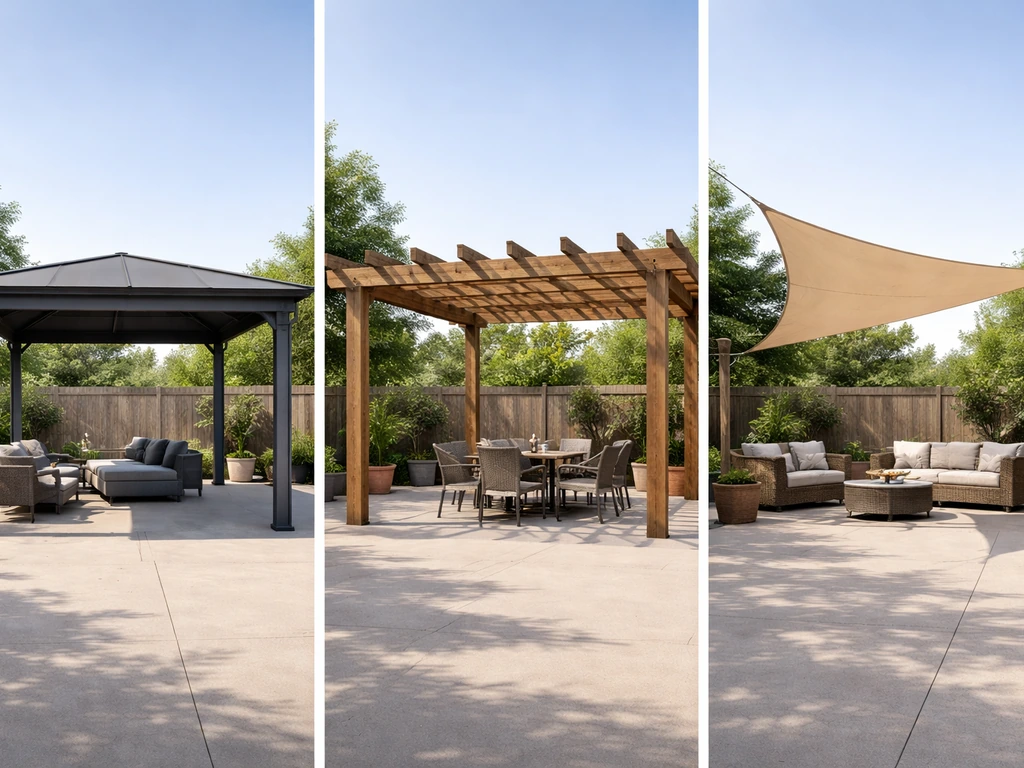
The confusion usually comes from lumping pergolas, shade sails, awnings, and hard top covers into the same category. They serve different purposes. A pergola is primarily a shade and aesthetic structure. Its roof is built with gaps between the slats, typically 1 to 2 inches of open spacing, so it filters sunlight but lets rain fall right through. Great for growing vines, not great for keeping your outdoor couch dry.
Retractable fabric canopies and shade sails are a step up in protection, but they come with trade-offs. They use mechanical parts that need regular service, and most manufacturers recommend retracting them before heavy storms. Over time, fabric degrades, motors fail, and you end up with a system that needs more attention than you expected. A well-built fixed hard top cover, by contrast, can last 15 to 20 years or more with minimal maintenance and handles strong winds and heavy rain without any action on your part.
Hard top covers fall into two main design categories: solid roof (full coverage, no light transmission) and open-louver (adjustable angled slats you can tilt to control shade, ventilation, and rain coverage). Solid roofs maximize weather protection. Louvered roofs give you flexibility but cost significantly more. Both are genuinely "hard top" structures, and both attach either to your house as an attached cover or stand independently as a freestanding structure.
Comparing hard top materials: what actually holds up
This is where most homeowners get lost. There are six or seven real material options, and each one makes sense for a different combination of climate, budget, and priorities. Here is an honest comparison.
| Material | Best For | Watch Out For | Typical Installed Cost (per sq ft) |
|---|---|---|---|
| Aluminum (solid panel) | Hot/sunny climates, coastal areas, low maintenance | Can get hot underneath without insulation; mid-range look | $20–$50 |
| Steel frame with metal roof panels | Heavy snow loads, large spans, commercial-grade durability | Needs quality coating in coastal/humid areas; heavier | $40–$60 |
| Polycarbonate panels | Natural light + rain protection, budget-friendly | Can yellow without UV coating; gets hot in summer sun | $16–$35 |
| Vinyl / PVC panels | Budget builds, DIY kits, dry climates | Not ideal for heavy snow; can warp in extreme heat | $15–$30 |
| Wood (cedar, redwood, composite) | Aesthetics, traditional/craftsman looks | Highest maintenance; not ideal for wet climates without treatment | $16–$36 |
| Engineered composite / insulated aluminum | Year-round comfort, premium builds | Higher upfront cost; professional installation typically required | $50–$150+ |
Aluminum: the workhorse option
Powder-coated aluminum is the most popular hard top cover material in the U.S. for good reason. It is lightweight, rust-resistant, and holds up well in heat and moderate coastal environments. For coastal installs, look specifically for systems with high-performance PVDF coatings (sometimes labeled Fluorofinish or similar). These are designed for salt-air environments and some carry 20-year coastal warranties. Maintain powder-coated aluminum by washing it down with mild soap and warm water a couple of times a year. Avoid anything abrasive that can chip the coating, because a chip left unchecked becomes a rust spot.
Polycarbonate: let the light in, keep the rain out
Polycarbonate panels are a smart choice if you want natural light without losing weather protection. They transmit diffused light while blocking rain, and they are much lighter than glass. The critical thing to verify before buying is UV protection. Polycarbonate without a UV-coated layer can yellow and degrade in as little as 1 to 3 years outdoors. UV-protected sheets from reputable suppliers typically carry a 10-plus year outdoor rating. Also remember that polycarbonate only has UV protection on one side. Install it backward and that protection is facing inward, where it does nothing.
Wood and composite: beautiful but demanding
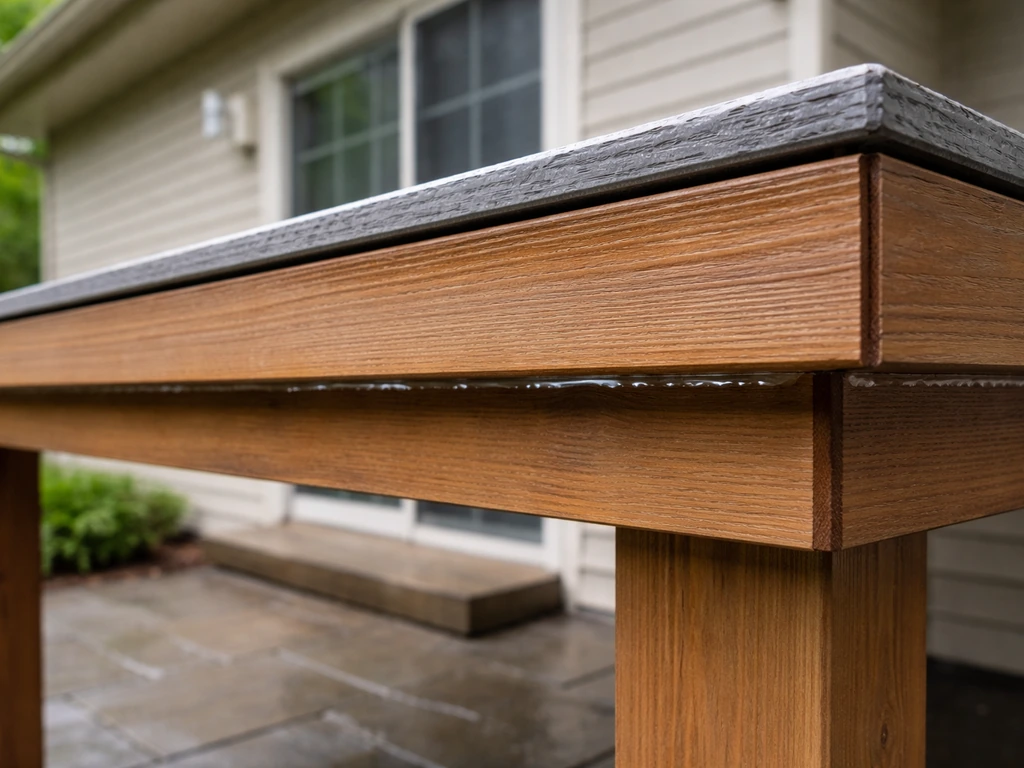
Cedar and redwood covers look fantastic and blend naturally into traditional home styles. The downside is maintenance. In wet climates especially, untreated or poorly maintained wood will rot, warp, or invite pests. Composite materials (engineered wood-like products) reduce some of that maintenance burden but do not eliminate it. If you love the wood look, composite or composite-clad aluminum frames give you that aesthetic with far less long-term upkeep.
Sizing, slope, drainage, and layout: the details that matter most
Getting the size and structure right is where a lot of DIY projects go sideways. Here are the practical things to nail down before you buy anything.
Span, beam spacing, and clearance
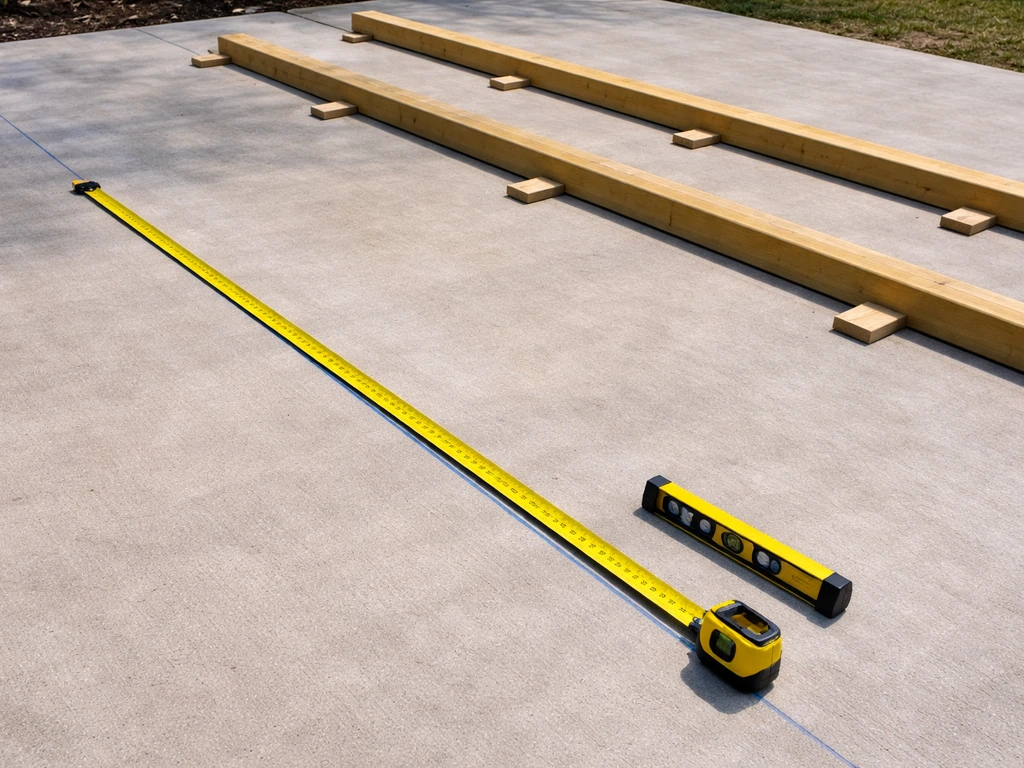
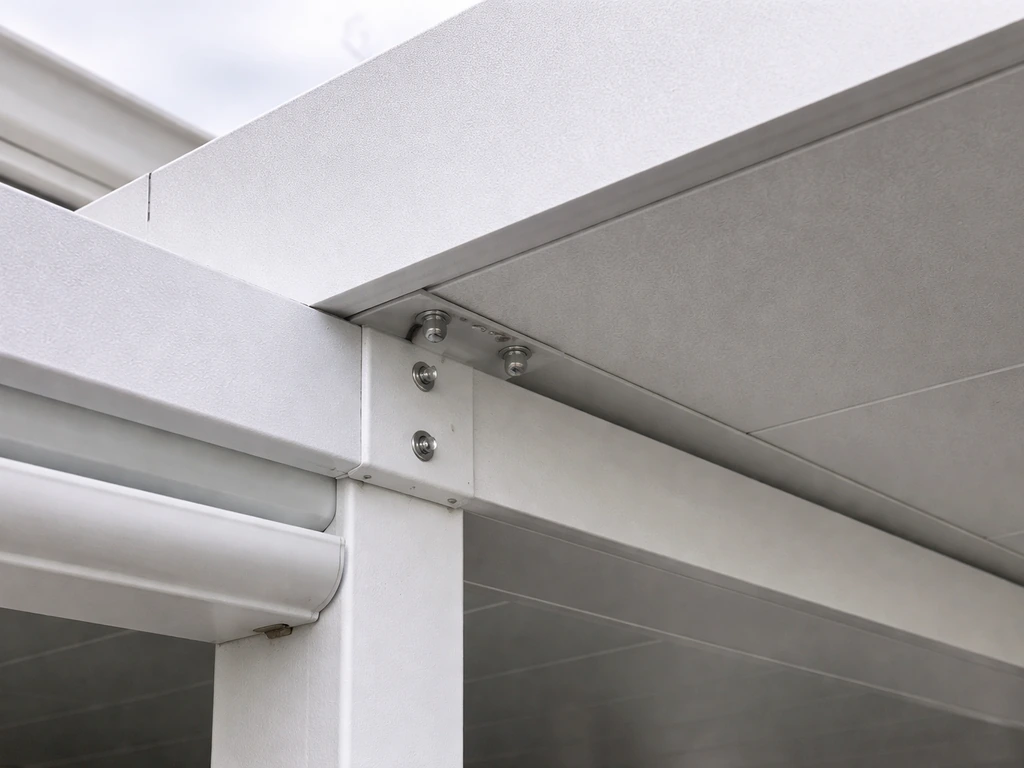
Your beam and purlin spacing depends directly on the material you are using. For polycarbonate panel systems, 2x4 purlins at 16 inches on-center is a common standard (fastened with 3-inch stainless steel screws). Profile screws need to be placed at least every 2 feet at a minimum per most installation manuals. Aluminum panel systems will have their own span tables from the manufacturer. Do not guess at these numbers. Use the manufacturer's engineering documents or, for larger builds, a structural engineer's calculations.
For clearance, plan for at least 7 to 8 feet of headroom at the lowest point of the cover. If you are adding ceiling fans (and in hot climates you should), you need at least 8 feet to the fan blades for comfortable airflow and safety. Check that your cover does not interfere with any door or window swing. This is an obvious thing that gets missed more often than you would think.
Slope and drainage
Every solid roof needs slope to drain water. For polycarbonate panels, a common recommendation is 1 inch of drop per 4 feet of run. Aluminum panel systems typically specify their own minimum pitch. The general rule is to slope the roof away from the house whenever possible. If you are attaching to the house, slope toward the outer edge and install a gutter or built-in drainage channel at the low edge to carry water away from your foundation. Many quality aluminum cover kits include a built-in gutter system that handles this automatically. A roof that traps water or drains back toward the house is going to cause problems fast, so this is not a detail to skip.
Attached vs. freestanding
Attached covers mount to a ledger board on your house wall, which simplifies the structure (you need fewer posts) but requires that the attachment be done correctly. This is the single most structurally critical part of an attached build. The bolt spacing and hardware have to match the engineering for your cover's size and local wind/snow loads. Freestanding covers are fully self-supporting with four or more posts and give you more placement flexibility, but they cost more because you need a complete independent structure.
DIY vs. hiring a contractor: an honest take
Hard top patio covers are one of the more DIY-accessible outdoor projects if you choose the right system and do not cut corners on the structural parts. Kit-based aluminum systems are specifically designed for homeowner installation and come with pre-engineered components and instructions. A basic 10x20 foot attached aluminum cover from a kit is a realistic two-weekend project for someone comfortable with basic carpentry and post setting.
When DIY makes sense
- You are using a manufacturer kit with pre-engineered components and clear installation instructions
- The cover is under 200 square feet and attached to a single-story house
- Your local permit requirements allow homeowner-pulled permits for this type of structure
- You have access to a drill, level, post-hole digger, and a helper for lifting beams
- You are comfortable reading load tables and following fastening schedules precisely
When to hire a pro instead
- The cover spans more than 20 feet or uses non-kit custom framing
- You are in a high-wind zone (hurricane-prone coastlines, tornado alley) or a heavy snow area
- The attachment point is to a second-story wall or above an existing deck
- You want a louvered roof system, which has more complex mechanical and waterproofing requirements
- Your local code requires licensed contractor pulls or stamped engineering drawings
- You are integrating electrical (lighting, fans, heaters) into the structure
If you hire out, get at least three bids. Ask each contractor for their license number, proof of insurance, and a copy of the permit they plan to pull. Ask specifically what wind load and snow load their design is rated for. A contractor who cannot answer that question clearly is not the one you want building a permanent structure over your home.
Permits, codes, wind loads, and snow loads
This section tends to make people's eyes glaze over, but skipping it is how you end up with a structure you have to tear down or that gets damaged in the first real storm. Here is what you actually need to know.
Do you need a permit?
In most U.S. jurisdictions, yes. Any permanent structure attached to your house or set on footings typically requires a building permit. The International Building Code (IBC) specifically addresses patio cover design loads, and most local codes adopt or adapt the IBC. The permit process will require you to show your cover's dimensions, attachment method, materials, and load ratings. Setback rules (how close you can build to a property line) vary by municipality but commonly require 5 to 10 feet from side and rear property lines for accessory structures. Check with your local building department before you buy materials.
Wind loads and snow loads
The structural design of your cover needs to account for your local wind speed and, where applicable, ground snow load. These are not generic numbers. The ASCE provides a free online hazard tool where you can enter your address and get site-specific design values based on ASCE/SEI 7-22. Your local building department uses these numbers, and so should your contractor or engineer.
For snow loads specifically, ASCE 7-22 Chapter 7 lays out how to calculate roof snow loads from ground snow load data. In areas like the Upper Midwest or mountain West, snow load is a primary design driver. A cover rated for 20 pounds per square foot (psf) ground snow load is not the right choice if your area gets 40 psf. For coastal and high-wind areas, look for products with documented wind uplift ratings.
UL 580 is one benchmark for wind uplift resistance commonly cited for roofing panel products. Intertek summarizes UL 580 as a standard test method used to evaluate wind uplift resistance of roof assemblies under dynamic and static wind loads UL 580 is one benchmark for wind uplift resistance commonly cited for roofing panel products.
UL’s listing for ANSI/UL 580 describes it as a test method intended for evaluating [uplift resistance of roof assemblies](https://www. shopulstandards. com/ProductDetail. aspx?
UniqueKey=15452), such as roof deck and covering materials, and it notes it does not assess certain roof-adjacent or structural integrity aspects.
What to ask before you commit to a product or contractor
- What is this system's rated wind uplift and snow load capacity?
- Is this system pre-engineered for permit submittal in my state or county?
- What are the required footing sizes and depths for my soil conditions?
- Does the design account for water drainage away from my house foundation?
- What are the setback requirements for my property zone?
What it actually costs: a realistic budget breakdown
Patio cover costs vary a lot depending on material, size, region, and whether you go DIY or hire a contractor. Here is a practical range based on real 2025-2026 project data.
| Approach | Typical Cost Range | Notes |
|---|---|---|
| DIY aluminum or polycarbonate kit (materials only) | $1,000–$5,000 | Excludes permits, concrete, and any electrical |
| Professionally installed aluminum solid roof cover | $20–$50 per sq ft | A 200 sq ft cover typically runs $4,000–$10,000 |
| Steel frame with architectural metal panels | $40–$60 per sq ft | Better for large spans or heavy snow areas |
| Louvered aluminum roof (motorized) | $50–$150+ per sq ft | Premium option; wide price range by brand and size |
| Wood or composite roof cover (installed) | $16–$36 per sq ft | Lower material cost offset by higher maintenance over time |
| Full gable roof patio cover (large project) | $14,000–$31,000 total | Includes framing, roofing, gutters, and labor |
The biggest cost drivers are square footage, the complexity of the attachment or foundation, local labor rates, and any add-ons like lighting, fans, screens, or gutters. Permits typically run $200 to $800 depending on your municipality. Do not forget to budget for concrete footings if you are setting posts. In areas with deep frost lines, footing costs go up significantly.
If you are comparing bids, make sure each contractor is pricing the same scope. One bid might include gutters and electrical rough-in while another does not. Get line-item breakdowns so you are actually comparing apples to apples.
Add-ons worth budgeting for upfront
- Ceiling fans: $150–$400 per fan plus wiring; essential in hot climates
- Recessed or overhead lighting: $500–$1,500 for a basic circuit and fixtures
- Screen enclosure panels: $1,000–$4,000 depending on size and material
- Built-in gutters or downspouts: often included in kits but add $300–$800 if custom
- Insulated roof panels: add $5–$15 per sq ft but dramatically reduce heat buildup underneath
Keeping your hard top cover in good shape long-term
A well-built hard top cover is genuinely low-maintenance compared to retractable or fabric systems, but it is not zero-maintenance. Here is what a reasonable annual routine looks like.
Aluminum and steel covers
Wash powder-coated aluminum twice a year with mild dish soap and warm water. Rinse thoroughly. The goal is to remove salt, pollen, and grime before they can work into any small chips in the coating. Inspect the surface once a year for chips, gouges, or scratches. Touch up any bare metal spots promptly with a matching touch-up paint to prevent rust. In coastal environments, monthly rinsing with fresh water makes a real difference in how long the finish lasts.
Polycarbonate panels
Clean polycarbonate panels with a mild soap solution and a soft cloth. Never use abrasive cleaners or solvents, which scratch the surface and damage the UV coating. Inspect annually for yellowing or cloudiness. Some discoloration is normal after many years, but rapid yellowing within the first few years usually means the UV-protected side was installed facing inward. If that happened, the panels will need to be replaced sooner than expected. Check all fasteners and gaskets once a year and replace any that show cracking or have loosened.
Wood covers
Wood requires the most attention. Plan on resealing or repainting every 2 to 3 years depending on your climate. Inspect for rot at the beam ends and post bases every spring. Check flashing where the ledger meets the house wall and reseal any gaps before they allow water intrusion.
General annual inspection checklist
- Check all fasteners, bolts, and brackets for tightness and corrosion
- Inspect gutters and downspouts for blockages, especially after fall leaf drop
- Look at the ledger attachment points for any signs of movement, cracking, or water damage
- Check post bases and footings for settling, heaving, or moisture damage
- Verify that drainage is still flowing away from the house foundation
- Inspect any screen panels or lighting fixtures and replace worn components
- Touch up any coating chips or raw metal before they develop into larger corrosion issues
Your action plan: from measuring to move-in ready
Once you have a sense of which material and approach fits your climate and budget, here is how to move forward without wasting time or money.
- Measure your patio space and note door/window locations, ceiling heights, and any obstructions
- Contact your local building department to confirm permit requirements, setback rules, and any HOA restrictions
- Look up your site's design wind speed and ground snow load using the ASCE hazard tool (free, address-based)
- Decide on attached vs. freestanding and solid vs. louvered based on your weather needs and budget
- Get at least three contractor bids or, for DIY, request manufacturer engineering documents before ordering a kit
- Compare warranties carefully: look at what is covered, for how long, and what voids the warranty (coating damage, improper installation, etc.)
- Budget a 10 to 15 percent contingency for site-specific surprises like poor soil, deeper footing requirements, or electrical routing
- Schedule installation outside of your region's peak storm season when possible
The right hard top patio cover is one you will barely think about after it is installed because it just works. If you are still deciding, these patio top cover ideas can help you narrow down the right style for your space and climate hard top patio cover. If you are shopping for a hard top canopy for patio spaces, focus on weatherproof materials and correct installation details hard top patio cover.
It handles rain without you rushing outside to crank in a retractable. It does not rot or blow off in the first windstorm. And it turns an outdoor space you avoid in bad weather into a room you actually use year-round. When shopping for patio top shades, focus on how the design controls sun and rain coverage without blocking your preferred lighting.
Getting the material, slope, drainage, and structural details right upfront is what makes that happen.
FAQ
Do I always need a building permit for a hard top patio cover?
Not always. If the project is “attached” to the house and has permitted footings or a ledger connection, it usually triggers permitting. Small, freestanding, non-load-bearing shade structures may be treated differently, but most hard top patio covers are considered permanent accessory structures. The safest move is to ask your building department whether your planned roof is treated as an accessory structure, and confirm whether you need stamped structural drawings for your specific attachment type.
What are the most common leaks on hard top patio covers?
That depends on the model, but a common failure point is water getting trapped at fasteners. If you choose polycarbonate or metal panels, confirm the kit includes correct drip edges, ridge closures (if applicable), and gaskets compatible with your panel type. Also verify the panel orientation and that drainage channels are installed so water flows out, not under overlaps.
Will an open-louver hard top patio cover keep me dry in heavy rain and wind?
For louvered or open-louver designs, you need to treat it like a system, not just “adjustable shade.” Many designs can reduce rain intrusion at certain angles, but they do not necessarily stop wind-driven rain during storms. Ask the installer or manufacturer what roof pitch and louver angles are required for rain performance in your climate, and whether there are restrictions during high wind events.
Can I add ceiling fans under a hard top patio cover, and what clearances should I plan for?
Yes, and it affects cost and safety. A ceiling fan changes required clearances because you need airflow and you also must avoid blade interference with lights or beams. Verify the fan’s blade height and recommended mounting clearance, and check whether you are planning to mount the fan to structural members rather than light-gauge panel supports.
How do I prevent water damage to the house from an attached hard top patio cover?
You want to stop water at the source, not just “wash it later.” For attached covers, confirm the ledger flashing plan includes proper weatherproofing where the cover meets the house, and that the low edge has a real gutter or drainage channel discharging away from the foundation. Also confirm the roof slope matches the panel system’s requirements so water does not back up during heavy storms.
How can I tell the correct side of polycarbonate panels, and what mistakes shorten their life?
Polycarbonate panels typically have a UV-coated side and it must face outward. A frequent mistake is installing panels backward, which makes them yellow and brittle sooner. Before install, check the panel marking or the kit instructions, and keep peel-off protective film on during fabrication, then remove it after the panels are secured.
Can I modify a kit (change size, pitch, or spacing) and still expect it to be code-compliant?
Yes, especially if your cover is freestanding or spans are longer than the kit assumes. Do not use “typical” spacing as a substitute for the manufacturer’s span tables and screw placement. If you are upsizing the width or changing roof pitch, you may need engineering confirmation to keep the wind uplift and deflection within spec.
Do I need a gutter or built-in drainage system under my hard top patio cover?
Gutters and drainage add value, particularly for attached builds. Many quality kits include a built-in gutter system, but you should confirm downspout placement and discharge direction. If discharge ends near the foundation or creates runoff toward doors, it can cause settlement or leaks. Plan the discharge route before you lock in the low-edge details.
When comparing bids, what should I ask about wind and snow ratings besides the product name?
Start with the site-specific design loads, then align material and fasteners to those requirements. Ask for the rated wind uplift and, if applicable, snow load values for the full system, including fasteners and anchorage, not only the roofing panels. If a contractor cannot provide these details clearly, it is a red flag.
What maintenance is most important in coastal or high-humidity climates?
Yes. Even if your cover is low-maintenance, you should protect it from corrosion starters. For aluminum, confirm the fasteners and accessories are compatible (for example, stainless hardware where specified), and in coastal areas rinse regularly to reduce salt buildup. For wood, prioritize sealing and flashing details at beam ends and ledger junctions, since water intrusion at those points causes the earliest failures.
Next Articles

Do It Yourself Outdoor Patio Ideas: Build, Upgrade, Maintain
DIY outdoor patio ideas for planning, building, upgrading, and maintaining floors, shade, privacy, lighting, and decor.
Quick Fix Patio Ideas for Instant Comfort and Style
Quick fix patio ideas for fast comfort and style: cleanups, repairs, shade, flooring tweaks, and safe upgrades on any bu
Cheap Do It Yourself Patio Ideas: Budget Build Guide
Budget DIY patio ideas with step-by-step flooring, prep tips, cost ranges, upgrades, and safety mistakes to avoid.