
The 'last best patio' is the one you only have to build once: a space designed so well, built from materials that last so long, and planned so thoughtfully for how you actually live that you never feel the urge to rip it out and start over. That means getting the goals, the site, the structure, the materials, and the finishing details right from the beginning rather than discovering problems in year three. This guide walks through every decision in order, from picking your uses and climate priorities through flooring comparisons, structural requirements for ground-level and rooftop builds, permits, contractor hiring, DIY tradeoffs, and ongoing maintenance. Whether you are planning a backyard ground-level slab, a raised deck in a cold Canadian climate, or a rooftop terrace in a city like Toronto, the same framework applies.
Last Best Patio: Ultimate Guide to Designing & Building

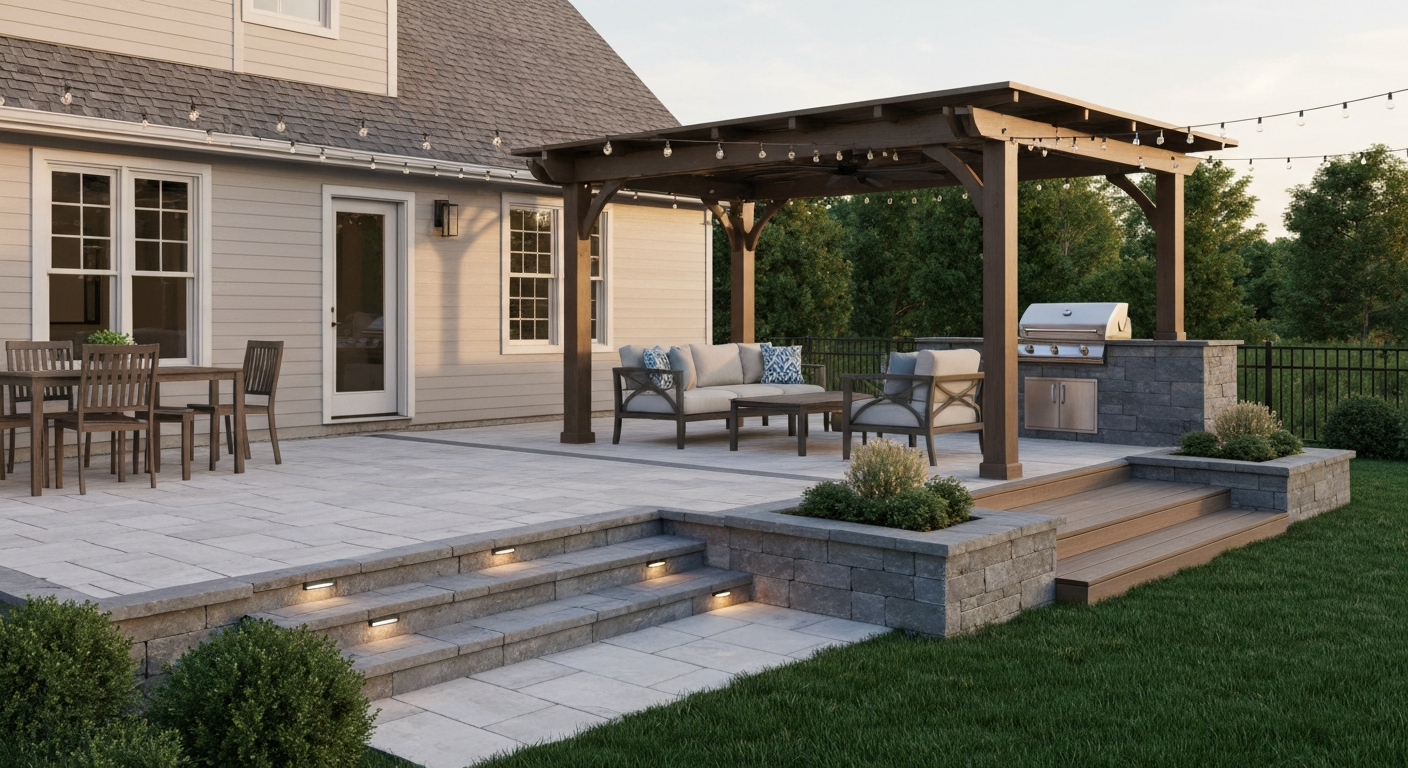
Who this guide is for and what you will get out of it
This article is written for homeowners who are done with half-measures. Maybe you have already replaced one cracked concrete pad, watched a timber deck rot faster than expected, or spent money on a patio that never quite worked for entertaining. You want a plan that accounts for your climate, your budget, your lot, and your lifestyle before you commit. It is also useful for first-time patio builders who want to avoid common mistakes rather than learn them the hard way. The guidance covers ground-level patios, elevated decks, high-top urban terraces, and rooftop patios including the structural, waterproofing, and permitting requirements that are specific to roof-level builds in cold climates. Cost ranges throughout are approximate 2025-2026 North American figures and will vary by region and contractor.
The workflow at a glance
The steps below represent the order in which decisions actually affect each other. Skipping ahead to materials before you have nailed down your site orientation, for example, leads to choosing the wrong finish for your sun exposure. Work through these in sequence, even if some steps take only ten minutes.
- Step 1: Define goals, uses, and performance targets
- Step 2: Site, orient, and understand your microclimate
- Step 3: Lay out zones and choose a plan scale (small, medium, large, or rooftop)
- Step 4: Select materials and flooring with pros, cons, and cost in mind
- Step 5: Address structure and foundation for ground-level or rooftop builds
- Step 6: Choose covers, shade, and weather protection
- Step 7: Add lighting, heating, cooling, and water features
- Step 8: Decide DIY vs. professional, get permits, and hire well
- Step 9: Budget and phase the project
- Step 10: Set up a maintenance schedule that keeps everything in good shape
Step 1: Define your goals, uses, and performance targets
Before you measure a single square foot, write down how the patio will actually be used. This sounds obvious, but most patio regrets trace back to vague goals at the start. Ask yourself how many people you want to seat for dinner regularly (not just for the biggest party you will ever host), whether you want to cook outside, whether you have kids or pets that will run across the surface, and whether you want to use the space year-round or only from May through September. Each of these answers eliminates some options and opens up others.
The four most common performance targets are: entertaining (needs enough flat, level, furniture-friendly space and easy flow from the kitchen), year-round use (needs heating, weather protection, and freeze-thaw-resistant materials), low maintenance (rules out certain woods and requires attention to drainage and joint stability), and rental income or resale value (demands durable materials, clean aesthetics, and permitted structures). You can have more than one target, but ranking them helps when budget forces tradeoffs.
- Entertaining priority: plan for at least 25 sq ft per seated person plus a dedicated cooking zone of 60-80 sq ft
- Year-round use in cold climates: budget for a fixed overhead structure and at least one heating source
- Low maintenance: prioritize porcelain, concrete pavers, or composite over natural wood or unsealed stone
- Resale/rental value: permitted, professionally built structures add more verifiable value than unpermitted DIY work
Step 2: Siting, orientation, and reading your microclimate
Where you place the patio on your lot, and which direction it faces, determines how comfortable it will be on a typical afternoon in July or a cool October evening. In the northern hemisphere, a south or southwest-facing patio gets the most afternoon sun and warmth. A north-facing patio stays cooler and shadier, which is actually an advantage in hot climates like Texas or Arizona but a drawback in Toronto or the upper Midwest where you want to capture every degree of warmth. East-facing patios are pleasant for morning coffee but shaded by afternoon. West-facing surfaces get intense late-day sun that can make them unbearably hot in summer without shade.
Urban settings add a few extra wrinkles. Rooftop patios in cities like Toronto experience urban heat island effect during summer (surfaces can run 5-10°F warmer than suburban yards) but also more wind exposure at elevation, which accelerates evaporative cooling and increases structural load requirements. City buildings create unpredictable wind channels, so if you are planning a rooftop or high-top patio, visit the site at different times of day before finalizing an overhead shade or cover design. A sail shade that works perfectly in a sheltered backyard can become a hazard on an exposed urban rooftop. Privacy at grade is usually solved with fencing or planting; at rooftop level, you are dealing with neighboring balconies and taller surrounding buildings, which calls for screen panels or trellises instead.
- Check sun angles at your latitude for mid-morning, midday, and late afternoon in both summer and winter
- Identify prevailing wind direction in your neighborhood; existing trees and structures redirect wind unpredictably
- Note where water pools after rain on your lot before finalizing patio location and drainage plan
- For rooftop patios, confirm building height relative to neighbors before committing to any overhead structure
Step 3: Layout and zoning, sample plans by size and type
Once you know where the patio goes and how it will be used, lay out distinct zones rather than treating the whole surface as one undifferentiated rectangle. Even a small patio benefits from having a defined dining area, a seating/lounge zone, and a transition path that does not force guests to walk through the cooking area to get to the chairs. Zoning is also how you avoid the most common patio-size mistake, which is building a surface that looks large in the yard but turns out to be too small once furniture goes in.
Small patio (under 200 sq ft)
A small patio works best when it does one thing well. A 10x16 ft (160 sq ft) surface can comfortably fit a 4-person dining set with 3 ft of clearance on all sides. Adding a built-in bench along one edge recovers circulation space and adds seating without consuming floor area. Keep the floor surface simple and consistent to make the space feel larger, and use vertical elements (wall-mounted planters, a trellis, a pergola overhead) to add presence without spreading out.
Medium patio (200-500 sq ft)
A 20x20 ft (400 sq ft) surface is the sweet spot for most suburban homeowners who want both dining and lounge zones. Plan the dining area closest to the house door for kitchen access, and put the lounge zone further out or in a corner. A 400 sq ft space can also accommodate a small outdoor kitchen (10-12 ft run) along one wall without sacrificing circulation. Material changes (a different paver size or a border course) can visually define zones without building walls.
Large patio (500+ sq ft)
Large patios often end up feeling empty rather than grand unless zones are clearly defined and scaled correctly. A 600-800 sq ft patio can support a full outdoor kitchen, a 6-8 person dining area, a separate fire pit conversation area, and a buffer circulation path, but each zone needs to be planned to human scale, not just drawn as a large rectangle. Large patios also require more attention to drainage: a flat 600 sq ft slab running to a single point will pool water. Plan for at least a 1-2% slope toward a drain or lawn edge, and consider channel drains along the house wall.
Rooftop and high-top patios
Rooftop patio layouts face hard constraints that ground-level patios do not: the structural capacity of the roof or floor below limits where heavy elements (outdoor kitchen, planters, hot tubs) can be placed; mechanical equipment (HVAC units, plumbing stacks) must be avoided or screened without blocking required access; and every element must account for wind load at elevation. For a rooftop patio in Toronto or any cold-climate city, the layout also needs to respect drainage requirements mandated by the membrane below, typically a minimum slope of 1:50 (approximately 1/4 inch per foot) to drain points. Zoning on a rooftop often mirrors ground-level layouts, but the fire pit conversation area is typically replaced by a fire table (no open flames on membrane assemblies in most codes) and heavy planters are clustered over load-bearing walls rather than distributed freely. Rooftop patio design deserves its own deep dive for city-specific details, especially in dense urban environments. For detailed, city-specific guidance on roof top patio design, see the dedicated roof top patio design article. For more design ideas and technical guidance on high top patio configurations, see the high top patio guide.
Step 4: Comparing flooring and surface materials
The floor is the biggest visual and functional decision you will make for the patio. It sets the tone for everything you put on top of it, determines long-term maintenance load, and has the widest cost range of any single patio element. Here is a practical comparison of the most common options.
| Material | Approx. installed cost (per sq ft) | Frost/freeze-thaw suitability | Maintenance level | Best use case |
|---|---|---|---|---|
| Poured concrete | $6-$12 | Good if sealed; prone to cracking without control joints | Low (seal every 2-3 years) | Large flat surfaces, budget builds, painted/stenciled finishes |
| Concrete pavers (ASTM C936) | $10-$18 | Very good; ASTM C1645 testing available; individual unit replacement possible | Low | Ground-level and most rooftop pedestal systems |
| Natural stone (flagstone, slate, limestone) | $15-$30+ | Varies by stone; limestone and some slate absorb water and spall in freeze-thaw | Medium-high (sealing, re-pointing) | Premium aesthetics; covered or sheltered patios in cold climates |
| Porcelain pavers | $12-$25 installed | Excellent; <0.5% water absorption; frost-resistant per EN/ISO testing | Very low | Rooftop pedestal systems; cold/wet climates including Toronto |
| Pressure-treated timber decking | $8-$15 | Fair; requires annual maintenance; ends can check and split | Medium-high (annual sealing/staining) | Elevated decks, budget-conscious builds with inspection access below |
| Composite decking | $15-$28 | Good; minimal moisture uptake; check for thermal expansion in direct sun | Low | Elevated decks, year-round use, low-maintenance priority |
| Artificial turf | $8-$14 | Good; no freeze-thaw concern; heat retention in direct sun is a drawback | Low | Pet areas, play zones, accent zones in larger layouts |
| Pedestal-supported porcelain/concrete (rooftop) | $20-$40+ installed | Excellent for freeze-thaw; drainage layer built into system | Low surface; membrane inspection possible | Rooftop and plaza applications; Toronto and cold-climate terraces |
For cold-climate rooftop applications specifically, porcelain pavers on adjustable pedestals are the most practical combination available right now. Porcelain's water absorption rate is typically below 0.5% (often below 0.1% for the better products), which matters enormously when you have hundreds of freeze-thaw cycles per year in a place like Toronto. Adjustable pedestal systems (from manufacturers like Buzon and others) allow the pavers to sit above the waterproofing membrane, protecting it from UV and foot traffic while keeping the surface level even when the membrane below has a positive drainage slope. The pedestals are sized and spaced according to manufacturer load charts and paver thickness, and the whole assembly must be checked by a structural engineer or qualified designer against the roof's allowable dead load before installation.
For ground-level patios in moderate climates, concrete pavers hit the best balance of cost, durability, and repairability. Unlike poured concrete, a single cracked or stained paver can be swapped out without touching the rest of the surface. Natural stone is beautiful but demands more judgment about the specific stone variety: granite and quartzite handle freeze-thaw well, while softer limestones and certain slates absorb water and spall over time in harsh winters.
Step 5: Structure and foundations, getting this right so the patio lasts
A beautiful surface installed on a bad foundation will move, crack, or drain poorly within a few years. This step is where most DIY mistakes and most contractor shortcuts end up costing homeowners the most money. The requirements are different for ground-level patios versus rooftop builds, so they are covered separately below.
Ground-level patios: base prep and frost heave
For a paver or concrete patio at grade, the base is almost always more important than the surface. The standard approach in cold climates is to excavate 8-12 inches below grade, compact the subgrade, lay 6-8 inches of crushed stone aggregate base, and top it with 1 inch of coarse bedding sand before setting pavers. In areas with frost penetration deeper than 36 inches (much of Canada, the upper Midwest, and New England), the aggregate base depth should be at your local frost line depth recommendation to minimize heave. Concrete slabs need control joints every 8-10 feet to manage cracking as the slab expands and contracts. Skipping control joints is the single most common concrete patio mistake I have seen, and it shows up as diagonal cracks radiating from corners within two or three winters.
Where the patio meets the house, you need to maintain a gap (typically 1/2 inch with a flexible sealant) between the patio slab or pavers and the house foundation wall. Tying the patio rigidly to the house allows frost heave to transfer load to the foundation or cause the patio edge to lift and crack. The patio surface should also slope away from the house at a minimum 1-2% grade (about 1/4 inch per foot) to direct water away from the foundation.
Rooftop patios: loads, waterproofing, and the membrane-first rule
Rooftop patios involve a fundamentally different structural logic. The primary obligation is to the roof membrane below: everything you build must protect it, not compromise it. The waterproofing membrane is the most expensive and most critical element to repair if it fails, and most membrane warranties are voided if the protection layer requirements are not followed. Canadian roofing practice guidance (such as that published by the RCABC and adopted in RoofStar specifications) requires a positive slope to drain of at least 1:50 (1/4 inch per foot) across the membrane surface, plus a protection board layer between the membrane and any pavers or overburden. A minimum protection board of 3 mm asphalt-core board, or at least 25 mm of extruded polystyrene plus a filter/drainage layer, is a common minimum requirement to maintain membrane warranty in plaza and terrace assemblies.
Structural loads for rooftop patios in Canada are governed by the National Building Code of Canada (NBCC). The National Building Code of Canada (NBCC), Table 4.1.6.3 and related clauses specify minimum uniformly distributed live loads (exterior balconies/assembly areas 4.8 kPa; general roof surfaces 1.0 kPa) and require exterior pedestrian-accessible areas to be designed for assembly live loads plus applicable snow loads per Subsection 4.1.7 blank" rel="noopener noreferrer">National Building Code of Canada (NBCC) — Table 4.1.6.3 and related clauses. Exterior balconies and pedestrian-accessible terrace areas are designed for a minimum live load of 4.8 kPa (about 100 lbs per sq ft), substantially higher than the 1.0 kPa minimum for general roof surfaces. In Toronto, the NBCC Appendix C ground snow load is approximately 1. NBCC 2020 Load Combinations Worked Example, Toronto (shows Ss = 1.8 kPa from NBCC Appendix C) provides a worked example using the NBCC Appendix C Toronto ground snow load value (Ss ≈ 1.8 kPa) for rooftop load calculations blank" rel="noopener noreferrer">NBCC 2020 Load Combinations Worked Example — Toronto (shows Ss = 1.8 kPa from NBCC Appendix C). 8 kPa, and this snow load (computed using the full NBCC formula: S = Is × [Ss × Cb × Cw × Cs × Ca + Sr]) must be added to live loads in the structural design. Paver dead loads also contribute: a precast concrete paver assembly with pedestals can add around 21 lbs per sq ft (~1.0 kPa) to the structural calculation. All of this means a rooftop patio in Toronto needs a professional structural engineer to confirm the existing roof structure can carry the load before any work begins. This is not optional and is required documentation for the permit application.
Toronto's permit process for rooftop decks and terraces mirrors its requirements for ground-level decks and porches: a building permit is required, applications must include scaled drawings and a site plan, and where engineer-sealed drawings are submitted, an Assumption of Responsibility for Engineering Content form must accompany the application. As of January 1, 2026, the City of Toronto residential deck permit fee is $214.79. That is a modest cost relative to the overall project budget, and there is no good reason to skip it, since an unpermitted rooftop structure creates liability problems when you sell the property and may be ordered removed.
Connections to the house: walls, doors, and windows
Where the patio meets the house wall, the flashing and waterproofing transition is one of the most failure-prone details in any build. At ground level, the patio surface should sit at least 6-8 inches below any wood sill plates, door thresholds, or siding to prevent water from wicking into the building envelope. At rooftop level, membrane flashing must run up the wall a minimum of 8 inches (and typically 12 inches) above the finished paver surface, and no penetrations (conduit, drainage scuppers, or structural anchors) should be made through the membrane without manufacturer-approved flashing collars. Ledger board attachments for elevated decks connected to the house wall are a common source of rot and structural failure and must be properly flashed and fastened per local building code.
Covers, shade, and weather protection options compared
Once the surface and structure are sorted, the cover is the element that most determines whether the patio is usable on marginal weather days, which is ultimately what separates a space you use constantly from one you avoid until conditions are perfect. The main options are open pergolas, shade sails, retractable awnings, solid-roof pergola kits, insulated patio covers, and full room additions. Each trades off cost, permanence, and weather performance differently.
| Cover type | Approx. cost installed | Rain protection | Sun/UV protection | Wind resistance | Permit typically required? |
|---|---|---|---|---|---|
| Open wood or aluminum pergola | $3,000-$12,000 | None (open slats) | Partial (50-80% shade with add-ons) | Low unless braced | Sometimes (check locally) |
| Shade sail | $300-$1,500 | None (permeable) | Good (70-90% UV block) | Low; must be removed in high wind | Rarely |
| Retractable awning (motorized) | $2,500-$8,000 | Good when deployed | Excellent | Low; retract in wind | Rarely |
| Solid-roof pergola kit (polycarbonate or aluminum) | $6,000-$20,000 | Good to excellent | Good | Moderate if properly anchored | Often yes |
| Insulated aluminum patio cover | $8,000-$25,000+ | Excellent | Excellent | Good if engineered | Usually yes |
| Screen enclosure/3-season room | $12,000-$40,000+ | Excellent | Good | Good | Yes |
For cold-climate year-round use, retractable awnings alone are not enough because they cannot be left out in heavy snow. An insulated aluminum patio cover or a properly engineered solid-roof pergola with snow load rating is a better long-term investment in Toronto or similar climates. In milder climates where the primary enemy is summer sun rather than winter snow, a quality motorized retractable awning is often the most cost-effective answer and adds less visual bulk than a fixed structure.
Lighting, heating, cooling, and finishing the space
Lighting is the element that most transforms a patio after dark, and it is also one of the more forgiving decisions because it can be added or changed without major structural work. The most useful approach is to layer three types: ambient (string lights, lanterns, or soffit lights that illuminate the whole space), task (focused lighting over cooking or dining areas), and accent (path lights, uplights on plantings, or step lights for safety). Low-voltage LED systems are the standard choice for DIYers because they run off a simple transformer, are safe to install without an electrician in most jurisdictions, and use very little power. Line-voltage systems (120V or 240V) for fixed fixtures near the cooking area require a licensed electrician and permit in most Canadian and U.S. jurisdictions.
For heating, the main options are propane or natural gas patio heaters (freestanding mushroom style or wall/ceiling mounted), electric infrared heaters, and in-floor radiant systems (practical in new concrete pours but expensive to retrofit). Infrared electric heaters are the most practical choice for covered patios because they heat people directly rather than heating the air (which escapes outdoors anyway) and can be mounted under a roof or pergola beam. Gas heaters produce more output per dollar of operating cost but require either a propane tank or a gas line run to the patio. For rooftop patios where gas lines involve extra cost and permitting, electric infrared is usually the path of least resistance.
Cooling on a hot patio comes down to shade first, then misting systems, then ceiling or pedestal fans. Misting systems (low-pressure systems around $100-$300 DIY, high-pressure systems $500-$2,000 installed) evaporatively cool the air by 10-20°F in dry climates but add humidity in already-humid regions like the Gulf Coast or parts of Ontario, so they are most effective west of the Mississippi and in arid parts of Canada. Ceiling fans rated for outdoor wet or damp locations are the universal option and provide comfort even on humid days by improving air movement. Size matters: a fan covering a 200 sq ft covered patio should have a blade span of at least 52 inches.
Decision matrix: matching materials and features to goals and climate
Use this matrix to cross-reference your primary goals and climate conditions against the best-fit choices. No single row will apply perfectly to everyone, but it narrows the field quickly.
| Primary goal / Climate condition | Best flooring option | Best cover | Best heating | Best cooling | DIY-friendly? |
|---|---|---|---|---|---|
| Year-round use, cold climate (e.g., Toronto) | Porcelain pavers or concrete pavers | Insulated aluminum cover or engineered solid-roof pergola (snow-rated) | Ceiling-mounted infrared electric | Ceiling fan (wet-rated) | Structure: no; surface: yes with experience |
| Entertaining, moderate climate (e.g., Pacific NW) | Concrete pavers or composite decking | Retractable awning or open pergola | Propane freestanding heater | Ceiling fan | Yes for most elements |
| Low maintenance, hot-dry climate (e.g., Southwest US) | Porcelain or concrete pavers | Shade sail or open pergola with slats | Not needed | Misting system + fan | Yes for surface; permit check for covers |
| Rooftop patio, urban cold climate | Pedestal-supported porcelain pavers | Retractable awning (wind-rated) or freestanding screen panels | Wall-mounted infrared electric | Ceiling fan (freestanding pedestal fan) | No; engineer and permit required |
| Budget-first, moderate climate | Poured concrete with control joints | DIY shade sail or wood pergola | Propane heater (portable) | Portable pedestal fan | Yes for most; permit check for structures |
| Resale/rental value, any climate | Porcelain or quality concrete pavers | Permitted fixed-roof structure | Built-in gas or infrared | Built-in ceiling fan | Partial DIY; professional for structure and electrical |
DIY versus professional: where to draw the line
I have done enough of both to have strong opinions here. DIY makes sense for paver installation at grade (it is labor-intensive but not technically complex if you have the base prep right), low-voltage lighting, shade sails, freestanding pergolas on a concrete pad, and cosmetic upgrades like furniture, planters, and accessories. The savings can be significant: a professional paver installation that costs $12,000-$18,000 for a 400 sq ft patio can often be done DIY for $4,000-$6,000 in materials and tool rental.
Professional work is genuinely necessary for rooftop membrane waterproofing (this is a warranty and liability issue, not just a quality issue), any structural work that connects to the house or bears load above occupied space, gas line extensions, line-voltage electrical work, any permitted deck or cover structure, and all rooftop patio structural assessments. Cutting corners on these items does not save money long-term because failures in these categories are expensive to repair and can create safety or insurance issues.
Contractor hiring checklist
- Verify the contractor holds a valid license for your province or state and the specific trade involved (general contractor, structural, waterproofing, electrical)
- Confirm they carry general liability insurance (minimum $1 million per occurrence) and workers' compensation coverage; request certificates naming you as additional insured
- Ask for three references from projects of similar scope (rooftop terrace, paver installation, deck build) completed within the past 3 years
- Request a written scope of work that specifies materials by product name, thickness, and grade — not just generic descriptions like 'pavers' or 'insulation'
- Confirm the contractor pulls and posts the permit; never let a contractor do permitted work without a permit pulled in your name or theirs
- Get a payment schedule tied to milestones, not to calendar dates; never pay more than 10-15% as a deposit on projects under $25,000
- Confirm the warranty on workmanship separately from manufacturer material warranties; three to five years on labor is reasonable for structural work
- For waterproofing and membrane work, ask for the manufacturer's warranty registration to be done in your name at project completion
Permit checklist for ground-level and rooftop patios
- Confirm with your local building department whether a permit is required (in Toronto, most decks and porches require a permit; the 2026 residential deck fee is $214.79)
- Prepare a scaled site plan showing property lines, existing structures, and the proposed patio location and dimensions
- Prepare scaled construction drawings showing materials, dimensions, elevations, footing or foundation details, and connections to the house
- For rooftop patios: engage a professional engineer for a structural assessment and have drawings engineer-sealed; in Toronto, include the Assumption of Responsibility for Engineering Content form
- For elevated decks or structures over 600 mm (about 24 inches) above grade: structural drawings are typically required
- Submit application with full documentation before starting any work; inspections are typically required at base/foundation stage and at framing stage
- Post the permit on site during construction as required
- Request and keep the final inspection approval in your files; you will need it at resale
Budgeting and phasing a realistic project
The most useful thing I can tell you about patio budgeting is to separate the non-negotiable base (surface, structure, drainage, permits) from the optional finishes (outdoor kitchen, fire table, fancy lighting, pergola). Build the base right first, even if it means delaying the extras. A well-prepared base with good drainage can have a kitchen and cover added years later without redoing the foundation. A beautiful pergola sitting on a base with bad drainage will require full demolition and redo to fix the drainage, taking the pergola with it.
Rough budget ranges for common project types (all figures are approximate 2025-2026 installed costs in major North American cities; rural areas and small markets will vary):
| Project type | DIY material cost | Professional installed cost | Notes |
|---|---|---|---|
| Basic 400 sq ft concrete paver patio, ground level | $3,500-$6,000 | $10,000-$18,000 | Includes base prep; excludes permit where required |
| 400 sq ft poured concrete patio with control joints | $2,500-$4,000 | $7,000-$13,000 | Includes finishing; control joints and sealer important |
| 400 sq ft composite decking on frame (elevated) | $6,000-$10,000 | $15,000-$28,000 | Permit usually required; includes ledger and footings |
| Rooftop patio 300 sq ft (pedestal porcelain system) | Not recommended DIY | $25,000-$55,000+ | Includes engineer, permit, membrane inspection, pedestals, pavers |
| Attached pergola with aluminum louvered roof | $8,000-$12,000 (kit) | $15,000-$30,000 | Permit often required; snow-load rating required in cold climates |
| Retractable motorized awning, 14 ft wide | $1,800-$3,500 (kit) | $3,500-$8,000 | Rarely permitted; check HOA rules |
| Basic low-voltage LED lighting package | $400-$900 DIY | $1,500-$3,500 | Professional cost includes line-voltage transformer circuit if needed |
| Outdoor kitchen (countertop, grill, undercounter) | $3,000-$8,000 DIY (modular) | $12,000-$40,000+ | Built-in gas requires licensed plumber; electrical requires permit |
Maintenance schedule to protect your investment
The difference between a patio that looks good at 15 years and one that looks tired at 5 years is almost always maintenance consistency. None of the tasks below are complicated or time-consuming, but they need to happen on schedule rather than when you notice something is wrong.
| Task | Frequency | Applies to | Notes |
|---|---|---|---|
| Clear debris from drainage channels and scuppers | After major storms; minimum twice per year (spring and fall) | All patios; critical for rooftop | Blocked drainage on a rooftop patio can cause water to pond on the membrane and void the warranty |
| Re-sand polymeric jointing sand in paver joints | Every 2-3 years or after joint washout | Concrete and natural stone pavers | Prevents weed infiltration and joint instability |
| Seal concrete pavers or natural stone | Every 2-3 years | Poured concrete, pavers, natural stone | Skip sealing on porcelain (not needed) |
| Inspect membrane flashing and sealant joints at house wall | Annually, before winter | Rooftop and elevated decks | Catch small failures before water gets into the building |
| Check ledger board fasteners and connections | Annually | Decks attached to house | Look for rust, rot, or fastener pull-out |
| Clean composite or wood decking | Annually (spring) | Composite and timber decks | Composite: soap and water or approved cleaner; wood: sand lightly and re-seal/stain |
| Inspect overhead cover anchors and hardware | Annually before storm season | Pergolas, awnings, shade sails | Tighten fasteners; replace degraded anchors before they fail |
| Check patio heater gas connections and burner operation | Before each heating season | Gas and propane heaters | Have a qualified technician check gas connections annually on permanent installations |
| Test and clean misting nozzles | At start of cooling season | Misting systems | Clogged nozzles reduce effectiveness and can cause drips |
| Inspect ground-level base for heave or settlement | Annually (spring after frost season) | Ground-level patios in cold climates | Minor heave in individual pavers can be re-leveled; major movement may indicate base drainage issue |
Pulling it all together: the mindset behind a last-best patio
The goal is not the most expensive patio or the most elaborate one. It is the one that is right-sized for how you actually live, built on a foundation that handles your specific climate, finished in materials that do not demand constant attention, and documented with permits so it adds real value when you sell. Every decision in this guide feeds that outcome. Design for your real use patterns, not an idealized version. Put money into base prep and structure before finishes. Respect the engineering requirements for rooftop and elevated builds, especially in cold climates where snow loads, freeze-thaw cycles, and membrane protection are non-negotiable. And plan a maintenance routine before you need one.
If you are working through other aspects of your outdoor space alongside this project, considerations like high-top seating zones, rooftop layout design for dense urban lots, and the specific structural and aesthetic trade-offs in top-of-building patio configurations all connect to the same framework described here. The decisions compound on each other, and the time spent planning up front is always the most valuable time you will spend on the whole project.
FAQ
What are the essential topic questions the article must answer to be a comprehensive 'Last Best Patio' guide?
List of authoritative questions to answer: 1) What is the 'Last Best Patio' concept and who is it for? 2) What are homeowners' goals (durability, low maintenance, resale, aesthetics, year‑round use)? 3) How do site constraints (slope, sun, wind, views, access) shape design? 4) What step‑by‑step workflow moves a project from goals → siting → materials → systems → finishes? 5) How do ground‑level and rooftop/high‑top patios differ in structure, waterproofing and drainage? 6) What NBCC/municipal structural loads and snow/rain factors must designers use (including Toronto values)? 7) What waterproofing/plaza assembly best practices and protection layers are required for rooftop patios? 8) Which flooring systems (pavers on pedestals, porcelain, timber, composite, concrete, turf) suit different climates and goals? 9) How to compare shade/heating/comfort systems (covers, awnings, pergolas, misters, fans, heaters) — pros/cons and cost ranges? 10) What permitting and documentation are required (scaled drawings, engineer seal, Assumption of Responsibility, fees)? 11) What are DIY vs professional tradeoffs and when must you hire engineers/roofers/structural pros? 12) How to budget realistically (materials, labour, permits, contingencies) and estimate lifecycle costs? 13) What maintenance schedules and common failure points should homeowners expect? 14) What sample layouts and visual assets (diagrams, tables, checklists) are needed for publication? 15) Which decision matrix criteria match materials/features to goals and climates?
What authoritative source categories should be consulted to support the article's technical and local guidance?
Priority source categories: 1) National/regional codes — NBCC (loads, snow, load combinations) and provincial code interpretations. 2) Municipal building departments — City of Toronto permit rules, fees, documentation checklists and guidance. 3) Roofing industry best practices — RCABC / RoofStar, NRCA manuals for membrane, drainage and plaza decks. 4) Manufacturer technical documents — waterproofing (Sarnafil/Sika), pedestal systems (Buzon), pavers, decking and fasteners. 5) Standards bodies — ASTM/CSA test methods for pavers, freeze‑thaw, materials. 6) Climate data sources — Environment and Climate Change Canada normals, City of Toronto climate datasets. 7) Structural engineering guidance and worked examples for snow/load calculations. 8) Trade associations/technical guides — roofing, landscape architects, deck builders. 9) Product cost databases and local contractor quotes for up‑to‑date pricing. 10) Peer‑reviewed or government research on durability and urban freeze–thaw performance where available.
Which code and loading questions must the article answer for rooftop/high‑top patios, especially in Toronto?
Key code/loading questions: 1) What NBCC live loads apply to terraces, balconies and roofs (assembly vs roof loads)? 2) How to include ground snow load (Ss) and compute site snow S per NBCC formula (and use local Ss ≈ 1.8 kPa as a Toronto example)? 3) What load combinations are required for design (dead + live + snow + rain + importance factors)? 4) When is an engineer‑sealed drawing required and how to document the engineer’s Assumption of Responsibility for Toronto permits? 5) How to estimate dead load contributions of pavers, pedestals, planters and furniture for structural checks? 6) What point loads and concentrated loads (planters, furniture, hot tubs) need special consideration?
What waterproofing, drainage and roof‑assembly topics must be covered for rooftop patios (best practices and manufacturer requirements)?
Essential topics: 1) Types of membranes (single‑ply, thermoset, liquid applied) and compatibility with plaza/overburden assemblies. 2) Requirement for positive slope to drain (minimum ~1:50) and design of internal drains/overflow. 3) Protection layers between membrane and pavers/soil (protection board or specified XPS + drainage layer per RCABC/RoofStar). 4) Pedestal systems and manufacturer limits — spacing, loading, and not installing pavers directly on membrane without approved protection. 5) Flashing, termination details and transition to penetrations. 6) Coordination with manufacturer warranty conditions and site‑specific approvals for overburden (Sika/Sarnafil recommendations). 7) Access for future membrane inspection and repair zones.
Which material and system comparisons should be included and what pros/cons and cost ranges to show?
Materials/systems to compare with pros/cons and sample cost bands: 1) Flooring: porcelain pavers (pros: freeze‑resistant, low absorption; cons: cost, weight) — costs vary widely (~$25–$100+/ft² installed for rooftop pedestal systems). 2) Concrete pavers/interlocking (pros: durable, economical; cons: salt/deterioration risks) — ~$15–$60/ft². 3) Timber decking (solid wood pressure‑treated, cedar) (pros: warm look; cons: maintenance, rot) — ~$15–$40/ft². 4) Composite decking (pros: low maintenance; cons: heat retention, higher cost) — ~$30–$70/ft². 5) Raised pedestal systems vs direct‑bond installations — pedestals enable drainage and membrane protection but add cost and dead load. 6) Shade/cover: fixed pergola/roof (permanent, higher cost) vs retractable awning (flexible, maintenance) — $2,000–$20,000+. 7) Heating: gas patio heaters (high heat, fuel needs) vs electric infrared (cleaner, wiring) — $200–$2,000+. 8) Lighting: integrated low‑voltage LED vs mains fixtures — energy and cost tradeoffs. 9) Drainage/green options: planted planters/green roof components (adds weight, maintenance, stormwater benefits). Provide ranges as local estimates and advise verifying local quotes.
What decision‑matrix criteria should the article present to match materials/features to homeowner goals and climates?
Decision criteria to include in a matrix: 1) Primary goals: longevity, low maintenance, budget, aesthetics, year‑round comfort, rapid installation. 2) Climate sensitivity: freeze‑thaw cycles, precipitation, UV, heat islands. 3) Structural constraints: allowable dead load, roof slope, access for repairs. 4) Water management needs: drainage, runoff control, waterproofing compatibility. 5) Use intensity: light foot traffic, heavy planters, hot tub, assembly occupant loads. 6) Resale and code/permit complexity tolerance. Matrix output examples: recommended finishes (porcelain on pedestals for cold/wet urban rooftop + low maintenance; composite or hardwood for ground‑level with good drainage) and recommended features (covered pergola for sun/wind control; removable heaters for seasonal use). Include a simple scoring method (weight goals vs constraints) for homeowner decisions.
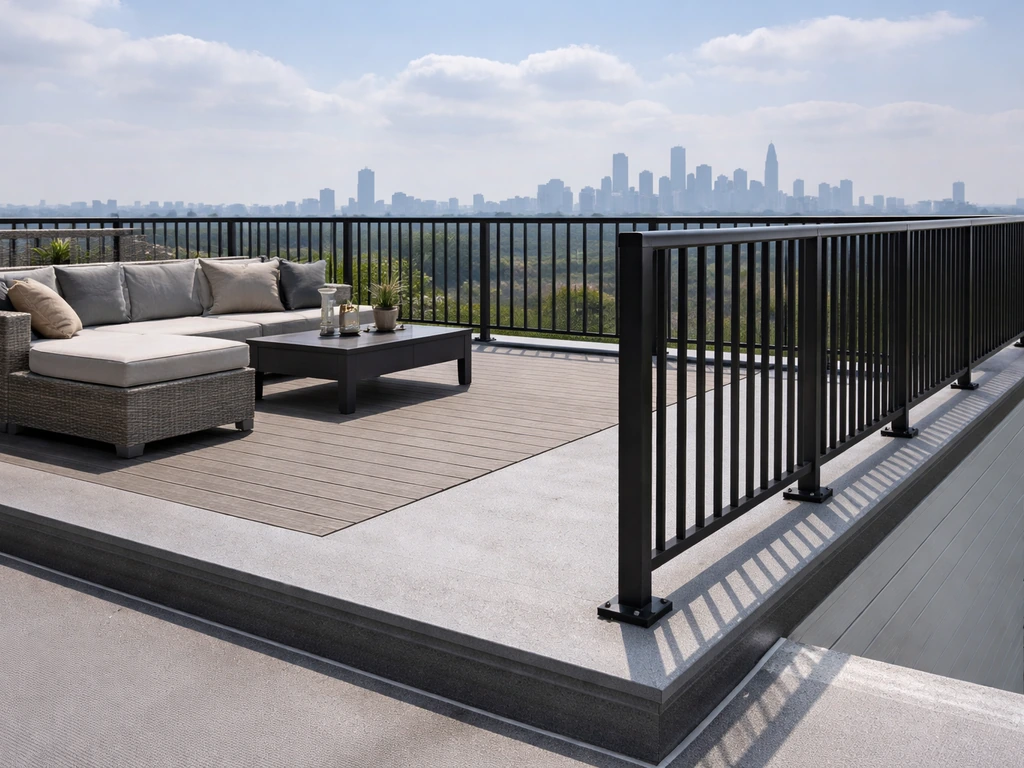
Step-by-step rooftop patio design guide covering load, waterproofing, drainage, layouts, materials, safety, and maintena
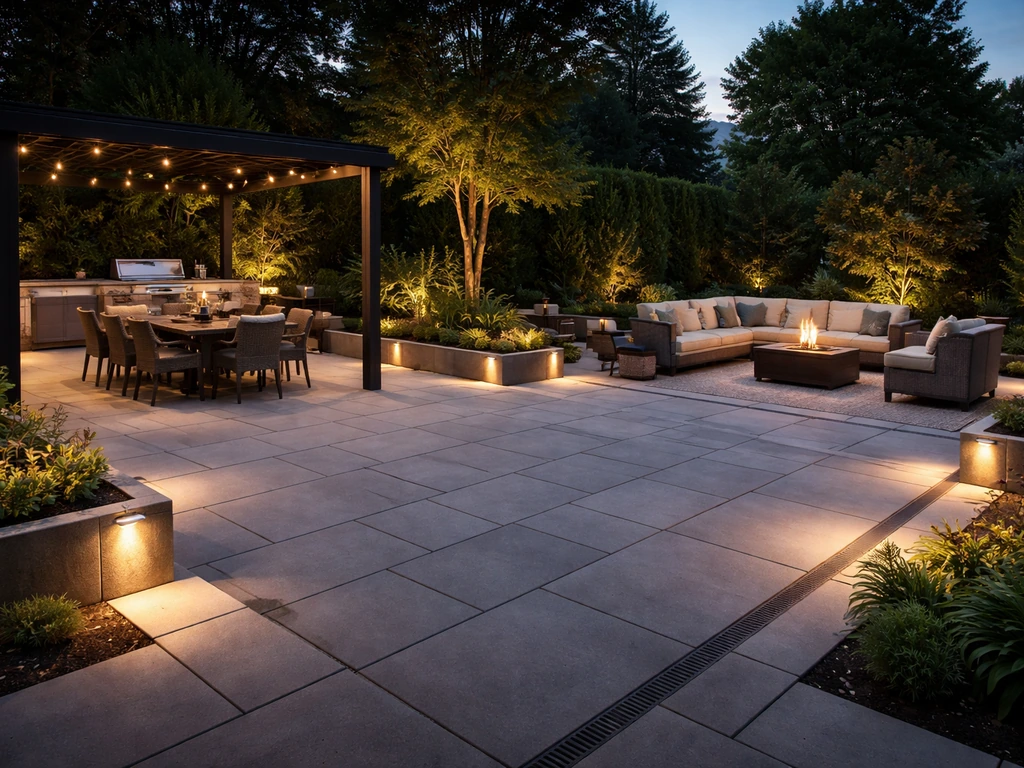
Plan the top patio with design, durable materials, drainage, weather upgrades, and DIY vs contractor next steps for your
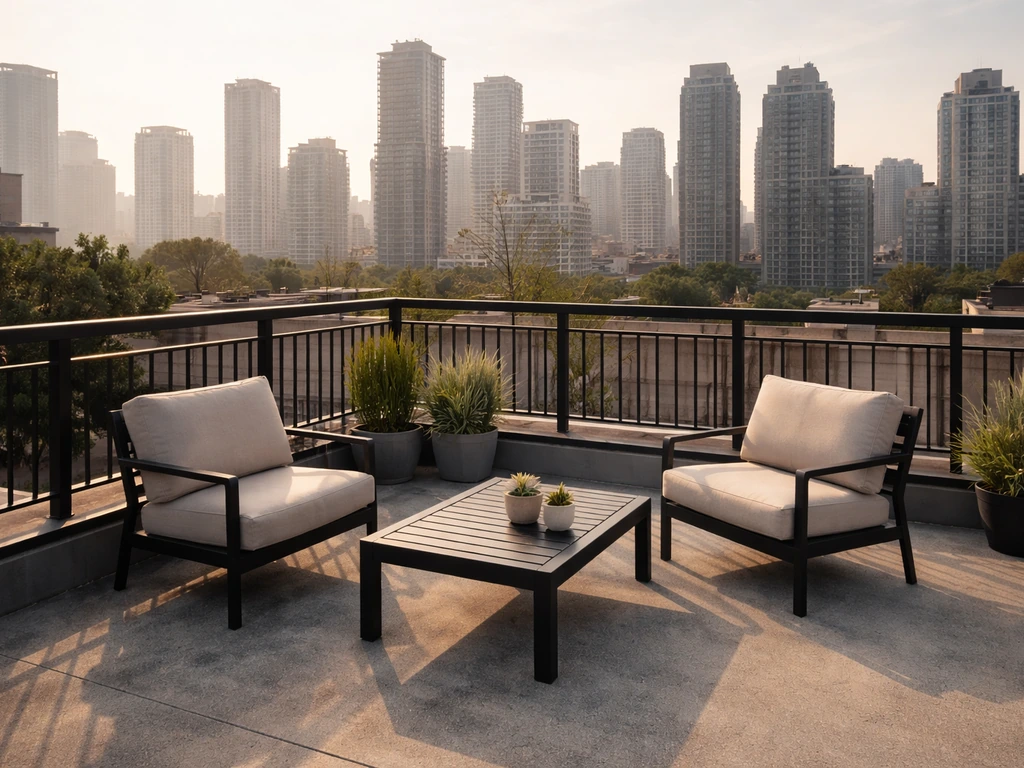
Toronto guide to roof top patio options: features, weatherproofing, feasibility checks, and choosing contractors for roo