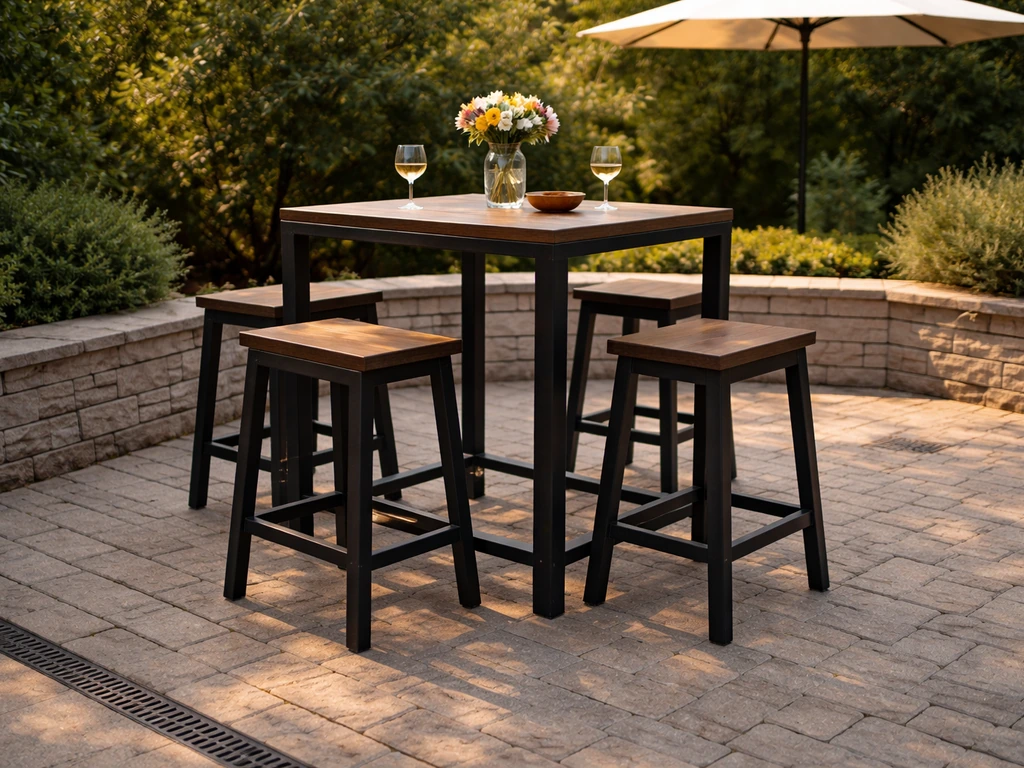
A high top patio for dining means setting up your outdoor space around bar-height or counter-height tables (34 to 42 inches tall) with matching stools or chairs, often on a raised platform or a defined patio surface that elevates both the seating and the sightlines. It is one of the smartest layouts for small backyards, uneven ground, entertaining crowds, or any spot where you want a casual, social feel without the formality of a traditional seated dinner table.
High Top Patio Dining: Plan, Build, and Upgrade Guide

Phoebe Foster
3 May 2026
What 'high top patio' actually means for dining (and the most common layouts)
The phrase gets used two different ways, and it is worth knowing which one you are planning for. The first is simply a patio dining setup built around high-top or bar-height furniture: tall tables, counter stools, and the clearances that go with them. The top patio concept can be planned around either a high-top dining setup or an elevated platform, depending on how you want the space to feel. The second is a physically elevated patio platform, raised above grade by several inches to several feet, where you happen to be dining. Often both ideas overlap: you build a raised deck or platform and furnish it with tall tables and stools.
The most common layouts homeowners end up with are a flush concrete or paver patio at grade level with bar-height bistro sets, a raised wood or composite deck (6 to 24 inches above grade) with a high-top dining zone near the railing, and a tiered patio where one level handles cooking and another handles eating. Rooftop patios are a different beast entirely and come with their own structural and code requirements, though the dining height principles are the same. To get the most out of a rooftop setup, focus on roof top patio design details like structural support, railing requirements, and weatherproof materials. If you are aiming for a roof top patio toronto build, make sure you plan for the structural support and local code requirements early Rooftop patios.
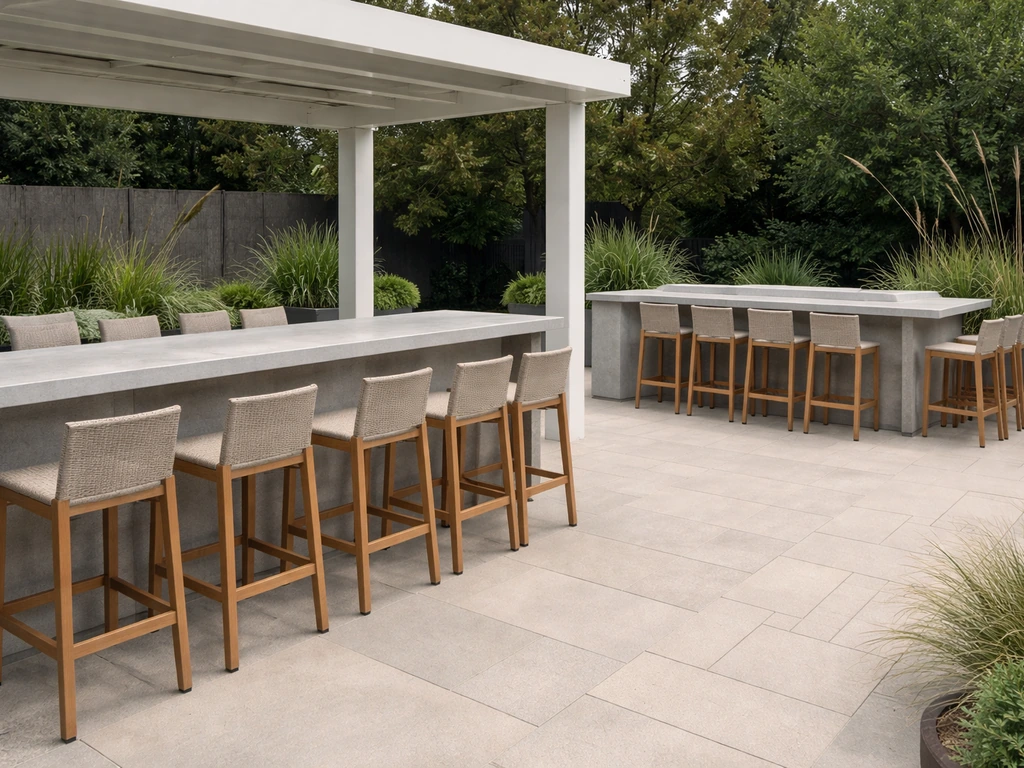
High-top dining makes especially good sense in a few specific situations: tight square footage where a full dining table and chairs would dominate the space, a yard with a view worth framing from a higher vantage point, sloped ground that would require significant grading for a flat at-grade patio, or a home where you entertain casually and guests tend to stand and mingle rather than sit for long meals. It is also a natural fit for anyone who already has an outdoor kitchen or grill island at counter height, since the sightlines and conversation flow better when your guests are at the same level as the food.
Planning the right height: table, seating, and clearances
This is where most people get tripped up, and getting the numbers right before you buy anything or pour concrete saves a lot of frustration. Bar-height tables run 40 to 42 inches tall and pair with stools that have a seat height of 28 to 30 inches. Counter-height tables sit at 34 to 36 inches and pair with stools at 24 to 26 inches seat height. The gap between seat and tabletop should be 10 to 12 inches for comfortable dining, so check that math before mixing furniture from different collections.
| Style | Table Height | Stool Seat Height | Knee Clearance Gap |
|---|---|---|---|
| Bar height | 40–42 in | 28–30 in | 10–12 in |
| Counter height | 34–36 in | 24–26 in | 10–12 in |
| Standard dining (for comparison) | 28–30 in | 17–19 in | 10–12 in |
Leg clearance under the table matters just as much as seat height. You want at least 12 inches of horizontal clearance between a seated person's legs and the table's center pedestal or legs, which is why round pedestal tables tend to work better in tight high-top setups than four-legged rectangular ones. For walkways around the table, plan a minimum of 36 inches of clear path for one person to pass comfortably, and 48 inches if you want two people to pass each other or a server to move through without bumping chairs.
If your high-top patio is a raised platform, railing placement interacts directly with dining. A railing at 36 inches (the minimum under most IRC-based residential codes) sits at roughly table height for a counter-height setup, which can feel claustrophobic. Many homeowners on raised decks bump their railing to 42 inches to match bar-height tables visually and to give a cleaner sightline over the rail from a stool. A guardrail is required by code once the drop from the deck surface to the ground below exceeds 30 inches at any point within 36 inches of the open edge, and the rail must be at least 36 inches tall with openings no larger than a 4-inch sphere. Check your local jurisdiction since some areas have stricter requirements.
Traffic flow is often the thing that kills an otherwise good high-top layout. Sketch a top-down view of your space and mark where people will enter the patio, where the grill or serving area is, and where trash or recycling goes. Leave a clear corridor from the door to the table and from the table to the exit. On a small deck or raised platform, 8 by 10 feet is the practical minimum for a two-person high-top setup with walking room on two sides. A four-person setup needs at least 10 by 12 feet.
Surface, drainage, and durability choices
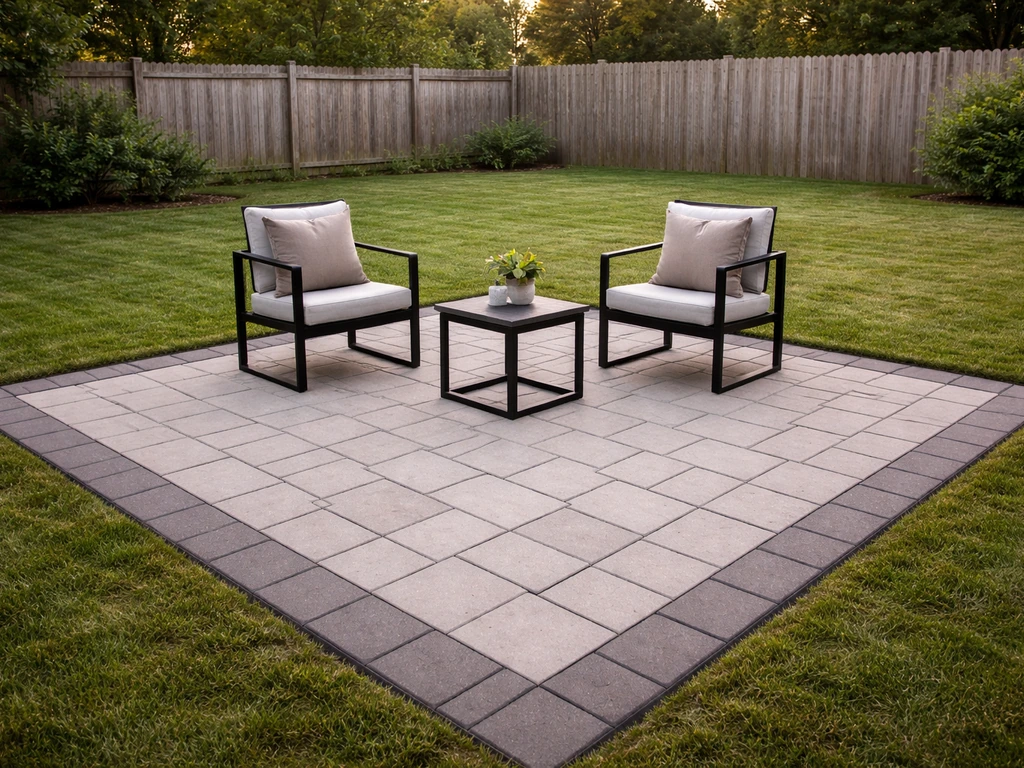
The surface your high-top patio sits on needs to handle foot traffic, furniture legs, moisture, and whatever your local climate throws at it. The main options are concrete (poured or stamped), pavers, natural stone, composite decking, and pressure-treated wood. Each has a different maintenance commitment and a different feel underfoot.
| Material | Slip Resistance | Drainage | Maintenance | Relative Cost |
|---|---|---|---|---|
| Brushed concrete | Good | Needs slope built in | Low | $ |
| Concrete pavers | Good to excellent | Drains between joints | Low–medium | $$ |
| Natural stone (flagstone, slate) | Varies by finish | Drains between joints | Medium | $$$ |
| Pressure-treated wood decking | Good if sealed | Gaps drain naturally | Medium–high | $$ |
| Composite decking | Good (textured surface) | Gaps drain naturally | Low | $$$ |
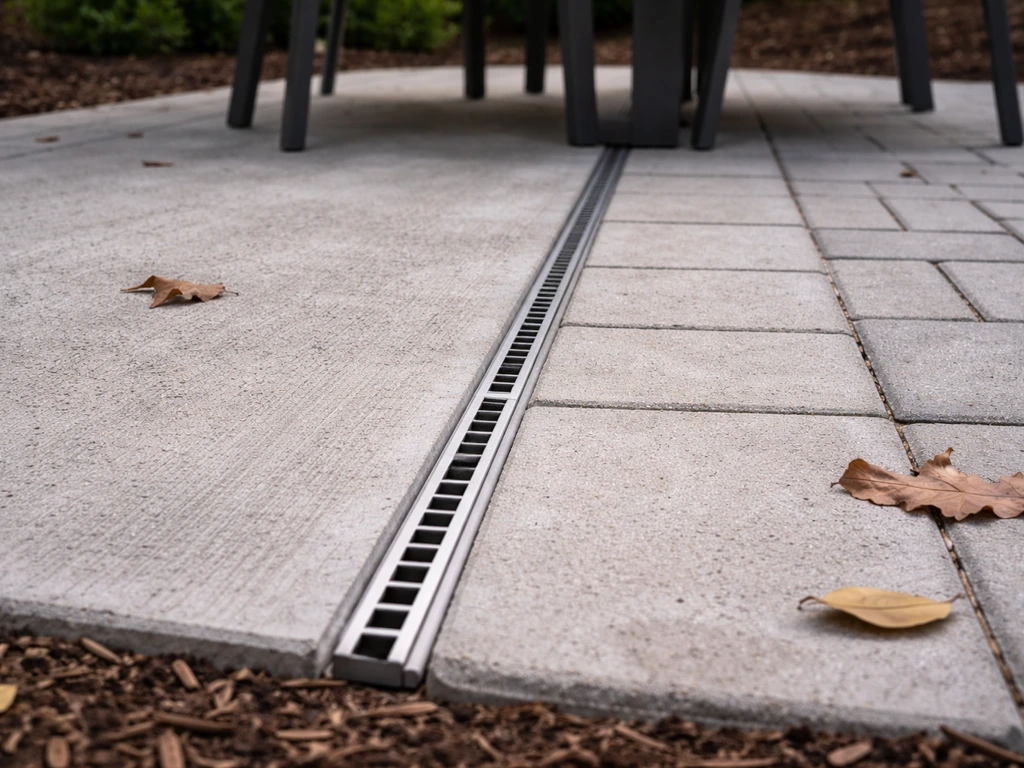
Drainage is non-negotiable. Water pooling under high-top furniture corrodes metal legs, warps wood furniture bases, creates slipping hazards, and, on a raised platform, can accelerate structural rot. Concrete and stone surfaces need a minimum slope of 1/8 inch per foot away from the house (1/4 inch per foot is better for heavier rain regions like the Southeast). Decking with gaps between boards handles rain naturally but still needs proper joist slope to direct water away from the house foundation.
Slip resistance matters more at high-top setups than standard dining because people are climbing on and off stools, which involves more movement and more opportunity for a misstep. Brushed or broom-finished concrete offers good grip. Smooth stamped concrete or polished stone gets dangerously slick when wet. If you love the look of a smooth surface, apply an anti-slip additive to the sealer or use grip strips near the stool positions. For wood or composite decks, a textured composite board is far safer than smooth-finished boards for a dining area.
On a raised platform, the edges need attention beyond just the surface. If the platform is more than a step or two above grade, edge framing and fascia boards protect the structure from moisture intrusion. On any elevated platform over 30 inches above grade, code-compliant railings are required. Even below that threshold, a simple decorative border of planters, low edging stone, or a cable railing system can mark the edge visually and reduce trip risk without making the space feel boxed in.
Weather protection and comfort upgrades that make high-top dining work year-round
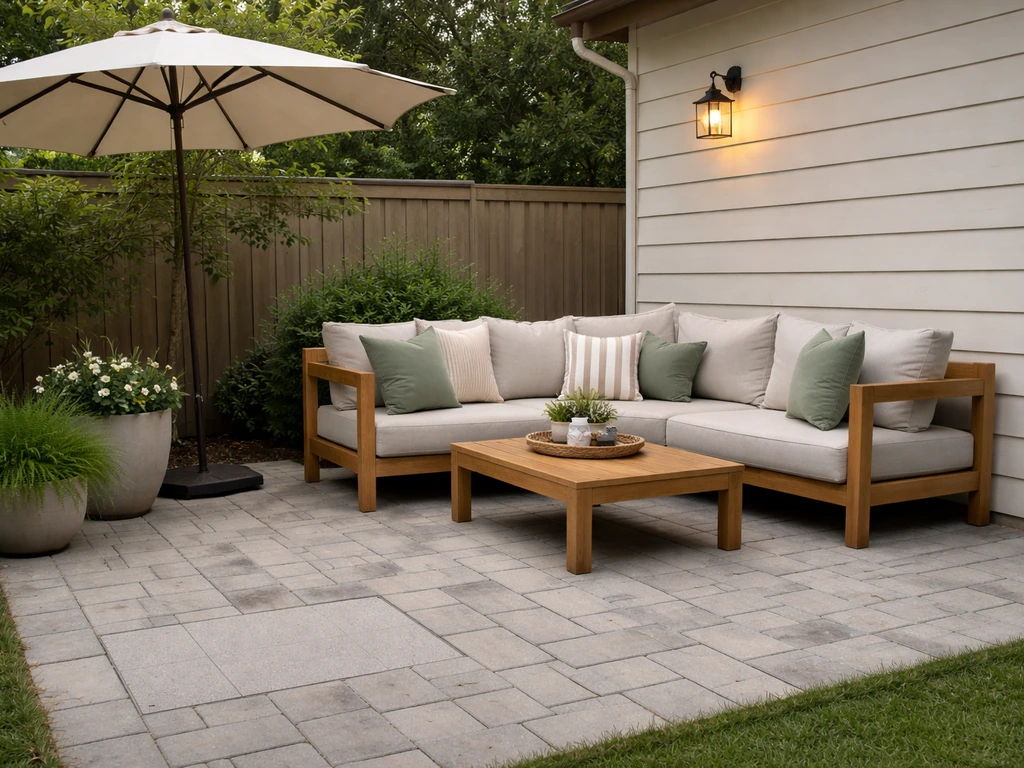
An exposed high-top dining area looks great in a catalog and is miserable in practice without some form of overhead cover. The options range from a permanent pergola to a freestanding cantilever umbrella to a shade sail, and they all have different trade-offs for a high-top setup specifically.
Pergolas are the most popular choice for a permanent high-top patio because they define the dining zone visually, can support string lights and ceiling fans, and are available in DIY kit form for under two thousand dollars or as custom builds for five thousand dollars and up. An attached pergola needs a ledger board secured to the house, so waterproofing that connection is critical. Freestanding pergolas avoid that complication and can be placed anywhere on the patio. For a high-top setup, size the pergola so the posts clear your stool backs (aim for at least 7 feet of clearance from decking surface to the lowest beam).
If a pergola is not in the budget, a large offset cantilever umbrella (9 to 11 feet in diameter) can cover a 4-person high-top table without a center pole getting in the way. The trade-off is wind vulnerability: these umbrellas need to be weighted with 50 pounds or more at the base, closed when winds exceed 20 to 25 mph, and stored or anchored before any serious storm. In consistently windy regions like the Texas Hill Country or coastal areas, a fixed shade sail tensioned between anchor points often holds up better.
For heat management, an outdoor ceiling fan under a pergola or covered patio is the single best investment for comfort in humid climates. A fan rated for wet or damp outdoor use (check the UL listing) with a 52-inch or larger blade span will move enough air to make a real difference. In drier climates, a misting system added to the pergola posts or a standalone misting fan can drop the perceived temperature by 10 to 20 degrees Fahrenheit. For cooler months or evenings, a freestanding propane patio heater positioned at the corners of the dining area is the fastest solution. Electric infrared heaters mounted to the pergola overhead are more permanent and provide more focused warmth, but they require a weatherproof electrical circuit.
- Pergola with ceiling fan: best all-around for humid or hot climates
- Shade sail: good for tight spaces or renters who want portability
- Cantilever umbrella: budget-friendly but needs significant ballast in wind
- Outdoor curtains or shade screens: adds wind and privacy protection on open sides
- Propane patio heater: fastest heat solution for cool evenings
- Electric infrared heater (ceiling mount): cleaner, more permanent, requires wiring
- Misting system: effective for dry climates, messy in humid ones
DIY vs hiring a contractor: cost, timeline, and what to ask
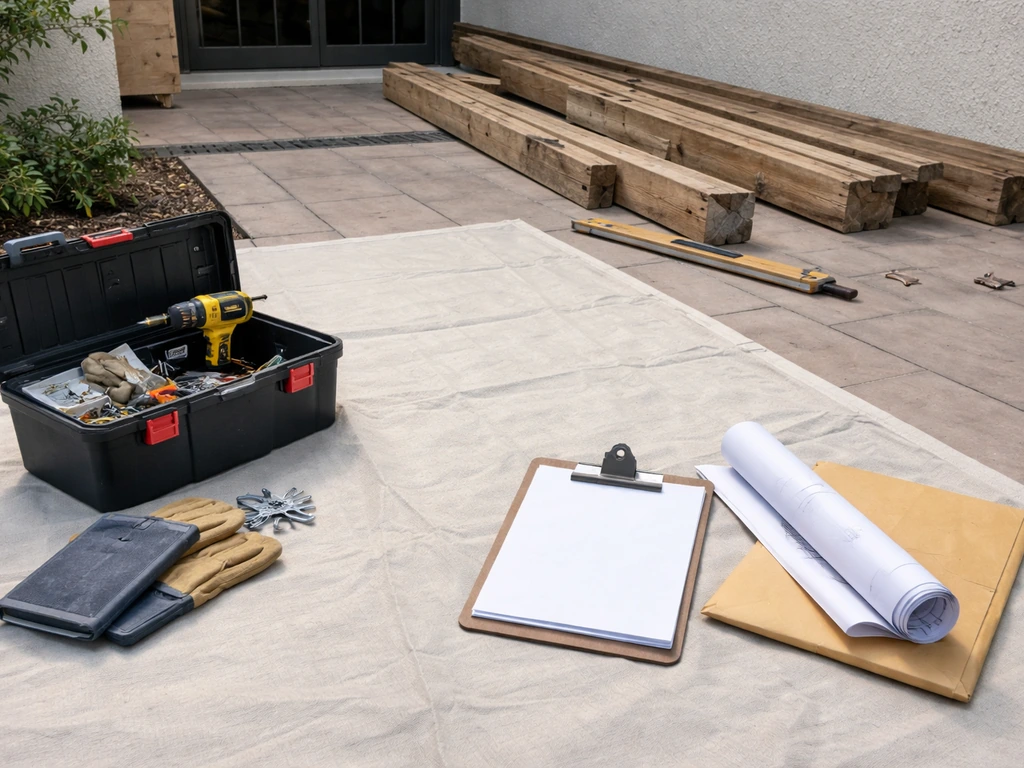
Whether to DIY or hire out depends mostly on what you are building. Furnishing an existing patio with high-top furniture and a pergola kit is well within reach for a confident DIYer. Pouring a concrete slab, building a raised wood or composite deck, or adding a permanent shade structure with electrical work is where hiring out usually makes more sense, both for code compliance and for long-term durability.
| Project Scope | DIY Feasibility | Typical Cost Range (DIY) | Typical Cost Range (Hired) |
|---|---|---|---|
| High-top furniture set + umbrella | Easy | $400–$1,500 | $400–$1,500 (no labor savings) |
| Pergola kit install | Moderate | $800–$2,500 | $2,000–$5,000 |
| Paver patio (at grade) | Moderate–hard | $800–$2,000 materials | $3,000–$8,000 |
| Raised wood/composite deck | Hard | $3,000–$8,000 materials | $8,000–$20,000+ |
| Poured concrete slab | Very hard | $1,500–$3,500 materials | $4,000–$10,000 |
| Electrical for fans/heaters | Not recommended | N/A | $500–$2,000+ |
If you are hiring a contractor for any structural work, get at least three quotes and ask the same set of questions across all of them so you are comparing apples to apples. The most important things to ask are whether they will pull the necessary permits (a contractor who says you do not need one for a raised deck almost always means you do but they want to skip the step), what the drainage slope will be and how it will be achieved, what the warranty covers on labor versus materials, and whether they have experience with the specific material you are choosing. Composite decking installs differently from pressure-treated lumber, and not every deck builder has hands-on experience with both.
Timeline-wise, a paver patio at grade can be done by a crew in one to three days. A raised deck typically takes one to two weeks from permit approval to final inspection, and permit approval itself can add two to eight weeks depending on your municipality. If you are planning a high-top patio for a summer entertaining season, start getting quotes and permits in early spring or even the prior fall. Material lead times for composite decking and custom pergola components can add another two to four weeks.
For the purely DIY path, a modular approach works well: start with a good paver base, add a freestanding pergola kit, wire in a solar-powered string light system to avoid electrical permits, and furnish with weather-resistant bar-height furniture. You can do this in stages across weekends without disrupting the yard for an extended period, and the total out-of-pocket cost can stay under three thousand dollars.
Decor, lighting, and accessorizing a high-top dining patio
Lighting makes or breaks a high-top dining patio in the evening, and string lights are the easiest win. A warm white Edison-style string (2700K color temperature) draped across a pergola or between anchor posts creates the right ambiance without needing any wiring beyond an outdoor outlet or a solar charger. For functional task lighting over the table, a waterproof pendant light hung from the center of a pergola beam works beautifully, but it needs a weatherproof junction box and a wet-rated fixture.
Outdoor rugs anchor the dining zone and add a layer of comfort underfoot when guests are standing and mingling around the table. For a high-top setup, size the rug so all stool legs sit on it when pulled out: for a 36-inch round table with four stools, that usually means an 8-foot round or an 8-by-10-foot rectangular rug. Look for rugs rated for outdoor use with a low pile or flatweave construction so stool legs do not catch and tip. Polypropylene rugs clean easily with a hose and handle moisture without mildew.
Serving and storage accessories make high-top dining more practical. A bar cart or outdoor sideboard at counter height (34 to 36 inches) placed adjacent to the dining area keeps condiments, drink ware, and serving pieces at arm's reach without requiring trips inside. Outdoor storage ottomans at seat height double as extra seating and stash cushions or throws between uses. For wind protection along open sides, fabric curtain panels on a pergola rail or a low row of potted tall grasses or bamboo planters can block gusts without closing in the space visually.
Plant placement is underrated in high-top patio design. Because your sightlines from a stool are higher than from a standard chair, low ground plantings disappear from view. Raise plants on stands, use tall container plantings (4 to 5 feet of combined pot and plant height), or hang trailing plants from pergola beams to keep greenery in the visual field while seated at bar height.
Measurement checklist and next steps to start your project
Before you call a single contractor or add anything to a cart, take these measurements and write them down. Everything else in planning flows from these numbers.
- Measure the total available patio footprint (length x width in feet) and note any obstructions: doors, windows, downspouts, HVAC units, gas lines
- Measure the elevation change from your door threshold to the patio surface and from the patio surface to grade at the lowest point (this determines railing requirements and drainage slope needs)
- Note the direction the patio faces (north, south, east, west) and the hours of direct sun from 10am to 4pm (this drives shade structure decisions)
- Measure the distance from the nearest outdoor electrical outlet to the center of the planned dining area (determines wiring cost for fans or heaters)
- Confirm table dimensions you are considering: height, top diameter or length/width, and leg or pedestal placement
- Check manufacturer specs on stool seat height and compare against table height to confirm a 10–12 inch gap
- Measure the door opening width and swing arc to confirm furniture delivery and daily traffic clearance
- If building a raised platform, measure the drop from the planned deck surface to grade at the open edge and check local code thresholds for guardrail requirements
When contacting contractors for quotes, share these measurements upfront so you get accurate estimates rather than ballpark ranges. Ask specifically about drainage slope, permit responsibility, material warranties, and timeline including permit lead time. If you are going the DIY route, use the measurements to order a paver layout grid online (most paver suppliers offer free layout tools), size your pergola kit, and confirm furniture will fit with clearances before anything ships.
The biggest mistake people make with high-top patio projects is buying furniture before the surface is done and then discovering the chairs do not fit the finished space the way they expected. Lock in your layout and clearances first, surface second, shade structure third, and furniture and decor last. That order keeps you from making expensive changes mid-project. Start with the measurements above, and you will have everything you need to talk to a contractor or place your first material order this week. Once you nail those basics, you can start dialing in your last best patio touches, like lighting, weather cover, and the right furniture scale for how you actually entertain.
FAQ
What’s the difference between a high top patio dining setup and a physically elevated patio platform?
A high top dining setup is mainly about bar-height furniture and the clearances around it (tall table plus stool seat heights). A physically elevated patio platform is about raising the walking and dining surface above grade. They often overlap, but you can have bar-height dining on a flat-at-grade patio, or a raised deck with standard tables.
Can I use a regular dining table on a high-top patio if I add a higher base?
It usually does not work well. Standard dining tables are typically designed around seated heights and leg clearances, so raising the tabletop often creates awkward knee space and cramped leg clearance. If you want a true high top feel, choose tables that match bar or counter heights and pair them with the correct stool seat height.
How do I choose between a bar-height and counter-height high top patio?
Use bar-height (taller tables, taller stools) if you want a more social, standing-like transition and better sightlines with an outdoor kitchen at counter height. Use counter-height if you prefer easier stool access, a slightly less dramatic look, or if your overhead railing height and sightlines need to feel less visually tall.
What’s the right clearance if my table has a center pedestal or different leg shape?
Pedestal tables can be easier in tight spaces because you can plan leg room around a single central obstruction. Still, confirm you can keep at least 12 inches of horizontal clearance from legs to the center support area, and test stool pull-out position so stools don’t collide with nearby furniture or the platform edge.
Do I need a guardrail for a raised high top patio even if it’s “only a few steps” high?
Many jurisdictions require guardrails once the drop is more than 30 inches at the edge, and there are also rules about guard height and opening size. Because your exact measurement depends on where the deck surface sits relative to grade, confirm the specific threshold and measurements with your local permitting office before building.
How can I prevent stools from sliding off a raised deck surface or getting wet?
Use non-slip floor protection under stool feet where appropriate (rubber pads or outdoor-rated anti-slip mats). Also make sure your decking or surface slopes water away and that there’s no low spot where puddles form under stool positions. If the surface is smooth or recently sealed, add grip strips near the stool contact points.
What’s the best way to handle drainage if my backyard slopes toward the house?
You generally need to design the high top patio surface so water moves away from the foundation. For concrete or stone, aim for at least 1/8 inch per foot slope away from the house (1/4 inch per foot in heavier rain regions). For decks, ensure joist and substructure drainage directs water off the foundation, not into low areas under furniture.
How do I choose a shade solution that won’t interfere with taller tables and stool backs?
Measure your stool back height and choose an overhead clearance so people can sit comfortably without hitting the underside. For example, a common target is at least about 7 feet from the deck surface to the lowest pergola beam. With umbrellas, verify the canopy height and that the base doesn’t block foot traffic or chair movement.
Are cantilever umbrellas a good fit if my area is windy?
They can work, but plan for wind management. Use proper weight on the base (often 50 pounds or more), and have a storage or anchoring plan before storms. If you regularly get strong gusts, a fixed shade sail tensioned between anchor points can hold up better, but you still need solid anchor design.
What lighting should I use if the dining area is under a pergola or cover?
For ambiance, warm white string lights are usually easiest. For task lighting, use a wet-rated pendant or a fixture designed for outdoor damp conditions, and plan the electrical box and wiring path so it’s protected and meets outdoor-rated requirements. If you’re using string lights powered by solar, confirm performance for how many hours you need.
What size outdoor rug should I buy so stools don’t catch or tip?
Aim for a rug that fully covers the stool footprint when the stool is pulled out. A low pile or flatweave outdoor rug helps prevent snagging on stool legs. For a four-stool 36-inch round table, that often means something like an 8-foot round or an 8-by-10-foot rectangular rug, but measure your exact stool overhang.
How do I plan plantings so they don’t disappear from bar-height seating?
From stool height, short plants can get blocked by the patio edge and table height. Use taller container plantings (often around 4 to 5 feet total height) or raise greenery on stands. If you want greenery in view without taking floor space, hang trailing plants from pergola beams.
What’s the most common ordering mistake with a high top patio project?
Buying furniture before the finished layout, surface height, and clearances are confirmed. The safer order is measure and finalize layout and clearances first, then lock the surface and shade structure, and only then pick table and stool styles. This prevents expensive swaps if stool sizes or spacing don’t match the finished build.
How should I compare contractor quotes for a high top patio?
Ask every contractor the same set of specifics: drainage slope method, permit responsibility, what their labor warranty covers versus materials warranty, and their timeline including permit lead time. Also confirm they have direct experience with your chosen surface material (for example, composite vs pressure-treated deck methods differ).
Next Articles

Do It Yourself Outdoor Patio Ideas: Build, Upgrade, Maintain
DIY outdoor patio ideas for planning, building, upgrading, and maintaining floors, shade, privacy, lighting, and decor.
Quick Fix Patio Ideas for Instant Comfort and Style
Quick fix patio ideas for fast comfort and style: cleanups, repairs, shade, flooring tweaks, and safe upgrades on any bu
Cheap Do It Yourself Patio Ideas: Budget Build Guide
Budget DIY patio ideas with step-by-step flooring, prep tips, cost ranges, upgrades, and safety mistakes to avoid.