You can turn almost any deck, porch, or patio into a genuinely better bird habitat with a handful of targeted changes: strategic feeder and water placement, a few bird-safe surface and landscaping upgrades, and some simple safety fixes that protect birds without making your outdoor space harder to enjoy. top notch decks and patios. The key is thinking through layout first, then materials and safety, so you're not constantly fighting mess, collisions, or cleanup.
Better Bird Deck Porch Patio: Step-by-Step Upgrade Guide

Phoebe Foster
29 Apr 2026
What 'Better' Actually Means for Birds on Your Outdoor Space
Better doesn't just mean more feeders. It means creating a setup where birds can eat, drink, and shelter safely while you can still use and enjoy your space. A better bird deck or patio hits four goals at once: it attracts the birds you want, keeps them safe from hazards (windows, pets, toxic plants, and chemicals), stays manageable to clean, and doesn't look like a mess. That last part matters more than people admit. If your bird setup turns your patio into a seed-shell graveyard or draws squirrels and raccoons every night, you'll tear it all down within a season.
So when you're planning upgrades, run every decision through that filter. Does this placement keep birds safer? Does it make cleanup easier? Does it fit how you actually use the space? A beautiful, functional bird zone and a great outdoor living space aren't in conflict if you plan it right. Once you’ve dialed in placement and safety, choosing the best bird feeders for patios comes down to matching feeder types to the birds that visit your area and your specific patio layout.
Layout Plan: Where to Put Feeders, Water, and Shelter
Placement is the single biggest factor in whether your bird setup works well or becomes a headache. Get this wrong and you'll deal with window strikes, mess in the wrong spots, and birds that never feel comfortable enough to stick around.
The Window Collision Rule
This one is non-negotiable. Homes with bird feeders are at roughly double the risk for bird-window collisions compared to homes without feeders, according to U.S. Fish and Wildlife Service data. The fix isn't removing feeders, it's placing them correctly. Both the FWS and the Cornell Lab's All About Birds recommend placing feeders closer than 3 feet from glass. At that distance, a bird startled off the feeder won't build enough speed to injure itself if it does hit the window. Anything in the 3 to 10 foot range is the danger zone, because a bird gets a running start without enough space to course-correct. If you can't get within 3 feet of the window, push feeders out to at least 10 to 15 feet away.
Feeder Placement Strategy
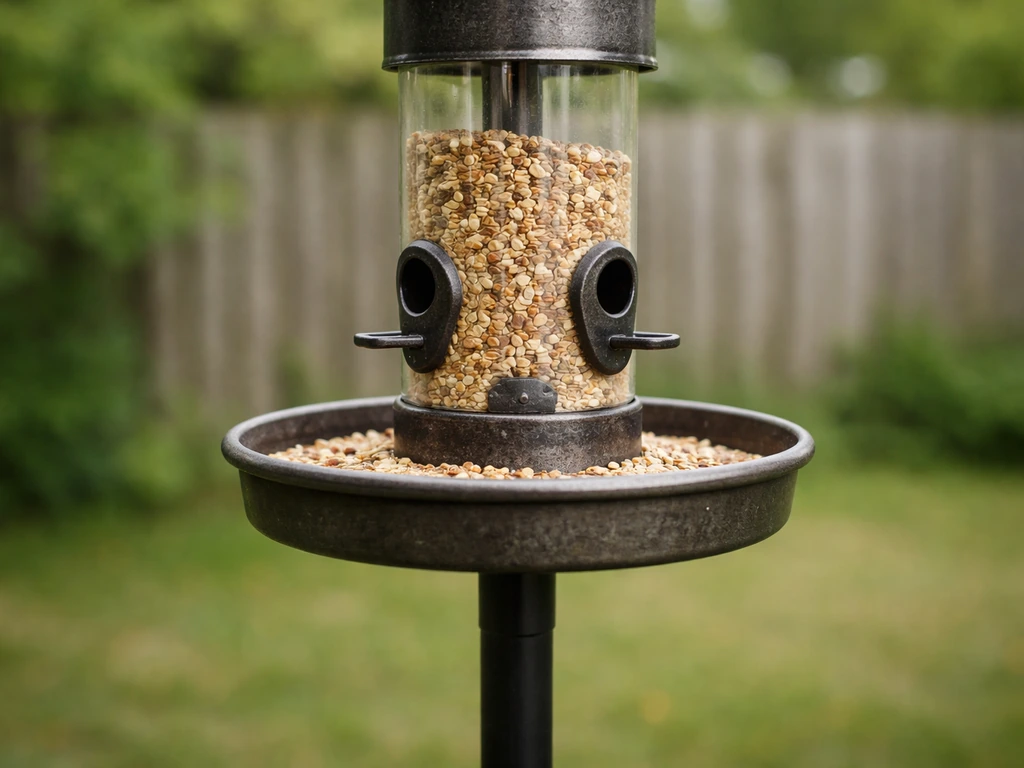
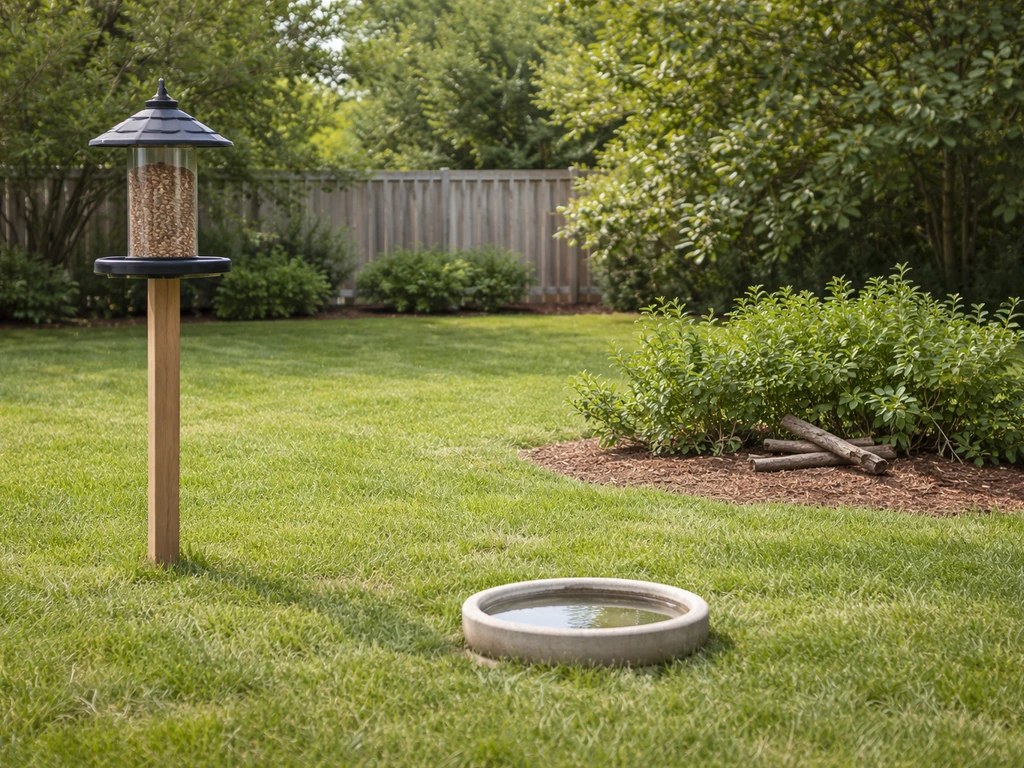
Mount feeders at eye level or slightly above, roughly 4 to 6 feet off the ground, to deter ground-level predators. Keep them at least 10 feet away from dense shrubs or fences that cats can use as launch pads. Use pole-mounted baffles if squirrels are an issue. Group feeder types by bird behavior: tube feeders for finches and small songbirds, platform feeders for ground-feeding species like juncos, and suet cages on a separate pole for woodpeckers and nuthatches. Avoid clustering everything in one spot since that concentrates mess and disease risk.
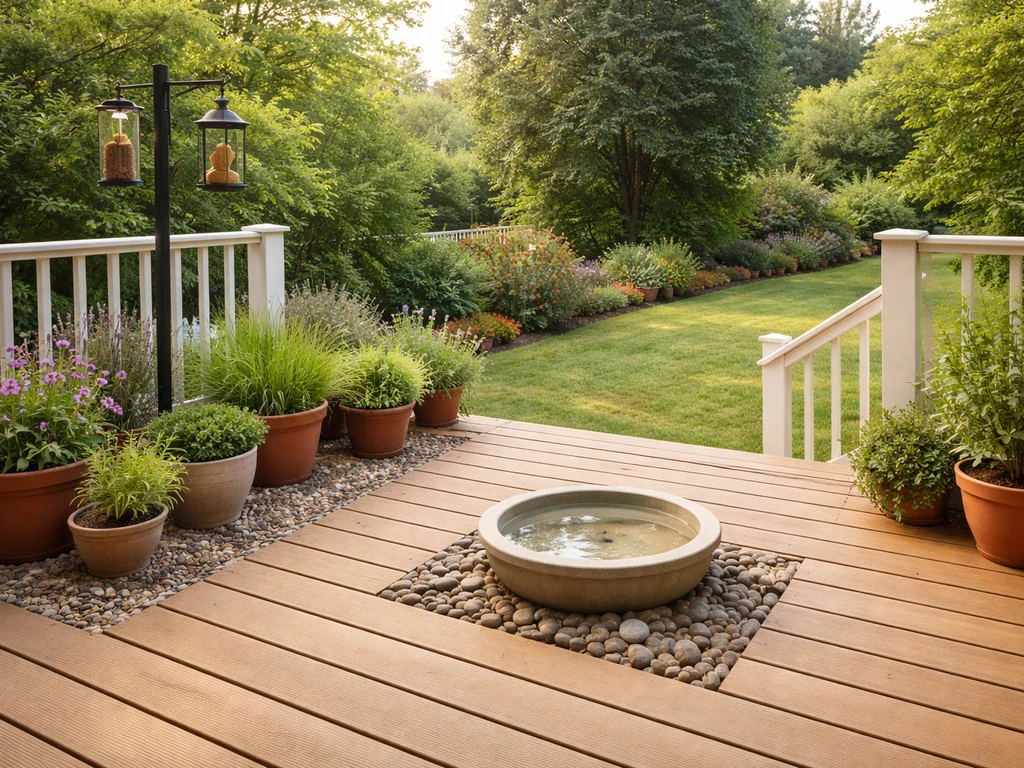
Water Placement
A birdbath or water dish draws more species than feeders alone. Place it within sight of feeders but at least 6 to 8 feet away so splashing doesn't contaminate seed. Keep baths in partial shade to slow algae growth and reduce evaporation, especially if you're in a hot climate like Texas or Arizona where an exposed bath can turn into a puddle by noon in July. A solar-powered wiggler or dripper adds movement to the water, which birds find irresistible and which also discourages mosquito breeding. Position baths at least 10 feet from dense cover to give birds a clear sightline while they drink.
Shelter and Perching
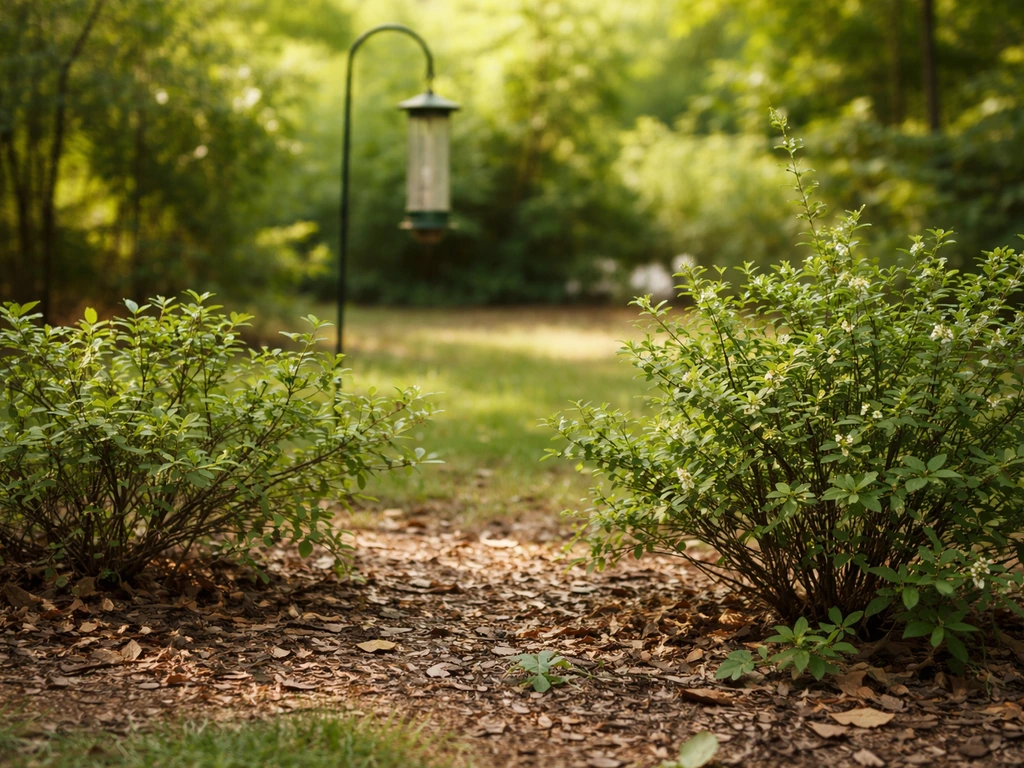
Birds need nearby escape cover but not right next to feeding stations. Plant native shrubs 5 to 10 feet from your feeder zone so birds have somewhere to land and survey before approaching, and somewhere to bolt if they feel threatened. On a smaller deck or patio where you can't add plantings, a simple shepherd's hook with a hanging basket of dense native plants provides the same function. If you're interested in nesting, hang nest boxes on the outer edges of your space, away from heavy foot traffic and at the height appropriate for your target species (bluebird boxes, for example, go 4 to 6 feet high facing open space).
Bird-Safe Upgrades by Space Type
The right upgrades depend on whether you're working with a raised deck, a covered front porch, or a ground-level patio. Each has different constraints around sunlight, wind exposure, access for predators, and available mounting points.
| Space Type | Best Feeder Mount | Top Priority Upgrade | Main Challenge |
|---|---|---|---|
| Raised Deck | Deck rail-mounted arm or freestanding pole | Pole-mount with squirrel baffle; seed tray to catch debris | Seed debris falling to ground level below; predator access from below |
| Covered Front Porch | Hanging hook from ceiling or wall bracket | Window decals or film on nearby glass; enclosed suet feeder | Wind exposure, limited space, foot traffic near feeders |
| Ground-Level Patio | Freestanding shepherd's hook or in-ground pole | Paving gap management and drainage for birdbath runoff | Ants in feeders; seed mess on hard surfaces; harder to use baffles |
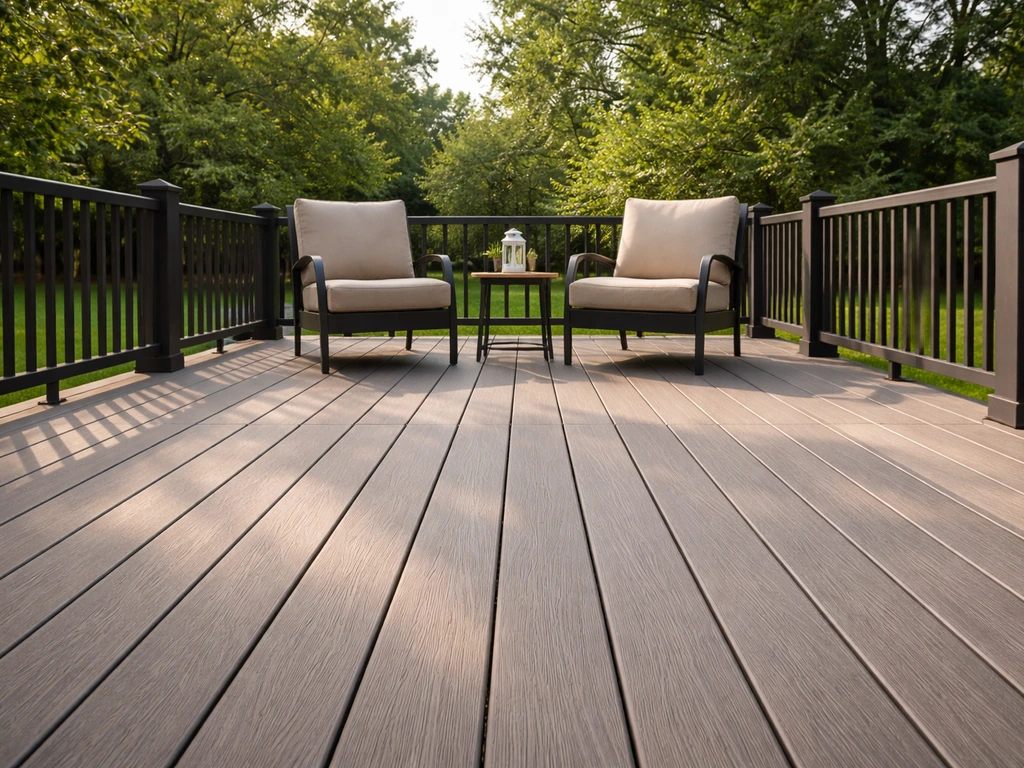
Raised Deck Upgrades
On a raised deck, your biggest win is a good pole mount with a built-in seed-catching tray. Seed shells falling between deck boards or off the edge create a feeding station below that attracts rats and raccoons. A tray feeder hung below your main tube feeder catches most of the debris. Deck rail-mounted arms are convenient but put feeders right at railing height, which is prime cat-jumping territory. A freestanding weighted pole set a few feet from the rail works better. Also think about drainage when you clean feeders and baths: make sure rinse water flows off the deck rather than pooling on the boards.
Covered Front Porch Upgrades
A covered porch is actually one of the better spots for a bird setup because you already have weather protection. The ceiling gives you natural hanging points, and the cover keeps seed and birdbaths from getting rained out or overheated. The main hazards here are the nearby glass on the front door or porch windows, and the foot traffic. Hang feeders close to windows (within 3 feet) or far away (beyond 10 feet), and apply bird-safe window film or dot-patterned decals to any large glass surfaces. Keep feeders at least 4 feet from the main door so birds don't get spooked every time someone walks in or out. Hummingbird feeders do especially well on covered porches since they're protected from direct sun, which degrades nectar fast.
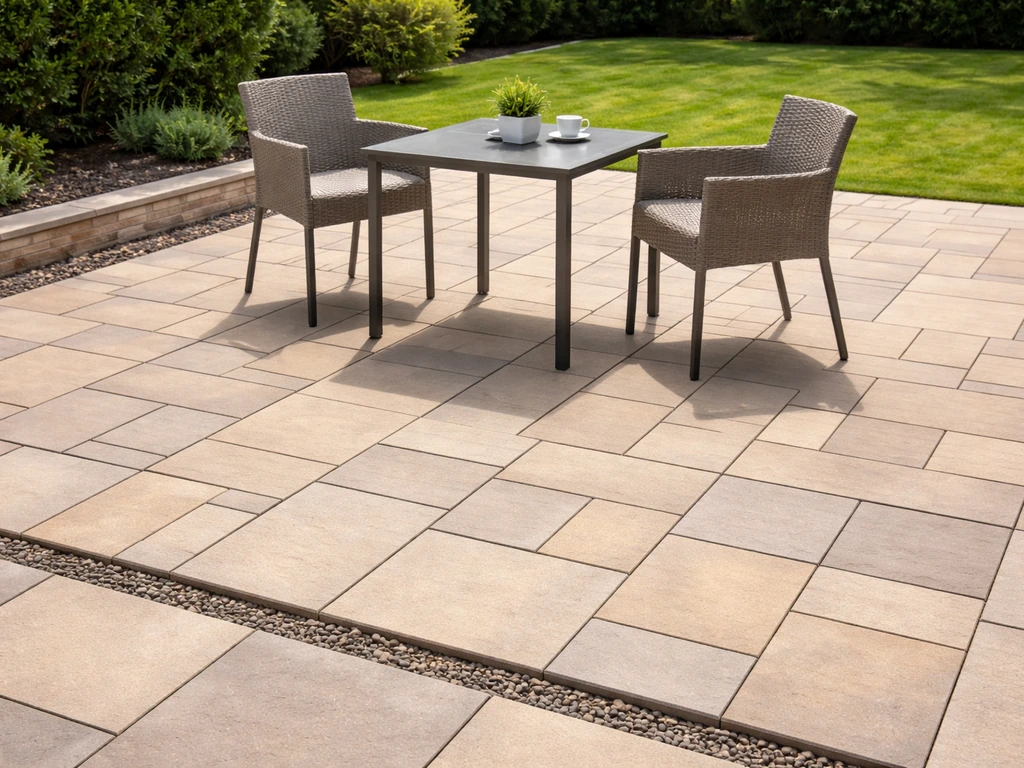
Ground-Level Patio Upgrades
Ground patios give you more planting options and room for a proper birdbath setup with a recirculating pump. The challenge is that seed mess on pavers, concrete, or composite tile is very visible and attracts ants. Use no-mess seed blends (hulled sunflower, nyjer, or shelled peanut pieces) that don't leave debris, and place a rubber anti-fatigue mat or removable deck tile section under feeders that you can hose off weekly. Ant moats on feeder poles work well at ground level and also protect hummingbird feeders. For the birdbath, a slightly recessed stone or concrete basin set into a paved area looks intentional and drains naturally if you overflow it during cleaning.
Materials and Surfaces That Make Maintenance Easier
If you're choosing or upgrading decking, paving, or porch flooring with birds in mind, a few material properties make a real difference in how much work you'll do every week.
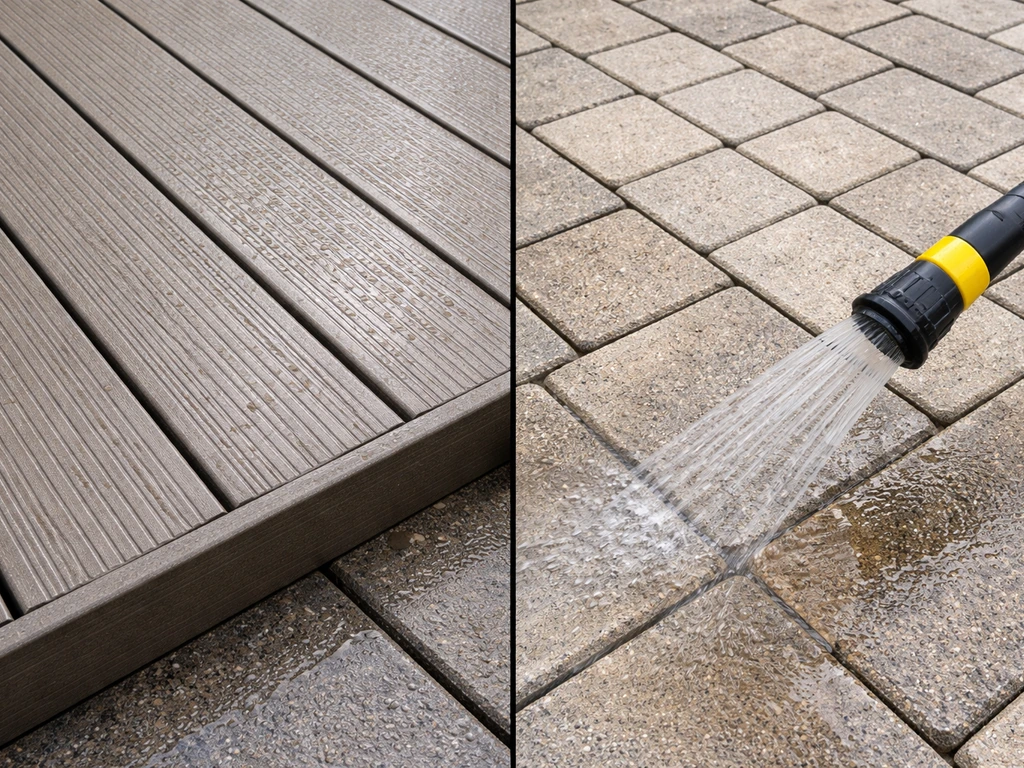
- Composite decking (like Trex or TimberTech): easy to hose down, doesn't absorb seed oils or bird droppings the way wood does, and resists staining better than pressure-treated lumber. The textured surface also gives birds better footing if they land on the deck itself.
- Concrete pavers with tight joints: easy to sweep and hose, and you can replace individual stained tiles. Avoid open-joint gravel infill right under feeders since it traps seed debris.
- Porcelain tile on covered patios: the slipperiest option when wet but the easiest to clean. Use a matte or textured finish for traction, and add a non-slip mat under any feeder station.
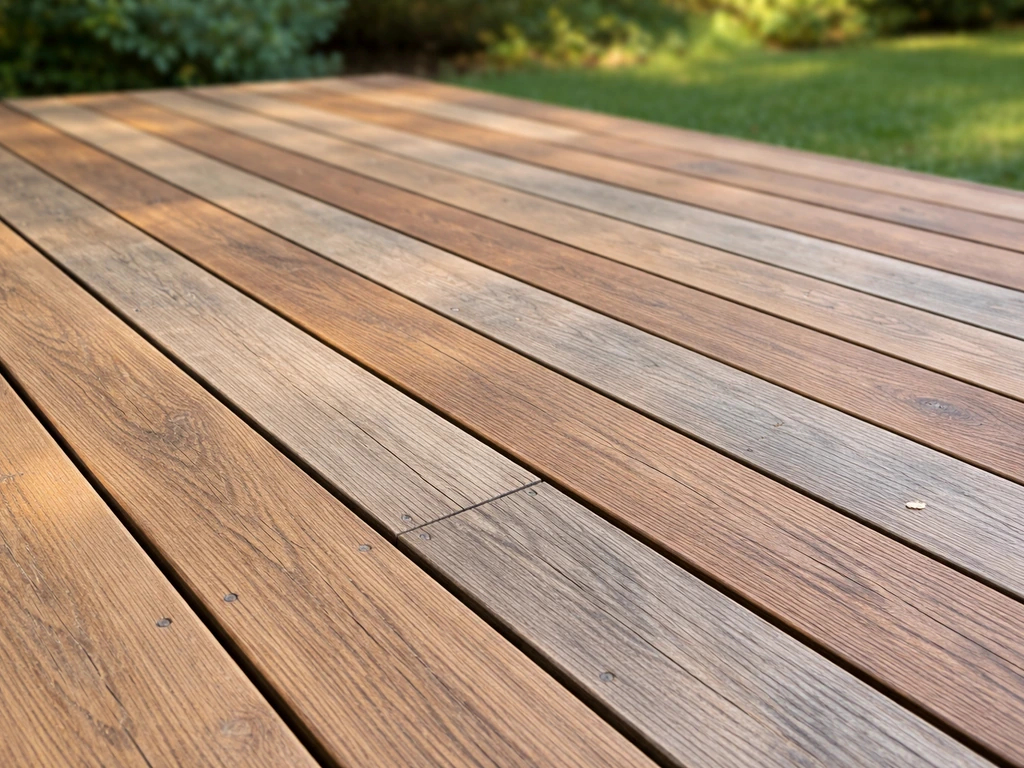
- Natural wood decking: looks great but absorbs droppings and seed oils. Seal it with a water-repellent finish annually and plan on more scrubbing around feeder zones.
- Rubber paver tiles or deck tiles: a budget-friendly overlay you can add directly over existing concrete or wood. Pull them up, hose them off, and replace. Great under birdbaths or water features.
Whatever surface you have, the single biggest upgrade you can make under feeders is a removable, washable mat or tray. It costs almost nothing, cuts cleanup time dramatically, and prevents staining on your actual deck or patio surface. If you're planning a larger patio renovation, it's worth looking at how the best patio decking options compare on drainage and cleanability before you commit to a material.
Bird Safety and Risk Reduction
A better bird space means fewer hazards, not just more features. These are the risks worth taking seriously.
Window Strikes
Birds can't tell the difference between a reflection of trees in glass and the real thing. Audubon recommends visual markers or film treatments on glass to break up reflections. The most effective options are: tape or cord in vertical strips no more than 2 inches apart, patterned window film applied to the outside of the glass, or adhesive dots placed in a grid pattern at 2-by-2-inch intervals. Standard opaque decals work only if they're dense enough: a single songbird silhouette in the middle of a large window does almost nothing. As noted above, the other proven fix is feeder placement: keep them under 3 feet from glass or over 10 feet away.
Pets and Predators
If you have cats, even indoor-outdoor cats pose a serious risk to ground-feeding birds and birds startled off low feeders. Keep feeders at least 10 feet from any surface a cat can reach, use baffles on poles, and consider adding a motion-activated deterrent around feeder bases. Dogs are less of an issue for birds but can knock over freestanding poles and birdbaths, so anchor everything securely.
Toxic Plants and Chemicals
Some common patio and porch plants are toxic to birds. Avoid oleander, sago palm, foxglove, yew, and lantana in your bird zone. Stick to native flowering plants like coneflowers, black-eyed Susans, native salvia, and serviceberry, which provide seeds and nectar without risk. On the chemical side, avoid using pesticides within 10 feet of feeders or birdbaths. Insecticide-treated birdseed or pest control sprays near your setup can be fatal to birds. Use insecticidal soap or diatomaceous earth for ant control near feeders rather than spray pesticides.
Weather and Climate
Climate affects every part of this setup. In hot southern climates, nectar in hummingbird feeders can ferment in under 24 hours in summer, so you need to clean and refill every day or two. In the Midwest and Northeast, heated birdbaths or bath heaters keep water liquid in winter when it's one of the most valuable resources you can provide. In rainy Pacific Northwest climates, suet feeders with a roof cover over the cake prevent the suet from melting into a greasy mess. Match your equipment to your weather and you'll spend less time on emergency maintenance.
Quick Wins You Can Do Today and a Maintenance Routine That Sticks
You don't need to renovate anything to start building a better bird space today. Here's what to do right now, and how to keep it running smoothly.
Do These Today
- Check your feeder distance from windows. If any feeder sits 3 to 10 feet from glass, move it immediately (under 3 feet or over 10 feet).
- Apply window decals or tape strips to any large glass surface near your bird zone.
- Put a shallow dish of fresh water outside. Even a clean pie plate on a stump counts. Birds will find it within hours.
- Switch to no-mess seed (hulled sunflower or a no-waste blend). It costs a little more but eliminates shell debris and reduces mess by about 80%.
- Place a rubber mat or tray under your main feeder to catch debris and protect your surface.
Weekly and Monthly Maintenance
| Task | Frequency | Why It Matters |
|---|---|---|
| Rinse and scrub birdbath | Every 2 to 3 days (daily in heat) | Prevents algae, bacteria, and mosquito breeding |
| Empty and refill hummingbird nectar | Every 1 to 2 days in summer, every 4 to 5 days in cool weather | Fermented nectar can harm birds |
| Wipe feeder ports and perches | Weekly | Reduces mold and disease transmission |
| Full feeder scrub with 10% bleach solution | Monthly | Eliminates salmonella and avian disease risk |
| Sweep or hose down surface under feeders | Weekly | Prevents ant and rodent attraction |
| Check feeder hardware (hooks, poles, baffles) | Monthly | Prevents feeders from falling or tipping |
Shopping List Categories to Have on Hand
- No-mess seed blend (hulled sunflower, nyjer, or shelled peanuts)
- Tube feeder with metal ports (resist squirrel chewing better than plastic)
- Platform or tray feeder for ground-feeding species
- Shallow birdbath with textured basin
- Solar wiggler or battery dripper for the bath
- Pole mount with squirrel baffle
- Seed-catching tray to attach below main feeder
- Window film or adhesive dot kit
- Ant moat for hummingbird or nectar feeders
- Rubber mat or removable deck tile for under feeder zone
DIY vs. Hiring: Where to Draw the Line
Most of what makes a better bird deck or patio is genuinely DIY-friendly. Feeder and bath placement, window treatments, plant selection, and surface mats cost almost nothing and take an afternoon. The line between DIY and hiring gets more meaningful when you're talking about structural or surface changes to the actual deck or patio.
Confidently DIY
- Installing pole mounts and shepherd's hooks (just use a post anchor or weighted base on hard surfaces)
- Applying window film or decals
- Adding removable deck tiles or rubber mats over existing surfaces
- Setting up a birdbath with a solar dripper
- Planting native container plants or in-ground shrubs in your bird zone
- Installing hardware cloth barriers or predator guards on existing structures
Worth Hiring Out
- Replacing or resurfacing deck boards with composite decking for drainage and cleanability improvements
- Adding a pergola, shade structure, or porch screen enclosure
- Installing a recirculating water feature or pond with proper drainage
- Any electrical work for outdoor lighting near bird zones (motion-sensor lights that deter night predators, for example)
- Repairing or improving grading and drainage on a ground-level patio to handle birdbath overflow
If you're considering a full deck or patio surface upgrade anyway, it's worth factoring bird-friendliness into that decision from the start. The best patio decks and <a data-article-id="8E0D9B4C-DB0A-4085-AC9C-151542A0CD11">highest quality patios</a> tend to use materials that also happen to be easier to clean around feeders: composite decking, sealed pavers, and porcelain tile all outperform raw wood or rough concrete when it comes to removing seed debris and droppings. The best patio decks and highest quality patios tend to use materials that are easier to clean around feeders. If you are weighing decking material choices, it also helps to compare the best patio decks so you pick something that stays cleaner around feeders. Getting a contractor quote on a surface change you're already considering is a smart move before you commit to working around a harder-to-maintain surface long-term.
The honest takeaway: you can build a genuinely great bird-friendly outdoor space for under $150 in equipment and an afternoon of setup, as long as you nail the placement and commit to a simple weekly cleaning habit. The upgrades that cost real money, like decking replacements or screen enclosures, are worth it only if they solve a problem you already have or are part of a larger project. Start with the quick wins, watch what the birds actually use, and invest further based on what's working.
FAQ
I’m getting window strikes but my feeder distance is not changing, what should I do next?
Start by mapping where birds can safely land, then place feeders so startled birds either have a clear escape path or can stop short before reaching glass. A practical rule is to test visibility from your main sitting areas, stand there and look for windows in the birds’ flight line, then adjust by moving the feeder closer than 3 feet or beyond 10 feet rather than splitting the difference around 3 to 6 feet.
Can I attract more birds without increasing cleanup and seed scatter?
Yes, but treat it as a targeted feeding strategy, not “all seed.” Use sheltered feeders (especially for finch or seed types), switch to hulled options when mess is the problem, and place feeders on mats or trays so you can remove waste quickly. Then add a water source, because many species will spend more time at water and less time scattering seed across the floor.
How often should I clean feeders and the birdbath, and what signs mean it’s overdue?
Clean frequency depends on heat and wetness, not just season. In hot weather, nectar and any syrupy contents can spoil quickly, while seed can mold after prolonged rain. A good baseline is to check feeders every 1 to 2 days during heat or rainy stretches, and sanitize deeper only when you see clumping, sour smell, or visible mold, using a food-safe approach you’re comfortable repeating weekly.
What’s the best way to set up a birdbath so birds actually use it reliably?
Avoid “set it and forget it” with water flow. Baths that are too shallow, too deep, or uncovered can reduce usage or create algae and stagnation. Aim for a bath depth that allows hopping and standing comfortably, keep water moving with a dripper or wiggler if algae is a recurring issue, and protect from direct sun during the hottest hours to slow rapid algae growth.
My hummingbird feeder attracts more bugs and gets messy, how can I fix that?
Yes, and the key is to keep hummingbird nectar fresh and shaded from harsh sun. On porches, position the feeder so it’s protected from direct midday rays, and clean the base and bottle more often than you would in cooler climates. If you see bees, wasps, or thickening nectar, that’s usually a cue to change frequency and storage conditions.
Should I place all feeder types in one spot, or spread them out?
It’s usually better to add more feeding points than to put every feeder next to each other, but keep spacing consistent with safety. Group by bird type (small birds, ground-feeders, suet) and use separate poles or zones so one chaotic species does not dominate and concentrate waste. This reduces disease risk from high-density clustering while also making cleanup easier because debris stays localized.
My cat only occasionally goes outside, what’s the minimum safety setup for a bird deck or porch?
Cats, even if indoor, often hunt when they can access a ledge or launch point. If you cannot guarantee distance from surfaces a cat can reach, prioritize pole baffles, anchor the setup so it cannot be knocked down, and move feeders so birds have escape cover that is not immediately adjacent to the feeding pole. Motion deterrents can help at the base area, but they should not replace physical barriers when cats are present.
Are heated birdbaths worth it in winter, and what are the hidden downsides?
No, and it can backfire quickly. Heated water is great for winter, but it can create surface hazards if cords, heaters, or wiring are accessible to pets. Use a weather-rated, stable setup that is protected from direct knock-over, route cords safely away from feeding areas, and keep water depth and overflow management controlled so you do not create icy slick spots around the feeder zone.
Would a screen enclosure or similar barrier solve both mess and safety issues, or should I avoid that?
Consider it if you want protection against both mess and predators, but make sure screens do not block bird access to escape routes. Position feeders so birds still have a clear path away from glass, use screened areas that allow you to access clean and refill safely, and plan for ventilation because heavy screen coverage can increase debris and reduce visibility if not set up well.
When is it worth upgrading the decking or flooring versus just changing feeders and mats?
Sometimes, but it depends on your goal. If you are trying to reduce waste and mold, switch to removable washable mats or trays first, then change seed types before changing decking. If droppings and seed shells are repeatedly getting embedded in rough surfaces or pooling water is causing staining, that’s when surface material upgrades become more cost-effective.
Next Articles
Best Patio Decking: Compare Materials, Costs, and Lifespan
Best patio decking guide: compare materials by cost, lifespan, maintenance, slip and weather resistance, plus installati
Best Patio Decks: How to Choose by Cost, Climate, and Needs
Choose the best patio deck by cost, climate, and needs with wood vs composite comparisons, hidden costs, DIY tips, and u
Top Quality Patios: Materials, Build Tips, Costs, Maintenance
Compare top-quality patio materials, build methods, costs, climate fit, maintenance, and contractor checks for long-last