
The best ceiling for an outdoor patio depends on three things you should nail down before you spend a dollar: your climate, your budget, and whether you want shade, weatherproofing, or a finished look. For most homeowners who want a fully weatherproof, durable solution, a solid roof with metal panels or architectural shingles wins on longevity and function. If you want filtered light and a more open feel, polycarbonate panels or a louvered pergola are strong runners-up. And if you already have a covered patio and just want to improve the interior ceiling finish, PVC/vinyl beadboard is the most weather-resistant, low-maintenance option available for under $5 per square foot.
Best Ceiling for Outdoor Patio: Materials, Costs & Guide

Phoebe Foster
19 Jul 2026
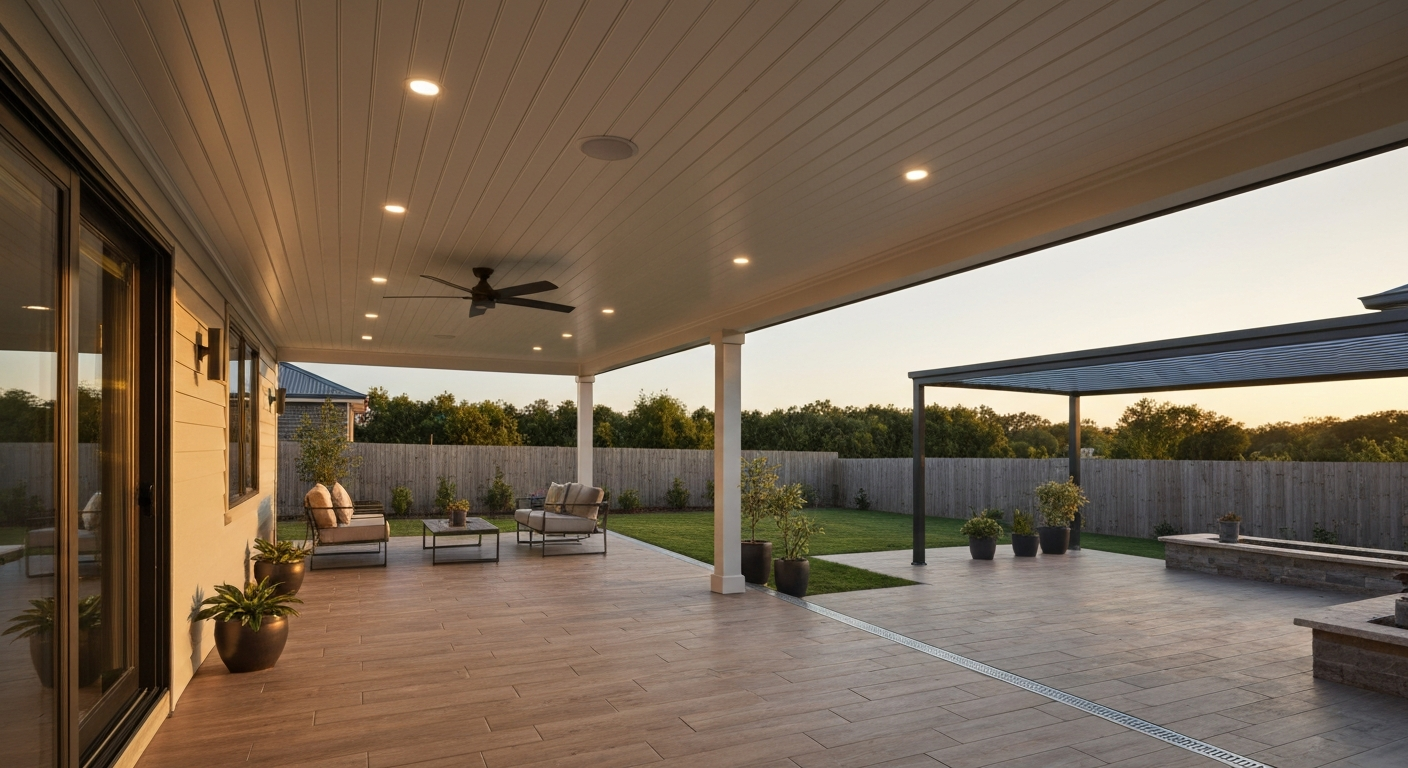
TL;DR Decision Matrix: Pick the Right Ceiling or Roof Fast
Not everyone wants to read a 3,000-word guide before making a decision. Here is a quick-reference matrix matching common homeowner situations to the best patio ceiling or roof choice.
| Your Situation | Best Pick | Approximate Installed Cost (per sq ft) | Key Trade-off |
|---|---|---|---|
| Tight budget, DIY-friendly, mild climate | Polycarbonate corrugated panels | $3–$7 | Noisy in rain, some yellowing over time |
| Full weatherproofing, long-term investment | Metal standing seam or metal panels | $9–$30+ | Higher upfront cost, can be loud without insulation |
| Shade + style, open-air feel | Aluminum louvered pergola | $15–$35 | Not fully waterproof without closed louvers |
| Matches existing home roof | Architectural asphalt shingles | $4–$12 | Needs proper framing, less DIY-friendly |
| Light transmission + weather protection | Multiwall polycarbonate | $5–$12 | UV coating degrades over 10–15 years |
| Finished ceiling look under existing cover | PVC/vinyl beadboard | $2–$5 | Not structural, needs substrate |
| High-snow or high-wind region | Solid metal or engineered panel roof | $12–$30+ | Requires professional structural design |
| North-facing or low-UV region | Wood pergola or cedar shingles | $8–$20 | Requires maintenance, mold-prone in shade |
| Maximum shade + adjustability | Motorized louvered pergola | $25–$60+ | Premium cost, mechanical components to maintain |
| Budget finish, partly covered patio | Painted pressure-treated wood beadboard | $1.50–$4 | Requires painting and periodic upkeep |
Ceiling vs. Roof: What's Actually the Difference for a Patio?
This is a question that trips up a lot of homeowners, and the confusion is understandable because the two terms often describe overlapping parts of the same structure. Here is the practical distinction: a patio roof is the structural, weather-facing assembly that sits on top, handles rain, snow, UV, and wind loads, and keeps water from getting in. A patio ceiling is the finished or decorative surface you see from below. Think of it the same way you'd think about your house: the roof is the shingles and decking outside, the ceiling is the drywall inside.
On a covered patio, you often have both. The roof does the structural work and weather resistance, while the ceiling adds aesthetics, insulation, or a place to mount lighting and fans. Sometimes they are the same element: exposed metal panels or polycarbonate sheets can function as both roof and visible ceiling at once. Other times, like with a fully enclosed patio cover using asphalt shingles up top and PVC beadboard underneath, they are separate layers doing very different jobs.
Knowing which one you actually need changes everything about your project. If your patio is already covered but looks rough underneath, you probably need a ceiling finish, not a new roof. If you are starting from scratch or fighting leaks, you need to think about roofing systems first. And if your existing cover is a wood pergola that lets rain through, you may need to add a weatherproof roof layer before any ceiling treatment makes sense.
What to Think Through Before You Choose Anything
I have watched homeowners spend $10,000 on a beautiful cedar pergola in Minneapolis only to watch it rot in three years. And I have seen people in Phoenix install a fully insulated solid roof when a simple shade sail would have done 90% of the job. The material choice matters less than matching that material to your actual conditions. Here are the factors you cannot skip.
Budget: Upfront Cost vs. Long-Term Cost
Polycarbonate and basic pergola kits look cheap upfront but can cost you more in repairs or replacements over 10 years. Metal roofing has a higher entry price (often $9–$30+ per square foot installed) but routinely lasts 40–70 years with minimal maintenance. Asphalt shingles land in the middle at roughly $4–$12 per square foot installed, with most architectural shingles carrying lifetime limited manufacturing warranties from brands like GAF and Owens Corning, though wind and transfer terms vary. HomeAdvisor's cost guide lists typical installed asphalt shingle prices in the $4–$12 per square foot range (materials + labor) and metal roofing often in the $9–$30+ per square foot range HomeAdvisor's cost guide lists typical installed asphalt shingle prices in the $4–$12 per square foot range (materials + labor) and metal roofing often in the $9–$30+ per square foot range.. Always calculate cost per year of expected lifespan, not just the purchase price.
Climate and Orientation
Your region dictates almost everything. In high-UV climates like the Southwest, UV-resistant coatings and heat-reflective finishes are non-negotiable. In the Midwest or Northeast, you need to account for ground snow loads and wind per ASCE 7 maps, which feed directly into IBC and IRC structural requirements. North-facing patios (which stay in shade longer) are more prone to moisture and mold, making material choice especially important there. NOAA's Climate Normals data (1991–2020) is the standard reference if you want precise local precipitation, snowfall, and temperature data for your area. If you are planning something with a clear panel and want to understand sun exposure by orientation, NREL's National Solar Radiation Database gives free irradiance data by location.
Live Loads: Snow, Wind, and Structural Design
This is where a lot of DIYers get into trouble. Any roof structure attached to your house needs to handle local wind and snow design loads. In the U.S., ASCE 7 (currently ASCE 7-22) is the primary standard referenced by the IBC and IRC for these design loads. The 2022 edition updated snow map selection and risk category handling, which matters especially for attached patio roofs in high-snow regions. See Prose Engineering’s technical explainer on ASCE 7‑22 snow load changes for guidance on applying ASCE/IBC/IRC wind and snow parameters with ASCE 7 maps and local amendments ASCE/IBC/IRC wind and snow design parameters should be used with ASCE 7 maps and local amendments — ASCE 7‑22 introduced changes to snow‑map selection and risk category handling that affect design loads for small attached roofs in high‑snow regions.. Practically, this means: if you live somewhere that sees regular snow accumulation or high wind speeds, you need framing that is engineered for those loads. A pergola rated for a 20 psf ground snow load may not be sufficient in a zone rated for 40 psf. Check with your local building department and, for attached structures, hire a structural engineer or contractor who can confirm compliance.
Waterproofing and Drainage
Water management is probably the most common thing homeowners underestimate. Even a 1/4-inch-per-foot slope matters for drainage. Where a patio roof ties into an existing home wall or roof, flashing and sealing at that junction is critical. The NRCA's roofing manual is the industry standard for flashing details, crickets (the wedge-shaped diverters behind protrusions), and transitions. Poor flashing is the number-one cause of leaks at these junctions. If you are hiring a contractor, ask specifically about their flashing approach at the wall tie-in. For polycarbonate and metal panels, panel laps, sealant tapes, and proper fastener placement all affect water tightness.
Permits and Code Triggers
Most homeowners do not realize that an attached patio cover almost always requires a building permit. Common triggers include: attaching the structure to the house (ledger or roof tie-in), installing permanent footings or posts, enclosing or insulating the ceiling, adding electrical (lights, fans), and exceeding a certain roof area or height. Small, freestanding shade structures sometimes fall below permit thresholds, but the moment you attach to the house, nearly every municipality requires a permit. Florida's Building Code, for example, cross-references ASTM and UL wind and impact test standards and requires product labeling for acceptance. Pulling a permit protects you legally, keeps your homeowner's insurance valid, and typically means an inspector catches structural errors before they become expensive problems.
Use and Aesthetics
Think about how you actually use the space. If you grill under your patio cover, fire resistance matters: metal and fiber-cement materials perform better near heat than wood or PVC. If you host in the evening, a solid ceiling with recessed lighting is more functional than open rafters. If you want natural light to filter through, polycarbonate or a louvered pergola beats a solid shingle roof. And if the patio is visible from inside your home, the ceiling material's visual quality matters more than in a backyard corner nobody looks at.
Overview of the Main Patio Roof and Ceiling Types
Before going deep on each material, here is a quick orientation to what you are actually choosing between. Most homeowners are deciding among these options:
- Solid roofs with asphalt shingles (most common match to existing home roofing)
- Solid metal roofs (standing seam, corrugated, or engineered metal panels)
- Polycarbonate or acrylic panels (clear or tinted, corrugated or multiwall)
- Wood pergolas (open-air, traditional look, cedar or pressure-treated pine)
- Aluminum louvered pergolas (adjustable shade, modern aesthetic)
- Retractable fabric canopies or shade sails (flexible, lower cost, limited durability)
- Cedar shake or shingle roofing (premium natural look)
- PVC/vinyl ceiling panels (finished interior ceiling look under existing cover)
- Beadboard (wood, composite, or PVC, ceiling finish only)
The roof types in this list handle weather and structure. The ceiling materials (PVC, beadboard) are finishes applied beneath an existing cover. Some materials, like polycarbonate or metal panels, can serve as both. The right choice really depends on that combination of budget, climate, and use we just covered, so use this section as a map before diving into the details below.
Solid Roof Systems: Shingles, Metal Panels, and Engineered Panels
A solid roof over a patio works exactly like the roof on your house: it is fully waterproof, handles wind and snow loads, and typically ties into your home's existing roof system at a ridge or wall flashing. For a focused comparison of solid roofing choices and which performs best in different climates, see our piece on the best roof for patio. This is the most robust option and the one that most closely matches your house's look. The main material choices are asphalt shingles, metal panels, and engineered solid panels (like insulated structural panels or fiber-cement boards).
Asphalt Shingles
Asphalt shingles are the most common choice simply because they match most American homes and contractors know how to install them. Architectural (laminated) shingles are the current standard: they are thicker, more wind-resistant, and better-looking than the old three-tab style. Leading manufacturers like GAF and Owens Corning sell these with lifetime limited manufacturing warranties, though wind coverage and transferability depend on the specific product tier and whether you use their required system accessories. For wind resistance, look for shingles tested to ASTM D3161 (Class F, up to 110 mph) or ASTM D7158. For hail-prone regions, Class 4 impact-resistant shingles tested to UL 2218 are worth the price premium and may even get you an insurance discount.
| Attribute | Asphalt Shingles | Metal Panels (Solid) | Engineered Panels |
|---|---|---|---|
| Typical installed cost (per sq ft) | $4–$12 | $9–$30+ | $10–$25+ |
| Expected lifespan | 20–30 years (architectural) | 40–70 years | 25–50 years |
| Waterproofing | Excellent with proper underlayment and flashing | Excellent with correct laps and sealant | Excellent (factory-sealed edges) |
| Insulation / thermal performance | Moderate (needs decking + attic space) | Low without insulation layer | High (insulated core options available) |
| Rain noise | Low | High without insulation backer | Low to moderate |
| Fire resistance | Class A (most products) | Class A | Varies by product |
| UV resistance | Good with granule coating | Excellent with factory Kynar/PVDF paint | Good to excellent |
| DIY feasibility | Moderate (framing is the hard part) | Low (seaming requires skill) | Low to moderate |
| Maintenance | Inspect annually, replace damaged shingles | Very low | Low, inspect seals and edges |
One thing people often miss with shingles on a patio: because patio roofs frequently have a lower slope than a home's main roof, you need to verify the shingle manufacturer's minimum slope requirements (typically 2:12 for most architectural shingles with modified underlayment). Going below minimum slope without the right underlayment detailing invites leaks. The framing for a solid shingle patio roof also needs to handle your local live load requirements per ASCE 7 and your local code, so do not skip the structural planning step.
Metal Panels (Corrugated, Standing Seam, and Structural)
Metal panel systems are gaining popularity for patio roofs because they offer exceptional longevity, low maintenance, and a clean modern look. Standing seam panels, where the fasteners are hidden inside raised seams, are the premium option. Corrugated metal panels are more DIY-accessible and significantly cheaper. For noise control (rain on metal is loud), install a foam closure strip under the panels and consider a rigid insulation layer or a finished ceiling below. The Metal Roofing Alliance and major manufacturers publish technical literature on panel gauges, factory paint coatings (PVDF/Kynar finishes being the most UV and corrosion resistant), and warranty terms.
Waterproofing on metal panels comes down to correct lap directions (always lap downslope), appropriate sealant tapes at laps and end laps, and proper flashing at wall tie-ins. For attached patio roofs, the step flashing and counter-flashing at the wall junction is the most failure-prone area: follow NRCA flashing guidance or insist your contractor does. Metal is Class A fire rated and handles wind and hail well; look for products tested to UL 580 or ASTM E1592 for wind uplift and UL 2218 for hail resistance if you are in a storm-prone region.
Pergolas and Louvered Roofs: Wood and Aluminum
A pergola is not a weatherproof roof, and I want to be clear about that up front because a lot of homeowners buy or build one expecting it to keep them dry and then are disappointed. A traditional pergola with open rafters provides shade and style, but rain comes straight through. That said, a pergola is one of the most popular and visually appealing patio cover options, and when you add the right upgrades, it can get close to full weather protection.
Wood Pergolas
Cedar is the traditional choice for wood pergolas because of its natural rot resistance and dimensional stability. The Cedar Shake and Shingle Bureau publishes installation and maintenance guidance, and their core advice is consistent: cedar needs periodic cleaning, sealing or staining every 2–3 years, and proper ventilation to avoid moisture buildup. On a north-facing patio or in a humid climate, cedar can mold and grey quickly without that maintenance. Pressure-treated pine is a cheaper alternative but does not hold stain as well and tends to warp more over time. Wood pergolas typically last 10–25 years depending on wood species, climate, and maintenance. Expect installed costs in the $8–$20 per square foot range for wood pergola structures, though custom designs run higher.
Aluminum Louvered Pergolas
This is the fastest-growing category in outdoor patio covers right now. An aluminum louvered pergola has adjustable roof slats that you can open for sun and ventilation or close to shed rain. High-end motorized systems close automatically when rain is detected. Aluminum does not rot, warp, or require painting, and the powder-coat finishes on quality systems are highly UV and corrosion resistant. Many systems accept add-ons like retractable screens, LED channel lighting, and even solar panels integrated into the louver blades.
The trade-off is cost: basic louvered pergola systems start around $15–$25 per square foot installed, and motorized systems with full enclosure options push $30–$60 or more per square foot. These are also not always fully waterproof when closed, particularly at the gutter channels that collect water from closed louvers. Check manufacturer specs on drainage capacity before buying, especially if you live in a high-rainfall region. On shade performance, closed louvers can block 95%+ of direct sun, which rivals a solid roof. Open louvers give you full sky access.
| Feature | Wood Pergola | Aluminum Louvered Pergola |
|---|---|---|
| Waterproofing (closed) | No (open rafters) | Partial to good (depends on gutter system) |
| Shade performance | Moderate (50–80% depending on rafter spacing) | Up to 95%+ when closed |
| Lifespan | 10–25 years (with maintenance) | 25–40+ years |
| Maintenance | Stain/seal every 2–3 years | Very low (rinse annually) |
| Installed cost per sq ft | $8–$20 | $15–$60+ |
| DIY feasibility | Moderate to high (kit systems available) | Moderate (kit systems available, electrical needed for motorized) |
| Solar panel add-on | Possible with reinforced framing | Yes (built into some louver systems) |
| Aesthetics | Traditional/natural | Modern/contemporary |
| Fire resistance | Low (untreated wood) | High (aluminum, non-combustible) |
Polycarbonate and Acrylic Panels: Light, Budget, and Longevity
Polycarbonate panels are popular because they are relatively inexpensive, let in natural light, and are far more impact-resistant than glass or acrylic. They come in two main forms: corrugated single-layer sheets (cheaper, thinner, more noise from rain) and multiwall flat panels (better insulation, less noise, better UV ratings). Acrylic panels are clearer than polycarbonate but more brittle and more prone to cracking from impact or thermal expansion.
The big long-term issue with polycarbonate is UV degradation. Without a proper UV-protective coating, polycarbonate turns yellow and becomes brittle over time. Quality products from manufacturers like Palram include a co-extruded UV-protective layer on the weather-facing side, and their residential products typically carry a 10-year limited warranty covering yellowing and light transmission loss. The UV durability of polycarbonate products is tested using ASTM G154 and ASTM D4329 (fluorescent UV exposure), which are the standard industry reference tests for weathering and UV resistance claims. Always check the specific warranty terms and whether the UV coating is co-extruded (better) or applied as a coating (wears off faster).
| Attribute | Corrugated Single-Wall Polycarbonate | Multiwall Polycarbonate | Acrylic Panels |
|---|---|---|---|
| Light transmission | 70–80% | 40–80% (varies by thickness) | Up to 92% |
| UV resistance | Good with co-extruded coating (10-yr warranty) | Good with co-extruded coating | Moderate (better clarity, lower UV protection) |
| Rain noise | High | Moderate | Moderate |
| Insulation (R-value) | ~R-1 | R-1.5 to R-3+ (twin/triple wall) | Low (~R-1) |
| Waterproofing | Good with correct laps and closure strips | Good with aluminum extrusion systems | Good with proper seals |
| Impact resistance | High (10x stronger than glass by thickness) | High | Low (brittle, cracks on impact) |
| Typical lifespan | 10–15 years before yellowing | 15–25 years | 10–20 years |
| Installed cost per sq ft | $3–$7 | $5–$12 | $5–$15 |
| DIY feasibility | High | Moderate to high | Moderate |
For patio use, multiwall polycarbonate is generally the better choice over single-wall corrugated unless you are trying to keep costs as low as possible. The insulation improvement is meaningful in both hot and cold climates, the reduced rain drumming is worth it for any space you actually want to sit in during a light rain, and the extra UV resistance typically adds years to the product's usable life. If light transmission is your top priority and you are in a lower-hail-risk area, acrylic is worth considering for its exceptional clarity, but treat it carefully during installation to avoid cracking.
Metal Patio Roofs: Steel, Aluminum, and Standing Seam in Detail
Metal roofing for patios is not just corrugated barn-tin anymore. The category spans painted corrugated steel panels at the budget end all the way to architectural standing seam aluminum systems at the premium end. Each has a different performance profile, and the differences matter more than most homeowners realize.
Steel vs. Aluminum: Rust, Corrosion, and Coastal Use
Steel panels are typically heavier, stronger, and less expensive than aluminum, but corrosion is a real concern. Bare Galvalume or galvanized steel performs well in most inland climates, but in coastal environments where salt air accelerates corrosion, aluminum or a high-quality PVDF-painted steel system is the better call. Aluminum does not rust at all, which makes it the preferred choice for coastal patios and swimming pool enclosures. Both materials are available with factory-applied PVDF (Kynar) paint finishes that provide excellent UV resistance and color retention for 25–40 years.
Standing Seam vs. Corrugated: Performance Differences
Standing seam systems hide their fasteners inside raised seams, which eliminates exposed screw holes as a potential leak source and gives a clean, architectural appearance. They are also better at accommodating thermal expansion, which matters with metal because panels grow and contract significantly with temperature swings. The downside is cost and installation complexity: standing seam systems typically run $15–$30+ per square foot installed and really need a professional installer. Corrugated or exposed-fastener metal panels are considerably cheaper ($9–$18/ft² installed range) and are genuinely DIY-accessible at smaller scales, but every exposed fastener is a potential leak point if the rubber washer seals degrade. Inspect and re-torque or replace fasteners every 5–10 years.
Noise and Insulation on Metal Roofs
Rain on bare metal is loud. If you install a metal patio roof and plan to actually use the space during rain, you need either a finished insulated ceiling beneath the panels or a closed-cell foam backer applied directly to the underside of the panels. The foam backer approach (often sold as 'bubble foil' or closed-cell foam rolls with foil facing) is a common DIY add-on for corrugated metal patio roofs. A fully framed and insulated ceiling below a metal roof is more effective and adds finished aesthetic value but adds cost. For thermal comfort in hot climates, a reflective metal finish on the top surface (typically a light-colored PVDF finish with high solar reflectance) meaningfully reduces heat gain compared to a dark metal or shingle roof.
Fastening, Flashing, and Waterproofing Notes
Metal panels require specific fastening patterns based on wind uplift requirements. Products tested to UL 580 or ASTM E1592 for wind uplift have published fastening schedules, and these should not be guessed at in high-wind zones. At wall tie-ins, step flashing and correctly sized counter-flashing (ideally integrated into the wall cladding or masonry) is essential. The NRCA's roofing manual is the standard reference for these details. At the ridge and at any penetrations (fan outlets, lighting fixtures), use manufacturer-supplied flashing boots and sealant caps. Metal-to-metal sealant (not standard caulk) at lap joints and closure strips at eaves and ridges are the other key waterproofing details that separate a dry roof from a leaky one.
| Attribute | Corrugated Steel (Galvalume) | Corrugated Aluminum | Standing Seam Aluminum/Steel |
|---|---|---|---|
| Typical installed cost (per sq ft) | $9–$18 | $10–$20 | $15–$30+ |
| Expected lifespan | 30–50 years | 40–60 years | 50–70 years |
| Rust/corrosion resistance | Good inland, poor coastal | Excellent (no rust) | Excellent with PVDF finish |
| Fire resistance | Class A | Class A | Class A |
| Rain noise | High (without insulation) | High (without insulation) | High (without insulation) |
| UV/heat resistance | Good with reflective finish | Good with reflective finish | Excellent with PVDF/Kynar |
| Wind uplift tested | ASTM E1592 / UL 580 (check product) | ASTM E1592 / UL 580 (check product) | ASTM E1592 / UL 580 standard |
| Hail resistance | Good (Class 4 products available) | Good | Very good (concealed fasteners reduce damage points) |
| DIY feasibility | High (corrugated) | High (corrugated) | Low (requires professional tools) |
| Maintenance | Inspect fasteners every 5–10 years | Very low | Very low |
Permits, Contractors, and Getting the Job Done Right
I will say this plainly: skipping a permit on an attached patio roof is one of the most common and most expensive mistakes homeowners make. Beyond the legal and insurance exposure, an unpermitted structure attached to your house can cause problems when you sell. Most municipalities require permits for any structure attached to the house, involving permanent footings, or including electrical work. Pull the permit, get the inspection, and protect yourself.
When hiring a contractor for a patio roof, ask these specific questions before signing anything:
- Are you licensed and insured for roofing or general construction in this state?
- Will you pull the permit and handle the inspection, or is that my responsibility?
- What flashing detail will you use at the wall tie-in, and can you show me an example or diagram?
- What is the minimum slope you are building to, and how will drainage work?
- What wind and snow loads is the framing designed for, and do you have documentation?
- What is the panel or shingle manufacturer's installation spec you are following?
- What is your warranty on workmanship, and how long have you been doing this type of work?
- Can I see photos or contact references from similar patio roof projects you have completed?
For DIY projects, polycarbonate corrugated panels over a simple freestanding pergola frame is probably the most accessible combination for a capable DIYer. Solid roofing systems (shingles, standing seam metal) on attached structures really benefit from professional installation, particularly at the wall and roof tie-in points where leaks are most likely to originate.
Finishing Touches: Lighting, Fans, Misters, and Gutters
Once your roof structure is sorted, the accessories are what make the space actually enjoyable. A ceiling fan rated for outdoor or damp-location use is one of the highest-value additions you can make to a covered patio: it extends usable hours in hot weather significantly and costs relatively little to add during construction when you already have a ceiling structure in place. Recessed lighting or LED strip lighting in the ceiling rafters adds evening functionality and, if done with the right fixtures (damp or wet-location rated per UL and NEC requirements), adds no meaningful maintenance burden.
In dry, hot climates (Arizona, Texas, New Mexico), a misting system plumbed into the patio ceiling can drop the perceived temperature by 10–20 degrees Fahrenheit on a dry day. They work best at low humidity: in the humid Southeast, they tend to make things feel muggy rather than cooler. Gutters on a solid or metal patio roof are not optional if the roof drains toward a walkway, a foundation, or a planted area. A 5-inch K-style aluminum gutter handles most residential patio roof drainage needs, and downspout placement should direct water at least 4–6 feet away from the foundation.
For ceiling finishes below a structural roof, PVC beadboard panels are the most practical choice: they resist moisture and insects, do not need painting (though they are paintable), and install with basic tools. For a more premium finish, tongue-and-groove cedar boards treated with an exterior sealer give a beautiful, warm look but need periodic refinishing. Painted pressure-treated wood beadboard is the budget option and works fine if you are committed to repainting every 3–5 years.
How These Choices Relate to Broader Patio Planning
Choosing a ceiling or roof material does not happen in isolation. The roof material connects directly to questions about the best patio roof material overall and what the best roof for your patio setup looks like structurally. If you are deciding between ceiling finish materials specifically (PVC, beadboard, wood), the best material for an outdoor patio ceiling deep-dives into those options. For a focused comparison of options, see the guide on the best material for outdoor patio ceiling (ref: 96f8fc0e-9201-4b67-8914-a2f914f7cbf5) best material for an outdoor patio ceiling. And if your patio faces north and you are managing shade, moisture, and UV exposure differently than a south-facing setup, there is specific guidance on the best material for a north-facing patio worth reviewing before you finalize your material selection. For focused guidance, see our guide on the best material for north facing patio. Each of those decisions layers together: the orientation shapes your material needs, the material needs shape your structural and waterproofing choices, and those choices determine what contractor skills and permits you need.
FAQ
Which national building codes and structural design standards must I reference to ensure patio roofs meet safety and load requirements?
Primary references are ASCE 7 (wind and ground‑snow loads — use the latest applicable edition such as 7‑16 or 7‑22) and the International Building Code (IBC) / International Residential Code (IRC), which incorporate ASCE 7 maps/tables. Use local amendments and the edition adopted by your jurisdiction.
What laboratory test standards should I cite for material performance (wind uplift, hail, impact, UV)?
Key test standards: ASTM D3161 and ASTM D7158 for shingle wind resistance; UL 580 and ASTM E1592 for uplift/wind resistance of roof assemblies and metal panels; UL 2218 for hail/impact resistance (Class 4 highest); ASTM G154 and ASTM D4329 for accelerated UV/weathering of plastics and coatings.
Which authoritative climate datasets are needed to make climate‑aware recommendations (snow, wind, UV, freeze dates)?
NOAA NCEI U.S. Climate Normals (1991–2020) for temperature, precipitation, snowfall, frost dates; ASCE 7 wind and snow maps for design loads; and NREL’s NSRDB / PVWatts for solar irradiance and orientation/UV exposure assessments.
What manufacturer and industry resources should I use to document product specifications, warranties, and installation details?
Manufacturer technical data and warranty pages for specific products (e.g., Palram for polycarbonate, GAF/Owens Corning for shingles, Metal Roofing Alliance for metal panels, Cedar Shake & Shingle Bureau for cedar). Also use product installation manuals and published warranty terms to state lifespan, exclusions, and required accessories for warranty validity.
Where do I find authoritative workmanship and waterproofing details for transitions, flashing, and attachments?
NRCA Roofing Manual and NRCA technical guidance are industry‑standard references for flashing, waterproofing, roof transitions, saddles/crickets and workmanship best practices where patio roofs connect to walls or existing roofs.
What sources provide realistic installed cost ranges and regional price variation?
Use RSMeans for construction unit costs, and aggregate consumer/home‑improvement cost guides (Angi, HomeAdvisor, Remodeling cost reports) to build installed ($/ft²) price bands and regional escalation factors. Cross‑check with local contractor quotes for market validation.
Next Articles
Best Material for North Facing Patio: Top Choices
Choose best material for north-facing patios: slip-safe, mold-resistant flooring like porcelain, pavers, stone, concrete
Best Roof for Patio: Materials, Costs, and Choosing Guide
Compare patio roof materials with costs and lifespans, plus structure, drainage, wind loads, and regional picks.
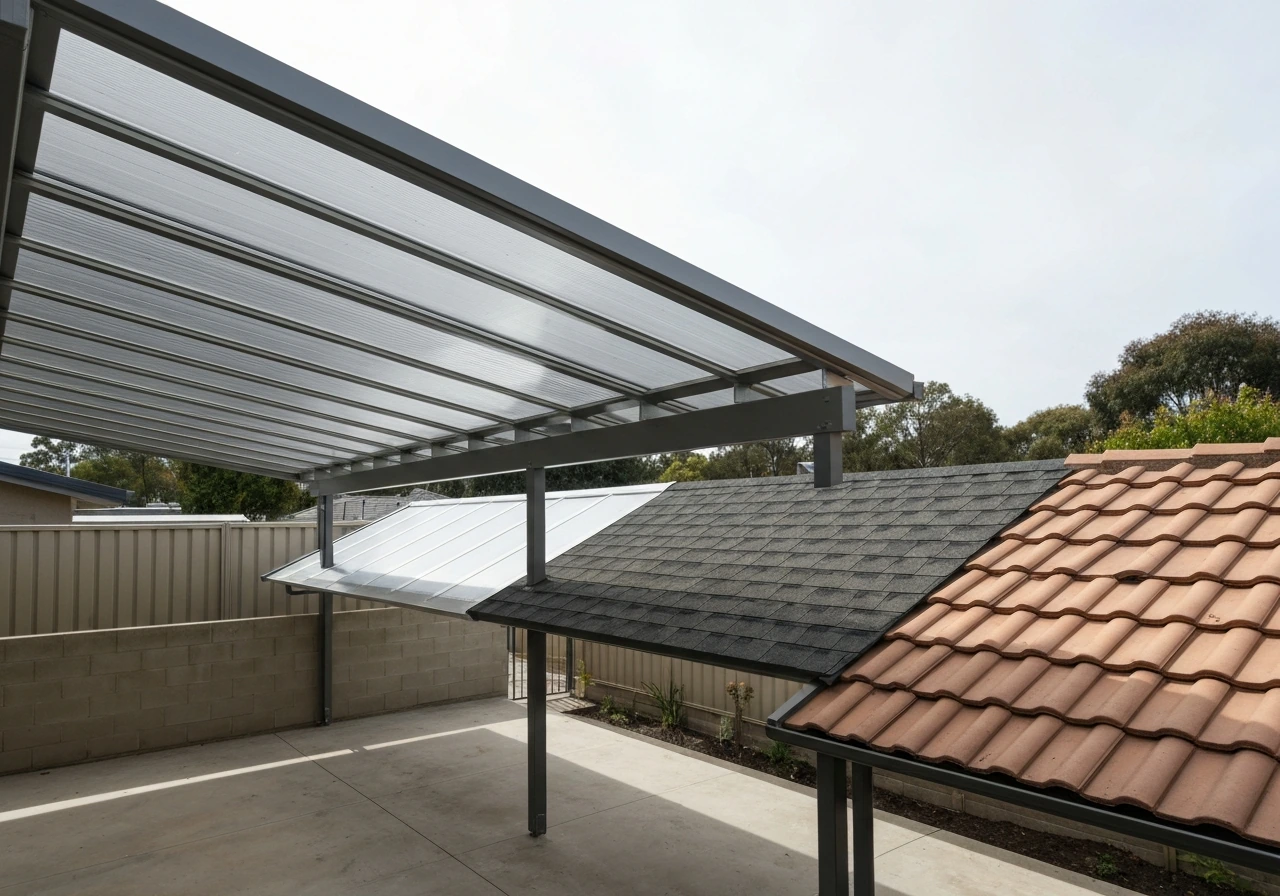
Best Patio Roof Material: How to Choose the Right One
Compare best patio roof material options by climate, durability, maintenance, insulation, cost, and drainage to pick rig