For most homeowners, polycarbonate and metal roofing panels are the two best patio roof materials available today. Metal (especially standing seam) wins on durability, appearance, and longevity. Polycarbonate wins when you want natural light, lower cost, and easier DIY installation. Beyond those two, your best choice really comes down to your climate, your patio's structure, your budget, and how much maintenance you're willing to do over the years. If you can only pick one answer: 24-gauge standing seam steel or aluminum is the most durable, lowest-maintenance patio roof material you can put up, period.
Best Patio Roof Material: How to Choose the Right One

Phoebe Foster
11 May 2026
How to choose the right patio roof material for your conditions
Before you buy anything, you need to answer four basic questions about your specific setup. These aren't just boxes to check. Getting them wrong means picking a material that either fails early, costs more than it should, or creates drainage and structural headaches you didn't see coming.
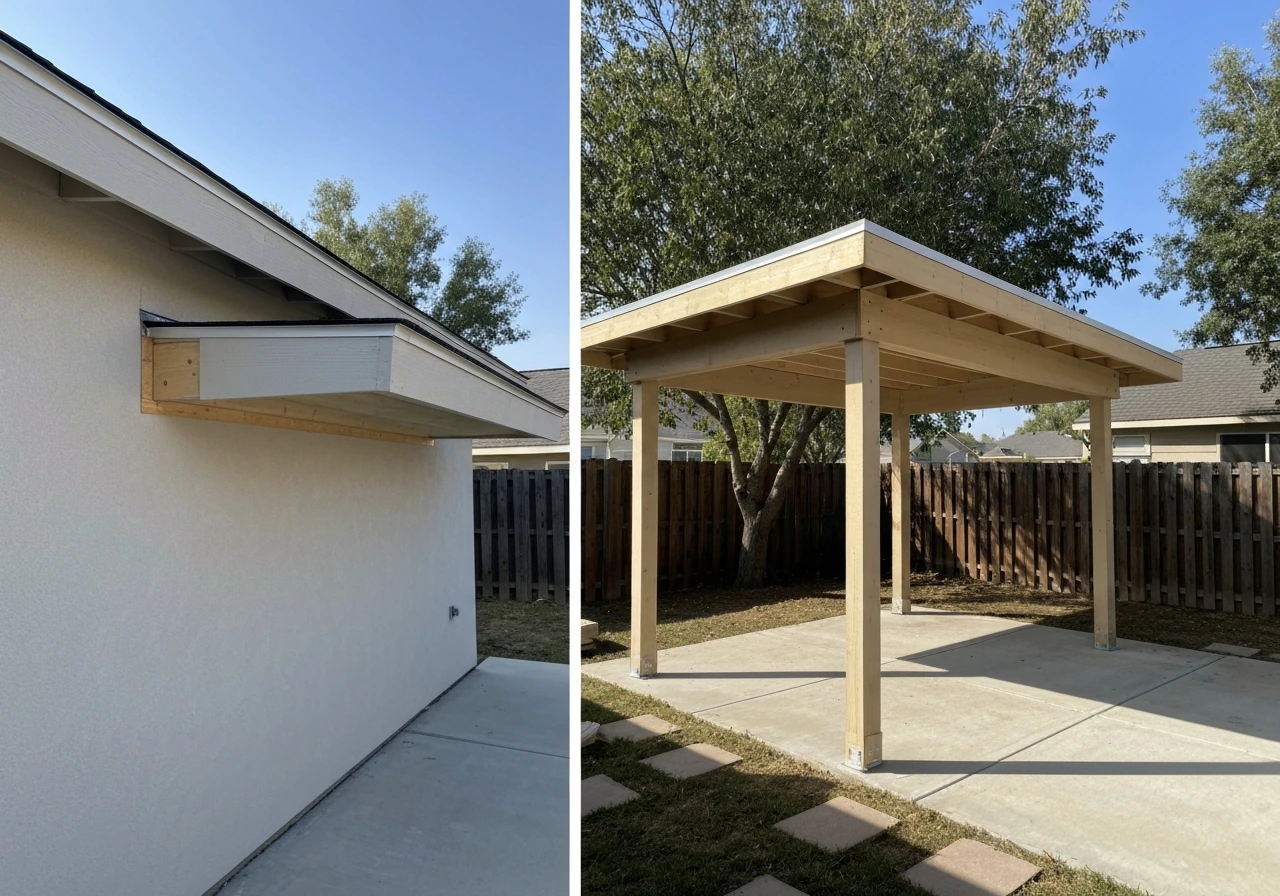
- Attached or freestanding? An attached patio roof ties into your home's structure (usually a ledger board on the house wall). This limits how much dead load you can add without checking your home's framing. Freestanding structures give you more flexibility but require their own footings and posts.
- What roof style? Flat (low-slope), shed/lean-to (single slope), or gable (two pitches meeting at a ridge)? Flat and low-slope designs demand materials with excellent drainage performance. Gable roofs open up more material choices. Slope requirements vary: metal panels generally need at least 1/4:12, while polycarbonate multiwall sheets typically need a minimum of 1:12 for proper drainage.
- What's your primary goal? Weather protection, shade only, light transmission, or year-round use? Light transmission points you toward polycarbonate. Full weather and thermal protection points to solid metal or insulated panel systems.
- How much can the structure actually hold? This matters more than most people realize. Clay tile can exceed 15 lbs per square foot, which can require significant structural upgrades. Standing seam metal runs about 1 to 3 lbs per square foot. If you're adding a roof to an existing pergola or older structure, weight is often the deciding factor.
Once you have clear answers to those four questions, narrowing down materials becomes a lot simpler. Most people eliminate two or three options immediately just by knowing their roof slope and whether their structure can handle heavy material.
Material comparison: pros, cons, lifespan, and maintenance
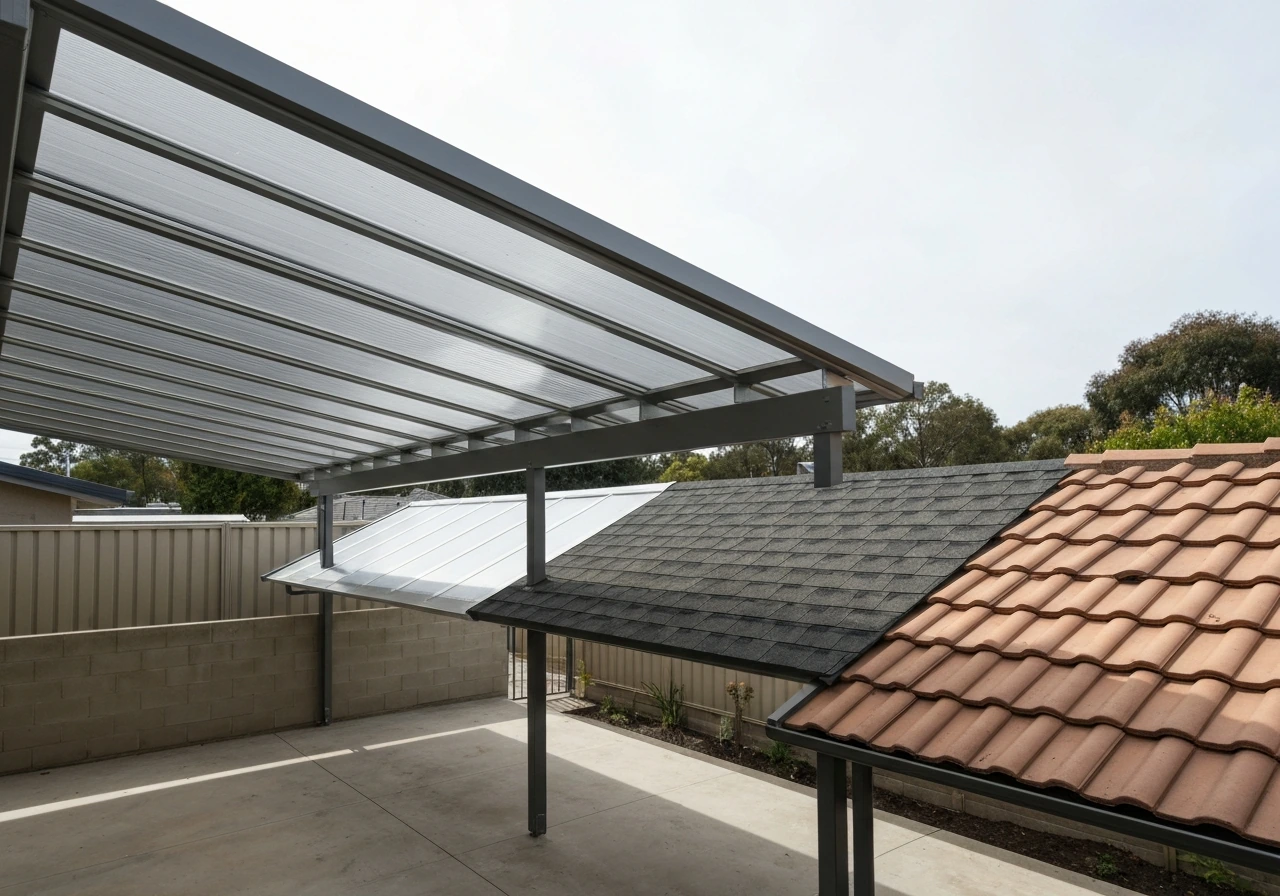
Here's an honest breakdown of the materials most homeowners are actually choosing for patio roofs right now. This isn't an exhaustive roofing encyclopedia. It's the shortlist of what actually makes sense for a covered patio project.
| Material | Lifespan | Maintenance | Light Transmission | Typical Weight (psf) | Best For |
|---|---|---|---|---|---|
| Standing seam metal (steel/aluminum) | 40-70+ years | Very low (annual inspection) | None | 1-3 lbs | Full weather protection, low maintenance |
| Multiwall polycarbonate | 10-20 years (UV warranty ~10 yrs) | Low-moderate (cleaning, resealing) | High (diffused light) | 0.1-0.5 lbs | Natural light, lightweight structures, DIY |
| Corrugated metal (steel/aluminum) | 20-40 years | Low (check fasteners annually) | None | ~0.75-1 lb | Budget metal option, sloped roofs |
| Asphalt shingles | 20-30 years | Moderate (periodic inspection) | None | 2.5-4+ lbs per sq ft | Matching house roof, attached patios |
| Clay or concrete tile | 50+ years | Low (fragile to walk on) | None | 10-15+ lbs | Spanish/Mediterranean style, warm dry climates |
| Solid polycarbonate panels | 10-15 years | Low-moderate | Very high (clear) | 0.1-0.3 lbs | Maximum light, warm climates |
| Insulated panel systems (SIP-style) | 30-50 years | Very low | None (opaque) | 2-4 lbs | Year-round rooms, full insulation needs |
Standing seam metal
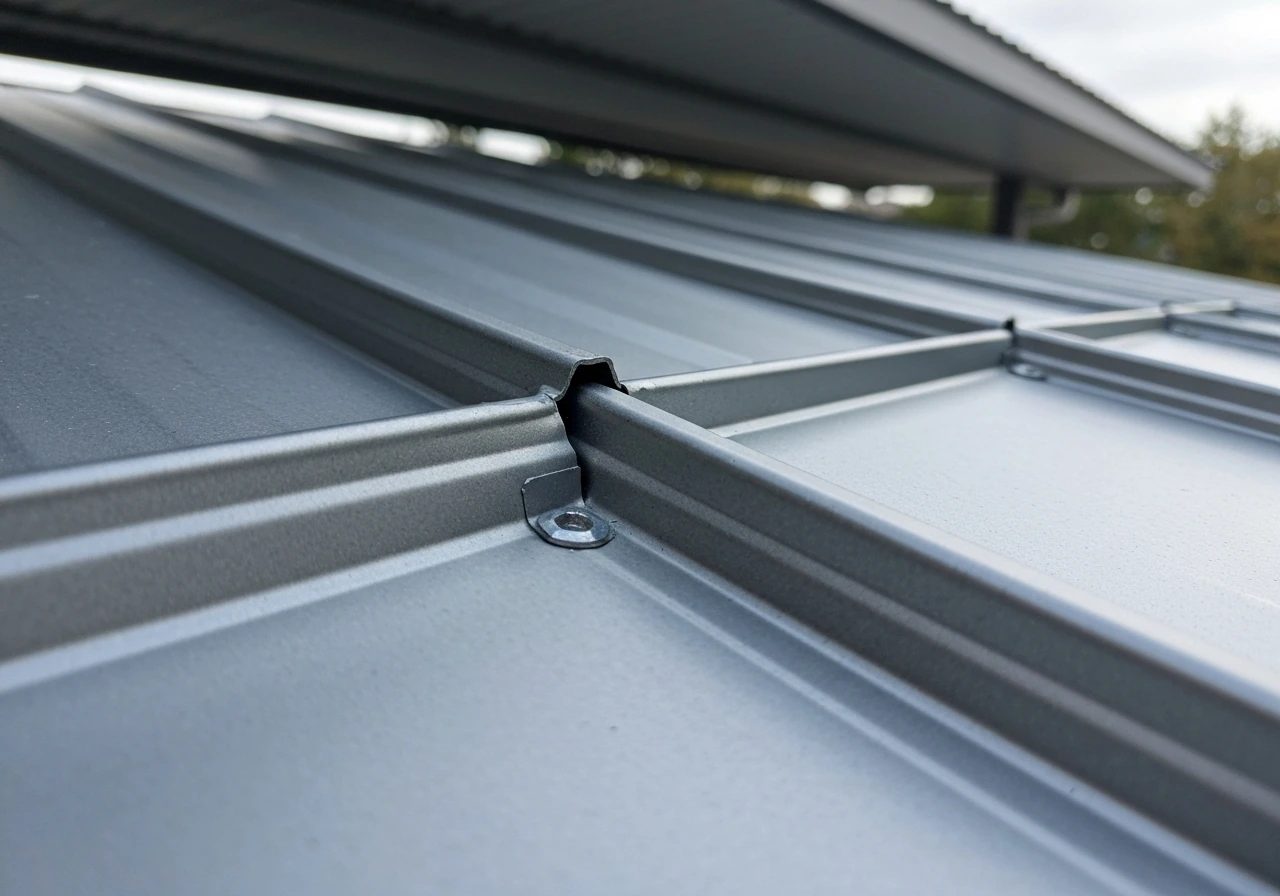
This is the gold standard for covered patio roofing if budget allows. The concealed fastener design means no exposed screws rusting or backing out over time. Properly installed 24-gauge steel or aluminum panels have genuinely low maintenance needs and handle everything from driving rain to heavy snow loads. The downside: it's not cheap, and DIY installation is difficult without experience. It also transmits rain noise, which some people love and others hate.
Multiwall polycarbonate
Multiwall polycarbonate (the hollow-channel sheets you see on modern pergola covers and greenhouses) is the material I recommend most often to budget-conscious homeowners who want natural light under their patio. It's incredibly lightweight, relatively easy to cut and install, and lets in diffused light without harsh glare. The catch is longevity. Studies tracking outdoor weathering of polycarbonate over ten years show meaningful degradation in clarity and impact resistance, especially when panels are mounted horizontally.
UV-protective coatings help, and some products carry a ten-year limited warranty covering yellowing and light transmission loss, but you should plan to replace panels eventually. For example, Duralight Plastics' CoverLite multiwall warranty specifies a 10-year warranty related to limits on loss in light transmission and yellowing, tested using ASTM methods ten-year limited warranty covering yellowing and light transmission loss.
Always install the UV-protected side facing up, use proper closure strips and blanking tape to prevent moisture and bugs from entering the channels, and make sure your slope is at least 1:12 so condensation drains out.
Corrugated metal
Corrugated steel or aluminum panels are the budget-friendly metal option. They're lighter and cheaper than standing seam and work well on lean-to style roofs with decent slope. The exposed fasteners are their weak point. Over time those screws work loose or the rubber washers dry out and leak. Plan to inspect and re-torque fasteners every year or two in climates with big temperature swings.
Asphalt shingles
Shingles are the obvious choice when you want the patio roof to match your house roof visually. They work great on properly sloped attached patio structures. Dimensional (architectural) shingles typically weigh 240 to 400-plus pounds per square (that's per 100 square feet), so structural framing needs to be solid. They're not ideal for low-slope applications and aren't a DIY-friendly material unless you have roofing experience.
Tile roofing
Clay or concrete tile looks incredible on Mediterranean or Spanish-style homes, and it genuinely lasts 50-plus years when properly maintained. But it's the heaviest common option, and adding it to a patio structure almost always requires a structural engineer's sign-off. Installed costs typically run $7 to $28 per square foot just for the tile work, making it one of the pricier patio roof choices. If your home already has a tile roof and you want a seamless look, it can absolutely be worth the investment.
Climate and performance: sun, rain, snow, wind, and humidity
Climate is probably the single biggest variable in this decision. What works perfectly in Phoenix will underperform in Minneapolis, and what's ideal in coastal Florida will corrode faster than expected in areas with salt air and constant humidity.
Hot, sunny climates (Southwest, Texas, Southeast)
UV exposure is brutal here, and it's the primary reason polycarbonate degrades faster in Arizona or Texas than in Oregon. If you go with polycarbonate in a high-UV climate, buy twin-wall or thicker multiwall sheets with a factory-applied UV coating, not aftermarket sprays. Metal roofing performs extremely well in heat. Lighter colors and reflective finishes reduce heat gain under the patio. Insulated panel systems are worth considering if you're trying to create a genuinely comfortable outdoor living space in the summer heat.
Rain-heavy and humid climates (Southeast, Pacific Northwest)
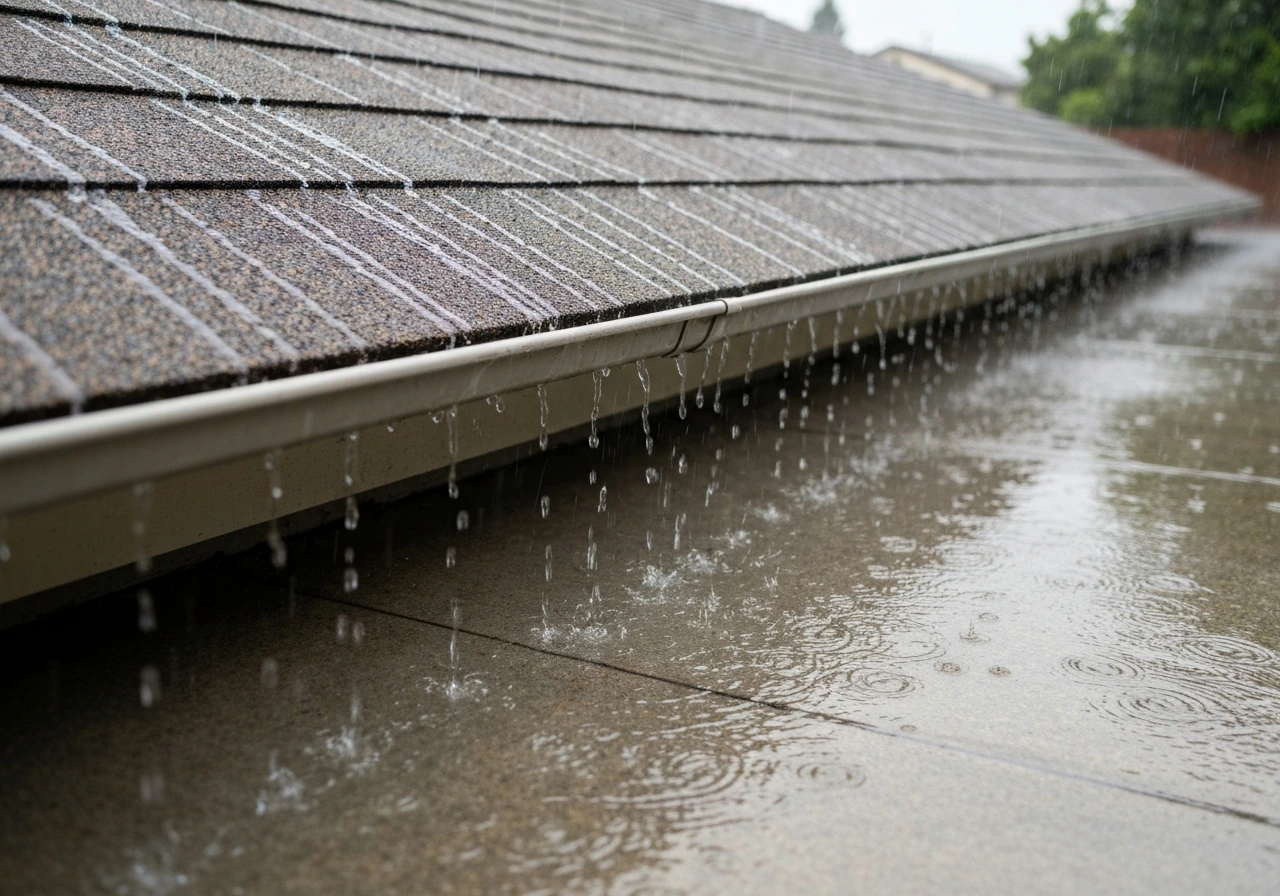
Drainage is everything in wet climates. Standing water on any flat or near-flat patio roof will cause long-term damage regardless of material. The National Roofing Contractors Association specifically calls out the importance of adequate slope and drainage outlets, not just relying on material quality to compensate for poor drainage design. For covered patios in rainy climates, aim for at least 1/4:12 slope with metal and 1:12 or better with polycarbonate. Make sure drip edge is installed at eaves and rakes so water sheds cleanly off the structure rather than running back onto framing. High humidity also accelerates corrosion on untreated steel, so aluminum or Galvalume-coated steel panels are smarter choices than bare steel in coastal or humid Southern climates.
Snow and cold climates (Midwest, Northeast, Mountain regions)
Snow load is the issue that catches people off guard most often. Patio cover systems are generally designed for a [minimum roof live load of 10 psf](https://www. icc-es. org/Reports/pdf_files/ESR-1398P.
pdf), but that number doesn't account for your local ground snow load, which can be dramatically higher. In some areas of the Midwest and Mountain West, design roof snow loads exceed 40 or even 60 psf. Local building codes (based on ASCE 7 and the IRC) set the actual design requirements, and your local building department will tell you what load your structure needs to handle.
In snow country, heavier, stiffer materials like metal and tile handle ice and snow weight better than polycarbonate, which can crack under heavy snow loads. Sloped roofs shed snow much more effectively than flat designs, which is another reason to avoid low-slope or flat patio roofs in cold climates.
High-wind areas (Coastal, Plains, Storm-prone regions)
Wind uplift is a serious structural concern for patio roofs. Patio cover systems can be evaluated under ICC-ES AC340, which includes wind uplift testing criteria. If you're in a hurricane zone or high-wind corridor, ask specifically whether the product you're buying has an ICC-ES evaluation report and what wind loads it's been tested to. Standing seam metal systems tested under ASTM E1592 for uplift resistance are among the best-performing options in high-wind areas. Polycarbonate panels in exposed locations need careful attention to fastener spacing and edge retention to prevent uplift failure.
Cost and installation: what you'll actually pay, and what your structure can handle
Professional patio cover installation typically runs $20 to $60 per square foot installed, depending on material choice, roof style, and local labor rates. That's a wide range, and the material itself is only part of the cost. Structural work, permits, ledger connections, and fascia finishing all add up. Here's a realistic breakdown by material type.
| Material | Typical Installed Cost (per sq ft) | DIY Difficulty | Permit Likely Required? |
|---|---|---|---|
| Standing seam metal | $25-$50+ | High (professional recommended) | Yes |
| Corrugated metal | $15-$30 | Moderate | Yes |
| Multiwall polycarbonate | $15-$35 | Low-Moderate (DIY-friendly) | Often yes |
| Asphalt shingles | $20-$40 | Moderate | Yes |
| Clay/concrete tile | $30-$60+ | High (heavy, fragile) | Yes |
| Insulated panels (SIP) | $35-$65+ | High | Yes |
Structural weight is not just a technical footnote. It directly affects whether you need to upgrade your patio's posts, beams, and footings before the roof goes on. Metal panels at 1 to 3 lbs per square foot add minimal dead load. Clay tile at 10 to 15-plus lbs per square foot can require significant structural reinforcement, which adds cost and permitting complexity. If you're attaching to your home, a ledger connection to the house framing may require a structural engineer's approval depending on your local jurisdiction.
Always pull a permit for a patio roof addition. I know it feels like extra hassle and cost, but patio covers are inspected for a reason. Unpermitted structures can complicate home sales, void homeowners insurance coverage for related damage, and may need to be torn down if discovered. Most jurisdictions process patio cover permits quickly when the plans are straightforward.
Insulation, ventilation, and noise control
These three factors don't get enough attention in most patio roof guides, but they make a real difference in how comfortable your covered patio actually is.
Insulation
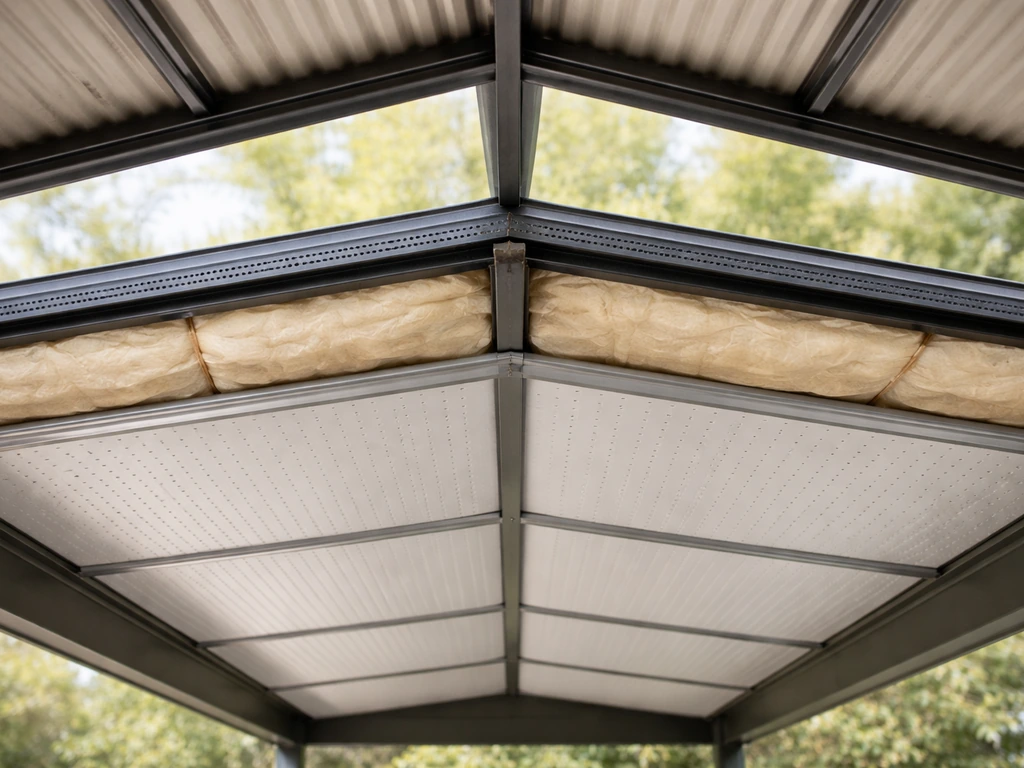
A bare metal or polycarbonate panel roof provides essentially zero thermal insulation. If you're planning to use your patio year-round or want to keep it cooler in summer, insulated panel systems (sometimes called structural insulated panels or SIP-style patio panels) are the only material type that provides meaningful R-value. They sandwich foam insulation between metal facing layers and can dramatically reduce heat gain. For a more open patio cover, adding a reflective radiant barrier under the roof material is an affordable way to reduce radiant heat without going full insulated panels.
Ventilation
Ventilation matters most in attached patio roofs that are adjacent to the home's exterior wall. Without an airway at the high end of the roof assembly, moisture can build up and cause condensation problems, which the U.S. Forest Products Laboratory specifically identifies as a leading cause of long-term roof damage. Multiwall polycarbonate panels create an additional condensation challenge because moisture can enter the panel channels and cause fogging or algae growth. Using proper blanking tape at the top and appropriate vented closure strips at the bottom of the panels is the fix here, and it's a detail that a lot of DIY installs skip.
Noise control
Rain noise is a big deal with metal and polycarbonate. Corrugated metal is the loudest option. Standing seam metal with a solid decking substrate underneath is significantly quieter because the decking absorbs vibration. Polycarbonate's hollow channels act almost like a drum during heavy rain. If noise is a concern, tile and asphalt shingles are the quietest patio roof materials because they have mass and a solid substrate absorbing sound. If you love metal but hate noise, ask your contractor about installing the panels over solid sheathing rather than open purlins.
Best material by use case and budget
Here's the direct answer most people are looking for. These are honest recommendations, not theoretical options.
- Best overall (budget not a primary constraint): 24-gauge standing seam aluminum or Galvalume steel. Long lifespan, low maintenance, handles virtually every climate, and looks great on modern and traditional homes alike.
- Best for natural light: Twin-wall or triple-wall multiwall polycarbonate panels with factory UV coating. Keep slope above 1:12, install correctly with proper sealing tape, and it's a legitimately good option for 10-plus years in most climates.
- Best budget option: Corrugated metal panels. Not as refined-looking as standing seam, but durable and affordable. Works well on simple lean-to or shed-style patio roofs with good slope.
- Best for matching your home's existing roof: Asphalt shingles if your home has a shingle roof, or tile if your home has a tile roof. Visual continuity makes attached patio additions look intentional rather than tacked-on.
- Best for hot climates and year-round comfort: Insulated panel systems. The only material that meaningfully addresses heat gain. Higher upfront cost but genuinely changes how usable your patio is in summer.
- Best for snow country: Standing seam metal on a properly sloped roof (ideally 3:12 or steeper). Sheds snow cleanly and handles high load ratings when framing is designed correctly.
- Best for DIY installation: Multiwall polycarbonate on a simple lean-to frame. Lightweight, easy to cut with basic tools, and forgiving for a first-time installer who takes the time to follow the installation guide carefully.
- Best for curb appeal on a Mediterranean or Spanish-style home: Concrete or clay tile, if you have the structure and budget to support it.
Next steps: measurements, contractor questions, and avoiding common mistakes
What to measure before you do anything else
- Measure your patio footprint accurately (length x width in feet). This gives you your square footage and helps you get accurate material and installation quotes.
- Measure your available head height and the attachment point on your house wall if it's an attached roof. This determines your maximum and minimum slope options.
- Calculate your slope: for every foot of horizontal run, how many inches does the roof drop? Write this down as a ratio (e.g., 2:12) before talking to contractors or suppliers.
- Check your existing structure: measure post sizes, beam spans, and note what the footings look like. If you don't know what's under your concrete pad, say so honestly when talking to a contractor.
- Look up your local ground snow load if you're in a snow climate. Your county or state building department website usually has a map. Write that number down.
Questions to ask contractors before hiring
- Will you pull the permit, and is that included in your quote? (The answer should always be yes.)
- What's the design load rating for this roof assembly? Can you show me documentation, like an ICC-ES evaluation report?
- How is the ledger connected to my home, and does that require any structural verification?
- What's the minimum slope you're designing to, and how will drainage work at the eave?
- What wind uplift rating does this system have, and has it been tested to any standard (like ASTM E1592)?
- What warranty comes with the materials, and what does it actually cover?
- Do I need a structural engineer for this project given my local snow or wind load requirements?
Common mistakes to avoid
- Building too flat. This is the number one patio roof mistake. Inadequate slope leads to ponding water, which causes long-term damage to every roofing material. If you can't achieve adequate slope, design a proper drainage system with internal drains before choosing your material.
- Skipping drip edge. Drip edge at eaves and rakes keeps water from running back onto fascia and framing. It's a small detail that prevents rot and staining over time.
- Buying polycarbonate without checking the UV warranty. Not all polycarbonate panels have equivalent UV protection. Verify the warranty covers yellowing and light transmission loss, and confirm which side faces up.
- Ignoring structural weight until the last minute. Find out what your structure can handle before you fall in love with a material. Heavy tile on an undersized structure is an expensive problem to fix after the fact.
- Assuming your patio cover doesn't need a permit. Most jurisdictions require permits for attached and freestanding patio covers. Check before you start.
- Underestimating snow loads in cold climates. The minimum 10 psf live load for patio covers is a floor, not a target. In snow country, consult your building department for local design snow load values and get a structural engineer involved if there's any doubt.
- Choosing material based only on price per panel. Installation labor, structural upgrades, permits, and flashing details can easily double or triple the panel cost. Always get a full installed quote, not just a materials estimate.
If you're also thinking about what goes on the inside of your patio roof, the ceiling material and finish choices are a separate but connected decision that affects both comfort and appearance. The best material for an outdoor patio ceiling depends on how much moisture, heat, and direct sun it will get, so match the ceiling finish to the same conditions you used for the roof ceiling material.
If you're wondering about the best ceiling for an outdoor patio, focus on moisture resistance, compatibility with your insulation plan, and how it will handle temperature swings ceiling material and finish choices. And if your patio faces a specific direction, like north, the exposure angle changes which materials hold up best over time and how much light you actually get.
For a north facing patio, the best material for your covered roof typically balances durability with good light transmission. Getting your material choice locked in first gives you a solid foundation for all those follow-on decisions.
FAQ
Can I replace my patio roof material later without reworking the structure and waterproofing?
Yes, but only in specific designs. If your patio roof is close to the house wall and water can flow back toward the siding, you need an installed drainage path that keeps water moving away from the wall (drip edge at eaves and rakes, proper flashing at the ledger, and gutters or controlled runoff). For many homeowners, a system that’s tested and installed as a full roof assembly will be safer than trying to retrofit a partial “water shedding” concept after the fact.
What if my patio roof is flatter than the recommended slope for polycarbonate?
Polycarbonate can work on lower-slope roofs, but it is not a blanket “use it anywhere” product. The key failure mode is condensation and slow drainage in near-flat layouts, which leads to fogging and faster channel degradation. If your slope is below the recommended minimum, you may need higher-quality closure and venting details, more aggressive drainage design, and a plan for earlier panel replacement.
What causes the most leaks in standing seam patio roofs, even when the material is “high quality”?
Standing seam is usually more forgiving because it has concealed fasteners, but any metal system still needs correct panel orientation, panel-to-trim sealing, and correct screw/fastener selection where penetrations occur. In practice, the biggest leak causes on metal patios are poor sealing around flashing transitions, missed drip edges, and fasteners installed outside the manufacturer’s pattern or spacing.
Can I buy cheaper polycarbonate and just add a UV coating later?
Do not rely on aftermarket UV sprays for long-term performance. If you choose multiwall polycarbonate, buy sheets with a factory-applied UV-protective coating and install the UV-protected side up. Aftermarket coatings often wash off or age unevenly, which can leave streaking, uneven degradation, and inconsistent warranty coverage.
How do I verify my patio roof will handle my local snow load, beyond general rules of thumb?
For snow-prone regions, the safest approach is to confirm the required roof live load for your exact location with your permit plans, not just assume “10 psf” because patio covers are commonly referenced that way. Also check the roof’s geometry, because steeper slopes shed snow better, and a more rigid assembly helps manage ice buildup and thermal expansion.
Is it safe to install polycarbonate in high-wind or hurricane areas?
Yes, but it depends on where the attachment points are and how wind uplift is resisted. If your patio roof is attached to the home, ledger connections and the rafter-to-beam connection details matter as much as the panel type. In high-wind areas, ask for product-specific uplift evaluation documentation and confirm your installer is using the tested fastening schedule and spacing for your wind exposure.
Will adding solid sheathing under metal panels make a big difference in rain noise?
It can be, but only if you address two issues: the roof deck/substrate and the underside moisture control. Corrugated metal tends to be louder when it vibrates freely, while standing seam systems over solid decking are quieter. If you use solid sheathing, ensure you still have correct ventilation at the roof assembly to avoid trapping moisture.
Can my existing patio frame support tile or does it almost always require structural upgrades?
In most cases, yes. If you choose tile, clay, or concrete, you must account for dead load and typically need structural reinforcement and sometimes an engineer’s sign-off. Even if your patio looks sturdy, the weak point is often the beam sizing and footing capacity, not the visual surface.
How do I prevent polycarbonate channel moisture that causes fogging or algae?
Yes, condensation and fogging are design and installation dependent, not only material dependent. Multiwall polycarbonate creates extra condensation risk because moisture can enter channels. Correct installation details include installing proper vented closure at the low ends, blanking tape at the top, keeping channels oriented correctly, and using the correct slope so water clears instead of pooling.
Is a radiant barrier enough, or do I need insulated roofing panels for real temperature control?
Often, but it depends on how you plan to use the patio. If you want meaningful year-round comfort, insulated panel systems are the main material category that provides real thermal performance. If you just want to reduce sun glare and radiant heat, a reflective radiant barrier under the roof can help, but it will not replace insulation when temperatures swing.
If I choose Galvalume or aluminum, do I still need to worry about rust in humid coastal areas?
It can help, especially for longevity in coastal or humid climates, but it does not eliminate the need for good installation and the right flashing details. Metal coatings like Galvalume can slow corrosion on the panels, yet exposed fasteners, cut edges, and improper sealing around penetrations can still become corrosion starting points.
Is DIY patio roof installation realistic for these materials, or are there common detail mistakes that usually require pro help?
For DIY, the limiting factor is usually not “cutting panels,” it is the integration details: ledger attachment, flashing transitions, drip edges, and fastening patterns. If your roof is attached to the home or has complex drainage paths, professional installation is often worth it because one missed flashing step can lead to hidden damage that appears later.
Next Articles

Do It Yourself Outdoor Patio Ideas: Build, Upgrade, Maintain
DIY outdoor patio ideas for planning, building, upgrading, and maintaining floors, shade, privacy, lighting, and decor.
Quick Fix Patio Ideas for Instant Comfort and Style
Quick fix patio ideas for fast comfort and style: cleanups, repairs, shade, flooring tweaks, and safe upgrades on any bu
Cheap Do It Yourself Patio Ideas: Budget Build Guide
Budget DIY patio ideas with step-by-step flooring, prep tips, cost ranges, upgrades, and safety mistakes to avoid.