You can build a solid, good-looking outdoor patio yourself for anywhere from a few hundred dollars (gravel or stepping stones) to a few thousand (pavers or concrete), and the best place to start is with three numbers: the square footage you want to cover, the drainage slope you need (1/4 inch drop per foot away from your house), and a realistic budget per square foot for the material you're considering. Get those three things right before you buy a single paver or bag of sand, and the rest of the project falls into place pretty logically.
Do It Yourself Outdoor Patio Ideas: Build, Upgrade, Maintain

Phoebe Foster
13 May 2026
Plan your layout before you touch the ground
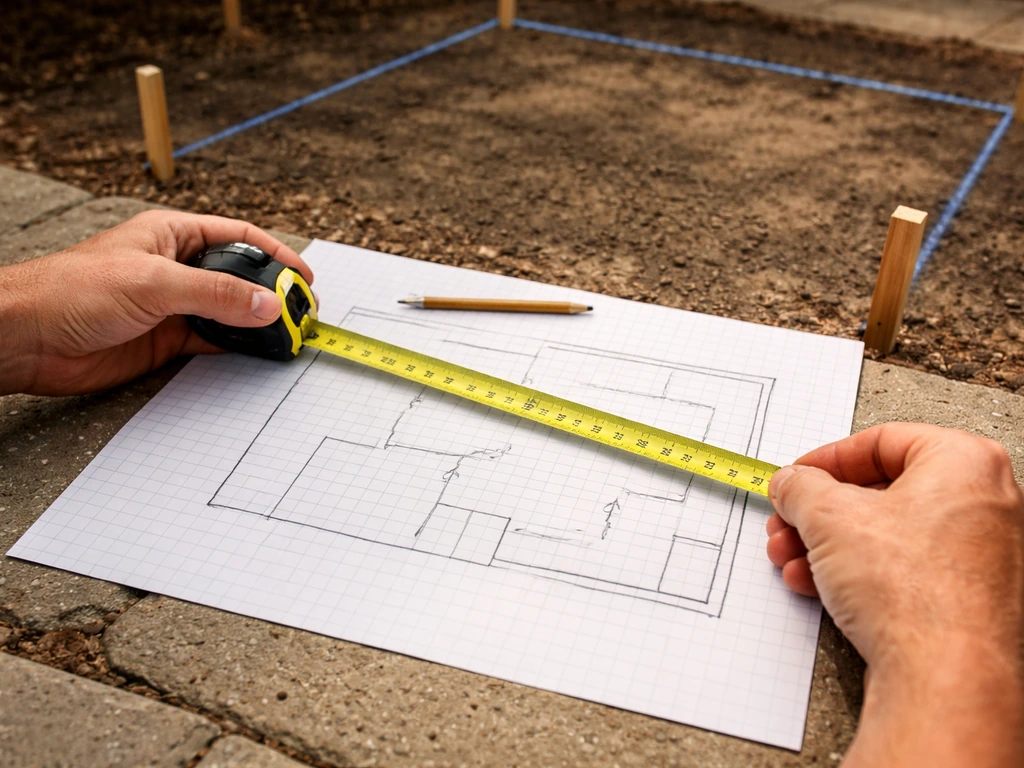
The most common DIY patio mistake is starting with materials instead of measurements. Grab a tape measure and sketch your space first. Multiply length by width to get your square footage, then add 10% for cuts and waste. A 12x16 patio is 192 square feet, which is a comfortable size for a four-person dining set with room to pull chairs out. If you want a larger lounge zone, 16x20 (320 sq ft) is a good target.
Think carefully about traffic flow before you finalize the shape. You need at least 18 inches of clear passage for one person to walk comfortably, and 36 inches minimum if someone in the space uses a wheelchair or walker. If a path circles the patio or connects to a gate, plan for a 60-inch turnaround area near entry points. Irregular patio shapes (L-shapes, curved edges) can work around existing trees or garden beds, but they do increase your material waste and cutting time, so factor that in.
Drainage is non-negotiable and it has to be built into the layout plan, not added as an afterthought. Every patio surface should slope away from your house at 1/4 inch per foot. On a 12-foot-deep patio, that's a 3-inch drop from the house edge to the outer edge. Mark that grade with stakes and string before you dig. This single step prevents water from pooling against your foundation and is the main reason DIY patios fail over time.
On budget: the cost range for an installed patio in 2026 is wide. Gravel sits at roughly $1 to $6 per square foot installed, poured concrete lands around $6 to $12 per square foot, concrete pavers run $8 to $18 per square foot, and natural stone can push $12 to $35 per square foot depending on the material and your region. For a 400-square-foot patio, that means a gravel project could cost as little as $400 to $1,200 in materials if you do the labor yourself, while pavers or concrete add up much faster. If budget is the primary driver, there are plenty of specifically cheap DIY patio approaches worth exploring. If you keep your choices focused on budget-friendly flooring and shade upgrades, you can still build some of the best patio ideas on a budget. Choosing the best DIY patio approach also means matching your materials and layout to your budget and climate. Affordable options like gravel layouts and simple paver borders are often the core of cheap do it yourself patio ideas. But for most homeowners, pavers hit the best balance of DIY-friendliness, durability, and finished appearance.
Picking the right flooring material for your climate
Material choice matters more than most people realize, and climate should be your first filter. If you're in the Midwest or any region with hard freezes, concrete pavers outperform poured concrete slabs because the individual units can shift slightly with freeze/thaw cycles without cracking. In wet climates with heavy rain, good drainage built into the base is critical regardless of material. In hot, sunny regions like the Southwest or Texas, avoid dark-colored materials that store heat, and think about how barefoot-friendly the surface is in summer.
| Material | Approx. DIY Cost (per sq ft) | Durability | DIY Difficulty | Best Climate Fit |
|---|---|---|---|---|
| Gravel/crushed stone | $1–$4 | Moderate (needs replenishment) | Easy | All climates; great for drainage |
| Concrete pavers | $4–$10 materials only | High | Moderate | All climates, especially freeze/thaw |
| Poured concrete | $6–$12 installed | High if sealed | Hard (usually hire out) | Dry or mild climates |
| Stamped concrete | $8–$18 installed | High if maintained | Very hard (hire out) | Mild climates, avoid heavy freeze |
| Natural stone (flagstone, etc.) | $8–$20+ materials only | Very high | Moderate to hard | All climates; irregular joints drain well |
| Rubber pavers / interlocking tiles | $3–$6 | Moderate | Very easy | Good for hot climates, over existing concrete |
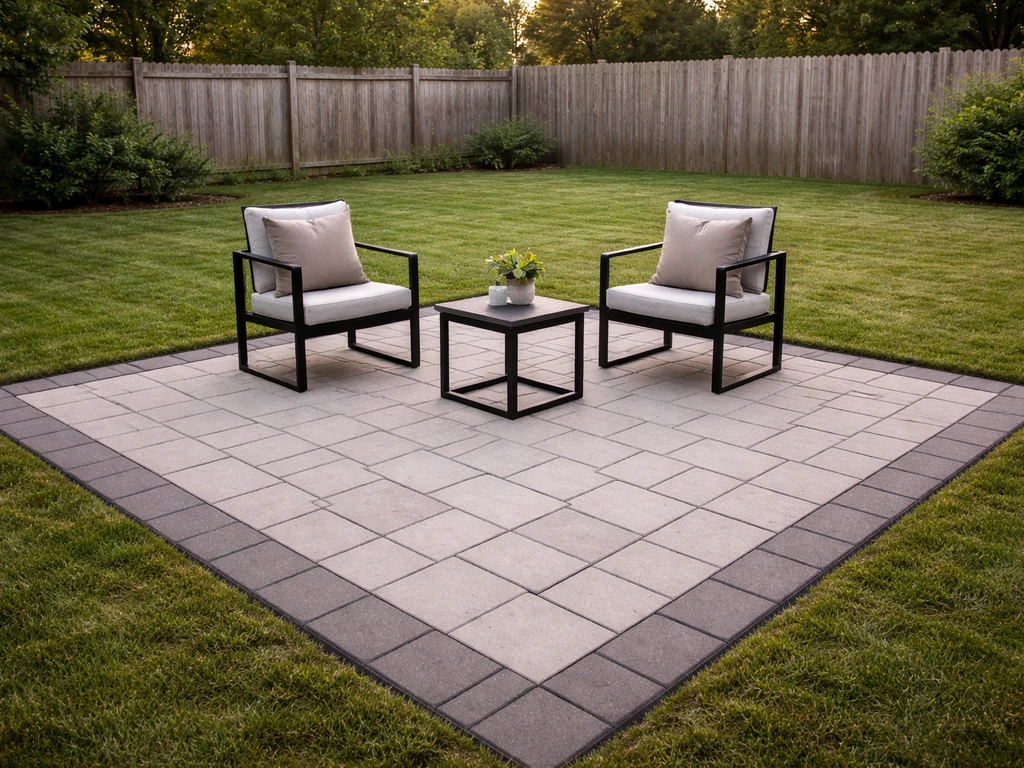
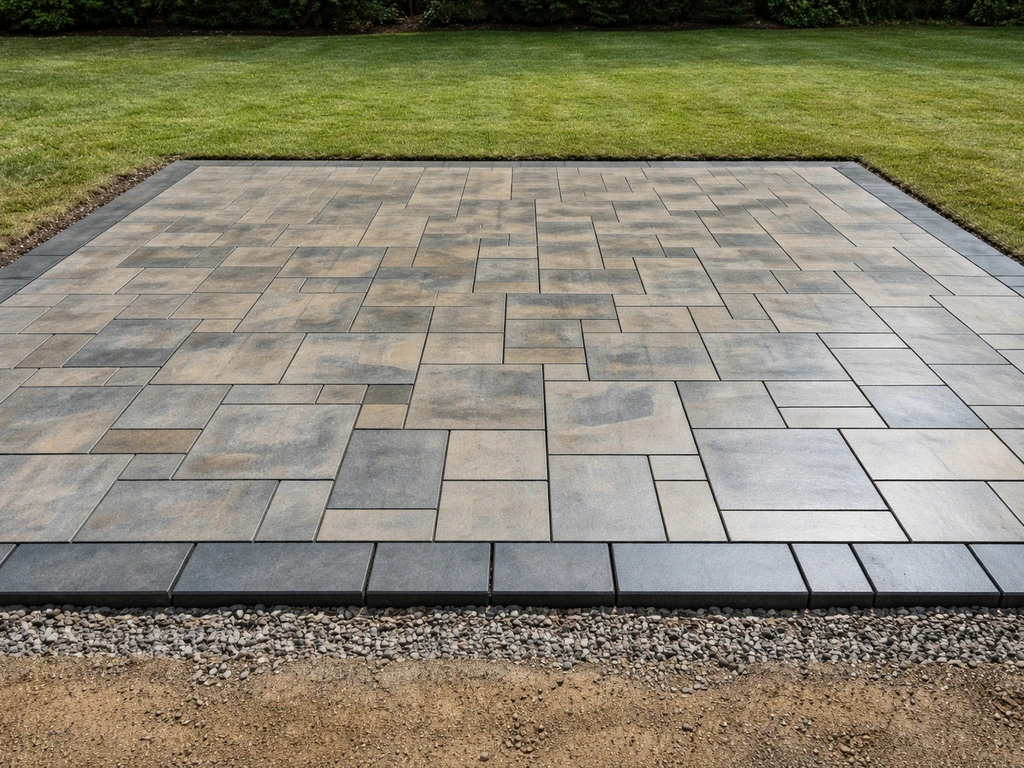
For most first-time DIYers, concrete pavers are the sweet spot. They come in standard sizes (12x12, 16x16, 24x24 inches), stack and cut with a rented wet saw or angle grinder, and you can do the whole project in a weekend with a plate compactor rented from your local home improvement store. The base matters as much as the pavers themselves: compact your subgrade, lay 4 to 6 inches of crushed aggregate base (increase to 6 to 8 inches in freeze/thaw climates), top it with 1 inch of coarse bedding sand, then set your pavers. Don't skip the compaction step and don't install into frozen ground.
Gravel is the easiest and cheapest DIY option, and it gets underrated. A well-edged gravel patio with landscape fabric underneath, 3 to 4 inches of pea gravel or decomposed granite, and a defined border looks intentional and drains perfectly. It's not ideal for rolling furniture across, but for a fire pit zone or casual lounge area, it works great. Top it with a few stepping stones to create a path through it and the look comes together quickly.
Poured concrete is honestly best left to professionals unless you have experience with formwork and finishing. Getting a smooth, properly sloped concrete slab takes skill and speed. The cost is higher per square foot when you hire out, but a bad DIY concrete slab (cracking, uneven surface, poor drainage slope) is expensive to fix. If you want a concrete look on a tight budget, consider concrete pavers or large concrete stepping pads instead.
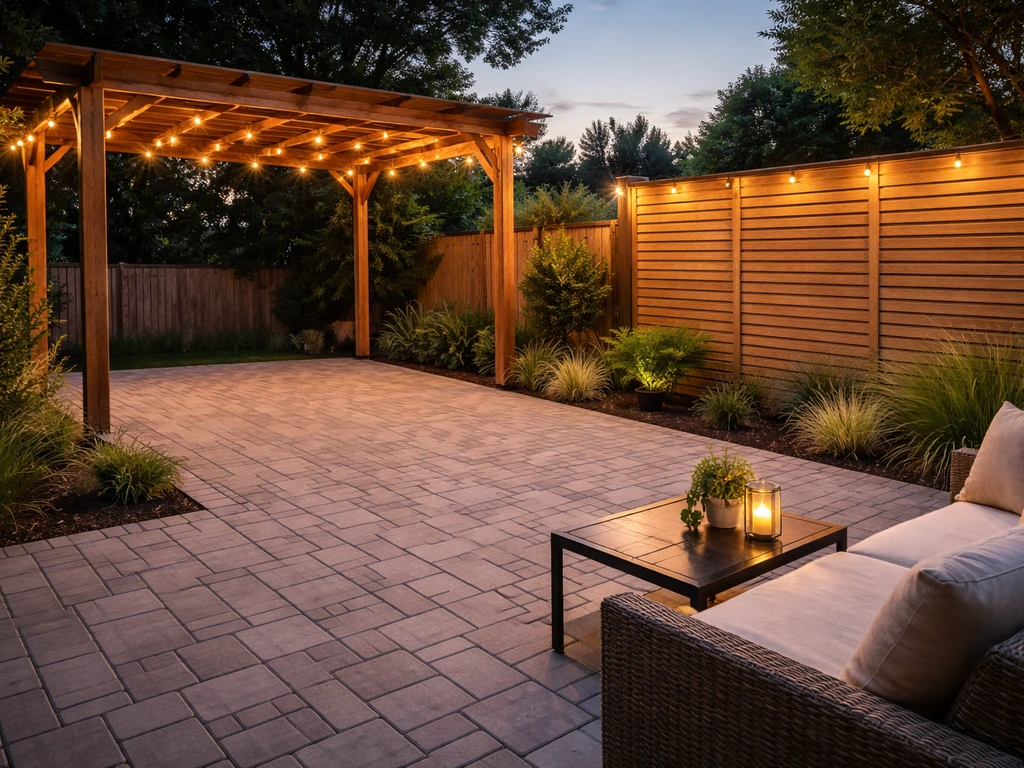
DIY shade and cover options
Shade is often the upgrade that transforms a patio from something you look at into something you actually use. The three most popular DIY options are market umbrellas, shade sails, and pergolas, and they each suit a different situation.
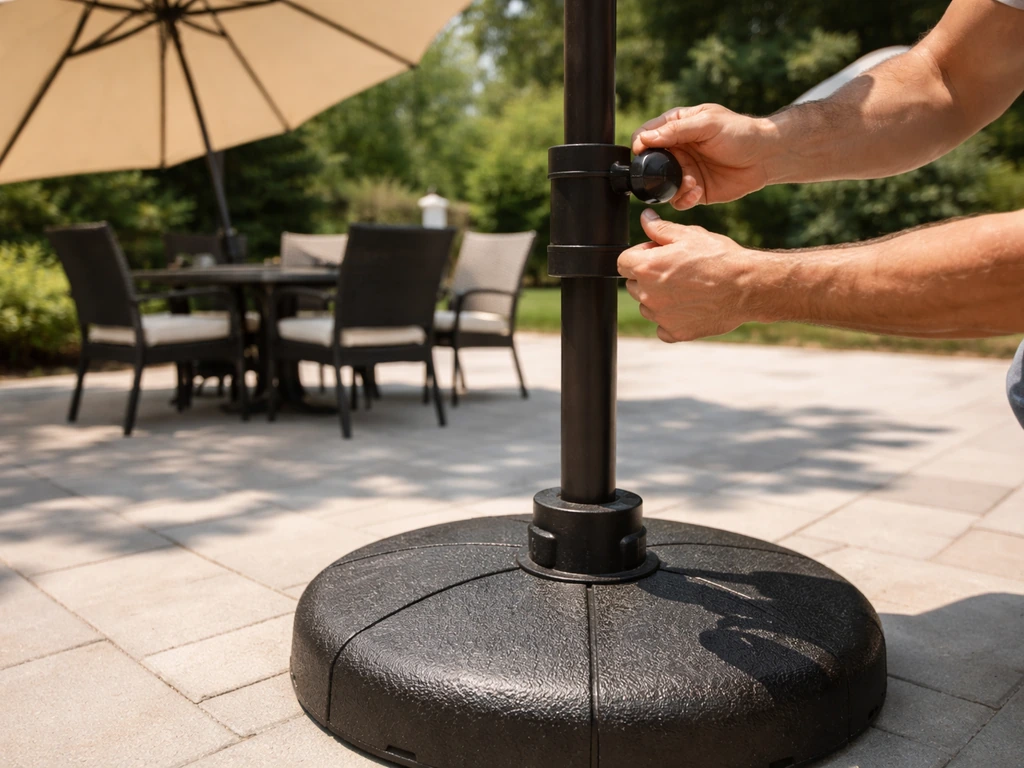
Market umbrellas
A 9-foot or 11-foot market umbrella is the fastest, cheapest shade solution you can add. A weighted base handles wind reasonably well for a smaller umbrella, but if you're in a windy area or want to leave it up for days at a time, bolt the pole through a hole in your patio table or set the base in a heavy concrete-filled planter. Offset (cantilever) umbrellas cover a wider area without a center pole, which is useful over a sectional sofa, but they need a much heavier base to stay stable. Always bring umbrellas in before a storm.
Shade sails
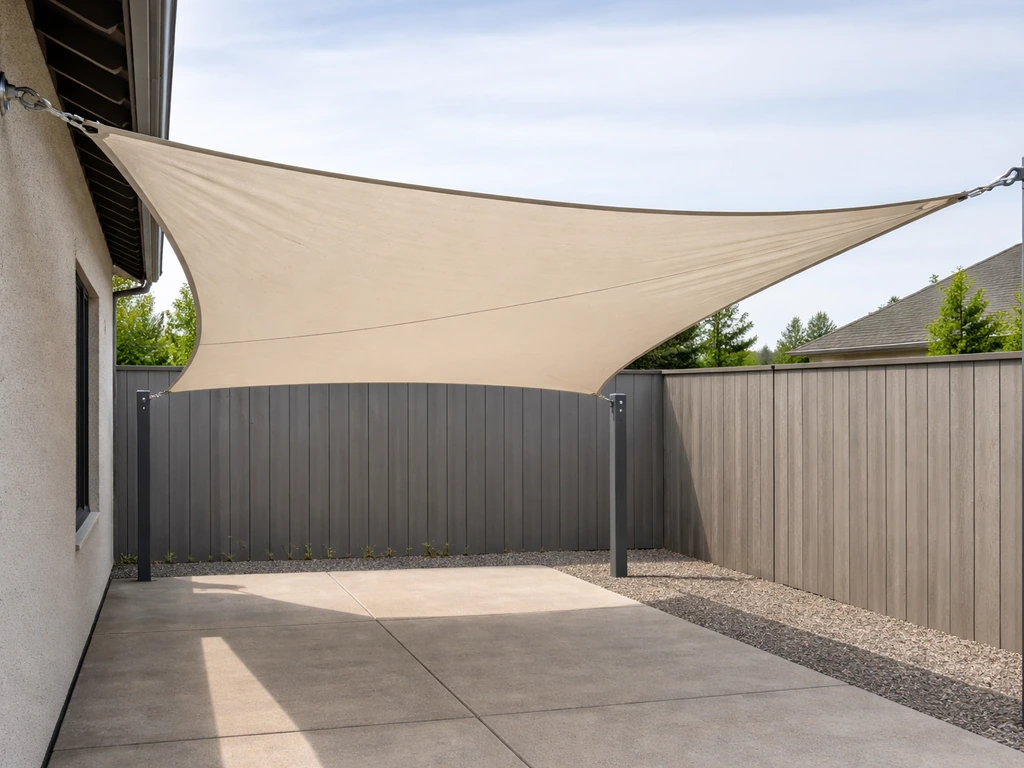
Shade sails look great and are genuinely DIY-friendly, but the anchoring is where most people underestimate the work. A shade sail under tension creates significant pulling force at every anchor point, especially in wind, and that force is mostly lateral (sideways), not just downward. Posts need to be set in concrete, typically 2 to 3 feet deep for a 10-foot post, and the post should lean slightly away from the sail (about 10 degrees) to counteract the inward pull. Use stainless hardware rated for outdoor tension loads. Triangular sails are easier to tension properly than square or rectangular ones. Don't attach a sail to fascia boards or gutters unless you've confirmed those structural members can handle the load.
Pergolas
A freestanding pergola kit is a realistic weekend project for someone comfortable with basic carpentry. Most aluminum or cedar kits in the 10x12 to 12x16 range cost $800 to $3,000 depending on material and come with all the hardware and instructions. The main steps are setting the four posts (again, footings matter, especially in frost-heave-prone soil), leveling the beams, and attaching the rafters. You can add shade cloth, outdoor curtains, retractable canopies, or climbing plants to control light. Pergolas attached to the house require a ledger board that ties into structural framing, and some jurisdictions require a permit for that, so check locally before you start.
Adding privacy without killing airflow
Privacy and airflow are often in tension, and the best DIY solutions address both at the same time. The key is intercepting sightlines from the specific angles that matter, not blocking every direction. Stand at your main seating spot and look out: where are you actually visible from a neighbor's yard or a street? You usually only need to screen one or two directions, not all four sides.
Fast-growing plants are the most attractive long-term solution. Arborvitae (especially 'Green Giant' or 'American Pillar' cultivars) are the go-to hedge plant for privacy screens, growing 3 to 5 feet per year once established and reaching 20 to 30 feet at maturity. Plant them 3 to 4 feet apart for a solid screen. For warmer climates where arborvitae struggles, bamboo (clumping varieties only, not running), tall ornamental grasses like 'Karl Foerster' feather reed grass, or native screening shrubs are good alternatives. Plants take a season or two to fill in, so pair them with a temporary screen while they grow.
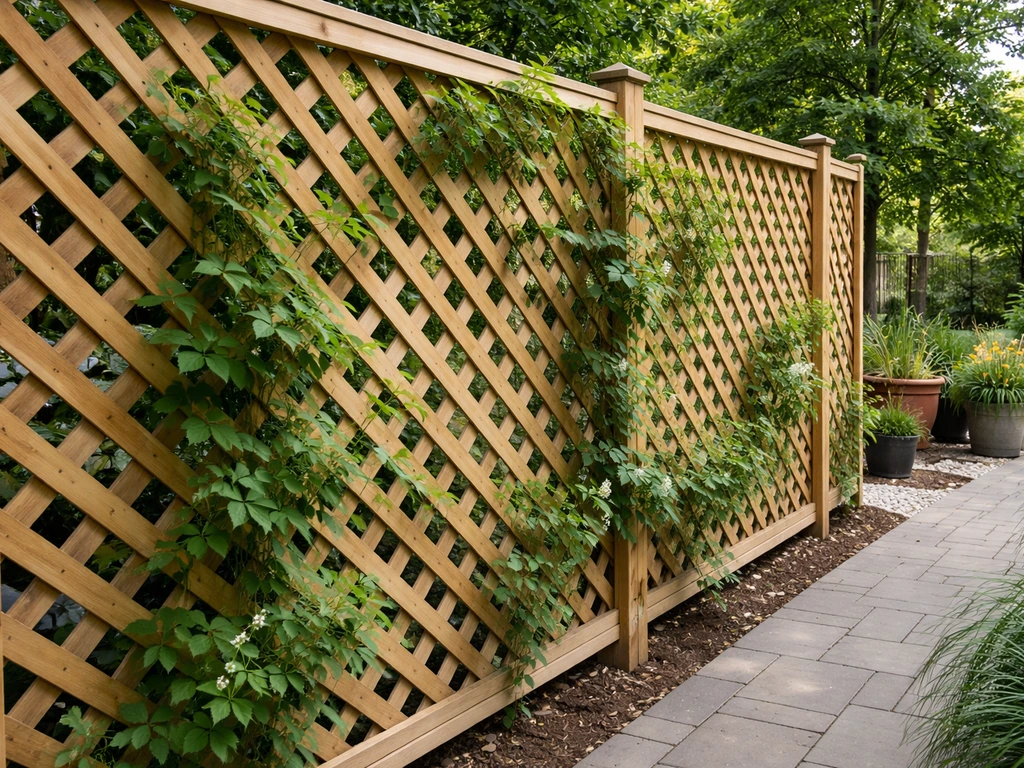
For immediate privacy, a slatted cedar screen panel or a pre-built trellis panel with a climbing vine (jasmine, climbing roses, or passionflower depending on your zone) works fast. The gaps in slatted screens let air through while blocking sightlines, which is exactly what you want. Avoid solid privacy fences on the windward side of a patio in hot climates, because you're also blocking natural cooling breezes. If you need a fence there, use a horizontal slatted design with 1/4-inch to 1-inch spacing rather than a solid board-on-board style.
Lighting, fans, and cooling upgrades
Good outdoor lighting extends your patio's usable hours significantly, and most of it is very DIY-friendly. Solar-powered path lights spaced 3 to 4 feet apart along the patio edge or walkway give you consistent ambient light with zero wiring. String lights (cafe lights) on a pergola or suspended between posts are probably the single most cost-effective atmosphere upgrade you can make, running $20 to $80 for a 48-foot strand and requiring nothing more than hooks and an outdoor extension cord or outdoor outlet.
For a step up, low-voltage landscape lighting runs off a transformer that steps your home's 120V supply down to 12V, making it safe and easy to install without an electrician. You run the low-voltage wire underground (no deep trenching needed, just a few inches) and connect fixtures with snap connectors. The transformers plug into a standard outdoor GFCI outlet and most have timers and photocell sensors built in. Plan for one transformer per zone and don't overload it.
Outdoor ceiling fans are one of the best investments for a covered patio. Make sure any fan you buy is wet-rated (look for ANSI/UL 507 certification) if it could get rained on, or damp-rated if it's protected overhead. Wire it to a GFCI-protected circuit. A 52-inch fan is appropriate for most covered patios up to about 16x16 feet. For larger spaces, go up to 60 inches or add a second fan.
In hot, dry climates, a misting system is a game-changer. For a fully open patio, space misting nozzles about 6 feet apart along the perimeter. For a covered patio with open sides, 12-foot spacing works. The system connects to a standard garden hose bib and runs vinyl tubing along the eave or pergola beam with brass nozzles crimped in. High-pressure systems (800 to 1000 psi) cool more effectively and create a finer mist that doesn't soak you, but they require a pump and more installation work. Mid-pressure systems are easier to DIY and still drop ambient temperature noticeably.
Finishing the space: decor, furniture placement, and upkeep
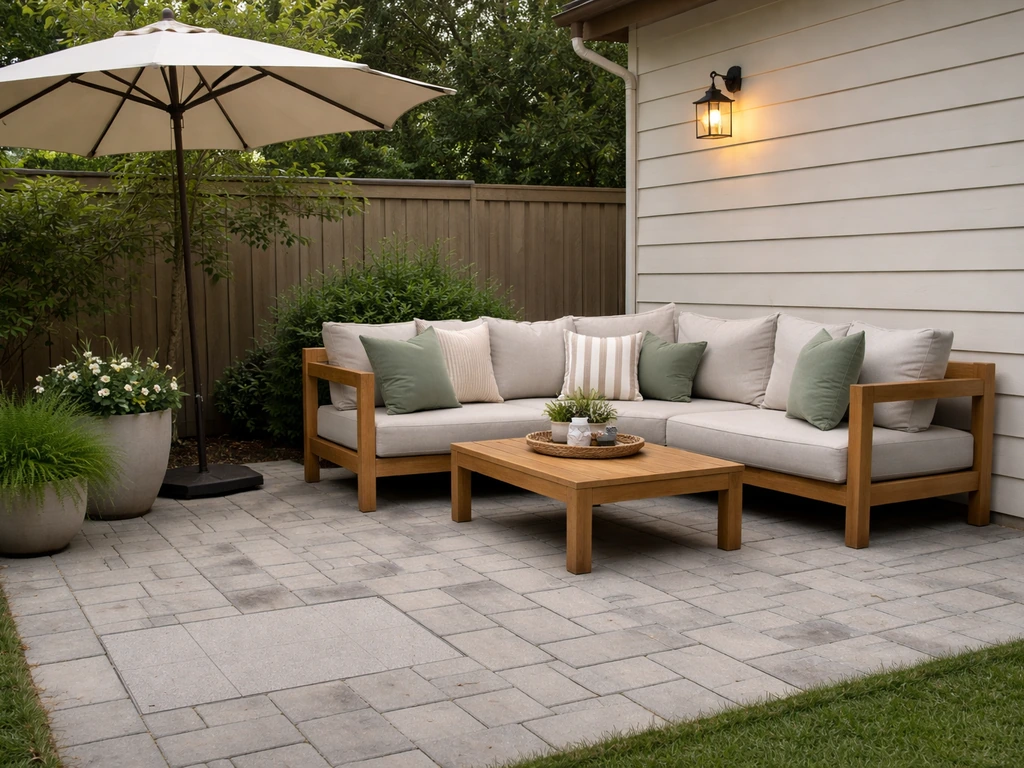
Furniture placement is where a lot of patios go wrong. People either crowd everything together or spread it so far apart it feels like a waiting room. Start with your main seating group, allow 18 to 24 inches of walking clearance around every piece, and keep the main conversation area tight enough that people don't have to raise their voices across it (roughly 8 to 10 feet across is the sweet spot). An outdoor area rug anchors the seating zone visually and helps define the space, especially if you're working with a large open patio. Larger rugs, at least 8x10 for a standard dining set, work better than small rugs that get lost under the furniture.
For decor that holds up, stick to materials rated for outdoor exposure: powder-coated steel or aluminum furniture, teak or eucalyptus wood, all-weather wicker (resin wicker, not natural), and outdoor-rated fabrics like Sunbrella. Cushion covers should be removable and machine washable. Planters add a lot of life to a patio and they're easy to move seasonally if you're in a cold-winter climate.
Maintenance that keeps your patio looking good for years
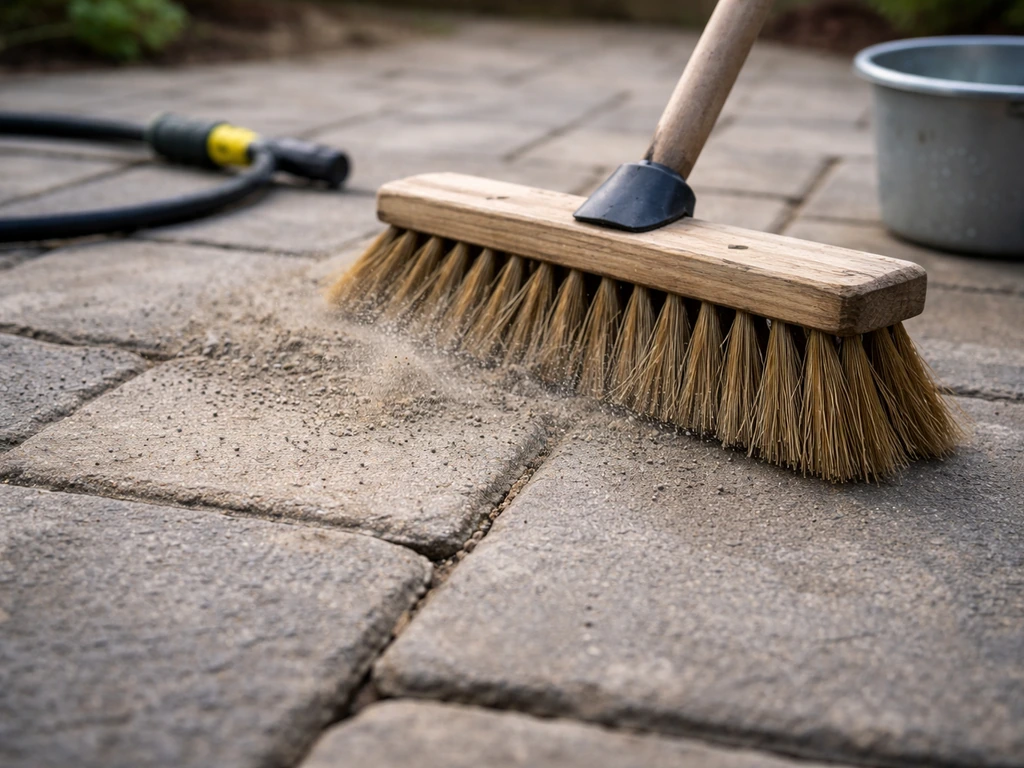
A paver or concrete patio needs annual maintenance to stay in good shape. Once a year, inspect for settled or heaved pavers, clean the surface (a stiff broom or low-pressure wash), and check the joint sand. If weeds are pushing up between pavers, pull them and re-sand the joints with polymeric sand: brush it into the joints dry, then mist it with water so it activates and hardens into a firm, weed-resistant filler. It makes a real difference.
Sealing is worth doing. For concrete patios, seal every 1 to 2 years, especially in climates that use de-icing salt or have hard freeze/thaw cycles. For pavers, a penetrating sealer every 2 to 3 years protects the color and reduces staining. Don't apply sealer to a dirty or damp surface, and always test a small area first. For gravel patios, the main maintenance is raking to redistribute material and occasionally topping up with a fresh inch of gravel.
Your next steps: what to measure, buy, and do first
Here's the order that actually makes sense for a DIY patio project:
- Measure your space and sketch the layout: length x width for square footage, note where the house wall, doors, and existing drainage are.
- Set your drainage slope stakes using the 1/4-inch-per-foot rule before any digging starts.
- Choose your material based on budget (gravel is fastest and cheapest, pavers are the best DIY-friendly mid-range option) and your climate (add base depth in freeze/thaw zones).
- Price out materials at your local home improvement store using your square footage plus 10% waste, and rent a plate compactor if you're going with pavers.
- Install your base and flooring surface first, then add shade (an umbrella or shade sail to start, a pergola as a phase-two upgrade).
- Add privacy screening in the one or two directions you actually need it, then fill in with plants for long-term coverage.
- Run your lighting (solar or low-voltage) and any fan wiring before you set furniture.
- Furnish and accessorize last, using an outdoor rug to anchor your seating zone.
- Set a calendar reminder for annual maintenance: inspect, clean, re-sand joints, and reseal on your material's recommended schedule.
You don't have to do everything at once. A phased approach, where you start with the ground surface and a simple umbrella, then add a pergola and lighting in year two, is completely valid and spreads the cost out. The most important thing is getting the layout, drainage slope, and base right in phase one, because those are the things that are expensive or nearly impossible to fix later. Everything else can be upgraded over time. If you're looking for quick fix patio ideas, tackle the low-effort upgrades first, like better edging, simple drainage tweaks, and refreshed top layers of gravel or sand.
FAQ
How do I know how much patio base and sand to buy for do it yourself outdoor patio ideas?
Use your patio square footage and multiply by the planned depth, then add 10 to 15% for uneven subgrade and compaction loss. For example, if you plan 4 inches of crushed base, convert 4 inches to feet (0.33 ft), multiply by square footage, and factor in that bedding sand and base usually need more than the theoretical volume.
What if my yard slopes the wrong way or toward the house, can I still do it yourself outdoor patio ideas?
You can, but you may need to re-grade or create a retaining edge so water still slopes away from the house at 1/4 inch per foot. If the site requires major earth movement, sometimes the cheapest “DIY” option is adding a properly built raised patio edge rather than trying to force the entire surface slope with thin sand.
Do I need a permit for a DIY patio, pergola, or outdoor ceiling fan?
Often patios themselves are not permitted, but structures that attach to a house (like a ledgered pergola), posts with significant height, and any electrical work can trigger requirements. In many places, fans and lighting additions also require compliance with GFCI and wet-location rules, even if you do the rest yourself.
Can I install pavers over existing concrete or a previous patio surface?
Usually not directly. Thin overlay attempts often fail because the base cannot be rebuilt to the correct drainage slope and compaction. If you want an overlay, the safer DIY approach is removing the old surface where possible or installing a new base system over the concrete with the right thickness and drainage strategy.
What’s the easiest way to prevent pavers from shifting after installation?
Locking starts with subgrade compaction and correct base thickness, then continues with proper edging. If you skip edging or use weak restraint, pavers can creep outward even if the surface looks level at first. Use solid perimeter edging and verify slope before and after compaction.
How do I choose between gravel, stepping stones, and pavers for a do it yourself outdoor patio ideas project?
If you want the lowest cost and simplest construction, gravel with stepping stones is usually easiest, especially for lounge zones or fire pit areas. For frequent foot traffic, wheeled items (strollers, carts), or dining furniture that must glide smoothly, pavers are more practical because they provide a stable, uniform walking surface.
Will weeds still grow in polymeric sand or gravel joints?
Polymeric sand reduces weed growth substantially, but it is not a guarantee. Avoid overwatering right after installation, and keep joints filled because gaps reopen as pavers settle. For gravel patios under fabric, weeds can still appear at edges and disturbed areas, so plan to refresh borders and top off gravel periodically.
What kind of edging works best for gravel patios in do it yourself outdoor patio ideas?
The goal is to contain the stone so it cannot migrate. Use sturdy metal, concrete, or landscape timbers set on compacted base, then embed them so the gravel sits slightly below the top edge for a clean look. If you rely on flimsy plastic edging, raking and freeze-thaw movement usually breaks the containment.
How often should I re-slope or re-check drainage on a DIY patio?
Check after the first heavy rain and again after the first winter, then do a quick annual inspection. If you see repeated pooling, the fix is usually at the edge or base, not by “spot sloping” the pavers. Address the water path early, because chronic pooling also accelerates paver and grout failures.
Can I add a pergola or shade sail to an existing patio without redoing the base?
Yes for freestanding pergolas and many shade sails, but anchors must reach stable material. You typically need proper footings below frost depth depending on your region, and you should not assume the paver base alone is adequate for high wind loads. Plan for core drilling or excavation to set posts in concrete, then reinstall around the new foundations.
What’s the safest way to power outdoor lighting when you DIY?
For low-voltage landscape lighting, use the manufacturer’s transformer rating, plan one transformer per zone, and keep wires enclosed or buried where required. For any line-voltage wiring (like mains-powered fixtures), use a GFCI-protected circuit and follow wet-location requirements, because outdoor electrical failures are more hazardous than most patio DIY mistakes.
How do I keep outdoor ceiling fans stable and quiet on a covered patio?
Use a properly rated wet-location ceiling fan and confirm the mounting is to a structural member, not just a decorative ceiling board. If your ceiling is covered with materials like soffits or thin decking, you may need to add blocking. Also balance the fan blades and ensure the downrod length matches the airflow needs and head clearance.
What furniture spacing rules should I follow if my patio is narrower than the typical 18 to 24 inches clearance?
If you cannot achieve full clearance, prioritize walk paths between the door/gate and the seating area, and keep the primary route wider than secondary paths. Consider smaller pieces, modular seating that can shift, and placing the dining set parallel to the shortest wall to reduce forced turns.
How do I clean pavers or concrete without damaging the surface or joints?
Use a stiff broom or low-pressure wash rather than aggressive high-pressure blasting, because forceful jets can erode bedding sand and dislodge joint filler. If using chemicals, choose cleaners labeled for the specific material and always rinse thoroughly to avoid residue that can discolor or make joints slippery.
When should I seal pavers versus wait, and what’s the most common sealing mistake?
Apply sealer only after the surface is fully dry and after cleaning is complete, then test in a small inconspicuous area first. A common mistake is sealing dirty or damp pavers, which traps moisture and can cause hazing or uneven color. Also avoid sealing directly on wet polymeric sand joints that have not cured fully.
Next Articles
Quick Fix Patio Ideas for Instant Comfort and Style
Quick fix patio ideas for fast comfort and style: cleanups, repairs, shade, flooring tweaks, and safe upgrades on any bu
Cheap Do It Yourself Patio Ideas: Budget Build Guide
Budget DIY patio ideas with step-by-step flooring, prep tips, cost ranges, upgrades, and safety mistakes to avoid.
Best DIY Patio Ideas and Step-by-Step Build Guide
Best DIY patio ideas plus a step-by-step build guide: materials, subbase, drainage, costs, tools, and maintenance tips.