The best setup for your patio garden depends on three things you probably already know: how much sun you get, how much space you're working with, and whether you want something you can actually keep alive without it becoming a second job. For most patios, a mix of containers and a few in-ground or raised-bed plantings gives you the most flexibility.
Best Patio Garden Ideas: Step-by-Step Plan for Buildable Success

Phoebe Foster
27 Jun 2026
Start with containers for color, herbs, and focal points, then add a narrow fence-line bed or patio-edge planting strip if you have the room. Pick plants matched to your actual light and regional climate, not just what looks good at the nursery. Get a simple drip or soaker system running before summer hits. Do that, and you'll have a patio garden that looks intentional and stays manageable.
Once you dial in the right container sizes, lighting, and water setup, you will have what every patio needs for long-term success.
Patio garden styles and layout concepts
Before you buy a single plant, it helps to pick a style direction. Not because you need to commit hard to a "theme," but because it shapes every decision that follows: what containers you choose, what plants make sense, what hardscape you keep or change. Here are the approaches that work best on real residential patios.
The container cluster layout
This is the most beginner-friendly and also the most adaptable. You place groups of containers in deliberate arrangements rather than scattering pots randomly. A tested small-space version uses around 8 containers in a compact arrangement that anchors corners, frames a seating area, and creates a clear path through the space. The key is treating your containers like structure: a tall planter as a focal point, mid-size pots flanking a doorway or gate, lower bowls at table level for herbs or trailing plants. This approach works on an 8x10 apartment balcony or a 400 square foot suburban patio.
The Mediterranean courtyard style
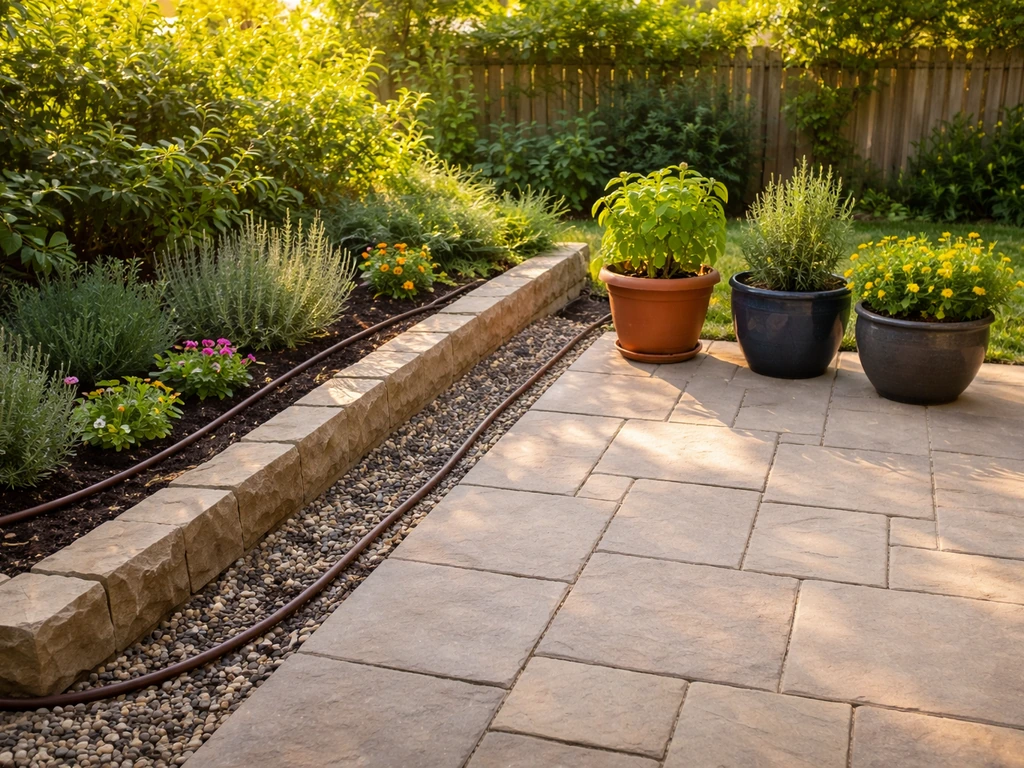
If you're in a hot, dry climate like the Southwest, Southern California, or Texas, a Mediterranean-inspired layout gives you a beautiful garden that actually survives the summer. The formula is simple: mineral elements like decomposed granite, gravel, and stone edging do most of the visual work, while drought-tolerant plants fill in around them. Think lavender, rosemary, ornamental grasses, agave, and low-growing sedums. You get structure without constant watering, and the gravel mulch keeps weeds down naturally. It looks polished with very little upkeep.
The multi-zone patio planting layout
This is what I'd recommend for patios with some square footage to work with. The idea is to give different parts of your patio a specific "job." Patio-edge beds frame the perimeter. A raised planter or two add height and structure. Narrow fence-line beds fill dead zones along walls. Containers placed near seating add intimacy. A small tree or large shrub in one corner gives canopy and scale. Each zone transitions to the next rather than stopping abruptly at gravel or pavement. The result looks designed, not assembled piece by piece over the years.
The edible patio garden
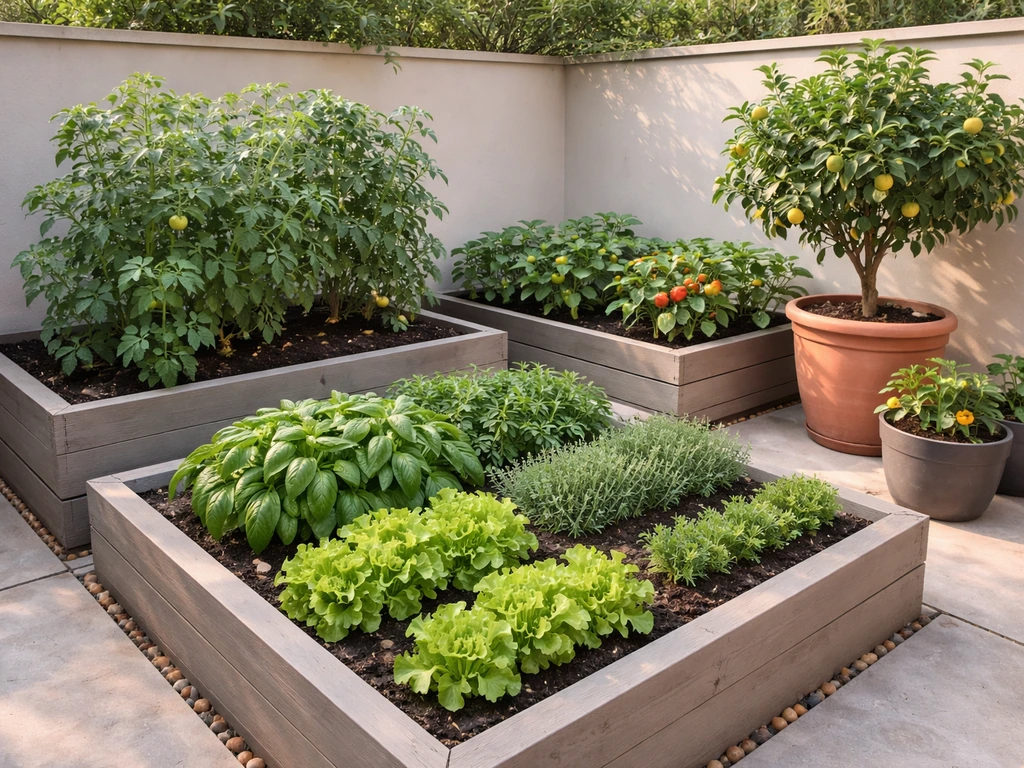
Herbs, tomatoes, peppers, lettuces, and dwarf fruit trees all grow well on patios when placed in the right containers or raised beds. Block-style bed layouts work especially well here: keep beds 3 to 4 feet wide so you can reach the center without stepping in, and leave at least 2 feet between beds for access and wheelbarrow clearance. This makes weeding, harvesting, and replanting dramatically easier over the course of a season.
Choose plants for your light, climate, and patio size
The single biggest mistake patio gardeners make is buying plants at peak bloom in spring, getting them home, and watching them slowly fail because the conditions don't match. Here's how to shop smarter.
Assess your actual light before anything else
Spend one day noting how many hours of direct sun your patio gets and when. Full sun is 6 or more hours of direct light. Part shade is 3 to 6. Deep shade is under 3. Many patios, especially those with south-facing walls or overhead structures, swing between intense midday sun and complete shade by 4pm. That pattern matters. Afternoon sun in Texas or Arizona is brutal; the same 6-hour count in Seattle behaves completely differently. Match your plant choices to the reality, not what you wish was true.
Plant picks by condition
| Condition | Good container choices | Good in-ground/bed choices |
|---|---|---|
| Full sun, hot climate | Lantana, portulaca, succulents, herbs (basil, rosemary) | Lavender, salvia, agave, ornamental grasses |
| Full sun, cooler climate | Petunias, marigolds, tomatoes, peppers | Coneflower, black-eyed Susan, ornamental kale |
| Part shade | Impatiens, caladium, ferns, coleus | Hostas, astilbe, coral bells |
| Deep shade | Boston fern, peace lily (covered patio), pothos | Shade groundcovers, moss, native ferns |
| Small patio/balcony | Dwarf herbs, compact geraniums, succulents | Not ideal; stick to containers |
For seasonal interest, layer plants that peak at different times: spring bulbs in pots, summer annuals for color, fall mums or ornamental peppers, and evergreen structure plants (boxwood, dwarf conifers, ornamental grasses) that hold the space through winter. If you're in a freeze zone, move tender container plants inside before first frost. If you're in a year-round warm climate, you can plan for color every month.
Wind and heat considerations
Covered patios and tight urban spaces create microclimates that can be hotter or windier than the surrounding yard. Wind dries out containers fast and snaps tall, fragile plants. If you're on an exposed patio, choose lower-growing, sturdy varieties or place taller containers against a wall for shelter. In heat traps (concrete patios surrounded by walls), plants rated for one zone hotter than your actual zone will handle the conditions better.
Containers vs in-ground: what works best on patios

On most patios, containers win by a wide margin, and not just because they're easy to move. Containers give you total control over soil quality, drainage, and placement. You can swap them out seasonally, adjust your layout as furniture changes, and take them with you if you move. In-ground planting and raised beds are worth adding only when you have a dedicated planting zone that you're committing to for several years.
When containers are the right call
- You're working with a paved or hardscaped patio where digging isn't an option
- You rent your home or aren't sure how long you'll stay
- Your patio is small, a balcony, or a courtyard with no soil access
- You want flexibility to rearrange for parties, seasonal changes, or furniture updates
- You're growing edibles and want to control soil quality precisely
- You have problem drainage on the patio surface itself
Container size matters more than most people expect. Undersized pots dry out in hours on a hot day and restrict root development. For most annuals and herbs, go with at least a 12-inch diameter pot. For tomatoes, peppers, or larger ornamentals, you want 15 to 20+ gallons. Use a high-quality potting mix, not garden soil, which compacts in containers and suffocates roots. Add perlite to improve drainage, and use pots with drainage holes every single time.
When in-ground or raised beds make sense
If your patio has a dirt border, a fence line with soil access, or an adjacent garden area, an in-ground bed along the edge can anchor the whole space beautifully. Raised beds on a patio are a middle ground: they sit on the surface like containers but give you more root depth and planting area. They work especially well for vegetables and perennials you want to establish over multiple seasons. Keep beds 3 to 4 feet wide so every part is reachable from the side without stepping in, and make sure the base has drainage holes or a gravel layer if sitting on concrete.
| Factor | Containers | In-Ground / Raised Beds |
|---|---|---|
| Setup cost | Low to moderate (pots + potting mix) | Moderate to high (materials, soil volume) |
| Flexibility | High (moveable, swappable) | Low (fixed location) |
| Watering needs | High (dries out fast) | Lower (retains moisture longer) |
| Best for | Annuals, herbs, edibles, small patios | Perennials, shrubs, large edible gardens |
| Soil control | Total control | Good control in raised beds, less in-ground |
| Winter protection | Easy (move indoors) | Mulch or leave in place |
Patio hardscape and flooring that supports a garden
Your patio surface affects your garden in ways that aren't always obvious at first. A solid concrete slab has no drainage, which means any water from containers or irrigation pools on the surface and can damage pavers or create slippery zones. The flooring you choose (or already have) shapes what garden setup will work best.
Flooring options and how they interact with plants
- Concrete slabs: durable but impermeable. Raise containers on feet or saucers to allow airflow and prevent staining. Seal the surface to prevent water damage from overwatering.
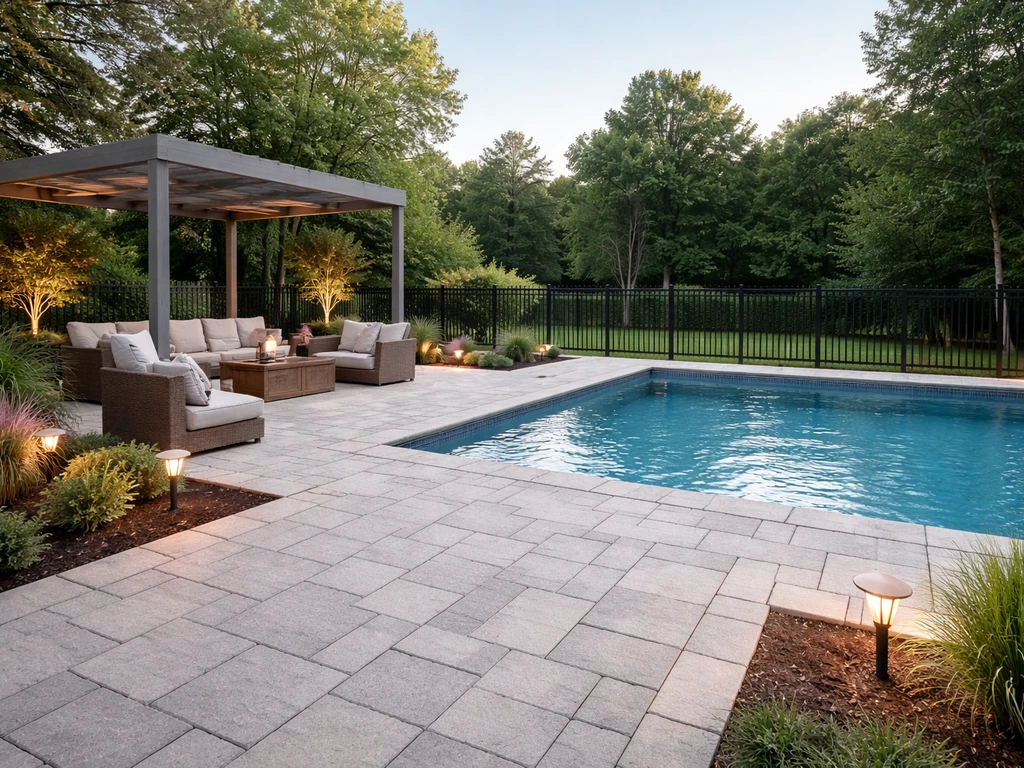
- Pavers (brick, natural stone, concrete): gaps between pavers can be planted with creeping thyme, moss, or dwarf sedums for a "planted hardscape" effect. Good drainage if set on gravel base.
- Gravel or decomposed granite: excellent drainage, pairs perfectly with Mediterranean-style plantings and drought-tolerant containers. Weed barrier underneath is essential.
- Wood decking: avoid direct container contact with wet soil; always use saucers or pot feet. Composite decking handles moisture better than natural wood.
- Tile or flagstone: good for Mediterranean or courtyard styles. Can be slippery when wet, so choose textured finishes.
If you're starting from scratch or planning a renovation, permeable pavers or a gravel-base paver install gives you the best long-term combination of drainage and aesthetics. You can leave planting pockets at the edges or between sections for in-ground plants without disrupting the overall hardscape. If you're working with an existing concrete slab, focus your garden on containers and raised beds, and consider adding a gravel border along the patio edge where it meets the lawn or fence to create a planting zone.
Irrigation, drainage, and maintenance-friendly setup
This is where most patio gardens quietly succeed or fail. A beautiful container setup that you have to hand-water every single morning in August either becomes a chore you resent or plants you let die. Getting irrigation right upfront changes everything.
Irrigation options for patios
- Hand watering with a hose or watering can: works fine for small setups with 5 or fewer containers, or if you genuinely enjoy the daily routine. Not sustainable for larger layouts in summer.
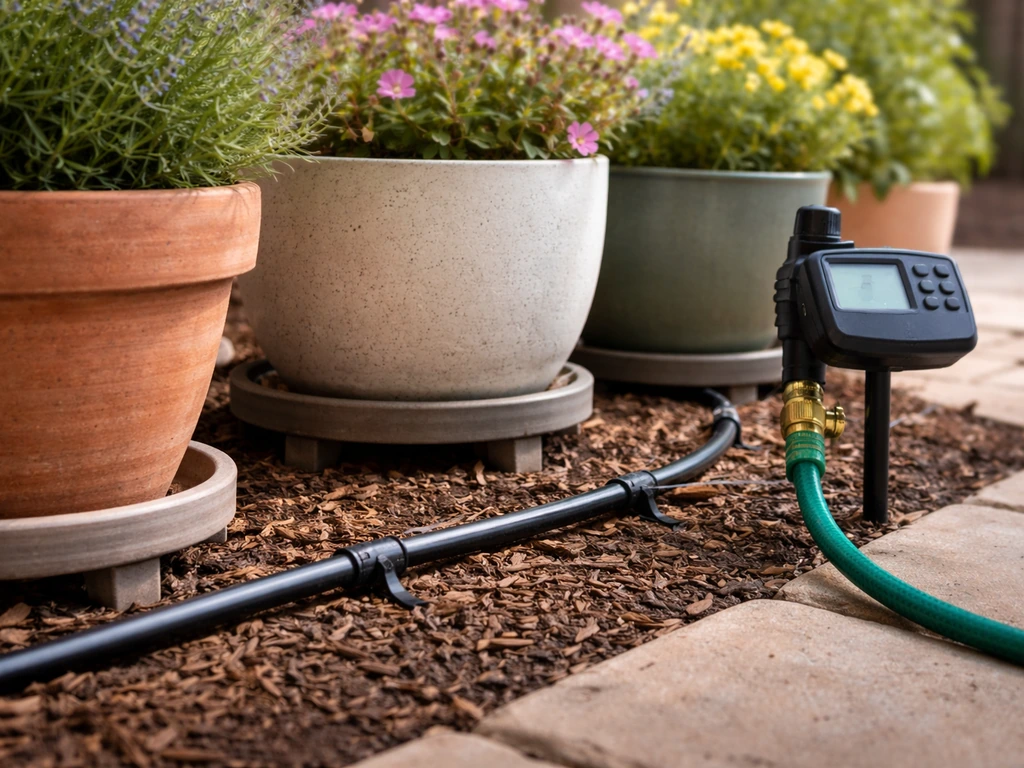
- Drip irrigation on a timer: the most practical upgrade for any patio with more than a handful of containers. A simple battery-powered timer at the hose bib with 1/4-inch drip lines to each container costs $40 to $100 and pays for itself in dead plants avoided. Set it to run early morning.
- Soaker hose in raised beds or edge beds: works well for in-ground or raised-bed plantings. Snake it through the bed and connect to a timer. Much more efficient than overhead watering.
- Self-watering containers: a smart option for balconies or spots far from a hose hookup. The reservoir in the base can keep plants watered for 3 to 7 days depending on heat and plant size.
- Smart irrigation controllers: worth it if you're integrating patio drip lines into an existing irrigation system. Most tie into weather data and skip watering cycles after rain.
Drainage: the thing most people skip
Every container needs a drainage hole, period. If you have a decorative pot without one, either drill it or use it as a cachepot with a plain nursery pot inside. On the patio surface itself, make sure water drains away from your home's foundation. A 1/4-inch slope per foot is the standard minimum. If your patio already pools after rain, address that before adding more water sources. For raised beds on concrete, add 2 to 3 inches of coarse gravel at the bottom of the bed before filling with soil mix, which prevents the soil from becoming waterlogged even without full drainage to the ground.
Keeping maintenance manageable
The lowest-maintenance patio gardens share a few traits: they use slow-release fertilizer worked into the potting mix at planting (so you're not chasing weekly liquid feedings), they use a good mulch or top-dressing on beds and even the top of containers to reduce evaporation, and they choose plants with similar water needs in the same irrigation zone. Mixing drought-tolerant succulents with thirsty ferns in the same drip line zone is a recipe for losing half of them. Group by water need, not just by look. For weeding, a 2-inch layer of mulch in any in-ground bed cuts weed pressure dramatically and keeps you out of the garden on your knees every weekend.
Decor, privacy, and lighting for a finished look
The difference between a patio that looks "done" and one that still feels unfinished usually comes down to three things: vertical interest, privacy, and light after dark. Plants alone rarely complete the picture.
Privacy with plants and structures
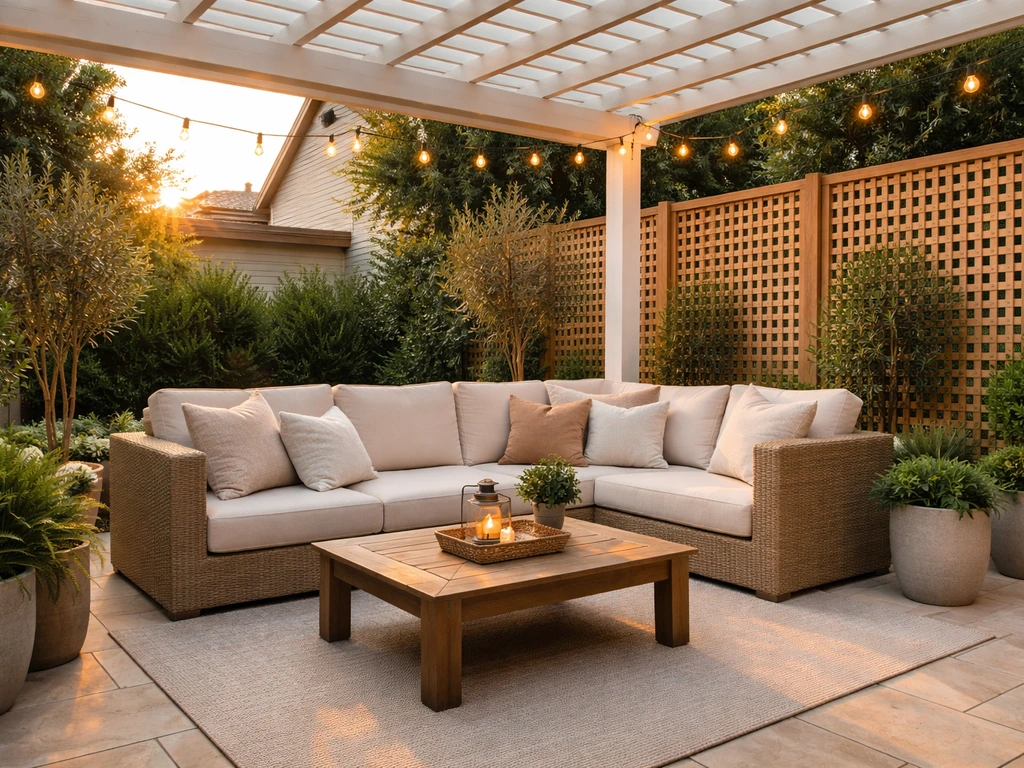
If privacy is a goal (and on most suburban patios, it is), the fastest solution is a combination of a structural element and living plants. A trellis, lattice panel, or pergola gives you the frame; climbing plants like clematis, jasmine, passionflower, or climbing roses grow in fast and soften the structure. On a fence line, tall ornamental grasses, bamboo in large containers (containment is important here, use non-spreading clumping varieties), or columnar arborvitae create a living wall without a major construction project. For a faster payoff, a row of large potted plants like a standard olive tree, tall ornamental grasses, or a lollipop-trained rosemary can give you immediate screening while permanent plantings establish.
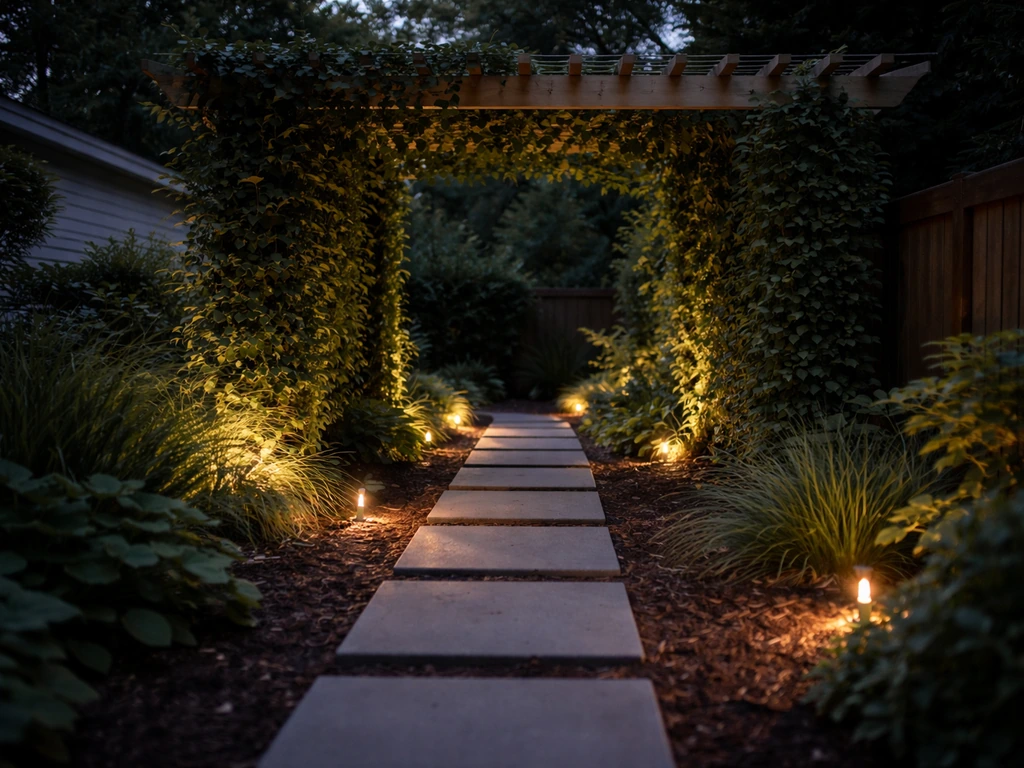
Lighting that works with a garden
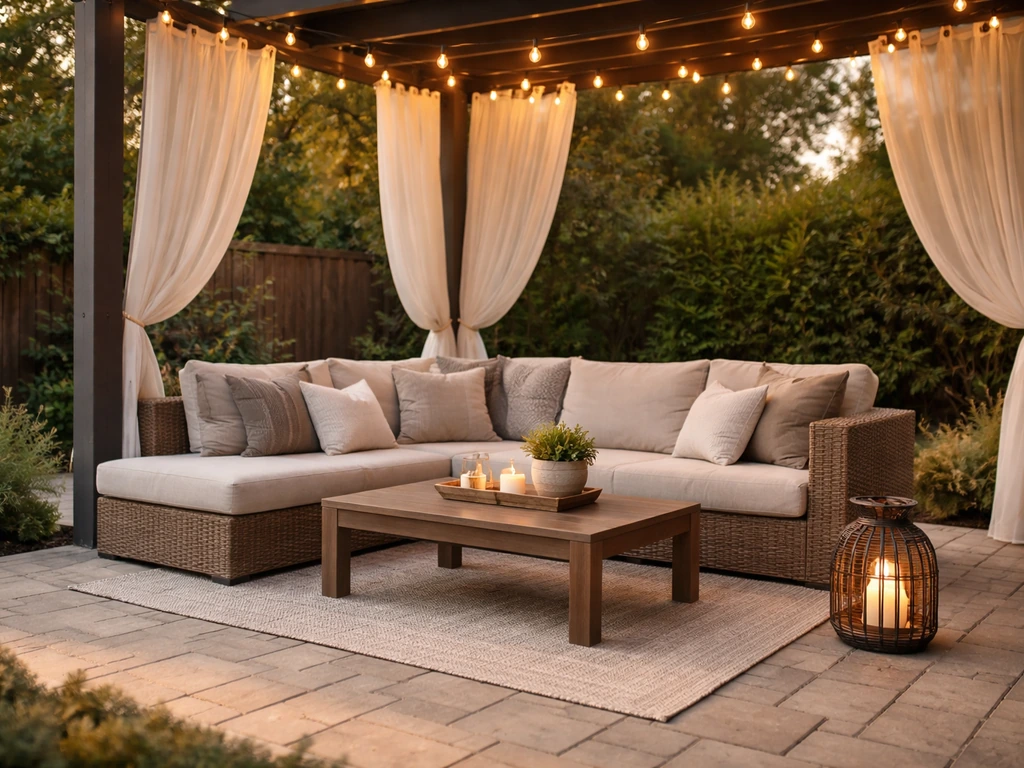
Low-voltage path lighting and uplighting both work beautifully in patio gardens. Uplighting a feature container or small tree from below creates dramatic evening ambiance with very little effort. Solar stake lights have improved a lot and work for accent purposes, though wired low-voltage systems are more reliable for primary lighting. String lights overhead on a pergola or draped between posts are still one of the best returns for cost on a patio, and they complement the garden by drawing the eye upward to the whole space. Keep light temperatures warm (2700 to 3000K) around plant material; cooler blue-white light tends to flatten greenery and looks clinical.
Finishing details that tie the garden to the patio
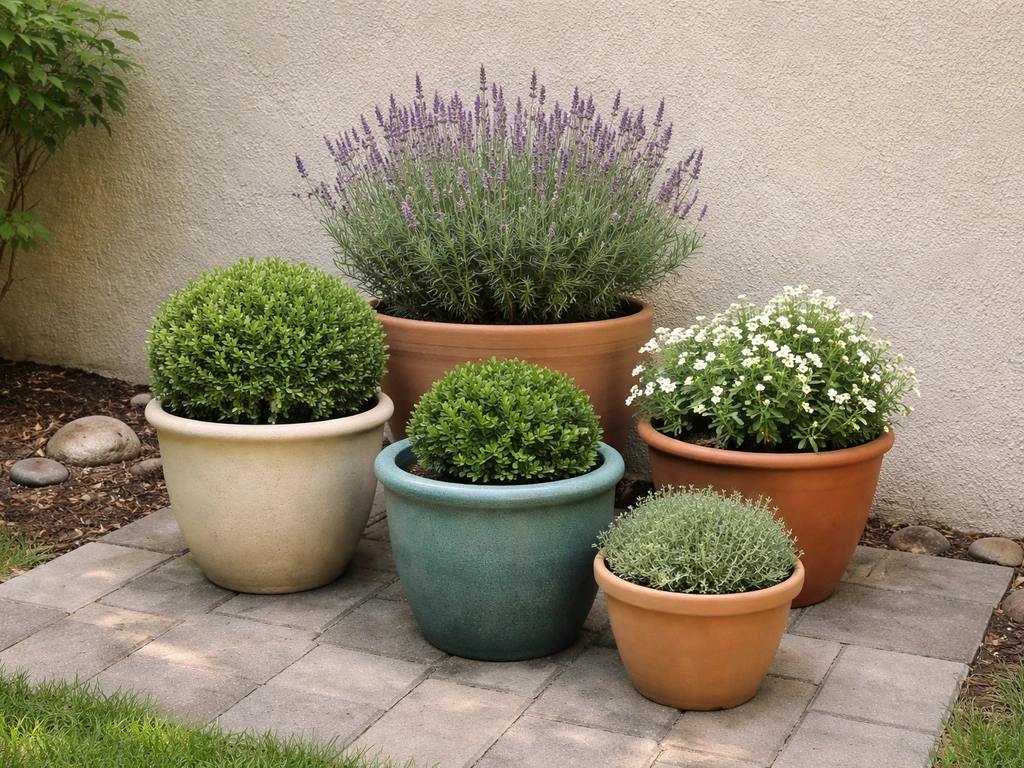
Consistent container materials and colors make a jumbled collection of pots look like a curated garden. Pick one or two materials (terracotta and black powder-coated metal, or concrete and natural wood, for example) and stick to them. Use odd-numbered groupings of three or five containers rather than even pairs, which tend to look stiff. Add a water feature if your budget allows, even a small tabletop fountain: the sound masks street noise and makes the space feel like a destination.
These finishing touches are the same ones that apply whether you're starting a patio garden from scratch or refining an existing setup, and they're worth addressing alongside the structural elements you'll find covered in topics like backyard patio must haves and what every patio needs.
DIY vs hiring help: tools, budgets, and timelines
Most patio garden work is genuinely DIY-friendly, and the savings are real. That said, a few tasks are worth outsourcing if your budget has room for it. If you're planning your own backyard patio must haves, focus first on a comfortable seating setup, practical lighting, and an easy-care planting plan that fits your climate.
What's easy to DIY
- All container planting: no special skills or tools required. Budget $15 to $50 per container including pot, soil, and plants depending on size.
- Installing a drip irrigation system on a hose bib: most homeowners can do this in an afternoon. A basic kit with timer, tubing, and emitters runs $40 to $120.
- Building or assembling raised beds: pre-cut raised bed kits start around $60 to $150. Custom-built cedar beds run $100 to $300+ in materials for a 4x8 foot bed.
- Installing gravel or decomposed granite borders: physical work but no expertise required. A wheelbarrow, landscape fabric, and an afternoon gets it done.
- Adding string lights and solar lighting: no electrical work required.
When to hire a pro
- Paver installation or hardscape work: getting the slope and base right requires experience. A poorly installed paver patio shifts, settles, and drains badly. Budget $15 to $30 per square foot installed.
- Low-voltage wiring and in-ground irrigation with backflow prevention: some municipalities require permits, and a bad install creates ongoing problems.
- Large tree or shrub installation: moving and planting anything in a 15+ gallon nursery container is hard work and easy to do wrong. A landscaper with a crew can do in an hour what takes two people half a day.
- Pergola or shade structure: structural and often requires permits. Worth getting right the first time.
Realistic budget ranges to plan around
| Project scope | DIY cost estimate | Hired-out cost estimate | Timeline |
|---|---|---|---|
| Starter container garden (8 pots) | $150 to $400 | $500 to $900 installed | 1 weekend |
| Raised bed setup (2 beds, drip system) | $300 to $600 | $800 to $1,500 | 1 to 2 weekends |
| Full patio garden makeover (containers + edge beds + lighting) | $800 to $2,000 | $3,000 to $8,000+ | 2 to 4 weekends DIY |
| Hardscape addition (pavers or gravel border) | $200 to $600 DIY | $1,500 to $4,000 installed | 1 to 3 weekends DIY |
If you're working on a tight budget, start with containers and a drip timer this season, then add a raised bed or edge planting in the fall or next spring when you have a clearer sense of what your patio needs. You don't have to build it all at once, and honestly, a patio garden that grows in stages often looks more natural and considered than one assembled in a single weekend shopping trip. The best patio additions tend to compound: each one makes the next one easier to plan and more satisfying to use.
FAQ
Can I start a patio garden on a concrete slab without damaging the patio?
Yes, but only if you design for drainage and root space from day one. If your patio slope causes pooling, fix that first, then choose containers with drainage holes and use a high-quality potting mix, not garden soil. For concrete slabs, keep the heaviest planters toward the driest areas and consider cachepots (decorative outer pot with a removable nursery pot inside) to prevent standing water.
How do I set an irrigation schedule that won’t waste water or kill mixed plants?
Aim for “maximum stress” rather than average weather. In hot climates, a practical starting point is running drip early morning and checking soil moisture with a finger test 1 to 2 inches down in the pot, then adjusting the timer weekly. Group plants by water needs so you do not run a single drip schedule for both succulents and moisture lovers.
What container size upgrades make the biggest difference for beginners?
If you want low maintenance, choose containers that are large enough to resist quick drying, typically at least 12 inches for herbs and annuals and 15 to 20+ gallons for tomatoes and peppers. Also use a mulch layer on top of the potting mix, and keep the same container sizes across a planting group so watering requirements stay consistent.
Are hanging planters a good idea for the “best patio garden ideas” approach?
Not always. Hanging baskets, window boxes, and small troughs often dry out too fast and are hard to keep evenly moist, especially on exposed patios. If you do use them, combine with an easy-wick self-watering insert or plan for more frequent checks, and pair them with hardy, heat-tolerant plants matched to your sun pattern.
How can I grow vegetables successfully on a patio, not just decorative plants?
Yes, and it usually fails when people try to grow vegetables in too little soil or with mismatched irrigation. Keep beds 3 to 4 feet wide for reach, use at least a 15-gallon container for tomatoes, and group veggies by water needs. Add a trellis for vertical growth early in the season so plants are supported before they become top-heavy.
What’s the easiest way to avoid choosing plants that look right at the nursery but fail at home?
Before buying, map your sun changes across the day, especially afternoon shifts from walls and overhead structures. Then, pick plants rated for your actual pattern, not just “full sun” on the label. If you see midday shade and late sun, prioritize sun-tolerant plants in the brighter pocket and use part-shade varieties in the dimmer area.
How do I make a scattered container collection look intentional?
You can, but treat it like a “design rule,” not an afterthought. Pick one container material pairing and reuse it consistently across the patio, then use odd-number groupings (three or five) for visual rhythm. If you want a change, do it with one repeatable accent, like the same color of potting container liners or the same plant type in multiple spots.
What should I do in winter so my patio garden doesn’t look empty or die off?
To keep it manageable, build in a winter plan while you’re designing summer plants. Use evergreen structure plants (ornamental grasses, dwarf conifers, boxwood) so the space does not collapse visually, and plan how you will protect tender containers, typically moving them indoors before first frost.
Why are my container plants drying out so fast even when I irrigate?
Morning watering helps, but the bigger lever is preventing water from pooling. Ensure each container drains, check that runoff does not create slippery or saturated zones, and keep drip lines consistent with plant water needs. If your patio is windy, shield taller or fragile plants by positioning them near a wall and choosing sturdier varieties, since wind can dry pots faster than heat alone.
How do I combine privacy and lighting so the patio looks good at night, not just during the day?
Treat privacy and lighting as separate “layers.” For privacy, use a trellis or fence-line planting so you control height gradually, then add living plants or large potted evergreens for immediate screening. For lighting, uplight a feature container or small tree, and use warmer bulbs (around 2700K to 3000K) to avoid a harsh look on leaves after dark.
What’s a smart staged plan if I cannot build everything in one season?
Start with containers plus a drip timer, then expand only where your layout proves itself. A common approach is to add an edge bed or raised planter after one full season of observation so you know where foot traffic, shade, and watering patterns really land. This staged method usually prevents buying permanent materials for a spot you later wish you had designed differently.
Next Articles
What Every Patio Needs: Essentials, Upgrades, and Checklist
Practical patio checklist with essentials, upgrades, zone ideas, material tips, and DIY vs contractor guidance for lasti
Pool Patio Must Haves Checklist: Safe, Comfortable, Durable
Pool patio must haves checklist for safe, comfortable, durable outdoor living, with DIY tips, budgeting, and material ch
Best Patio Additions: Comfort, Shade, Privacy, and More
Best patio additions ranked by comfort, shade, privacy, cooling, lighting, and weatherproofing with DIY, costs, and trad