The best patio additions depend on what's actually making your space less usable right now. If you want a quick checklist, start with the backyard patio must haves like shade, comfort-focused lighting, and privacy patio additions. Once you know the main bottleneck, you can prioritize the pool patio must haves that will make the whole area usable and comfortable. If you're baking in the sun, a pergola or shade sail is the most impactful first move.
Best Patio Additions: Comfort, Shade, Privacy, and More

Phoebe Foster
11 May 2026
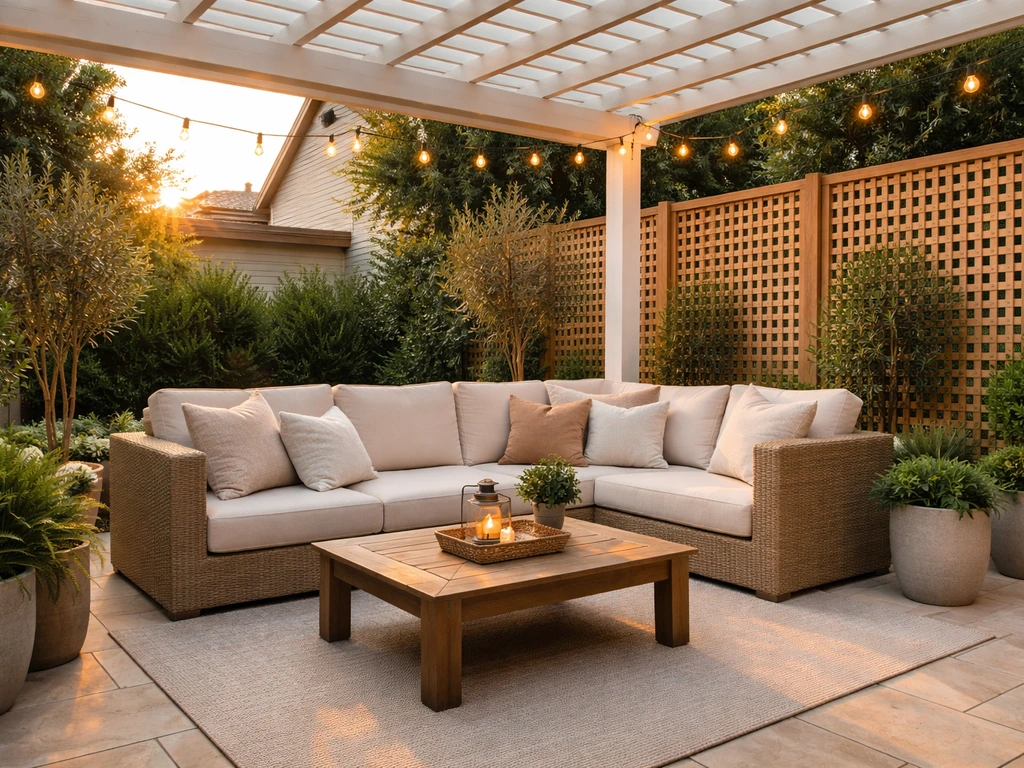
If you're losing the space after dark, a string light setup with a fire feature changes everything. If bugs, neighbors, or wind are the issue, privacy screens and strategic planting solve it faster than a full remodel. This guide walks through the top installable upgrades by priority, what they actually cost, when you need a permit or a pro, and how to sequence everything so you're not redoing work later.
If you want a patio that feels complete fast, focus on what every patio needs first, then move on to the extras top installable upgrades.
Pick your goal first: the best additions by priority
Before you start shopping, lock in your one or two biggest pain points. Every upgrade on this list is genuinely useful, but the sequencing matters. Adding a misting system before you have shade is money wasted. Installing a fire pit before you have adequate lighting makes the space feel unfinished. Here's how to match your goal to the right first addition.
| Your Primary Goal | Best First Addition | Best Supporting Addition |
|---|---|---|
| Beat the heat / stay cool | Pergola with shade cloth or solid patio cover | Misting system or ceiling fan |
| Use the patio at night | String lights + low-voltage path lighting | Fire pit or propane fire table |
| Add warmth for cool evenings | Propane or natural gas patio heater | Fire table or outdoor fireplace |
| Increase privacy | Lattice privacy screen or tall planter boxes | Evergreen hedging or shade sail |
| Improve comfort underfoot | Composite decking overlay or large-format pavers | Outdoor rug over existing concrete |
| Extend into summer humidity / bugs | Screen enclosure or pergola with curtains | Ceiling fan for air movement |
| Add all-weather usability | Insulated aluminum patio cover (solid roof) | Outdoor-rated heater + ceiling fan combo |
If your patio is new or bare, the sequence most designers (and most experienced homeowners) follow is: shade first, then lighting, then heat or cooling, then privacy, then flooring and finishing touches. That order exists because shade structures often anchor where everything else goes. Getting the structure right before you run electrical or lay new pavers saves real money.
Shade structures ranked: covers, pergolas, awnings, shade sails, and umbrellas
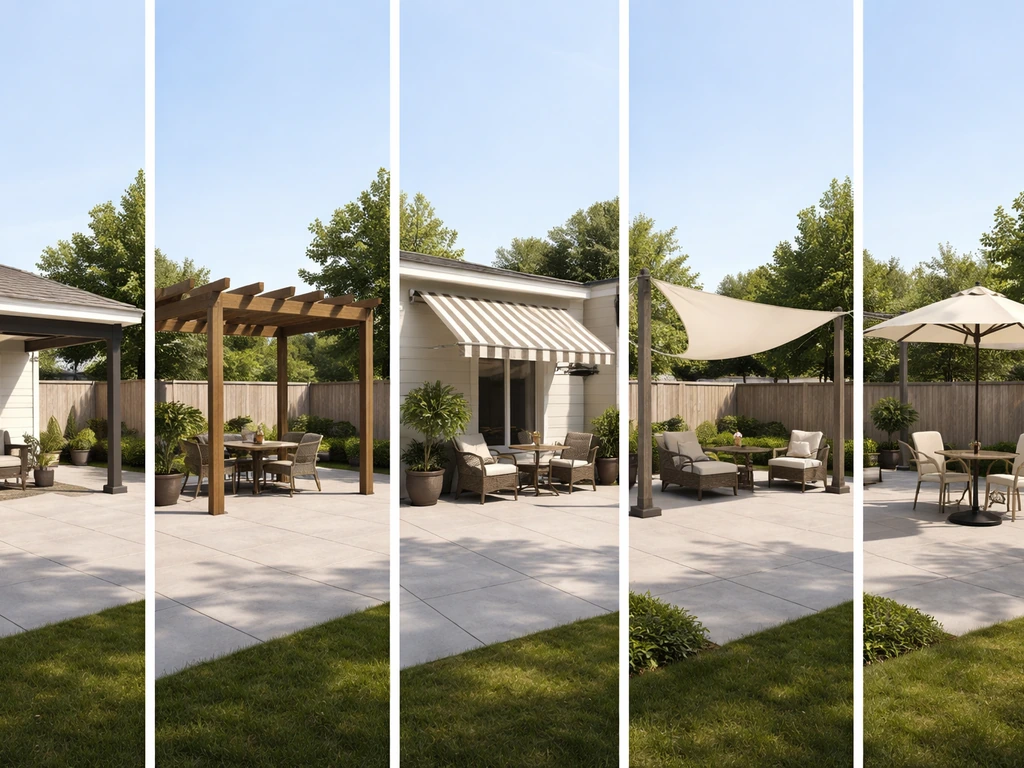
Shade is the single most impactful upgrade you can make to an existing patio. A well-designed shade structure can drop the perceived temperature under it by 10 to 15 degrees on a sunny afternoon. Here's how the main options stack up against each other in real-world use.
Solid patio covers (aluminum or wood)
A solid attached patio cover gives you the most protection and the best base for ceiling fans, lighting, and speakers. Aluminum insulated covers (the kind with foam-core panels) are the gold standard for hot climates like Texas or Arizona because they block radiant heat, not just sunlight. Wood covers look better in traditional settings but require regular painting or staining and are more vulnerable to moisture in humid climates like the Southeast. Expect to pay $3,000 to $12,000 installed for an aluminum cover on a standard 12x20 patio, depending on your region and whether it needs a permit.
Pergolas (freestanding and attached)
Pergolas are the most popular patio addition right now, and for good reason. They define the space visually, allow airflow (which matters a lot in humid climates), and work as a framework for string lights, shade cloth, retractable canopies, or climbing plants. A basic pressure-treated wood pergola can be DIYed for $1,500 to $3,000 in materials. A pre-engineered vinyl or aluminum kit runs $2,500 to $6,000 installed.
Premium cedar or custom-built pergolas go up fast from there. The tradeoff: an open pergola alone doesn't block much direct sun unless you add fabric, a louvered roof, or dense climbing plants. Louvered pergolas with adjustable slats are a premium option (often $8,000 to $20,000 installed) that give you sun control and rain protection in one.
Retractable awnings
A motorized retractable awning attached to the house is one of the most flexible options if you want shade on demand without a permanent structure. Good ones extend 10 to 18 feet and cost $1,500 to $4,500 installed. The downside is wind sensitivity: most awnings retract automatically in high winds (or should, if they have a wind sensor), and they can't support lights or fans the way a solid cover can. They're a strong choice for climates with variable weather where you want the option to open the patio up. They are not a great choice for areas with frequent high winds or heavy rain.
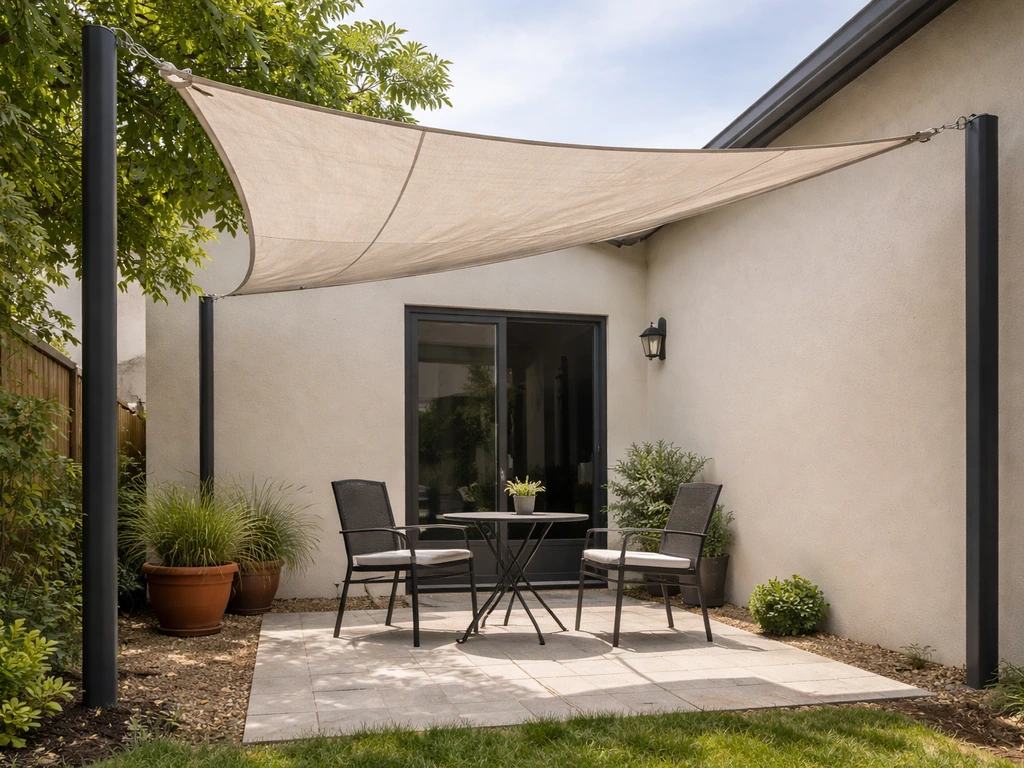
Shade sails
Shade sails are the most affordable permanent-ish shade option, often $200 to $800 for the sail itself plus hardware. They work best when stretched tight between posts or anchor points at slightly different heights so rain runs off. The common DIY mistake is under-tensioning them, which leads to sagging and UV degradation within a season. Properly installed, a quality HDPE shade sail (look for 90%+ UV block ratings) can last 5 to 10 years. They're not ideal for areas with heavy snow loads or consistent high winds. For renters or anyone not ready to commit to a permanent structure, a shade sail is the best starting point.
Patio umbrellas
Umbrellas are the easiest and cheapest entry point, but they cover limited area and need to be brought in during storms. A cantilever umbrella (offset base, no center pole) is the most useful format because it doesn't interfere with seating. Good cantilever umbrellas start around $300 and scale up to $1,200 or more for commercial-grade versions with weighted bases. For a small patio or a spot where you just need shade over a dining table, a large cantilever umbrella is completely legitimate. For a larger space or a hot climate where you're outside daily, it's a starting point, not a long-term solution.
| Option | Approximate Cost | Permanence | Best Climate Fit | DIY Friendly? |
|---|---|---|---|---|
| Solid patio cover (aluminum) | $3,000–$12,000 installed | Permanent | Hot, sunny, rainy | No (usually needs permit + pro) |
| Pergola (kit) | $2,500–$6,000 installed | Permanent | Most climates | Yes (with help) |
| Louvered pergola | $8,000–$20,000 installed | Permanent | All climates | No |
| Retractable awning | $1,500–$4,500 installed | Semi-permanent | Variable weather, mild wind | No (motorized needs electrician) |
| Shade sail | $200–$800 + hardware | Semi-permanent | Hot, dry, light wind | Yes |
| Cantilever umbrella | $300–$1,200 | Portable | Any | Yes |
Keeping cool: fans, misters, and ventilation
In climates where summer temperatures push 90°F or above, shade alone won't keep your patio comfortable. You need active cooling, and the right choice depends heavily on humidity levels in your region.
Outdoor ceiling fans

An outdoor ceiling fan mounted under a covered patio is one of the best investments you can make for under $500 all-in. It moves air without using water, works in any climate, and can double as a light fixture. You need a covered, weatherproof mounting surface (a solid patio cover or the underside of a pergola beam works well). Look for fans rated "wet" or at minimum "damp" for outdoor use. A 52-inch fan is adequate for a 12x12 space; go to 60 inches for larger areas. Installation typically requires a junction box rated for ceiling fan support, so if you're not comfortable with basic electrical, budget $100 to $200 for an electrician.
Misting systems
Misting systems are transformative in dry heat climates (think Arizona, New Mexico, Southern California) where humidity is below 40%. A properly pressurized misting system can drop ambient temperature by 20 to 30 degrees through evaporative cooling. In humid climates like Florida, Georgia, or coastal Texas, misters mostly just make you wet and sticky, so skip them there.
Basic low-pressure misting kits attach to a garden hose and run $30 to $100, but they produce larger droplets that can make furniture damp. Mid-pressure systems ($300 to $700) and high-pressure systems ($1,500 to $3,500 installed with a pump) produce a finer mist that evaporates before it hits surfaces. If you live in the right climate, a mid-pressure system is the sweet spot for most homeowners.
Ventilation and airflow design
If you're planning a fully enclosed or screened patio, airflow design matters more than most people realize. Cross-ventilation (openings on opposing sides) is far more effective than a single screen door. Open pergola designs allow natural convection to pull hot air up and out. In a covered patio, a combination of ceiling fan plus screened or louvered side panels works well. Avoid fully sealing a hot patio with glass panels or solid walls on all sides without a plan for mechanical ventilation or an outdoor-rated mini split system, which runs $1,500 to $4,000 installed.
Fire features, lighting, and making the patio work after dark
Lighting and fire features are what turn a patio from a daytime-only space into somewhere you actually want to be on a weeknight. The goal is layered light: ambient overhead lighting, task lighting for dining or cooking areas, and accent or decorative lighting for atmosphere. A single harsh floodlight does none of those jobs well.
String lights and ambient overhead lighting
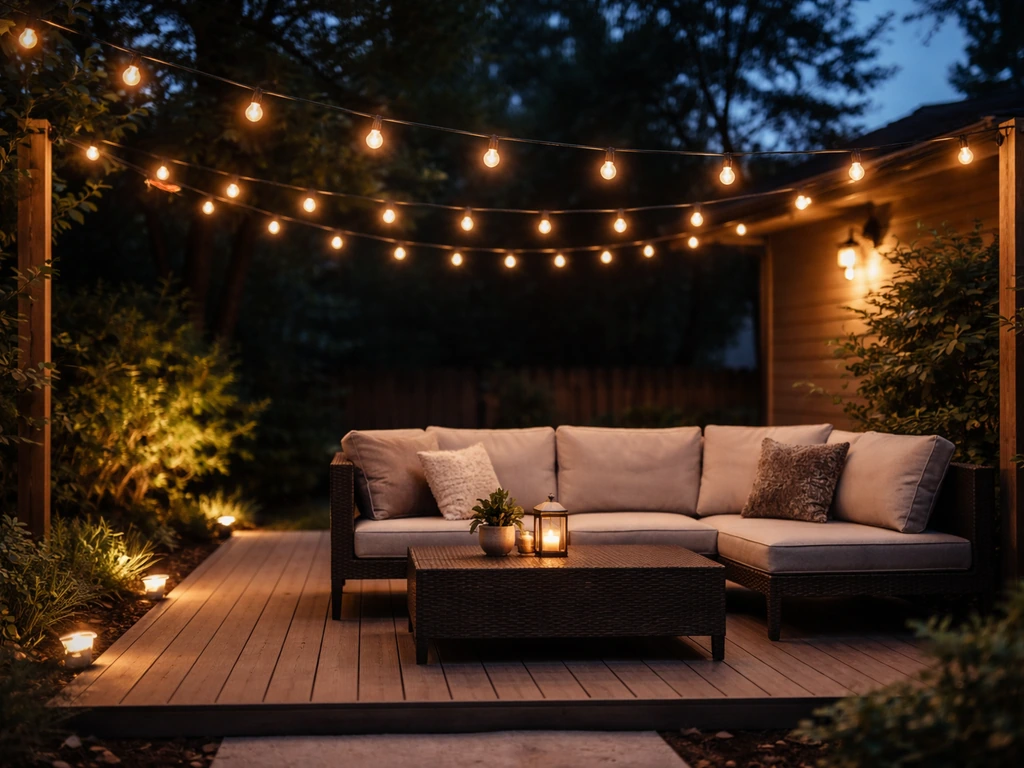
Outdoor string lights are the highest-impact, lowest-cost lighting upgrade available. UL Solutions explains that even when string lights are UL Certified, their use and installation must still follow NEC requirements and other restrictions such as not installing them in clothes closets [Outdoor string lights are the highest-impact, lowest-cost lighting upgrade available. ](https://www. ul.
com/thecodeauthority/news/string-lights-all-year-useul-588-supplement-sd). A 50-foot run of commercial-grade LED string lights (G40 or Edison-style bulbs) costs $40 to $120 and can be hung between a pergola, fence posts, or wall hooks in a few hours. The key is using a dimmable outdoor outlet or smart plug so you can adjust the mood. For a more permanent installation, low-voltage LED downlights recessed into a patio cover ceiling run about $80 to $150 per fixture installed and give you even, glare-free illumination.
Solar string lights have gotten much better in the past few years but still can't match the consistency of wired lights, especially in shaded patios where the panels don't charge fully.
Path lighting, step lighting, and accent lights
Low-voltage path lights and step lights serve a safety function as much as a design one. A 12-volt landscape lighting kit with transformer runs $150 to $400 for a basic setup and can be DIYed by most homeowners in an afternoon. In-ground or surface-mount step lights are especially useful if your patio is elevated or has level changes. These typically require a low-voltage wire run from the transformer but no permit.
Fire pits and fire tables
A fire feature is both a heat source and an anchor for the whole patio layout. Propane fire tables ($400 to $1,500) are the most versatile option: no smoke, easy on/off, and they work as a low table between uses. Wood-burning fire pits ($200 to $800) produce more warmth and that traditional campfire atmosphere, but require cleanup, produce smoke (which matters in neighborhoods or in drought-prone areas with burn bans), and need at least 10 feet of clearance from structures.
Natural gas fire features require a licensed plumber to run a gas line and are the most permanent option. A built-in gas fire table or fireplace can run $3,000 to $10,000 installed but is the cleanest and most convenient long-term choice if you entertain frequently.
Patio heaters for cold nights
For climates that drop into the 40s or 50s on fall and spring evenings (most of the U.S., not just cold climates), a freestanding propane heater ($150 to $400) extends your usable season by weeks. Electric infrared heaters mounted under a patio cover ($200 to $600 per unit) are more permanent and convenient, but they require a dedicated 240V circuit in most cases. In mild climates with occasional cool nights, a propane tower heater is usually all you need. In the Midwest or Northeast where you want to use the patio through October, a pair of mounted electric infrared heaters under a covered patio is the better long-term investment.
Flooring upgrades that hold up in high-traffic areas
Patio flooring is often overlooked until the existing concrete cracks, fades, or becomes a surface you actively avoid walking on barefoot in summer. Flooring upgrades also dramatically change the look and feel of the space, and some options can be layered right over existing concrete with minimal demolition.
Large-format porcelain or concrete pavers
Porcelain pavers (24x24 or larger) laid over existing concrete with a thin-set or pedestal system are one of the best flooring upgrades available right now. They're extremely durable, don't absorb water, resist staining, and stay cooler than dark concrete in full sun. A professional installation runs $15 to $30 per square foot including materials. A DIY pedestal installation (where pavers sit on adjustable risers without adhesive) is possible but requires a level substrate and some patience. Porcelain pavers are also the best choice if you want a modern, seamless look that ties an indoor tile floor to an outdoor space.
Composite decking overlays
Composite deck boards installed over a concrete slab (using sleeper framing or a direct-lay system) give you the warmth and texture of wood without the maintenance. This works well for homeowners who want a softer, more inviting look than bare concrete. Composite decking runs $3 to $8 per square foot for materials, plus $5 to $10 per square foot for installation with a sleeper frame. The main consideration: composite over concrete raises the floor height by 2 to 4 inches, which can affect door clearances and drainage flow. Check those measurements before committing.
Concrete resurfacing and coatings
If your existing concrete is structurally sound but looks rough or faded, a concrete resurfacing overlay or an epoxy/polyurea coating is the most budget-friendly option. Epoxy coatings start around $3 to $7 per square foot professionally applied. Stamped or textured concrete overlays can mimic stone or tile for $6 to $15 per square foot. These options are most cost-effective when the existing slab is in decent shape. If there's significant cracking or settling, it's better to address the underlying issue before adding a coating.
Outdoor rugs as a starting point
If budget or permanence is a concern, a quality outdoor rug ($100 to $400 for a 9x12) can define a seating area and soften the look of plain concrete immediately. Choose polypropylene or recycled PET materials that dry quickly and resist mold. Rugs aren't a long-term flooring solution, but they're a legitimate way to test a layout before committing to a more permanent surface treatment.
Privacy screens, living walls, and landscaping add-ons

Privacy is one of the most common reasons a patio doesn't get used as much as it should. If you feel visible to neighbors or a road, you simply won't relax out there. The good news is that privacy upgrades range from a same-day install to a seasonal landscaping project.
Privacy screens and panels
Pre-built cedar, composite, or metal privacy panels (typically 4x8 feet) can be installed between posts to block sightlines quickly. A basic 20-foot privacy screen using cedar panels and two 4x4 posts costs $300 to $700 in materials and can be DIYed in a weekend. Powder-coated metal panels with geometric or lattice patterns are a more contemporary option and extremely durable. Fabric privacy screens designed to attach to a pergola or fence are a lower-cost option ($50 to $200) but degrade faster in UV exposure and need replacement every few years.
Tall planters and green walls
A row of tall planters (24 to 36 inches) with bamboo, ornamental grasses, or tall shrubs can create a natural privacy buffer without a fence. This works especially well along a property line where a fence might require a permit or neighbor cooperation. Large fiberglass planters with fast-growing columnar plants (Italian cypress, bamboo in contained root barriers, or arborvitae) can reach 6 to 8 feet within two to three seasons. Expect to spend $200 to $600 for a planter-and-plant setup per section, with the advantage that it's portable and doesn't require any permits.
Hedging and landscaping buffers
In-ground evergreen hedging (boxwood, holly, arborvitae, or photinia depending on your region) is the most permanent and natural-looking privacy solution. It takes 3 to 5 years to fill in fully but creates a living barrier that also absorbs noise and provides wildlife habitat. If your patio backs up to a fence or property line where you have planting space, this is worth planning now even if the payoff is a few years away. It's also worth noting that landscaping around a patio is a topic with a lot of creative overlap with garden additions, particularly if you're thinking beyond just privacy to the full visual experience of your outdoor space.
Permits, electrical, plumbing, and safety: what you need to know
This is the section most homeowners skip and later regret. Permit and electrical requirements are not just bureaucratic hurdles: they protect you at resale, prevent insurance complications, and keep your family safe. Here's a realistic breakdown.
What typically requires a permit
- Attached patio covers or pergolas (most municipalities, especially if they're attached to the house structure)
- Freestanding structures above a certain size (often 200 square feet, though this varies by jurisdiction)
- Any new electrical circuit, including circuits for ceiling fans, heaters, or outdoor lighting panels
- Gas line extensions for fire features or outdoor kitchens
- Plumbing extensions for outdoor sinks or misters connected to the home's plumbing
- Decks and elevated structures above 30 inches off grade in most states
Permit rules vary significantly by city and county. Always check with your local building department before starting work on an attached structure. The permit process for a simple covered patio typically takes 1 to 3 weeks, and the inspection is usually straightforward if a licensed contractor did the work. Skipping a permit can create problems when you sell the house: appraisers and buyers' agents are trained to spot unpermitted structures.
Electrical requirements
Any outdoor outlet, lighting circuit, or appliance circuit must use GFCI (ground fault circuit interrupter) protection, which is code in the U. The U. S.
Consumer Product Safety Commission also warns that seasonal or holiday decorative lighting products that lack certain readily observable safety characteristics, such as minimum wire size, sufficient strain relief, and overcurrent protection, can present a risk of electrical shock or fire and are a substantial product hazard seasonal or holiday decorative lighting products can be a substantial electrical shock or fire hazard if they lack observable safety characteristics. S.
for all outdoor electrical. If you're adding a dedicated circuit for a heater, fan, or refrigerator, that requires a licensed electrician in most areas. Low-voltage landscape lighting (12V systems) typically doesn't require a permit or electrician and is genuinely DIY-friendly. Line-voltage lighting (120V) does.
When in doubt, hire a licensed electrician for anything involving the main panel or new circuits.
Gas line and plumbing basics
Running a natural gas line to a fire feature or outdoor grill requires a licensed plumber or gas fitter in all U.S. states, period. This is not a DIY project. The cost to run a gas line from the meter to a patio is typically $300 to $800 for a short run but can go higher depending on distance and local labor rates. Propane fire features avoid this by using a tank, but you'll need to factor in propane delivery and storage. Outdoor misting systems connected directly to home water lines typically don't need a plumbing permit but should include a backflow preventer to protect the drinking water supply.
Fire feature safety clearances
The National Fire Protection Association recommends keeping open fire features at least 10 feet from any structure, including your home, pergola, or fence. Check local ordinances because some municipalities prohibit wood-burning fires within city limits entirely. Always keep a fire extinguisher accessible when using any fire feature.
Budgeting, DIY vs. hiring, and finding the right contractor
Most homeowners underestimate what a well-done patio upgrade costs and overestimate how much they can DIY without prior experience. Here's a realistic starting point for budgeting and decision-making.
Budget ranges by project type
| Addition | DIY Material Cost | Professionally Installed |
|---|---|---|
| Shade sail (single) | $200–$400 | $400–$900 with posts |
| Pergola kit (aluminum or vinyl) | $1,500–$3,000 | $2,500–$6,000 |
| Solid aluminum patio cover | Not recommended DIY | $3,000–$12,000 |
| Retractable motorized awning | Not recommended DIY | $1,500–$4,500 |
| Outdoor ceiling fan (with outlet existing) | $100–$300 | $300–$600 with install |
| Mid-pressure misting system | $300–$500 | $500–$900 |
| Propane fire table | $400–$1,200 | $400–$1,200 (plug-and-use) |
| Natural gas fire feature | N/A (needs plumber) | $2,000–$6,000 |
| String lights (50-foot run) | $40–$120 | $150–$300 with mounting |
| Low-voltage path lighting (kit) | $150–$400 | $400–$800 |
| Porcelain pavers over concrete | $1,500–$3,000 (materials) | $4,000–$8,000 installed |
| Cedar privacy screen (20 ft) | $300–$700 | $800–$1,500 |
What's genuinely DIY-able
String lights, outdoor rugs, propane fire tables, shade sails (if you have existing attachment points), low-voltage landscape lighting, freestanding umbrellas, and prefab pergola kits are all realistic DIY projects for someone comfortable with basic tools. Concrete resurfacing and ceiling fan swaps (if an outdoor outlet already exists) are also manageable with some patience and online tutorials. The rest, particularly anything involving new electrical circuits, gas lines, structural attachments to the house, or large poured footings, is better left to licensed professionals.
How to find and compare contractors
For patio covers, pergolas, and outdoor living structures, look specifically for contractors who specialize in outdoor living or patio construction rather than general contractors who treat it as an add-on. Ask for a portfolio of completed projects in your local climate, check that they pull permits as standard practice (walk away from anyone who suggests skipping the permit to save money), and get at least three quotes. Lead times for popular patio cover companies can run 8 to 16 weeks in peak season (spring and early summer), so plan accordingly. For electrical and gas work, use licensed tradespeople and verify their license status with your state licensing board before hiring.
A practical planning sequence
- Measure your existing patio dimensions and note any structural features (existing outlets, gas lines, roof overhangs, drainage slope).
- Identify your top one or two priorities from the goal table at the top of this article.
- Check your local permit requirements for structures and electrical work before getting quotes.
- Get contractor quotes in spring for summer projects (or fall for the following spring) to avoid the longest wait times.
- Sequence your additions so structural work (shade covers, pergolas) comes first, followed by electrical, then lighting, fans, and fire features, then flooring and finishing touches.
- Budget 15 to 20% above your initial estimate for permitting fees, material delivery, and unexpected site conditions.
The most common regret from homeowners who've done multiple patio upgrades is not thinking ahead far enough. If you're adding a pergola now but might want a ceiling fan in two years, run the electrical conduit now while the structure is being built. If you're pouring a new patio slab, stub out a gas line while the concrete is open. Small planning steps like these save hundreds or thousands in rework costs later, and they're exactly the kind of thing a good outdoor living contractor will flag for you if you ask the right questions upfront.
FAQ
How do I figure out how much shade coverage I really need for the best patio additions?
Measure the shade you actually need in usable zones (dining, seating, grill), not just the overall patio footprint. A structure that blocks sun for one time of day may still leave you exposed during peak afternoon, so angle check both summer and shoulder-season sun when possible (or pick a fixed direction and plan for worst-case).
What measurements should I verify before buying patio flooring upgrades or installing a patio cover?
Plan for drainage and door clearance before selecting flooring or shade hardware. Many patio cover upgrades and paver systems shift heights by a few inches, which can interfere with exterior door thresholds and alter slope, so confirm the final surface height and keep water moving away from the house.
When is the right time to run wiring and plan for lighting with pergolas or patio covers?
If you want lights and a fan under a new shade structure, rough-in electrical should happen when the cover or pergola is being built. Running wiring later often requires cutting into finished surfaces, and it also delays fixture placement, which can leave gaps in the intended lighting layers.
How should I design outdoor lighting controls so the patio feels usable at night?
Use a dedicated power plan for each functional area, instead of one outlet or one switch. For example, keep task lighting (dining, cooking) separate from ambiance (string lights, accent) so you can dim or switch zones without affecting safety lighting like path lights.
Can I install an outdoor ceiling fan even if I do not already have an outdoor ceiling outlet?
Outdoor ceiling fans usually require a properly rated junction box and a weatherproof mounting underside. If you do not have an existing outdoor-rated power source at the location you want the fan, factor in new wiring runs and confirm the fan is marked “wet” or at least “damp.”
How do I know whether a misting system will actually work in my climate without making the patio wet?
Choose misting based on humidity tolerance and droplet behavior. If you often have overcast days or humidity stays high, avoid misting and prioritize shade plus airflow. If you do mist, mid-pressure systems generally reduce wetting compared with low-pressure kits, but you still should protect electronics and furniture fabrics.
What is a privacy strategy that does not make my patio feel hot or closed in?
Skip “blanket privacy” that blocks airflow. Combine a partial-height screen or panels with strategic planting, and keep major circulation paths open. Fully sealing a patio can trap heat and reduce comfort, especially if you are also adding a cover.
Should I choose an open pergola or a louvered pergola if my main goal is midday sun reduction?
For pergolas, the first decision is whether you want sun control built in or added later. An open pergola plus string lights looks great, but you will still need shade cloth or louvers if you want consistent midday coverage, especially for families that spend time outdoors daily.
When is a cantilever umbrella a smart patio addition versus a short-term fix?
Cantilever umbrellas work best as a “dining zone” solution, not a whole-patio system. If you want the entire seating group comfortable, the umbrella size and wind exposure matter a lot, so verify the umbrella throws enough coverage and you have storage or a storm plan.
What should I consider beyond heat reduction when choosing an aluminum insulated patio cover?
Insulated aluminum covers help most with radiant heat, but they also create a different acoustic and airflow profile. If you plan to add speakers or ceiling fans, confirm the cover design can support mounting loads and that the underside surface is suitable for your intended fixtures.
How do I place path and step lighting so it improves safety without looking harsh?
For patios with steps, uneven slabs, or elevated areas, plan the path lighting route first, then match fixture types to the elevation changes. Step lights reduce tripping risk, but you still need adequate brightness and correct spacing, and you should avoid glare by angling or using diffusers where possible.
How can I improve privacy and wind comfort together without overbuilding?
If you want to reduce neighbor visibility and also handle wind, aim for “layered” screening. For instance, use a partial screen plus plants, and place the most solid material so it blocks the sightline but does not act like a sail that accelerates wind across open seating.
Do patio additions always require permits, and what common projects are most likely to trigger them?
Check for permit triggers early if the upgrade is attached to the home, changes roof or structural elements, or adds new electrical or gas service. Even when something seems small, attached covers, roof-mounted shade, and any new outdoor circuits can require permits depending on your city and county.
What is the safest way to plan a gas fire feature if I am also adding shade or furniture nearby?
If you are adding a gas fire table or outdoor grill that connects to the existing gas system, plan on licensed gas work. Also consider local clearances to structures and any burn restrictions, and make sure you have a practical extinguisher location before final layout.
What should I do first to avoid redoing work when I plan multiple patio additions over time?
A common mistake is committing to a floor upgrade before the sub-work is done (electrical, drainage changes, conduit). If you foresee adding ceiling fans, misters, or additional lighting later, rough-in or stub key utilities first so you avoid tearing up finished pavers or decking.
Next Articles

Do It Yourself Outdoor Patio Ideas: Build, Upgrade, Maintain
DIY outdoor patio ideas for planning, building, upgrading, and maintaining floors, shade, privacy, lighting, and decor.
Quick Fix Patio Ideas for Instant Comfort and Style
Quick fix patio ideas for fast comfort and style: cleanups, repairs, shade, flooring tweaks, and safe upgrades on any bu
Cheap Do It Yourself Patio Ideas: Budget Build Guide
Budget DIY patio ideas with step-by-step flooring, prep tips, cost ranges, upgrades, and safety mistakes to avoid.