
For most of the continental United States, late spring (April through early June) and early fall (September through October) are the best times to install a patio. Temperatures are mild enough for proper curing and compaction, rain is manageable in most regions, and contractors are still bookable before the summer backlog peaks. That said, the actual best window for your project depends heavily on where you live, what material you are using, and how far ahead you plan. A concrete patio in Minnesota follows completely different timing rules than a gravel patio in Phoenix.
Best Time of Year to Install Patio: Month-by-Month Guide

Phoebe Foster
15 Jul 2026
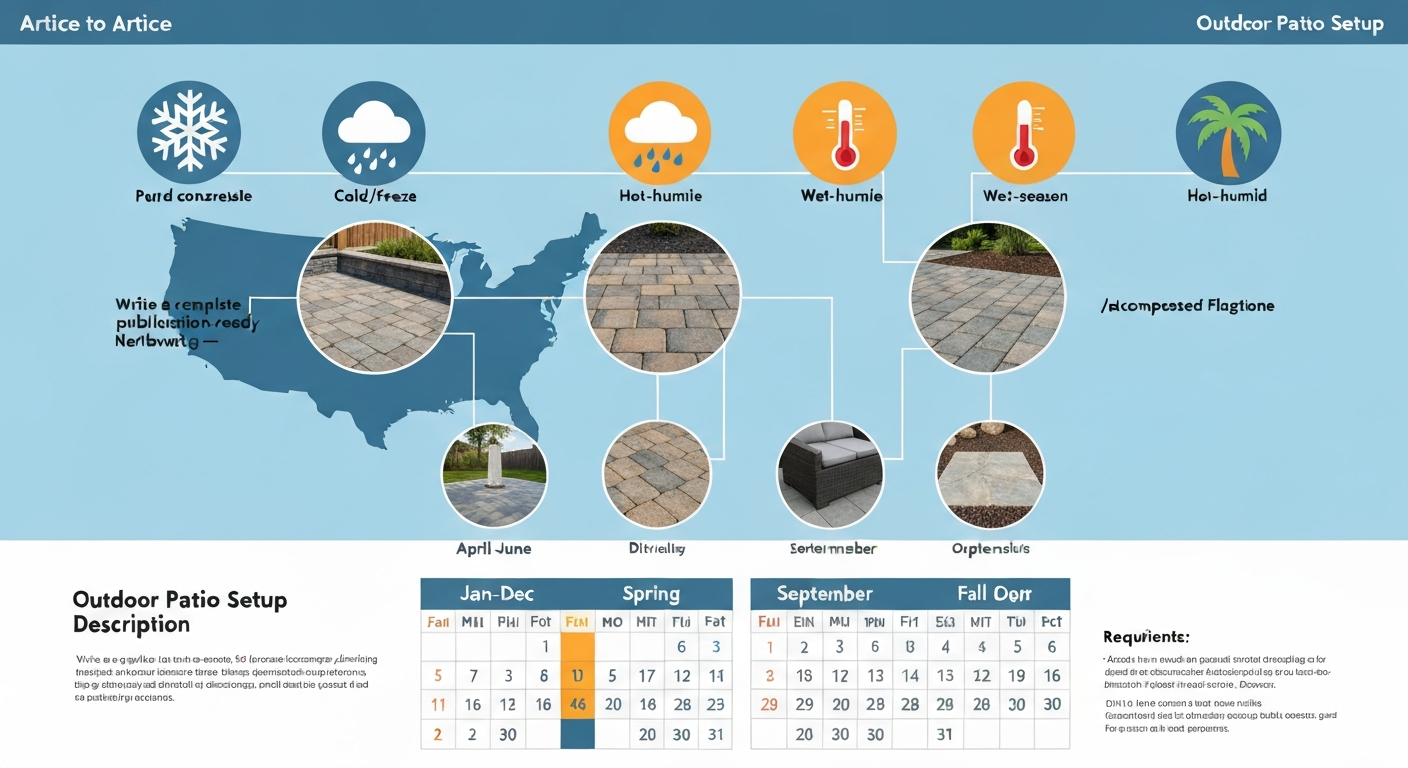
Best months to install a patio, broken down by climate zone
There is no single universal answer, but the table below gives you a practical starting point based on climate zone. These ranges reflect conditions that support proper base compaction, material curing, and dry working days, the three things that most directly affect how well your patio holds up over time.
| Climate Zone | Best Install Window | Avoid These Months | Primary Reason |
|---|---|---|---|
| Cold/freeze (Midwest, Northeast, Mountain West) | Late April – May and September – October | November – March | Frozen ground, frost heave risk, concrete cannot cure below 40°F |
| Hot and humid (Southeast, Gulf Coast) | March – May and October – November | June – August | Extreme heat degrades concrete, peak hurricane/rain season |
| Wet-season/Pacific Northwest | June – September | October – March | Persistent rain prevents proper base compaction and drainage setup |
| Arid/desert (Southwest, Intermountain West) | October – April | June – August | Extreme heat (95°F+) causes rapid moisture loss in fresh concrete and mortar |
| Temperate/mild (coastal California, Pacific NW dry side) | March – June and September – November | July – August (heat peaks) | Mild year-round but fire season dust/wind and summer heat still affect installs |
These windows are starting points, not guarantees. You still need to check NOAA's monthly precipitation normals for your specific county, confirm your local frost depth from your municipality's building department, and add permit lead time to your schedule. More on each of those below.
Why timing matters more than most people expect
I have watched homeowners install beautiful-looking patios in the wrong season and spend the next two summers watching them crack, settle, or shift. The timing of a patio install is not just about convenience, it directly affects the structural integrity of the finished surface. There are four specific factors that explain why.
Temperature and curing
Concrete and mortar-set materials need to cure at specific temperature ranges to reach their design strength. The American Concrete Institute's ACI 306R standard defines cold-weather concreting as any period when average daily air temperatures are expected to drop below 40°F (about 4°C) during the curing window. Pour concrete in those conditions without active heating, blankets, or admixtures and it risks freezing before it gains meaningful strength. On the other end, ACI 305R hot-weather guidance flags concrete temperatures above roughly 95°F (35°C) at discharge as a problem, that kind of heat drives rapid moisture evaporation, which causes plastic shrinkage cracking and permanently reduces durability. The sweet spot for most concrete work is 50°F to 85°F, which largely maps to the spring and fall windows mentioned above.
Moisture and base compaction
The base is the part of your patio you never see, but it is the part that determines whether the whole thing stays flat in five years. The Interlocking Concrete Pavement Institute (ICPI) is explicit: do not install bedding sand or pavers on frozen, saturated, or waterlogged base material. ICPI also references ASTM compaction tests (D698 and D1557) and requires the base to be dry and fully compacted before any surface material goes down. When contractors try to shortcut this in wet or frozen conditions, the base compacts unevenly after the fact, and pavers, flagstone, or tile shift. That is the number one cause of rework I have seen.
Frost depth and heave risk
In cold climates, this is the factor most DIYers underestimate. The International Residential Code (IRC Chapter 4) requires footings and structural elements to extend below the local frost line or use approved frost-protected shallow foundation methods. Frost penetration and freeze-thaw cycles create frost heave, which can lift patio edges, crack slabs, and pop pavers out of alignment. FHWA research on long-term pavement performance confirms that frost-susceptible soils are a primary driver of surface failure over time. FHWA's Long-Term Pavement Performance (LTPP), Frost Penetration (FHWA) documents that frost penetration and freeze–thaw cycles drive pavement/base design decisions (deeper/select base, capillary barriers, insulation) and that mitigations can add excavation, materials, and cost if not planned before the ground is frozen or waterlogged Long-Term Pavement Performance (LTPP) — Frost Penetration (FHWA). If you are in a climate where the ground freezes, get your local frost depth from your building department before you dig.
Contractor availability and permit lead times
Spring and summer are peak season for hardscape contractors in most regions. If you plan a late spring install and start calling contractors in April, you will likely be looking at July or August start dates in busy markets. Permits add another variable. Municipal plan review cycles typically run two to eight weeks even in normal periods, and some jurisdictions push longer during peak building season. The City of Oakland, as one example, publishes average permit processing targets that reflect these backlogs. If you want a late-May install, you should be pulling permits in March and locking in a contractor in February or early March at the latest.
Cold and freeze zones: what you are really working around
If you live in the Midwest, Northeast, or higher elevations of the Mountain West, your primary scheduling constraints are frost depth and the soil thaw calendar. The ground needs to be fully thawed and dried before any excavation and base work begins. In practice, that means late April in many areas, or even mid-May in northern Minnesota, Wisconsin, or the Northern Plains where frost depths regularly reach 42 to 60 inches. Trying to rush a late-March or early-April install when only the top few inches have thawed creates a problematic situation: the surface looks workable, but saturated soil just below means compaction numbers will be off.
Fall installations in cold zones are workable but have a firm deadline. You need enough time for concrete to cure to at least 70% of design strength before the first hard freeze. FHWA curing guidance recommends a minimum of seven days for normal portland cement mixes, and that is assuming temperatures stay above 50°F throughout. Plan your pour date so you have a confident 10- to 14-day buffer before the average first freeze date for your area. NOAA's U.S. Climate Normals (1991-2020) include station-level freeze date data that can help you calibrate this. For paver installations in fall, the same base-compaction timing applies, if the forecast shows rain followed by dropping temperatures, push the install date. Wet sand that freezes before the pavers are set and joint sand is locked in will shift come spring.
One thing worth knowing: contractors can technically pour concrete in cold weather using accelerating admixtures (ASTM C494 Type C), insulating blankets, and heating equipment. This is standard practice for commercial projects. For a residential patio, it adds meaningful cost and complexity and I would generally recommend against it unless you have a compelling reason to install in November or December. It is usually more cost-effective to wait.
Hot and humid climates: the heat and rain double problem
In the Southeast, Gulf Coast, and similar humid subtropical zones, you are managing two separate risks: peak summer heat and a rainy season that overlaps with the warmest months. In coastal Texas, Florida, Louisiana, and the Carolinas, June through August combines daily high temperatures that regularly push concrete discharge temps above the 95°F threshold ACI 305R flags as problematic, with afternoon thunderstorms that can dump an inch of rain in 20 minutes. Neither is what you want when you are trying to finish a fresh concrete pour or screed a paver base.
The practical windows in these regions are March through early May and October through November. March and April in the Southeast are genuinely good months, temperatures are mild, rainfall is more predictable, and hurricane season is months away. October and November offer similar conditions with the added bonus that contractor demand starts to drop after the summer rush. If you are reading this from Houston or Atlanta and want a patio done right, start planning in January, get your permit in February, and target a March or April installation date.
If you are forced into a summer installation in a hot and humid climate, say, you are working with a contractor who only has summer availability, ask specifically about their hot-weather concrete protocol. ACI 305R recommendations include cooling mixing water or aggregate, using retarding admixtures to slow set time, fogging the subgrade and forms before placement, and using white-pigmented curing compound. A contractor who has no answer to that question is one I would be cautious about.
Wet-season regions: find the dry window and protect it
The Pacific Northwest is the most obvious example in the U.S., but the wet-season scheduling challenge applies anywhere with a concentrated rainy period. NOAA's monthly precipitation normals show that Portland, Oregon averages around 5 to 6 inches of rain in November and December but less than 1 inch in July. That difference is enormous for patio scheduling. June through September is the reliable working window in the Pacific Northwest, and even within that window, you want to watch the 10-day forecast closely before starting any excavation or base work.
Outside the U.S., the principle is the same but the months shift. Northern Australia's monsoonal wet season runs roughly October through April, delivering the bulk of annual rainfall during that period. The dry season from May through September is when exterior hardscape installation makes sense, and the Bureau of Meteorology's regional climate data confirms the severity of the wet-season risk, waterlogged subgrades and saturated base materials are not recoverable with admixtures or scheduling tricks. Similarly, in monsoon-affected regions of South Asia, blank" rel="noopener noreferrer">the southwest monsoon delivers roughly 75 to 80% of annual rainfall from June through September, making that entire window unsuitable for base preparation and paving work.
One practical note on drainage: if you are in a wet-season climate, drainage design is not optional. Positive slope away from the structure (typically a minimum of 1/8 inch per foot), a properly graded aggregate base, and clear edge drainage paths are the difference between a patio that handles heavy rain and one that becomes a pond. Get the drainage right during installation, retrofitting it afterward is expensive and usually requires tearing up the surface.
Arid and desert climates: cooler months are your friend, but watch the details
Phoenix, Las Vegas, Tucson, and the surrounding desert Southwest are some of the trickiest environments for patio installation, but not for the reasons most people assume. The real problem is not summer temperatures by themselves, it is the combination of extreme heat, low humidity, and rapid moisture evaporation that makes concrete and mortar work genuinely risky from June through August. Surface temperatures on dark or exposed concrete can exceed 150°F in direct Arizona summer sun, and fresh concrete can lose bleed water faster than it is replaced, causing plastic shrinkage cracks that form within hours of placement.
The ideal installation window in arid climates is October through April. Desert winters are mild enough that cold-weather concrete concerns rarely apply at lower elevations, Phoenix averages daily lows well above freezing from October through March. You get workable temperatures, more moisture retention in the air, and usually cooperative conditions for base compaction. The one caveat in the desert is dust and loose soil conditions. Compaction testing matters more here because sandy or silty desert soils can look firm but compact poorly without proper moisture conditioning. If you are doing a DIY install in the Southwest, add water to your compacted aggregate base in measured stages rather than all at once, and check compaction with a plate compactor before any surface material goes down.
Also worth noting: some desert areas, particularly in New Mexico, Colorado, and higher-elevation Arizona, do see meaningful freeze-thaw cycles in winter. Do not assume desert means frost-free, check your local frost depth before scheduling a November or December install in areas above about 4,000 feet elevation.
How your material choice changes the timing equation
Timing is not just about climate, it is also about what you are installing. Different patio materials have meaningfully different temperature tolerances, curing needs, and sensitivity to moisture. This is where a lot of homeowners get tripped up, especially when they are comparing materials from a cost or longevity standpoint without factoring in the scheduling implications.
Concrete slabs
Poured concrete is the most temperature-sensitive of the common patio materials. The ACI cold-weather (306R) and hot-weather (305R) guidelines both apply, and the standard minimum curing period of seven days for normal mixes means you need a reliable weather window of at least 10 to 14 days post-pour. Concrete is also the material where admixtures give you the most flexibility to extend your season slightly, accelerators in fall, retarders and water reducers in heat, but those options add cost and require a contractor who knows how to use them properly.
Concrete and natural stone pavers
Pavers are less temperature-sensitive than poured concrete once they are in place, but the installation process is highly moisture-sensitive at the base level. ICPI's prohibition on installing on frozen or saturated base materials is the binding constraint. That means your scheduling window for pavers is largely determined by base conditions, not by paver material itself. The tolerance for bedding sand is tight, ICPI specifies a screeded surface tolerance of plus or minus 3/8 inch over 10 feet, and you cannot hit those tolerances on a wet or unstable base. Natural stone pavers (flagstone, bluestone, slate) carry the same constraints, with the Natural Stone Institute also recommending against setting stone on frozen or saturated bases.
Gravel and decomposed granite
Loose aggregate patios are the most forgiving of the common options from a timing perspective. There is no curing window and no mortar or concrete to manage. The primary constraint is base compaction, which still requires dry, workable soil. In most climates, gravel patios can be installed in a wider seasonal window than other materials. They are also one of the most budget-friendly starting points, though they do require periodic re-leveling and top-off over time. For a focused comparison of upfront and long-term costs, see our guide on what is the most cost-effective patio.
Wood and composite decking
If your patio design includes a wood or composite deck component, manufacturer installation guidance adds a temperature-based gapping requirement. Composite deck boards from manufacturers like Trex and TimberTech publish installation spacing tables tied to the board temperature at the time of installation. Boards installed in cold weather will expand in summer, and boards installed in peak heat may shrink slightly in cooler months. Installing at temperatures significantly outside the moderate range (roughly 50°F to 90°F) without adjusting gap spacing per the manufacturer's table risks buckling or excessive joint gaps later. This is one of the most commonly missed details in DIY deck installs.
| Material | Ideal Temp Range | Key Timing Constraint | Cold-Weather Risk | Hot-Weather Risk |
|---|---|---|---|---|
| Poured concrete | 50°F – 85°F | 7-day post-pour cure window | Freezes before gaining strength | Plastic shrinkage cracking, reduced durability |
| Concrete/stone pavers | 40°F – 90°F (base must be dry) | Dry, compacted base required | Frozen base = settlement/shift | Bedding sand can dry out unevenly |
| Natural flagstone (dry-set) | 40°F – 90°F | Dry, well-compacted granular subbase | Same as pavers | Rapid dry-out of setting material |
| Natural flagstone (mortar-set) | 50°F – 85°F | Mortar cure period (3–7 days) | Mortar can crack if it freezes while curing | Rapid mortar drying, cracking |
| Gravel / decomposed granite | Any above freezing | Dry, workable subgrade | Low risk if base is dry | Low risk |
| Wood decking | 40°F – 90°F | Dry, stable framing | Wood movement, fastener issues in freeze | Checking/splitting in extreme heat |
| Composite decking | 50°F – 90°F (per mfr. gap tables) | Gap spacing tied to install temp | Boards may expand excessively in summer | Boards may shrink/gap in cooler months |
Site prep, permits, and the phases most people forget to schedule
One of the most common planning mistakes I see is treating the install date as the start of the project timeline. In reality, the install date is somewhere in the middle. The actual sequence looks like this, and each phase has its own lead time.
- Design and material selection (2–6 weeks): deciding on material, size, layout, and any drainage or electrical needs before anything else
- Contractor quotes and selection (2–4 weeks for a fair comparison): getting at minimum three quotes, checking references, and signing a contract
- Permit application and plan review (2–8+ weeks depending on jurisdiction and season): apply as early as possible, especially in spring when municipal offices are backed up
- Material procurement (1–4 weeks): some pavers, natural stone, and specialty materials have lead times, particularly if ordered from a specific quarry or supplier
- Site preparation: excavation, soil testing, base installation, compaction (1–3 days for most residential patios, longer if drainage work is needed)
- Installation (1–5 days depending on size and material)
- Curing and settling period (3–14 days for concrete and mortar, 24–48 hours for pavers before sealing or heavy use)
Add those up and you are looking at a realistic lead time of six to twelve weeks from decision to completed install for a professionally contracted patio. If you want to be sitting on your new patio by Memorial Day, you should be starting the design and contractor search process in early to mid-March at the latest. For a fall install targeting a September completion, start in June or July.
On permits: not all patios require one, but many do, particularly if the patio is attached to the house, exceeds a certain square footage, includes electrical, or involves drainage modifications. Check with your local building department before assuming a permit is not needed. Getting caught installing without a required permit can mean mandatory removal and reinstallation, which is a much more expensive lesson than the permit fee.
DIY vs. hiring a pro: timing affects this decision too
If you are going the DIY route, timing matters even more than it does when you are hiring a contractor, because you do not have the crew size, equipment, or concrete admixture experience to compensate for bad conditions. A three-person professional crew can pour and finish a 400-square-foot concrete patio in a single day, giving them less exposure to weather changes. A solo DIYer working in sections can stretch that same project over a weekend, which creates more exposure to temperature swings and rain events.
For DIY paver and flagstone installs, the most important tool investment after base compaction equipment is a quality laser level. Getting accurate, consistent elevation across a patio surface is genuinely difficult with a string line over any significant distance, and an unlevel surface is both a trip hazard and a drainage problem. A self-leveling rotary or line laser level removes most of the guesswork from establishing grade and pitch. If you are going this route, it is worth reading up on which laser level options work well for outdoor patio grading specifically before buying. See our guide to the best laser level for patio to compare outdoor-ready models and features before you buy.
Gravel and decomposed granite patios are the most DIY-accessible option from a skill and timing perspective, and they also tend to be among the most cost-effective approaches upfront. The trade-off is ongoing maintenance, re-leveling, replenishing material, and managing weeds. If you are budget-constrained but want something durable and low-maintenance for the long term, it is worth comparing gravel against other materials on both cost and maintenance before committing.
Seasonal accessories: plan for these during installation, not after
One thing that comes up a lot when homeowners look back at their finished patio is wishing they had planned for accessories during installation rather than retrofitting them. If you know you want a patio heater, a misting system, a pergola, or a patio cover, the best time to rough in the electrical conduit, water lines, and structural footings for those features is before the surface material goes down. Cutting into a freshly installed concrete patio to run conduit is both costly and structurally disruptive.
The same applies to patio covers and shade structures. If you are in Texas, Arizona, or any region where summer sun makes an uncovered patio functionally unusable from May through September, factoring a cover or pergola into the original design and installation schedule is far more economical than adding it as a separate project. Footings for freestanding shade structures should go in at the same time as your patio base work, before the surface is finished.
A practical planning checklist before you schedule your install
- Check NOAA Climate Normals for your county: confirm monthly average precipitation and freeze dates for your target install window
- Get local frost depth from your building department or IRC frost depth map (critical in cold/freeze zones)
- Confirm whether your patio requires a building permit and estimate review timeline for your municipality
- Choose your material and check manufacturer temp/moisture constraints (especially for composite decking and mortar-set stone)
- Request at least three contractor quotes; ask specifically about their cold-weather or hot-weather concrete protocol if your install timing is near seasonal limits
- Account for material lead times, especially natural stone and specialty pavers
- Plan drainage: confirm slope, edge drainage, and any subsurface drainage needs before excavation begins
- Identify accessories (heaters, misters, covers, lighting) and rough in conduit and footings during base installation
- Build a weather buffer: for concrete installs, verify a 10- to 14-day window of temperatures above 50°F after your pour date
- For DIY installs, secure base compaction equipment and a laser level before the project start date
Putting it all together
The best time to install a patio is whenever you can combine mild temperatures, dry base conditions, a properly cured material window, and enough lead time to handle permits and contractor scheduling without rushing. For most homeowners in the continental U.S., that means targeting late spring or early fall as the default answer and then adjusting from there based on climate zone and material. Start the planning process earlier than feels necessary, six to eight weeks before your target install date is not too early, and in spring, it might not be quite enough.
Once you have your timing locked in, the next decisions that affect long-term satisfaction are material choice and design. If you are still working through which surface material fits your budget, maintenance tolerance, and climate best, there is a lot of overlap between timing decisions and the broader material comparisons worth reviewing. If you’re still unsure which surface to choose, read our guide on what type of patio is best to match material, maintenance, and climate. Understanding what type of patio lasts longest in your region, what the most low-maintenance options are, and what the actual cost differences look like between concrete, pavers, and stone will all shape both your schedule and your outcome. If you need help deciding, read our guide on what type of patio lasts the longest for durability comparisons and maintenance expectations. For a concise comparison of options, see our guide to the best low maintenance patio for practical, region-specific recommendations.
FAQ
Short answer: When is the best time of year to install a patio overall and by climate zone?
General: install in your region's dry, moderate‑temperature months when the ground is not frozen and extended rain is unlikely. Cold/freeze climates (northern US, Canada, northern Europe): late spring after frost danger passed through early fall (roughly May–September). Hot/arid climates (Southwest US, interior Australia): late fall to early spring (roughly October–April) to avoid extreme heat during placement and curing. Hot/humid or monsoon climates (southeast US, India, northern Australia): schedule for the local dry season (e.g., post‑monsoon — India: Oct–May; northern Australia: May–September). Temperate/mild climates (coastal Mediterranean, parts of California): much of the year is workable, but avoid mid‑winter rainy season and the hottest summer months for concrete work. Use local climate normals (NOAA, BOM, IMD) to pick lower‑precipitation months and verify freeze/frost dates.
Why does timing matter for patio installation?
Timing affects base compaction, drainage, concrete curing, material expansion/contraction, and permit/contractor availability. Installing on frozen or saturated soils causes poor compaction and settlement. Pouring concrete in very cold or very hot conditions requires special measures (insulation, heating, admixtures, cooling) that add cost and can affect long‑term durability. Rain during bedding/paver work leads to wet bedding and rework. Seasonal contractor backlogs can delay projects if you don't account for permit and scheduling lead times.
Climate‑specific rules: what to watch for in cold/freeze, hot/humid, wet‑season, and arid zones?
Cold/freeze: never place footings or edge restraints on frozen ground; design to frost depth per local code and schedule after frost penetration retreats. Hot/dry: avoid peak heat to reduce plastic shrinkage and rapid curing—use ACI hot‑weather measures if unavoidable. Hot/humid/monsoon: avoid earthwork and bedding installation during the rainy season; wait for thoroughly dried, compactable subgrade. Arid: watch for rapid drying of concrete and adhesives—plan curing and shading. Always check local monthly precipitation normals and freeze calendars (NOAA, BOM, IMD) before scheduling.
Material‑specific timing constraints: concrete, pavers, flagstone, gravel, wood/composite decking?
Concrete: avoid average daily temps below ~40°F (4°C) without cold‑weather protection (ACI 306R) and above ~95°F (35°C) at discharge without hot‑weather measures (ACI 305R). Allow typical curing windows (3–7+ days for initial cure; longer for full strength). Pavers (interlocking): do not install bedding or pavers on saturated or frozen bases; compacted, dry base required (ICPI). Flagstone/natural stone: avoid setting on frozen/saturated bases; mortar‑set requires cured slab and specific freeze‑thaw cures. Gravel: flexible in timing but ensure subgrade is compactable and not waterlogged. Wood/composite decking: follow manufacturer temperature/gap tables—install in moderate temps to accommodate thermal expansion/contraction; avoid installing wet lumber. Materials installed during non‑ideal seasons may need additives, insulation, or extra work that raise costs and risk reduced longevity.
How do frost depth and frozen ground affect scheduling and design?
Local frost depth drives footing/edge restraint depth; the IRC requires footings to bear below frost or use approved frost‑protected methods. Installing on frozen ground risks later settlement when the soil thaws. If frost‑susceptible soils exist, designers may require extra excavation or non‑frost‑susceptible fill—these surprises commonly add time and cost if work is scheduled without consulting frost maps or geotechnical guidance.
What curing and temperature considerations should homeowners plan for concrete patios?
Plan to maintain concrete above minimum cure temperatures for the specified curing period (commonly 3–7 days minimum; longer for normal mixes). In cold weather use insulated blankets, heated enclosures, or accelerators per ACI 306R. In hot weather use chilled mix water, retarders, fogging, and curing compounds per ACI 305R to prevent plastic shrinkage. Consider admixtures (ASTM C494 types) when temperature extremes are expected. Schedule pours when conditions let you meet curing requirements without excessive temporary protection costs.
Next Articles
Best Low Maintenance Patio: Materials, Costs & Checklist Guide
Find the best low-maintenance patio: compare materials, costs, climate tips, DIY vs pro, and a final decision checklist.
Do It Yourself Outdoor Patio Ideas: Build, Upgrade, Maintain
DIY outdoor patio ideas for planning, building, upgrading, and maintaining floors, shade, privacy, lighting, and decor.
Quick Fix Patio Ideas for Instant Comfort and Style
Quick fix patio ideas for fast comfort and style: cleanups, repairs, shade, flooring tweaks, and safe upgrades on any bu