
The best low-maintenance patio for most homeowners is a concrete paver or porcelain paver surface set on a properly compacted base with polymeric sand joints and good edge restraints. Those two materials hit the sweet spot of durability, repairability, and low ongoing upkeep. But "low maintenance" means different things depending on whether you live in a freeze-thaw climate like the Midwest, a high-UV desert like Arizona, or a wet subtropical zone like coastal Georgia. The right choice also depends on your budget, whether you want a DIY-friendly option, and how long you expect to stay in the house. This guide walks through every major patio material with honest pros, cons, typical costs, and care requirements so you can make the call that fits your actual situation.
Best Low Maintenance Patio: Materials, Costs & Checklist Guide

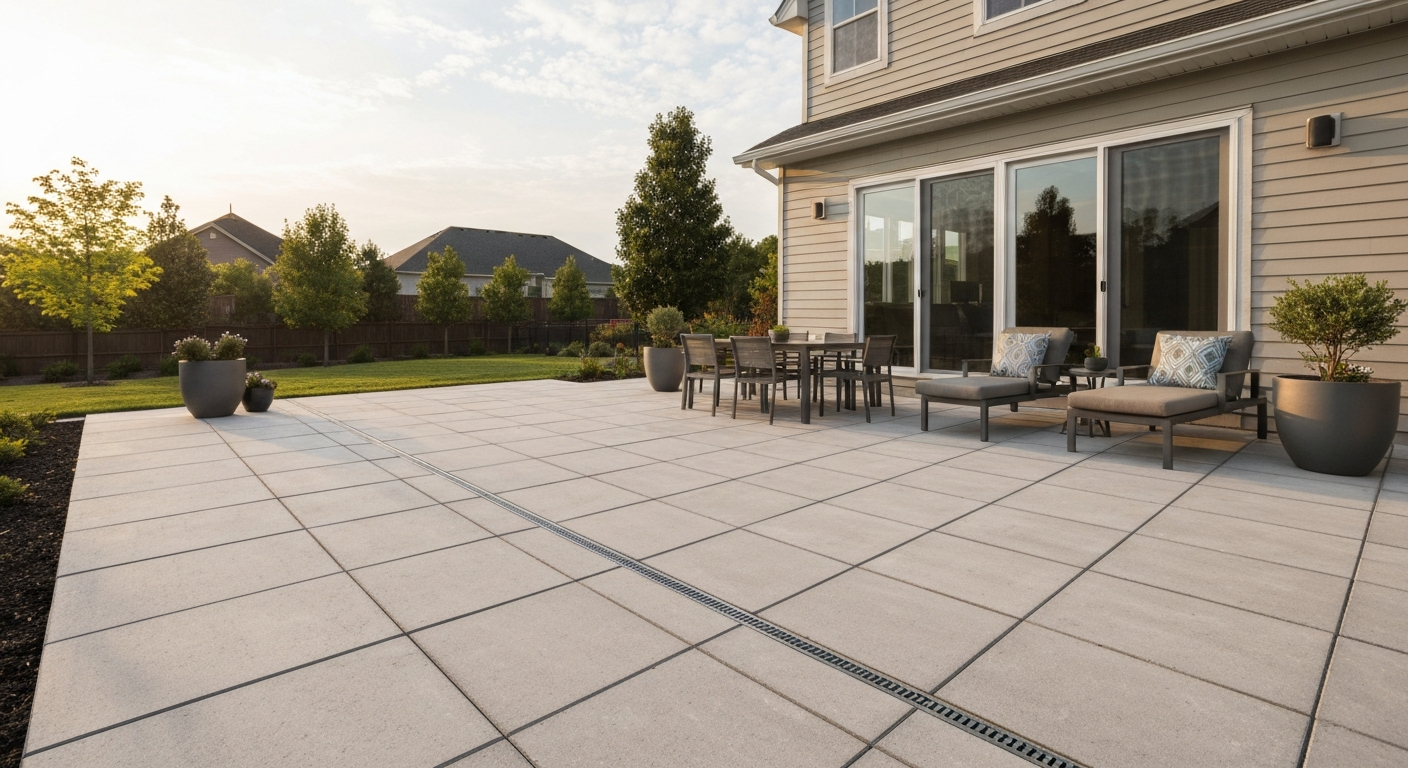
What "low maintenance" actually means for a patio
A low-maintenance patio is one that needs minimal annual effort to stay safe, functional, and presentable. That means fewer reseals, no painting, no staining every couple of years, no pulling weeds every weekend, and no dealing with major cracking or heaving after one hard winter. It does not mean zero maintenance. Every outdoor surface needs some attention, whether that's an annual rinse, a periodic joint sand refresh, or a reseal every few years. The goal is to minimize those tasks and avoid expensive repairs. Key factors that determine how much upkeep you'll actually do: the material itself, how well the base is built, how good the drainage is around the patio, and whether you take a few hours once or twice a year to inspect and address small issues before they become big ones.
Before choosing a material, think through a few site-specific questions. Does your yard drain well, or does water pool against the house? Do you get hard freezes in winter? Is the patio in full sun all day, where UV and heat will accelerate sealer breakdown and bleach out certain materials? Are you planning to DIY the installation or hire a contractor? Answering those questions shapes the right material choice as much as budget does. If you're also evaluating overall cost, it's worth reading through what the most cost-effective patio option looks like, since low-cost and low-maintenance don't always overlap. For a focused comparison of price versus longevity, see our guide on what is the most cost-effective patio.
Quick snapshot: best pick by priority
If you want a fast answer before diving into the details, here's how the major options stack up by what most people care about most.
| Priority | Best Pick | Runner-Up | Why |
|---|---|---|---|
| Lowest ongoing upkeep | Porcelain pavers | Concrete pavers | Near-zero absorption, weed and stain resistant, no sealing needed in most cases |
| Lowest upfront cost | Gravel or poured concrete slab | Concrete paver (DIY) | Gravel from $1–$4/ft²; poured concrete slab $5–$15/ft² installed |
| Longest lifespan | Natural stone or concrete pavers | Poured concrete slab | 25–50+ years with good base; individual pieces replaceable if damage occurs |
| Easiest DIY install | Concrete pavers | Gravel with edging | No mixing, no forms, no curing; leveling and compaction are the main skills |
| Best freeze-thaw performance | Porcelain pavers (≤0.5% absorption) or concrete pavers | Dense granite/quartzite stone | True porcelain rated impervious per ANSI A137.1; resists freeze-thaw cycling |
| Best for hot/high-UV climates | Concrete pavers or porcelain pavers (light colors) | Poured concrete (brushed finish) | Stable color, no UV-degrading sealer film required, good heat reflectance with light tones |
| Best budget DIY option | Concrete pavers | Decomposed granite/gravel | Widely available, forgiving to install, repairable one paver at a time |
Overview of the main patio materials
There are seven material categories worth considering for a low-maintenance patio. Each has a distinct installation method, cost range, lifespan, and care routine. Understanding the trade-offs across all of them is what lets you make a confident decision rather than just going with whatever a contractor quotes first.
- Poured concrete slab: the workhorse option, widely available, affordable, smooth or brushed finish, prone to cracking over time but can last 30–50+ years with a good base
- Concrete pavers (interlocking): individual units on a compacted aggregate base, fully repairable piece by piece, highly durable, wide range of styles and price points
- Porcelain pavers: large-format tiles engineered for outdoor use, near-zero water absorption, extremely stain resistant, premium cost but almost no sealing required
- Natural stone: flagstone, bluestone, travertine, granite, quartzite—beautiful and long-lasting but variable porosity and freeze-thaw performance depending on species
- Composite decking: wood-alternative boards over a structural frame, best for elevated or attached decks rather than ground-level patios, long warranties, no painting or staining
- Gravel and decomposed granite: lowest cost, permeable, DIY-friendly, but requires periodic top-up and edging maintenance; not ideal for furniture-heavy setups
- Stamped concrete and overlays: decorative poured concrete with pattern and color, good aesthetics, but resealing every 2–3 years is genuinely necessary and resurfacing repairs are harder to hide
Installed cost ranges vary a lot by region, access, and whether demo or grading is included. As a general 2025–2026 U.S. baseline: gravel runs $1–$4 per square foot installed, poured concrete $5–$15, stamped concrete $12–$30, concrete pavers $10–$30, large-format porcelain $12–$40, natural stone $15–$40 or more, and composite decking $25–$70. Those numbers shift significantly based on local labor rates and site conditions, so treat them as planning benchmarks rather than firm quotes.
Poured concrete slab
What it's like to live with
A poured concrete slab is still one of the most practical patios you can build. It's affordable, widely understood by contractors, and can go down relatively quickly. A well-built 4-inch slab on a compacted sub-base with proper control joints and good drainage can realistically last 30 to 50 years or more. For more detail on what type of patio lasts the longest, see our guide on that topic. The control joint spacing matters: a common field guideline based on ACI 302.1R is to space joints at roughly 2.5 times the slab thickness in feet, which means about 10-foot intervals for a 4-inch slab. For detailed guidance on control-joint spacing and curing details, see blank" rel="noopener noreferrer">ACI 302.1R-15: Guide to Concrete Floor and Slab Construction (preview). That gives cracks somewhere to go instead of randomly across the surface. Where I see slabs fail prematurely is almost always a base problem or drainage problem, not the concrete itself.
The maintenance story is manageable but not minimal. A plain brushed concrete slab can get away with an annual rinse and an occasional reseal every 3–5 years using a penetrating silane/siloxane product to reduce moisture absorption and surface wear. Stamped and colored decorative concrete is a different story: topical acrylic sealers on those surfaces need refreshing every 2–3 years to maintain appearance and protect the color, and VOC concerns apply to solvent-based topical products in some states. Concrete also stains from oil, rust, and organic debris if left unsealed, so patio furniture placement and tree proximity matter.
Pros, cons, and key numbers
| Factor | Detail |
|---|---|
| Installed cost | $5–$15/ft² plain; $12–$30/ft² stamped/decorative |
| Expected lifespan | 30–50+ years (cracking expected; base quality is the main variable) |
| Freeze-thaw performance | Good with air-entrained mix and proper drainage; thin overlays more vulnerable |
| Sealing required | Penetrating sealer every 3–5 years (plain); topical reseal every 2–3 years (stamped) |
| Repair difficulty | Moderate to hard: patches and color-match repairs are visible; full resurfacing is an option |
| DIY feasibility | Low: forming, ordering, finishing, and curing concrete correctly requires skill and help |
| Best for | Budget-conscious buyers who want a single pour, clean look, and are okay with occasional resealing |
One climate note worth calling out: avoid pouring concrete when temperatures are forecast to drop below 40–50°F in the 24–72 hours after the pour unless your contractor is using cold-weather procedures per ACI 306R. Cold concrete cures poorly and can be permanently weakened. In the Midwest and Northeast, this means the practical pour window is roughly late spring through early fall. Timing your install properly is one of the most underrated decisions you can make, and it's worth thinking through before you book a contractor. For guidance on scheduling your project, read our guide on the best time of year to install patio.
Concrete pavers (interlocking)
What it's like to live with
Interlocking concrete pavers are my go-to recommendation for most homeowners who want a durable, low-maintenance, DIY-friendly patio. The individual-unit design is the key advantage: if one paver cracks, settles, or gets stained, you pull it out and replace it without touching the rest of the patio. That repairability alone makes them dramatically lower-maintenance over a 20- or 30-year horizon than a solid concrete slab. And the installation is forgiving: you're compacting a granular base, screeding a 1-inch bedding sand layer, laying units, compacting again, and filling joints. No forms, no mixing, no curing window to worry about.
The base is everything with concrete pavers. ICPI guidance calls for a minimum 4-inch compacted granular base for pedestrian patios, with edge restraints on all sides to prevent lateral movement. Skip the edge restraints and the patio will slowly spread and joints will open up, which is one of the most common failure modes I've seen on DIY paver jobs. Polymeric sand in the joints helps lock everything together and significantly reduces weed and ant intrusion, though it needs to be installed carefully: if you get a haze on textured surfaces or the sand gets washed out before it cures, it's a headache to fix. Inspect your joints twice a year and plan to refresh polymeric sand every 5 or more years as needed, with a reseal every 2–4 years if you're using a topical sealer.
Pros, cons, and key numbers
| Factor | Detail |
|---|---|
| Installed cost | $10–$30/ft² depending on paver style and region |
| Expected lifespan | 25–50+ years; individual pavers replaceable indefinitely |
| Freeze-thaw performance | Good when base is designed for drainage and edge restraint is solid |
| Sealing required | Optional but recommended; reseal every 2–4 years; polymeric sand refresh every 5+ years |
| Repair difficulty | Very easy: individual paver replacement without disturbing surroundings |
| DIY feasibility | High: most homeowners with basic equipment and time can complete a paver patio |
| Best for | Homeowners wanting DIY-friendly, repairable, long-lived surface with wide style options |
One permeable option worth mentioning here: permeable interlocking concrete pavers (PICP) use wider joints filled with aggregate to allow stormwater infiltration, which the U.S. EPA recognizes as an effective stormwater management technique. They do require periodic vacuuming and inspection to maintain infiltration rates, so they add a small maintenance step. But in areas with impervious surface restrictions or stormwater fees, permeable pavers can have real cost and regulatory advantages. Ask your local municipality whether they offer incentives or relaxed requirements for permeable surfaces.
Porcelain pavers
What it's like to live with
Porcelain pavers are the closest thing to a no-sealing-required patio surface you can get. True outdoor porcelain is defined under ANSI A137.1 as having water absorption at or below 0.5%, which means it's essentially impervious. That single characteristic is what makes it so low-maintenance: it resists stains, doesn't absorb de-icing salts, handles freeze-thaw cycling in most climates, and doesn't need the penetrating or topical sealers that stone and concrete require. A rinse with a garden hose and occasional mild detergent is genuinely the maintenance routine for most porcelain paver installations.
The trade-offs are cost and installation complexity. Large-format porcelain pavers run $12–$40 per square foot installed, placing them at the higher end of the patio material range. Installation requires either a properly compacted dry-lay base (similar to concrete pavers), a mortar bed, or a pedestal system for elevated decks, all following TCNA/ANSI methods. The tiles can chip at edges if heavy objects are dropped, and because they're a uniform manufactured product, repairing a cracked or chipped piece to match perfectly can be difficult if the product line is discontinued. Buy extra at installation. For freeze-thaw climates, verify that the specific product you're buying carries a manufacturer frost-resistance rating, not just that it's labeled "porcelain."
Pros, cons, and key numbers
| Factor | Detail |
|---|---|
| Installed cost | $12–$40/ft² depending on format size, thickness, and region |
| Expected lifespan | 20–40+ years; dependent on installation method and edge protection |
| Freeze-thaw performance | Excellent for true porcelain (≤0.5% absorption, frost-rated by manufacturer) |
| Sealing required | Generally not required; no penetrating or topical sealer needed in most cases |
| Repair difficulty | Moderate: individual tiles replaceable but color/texture matching can be difficult if line is discontinued |
| DIY feasibility | Moderate: dry-lay and pedestal installs are DIY-able; mortar-bed installs benefit from tile-setting experience |
| Best for | Homeowners who want truly minimal upkeep, modern aesthetics, and strong freeze-thaw performance |
In hot climates like Texas or the Southwest, light-colored porcelain in a matte or textured finish handles radiant heat well and stays cooler underfoot than dark concrete or certain stones. Just confirm the tile carries a slip-resistance rating appropriate for outdoor use (COF 0.42 or higher wet is the common threshold) since polished finishes can be dangerously slick when wet.
Natural stone
What it's like to live with
Natural stone patios are beautiful and can last as long as any surface you'll install, but "low maintenance" depends heavily on which stone you choose. Dense, low-porosity stones like granite and quartzite are nearly as maintenance-free as porcelain once sealed: a penetrating silane/siloxane or fluoropolymer sealer applied every 2–3 years is typically all they need. Calcareous stones like travertine, certain limestones, and softer sandstones are a different story. They're more porous, more vulnerable to acid etching from leaves and food spills, and can fail in freeze-thaw climates if water gets into the stone and cycles through freezing. If you're in the Midwest or Northeast and love the look of travertine, do your homework on freeze-thaw ratings for the specific product before committing.
The annual water drop test is the simplest maintenance check for natural stone: put a few drops of water on the surface. If it beads, the sealer is working. If it absorbs quickly, it's time to reseal. Penetrating impregnating sealers are the right category here: they preserve breathability and don't create a surface film that can peel or trap moisture. Products like Miracle Sealants 511, Aqua Mix Sealer's Choice Gold, and Prosoco Consolideck are widely used and trusted. Topical film-forming sealers on natural stone are generally a bad idea: they look good for a year and then peel, which is far more work to fix than just reapplying a penetrating sealer on schedule.
Pros, cons, and key numbers
| Factor | Detail |
|---|---|
| Installed cost | $15–$40+/ft² depending on stone species, sourcing, and region |
| Expected lifespan | 25–50+ years for dense stones; shorter for softer calcareous types in harsh climates |
| Freeze-thaw performance | Excellent for granite, quartzite; poor for travertine and porous limestones without careful design |
| Sealing required | Yes: penetrating sealer every 1–3 years depending on porosity; water drop test annually |
| Repair difficulty | Moderate: individual flagstone pieces can be reset; matching new stone to aged stone can be challenging |
| DIY feasibility | Moderate: flagstone dry-lay over compacted base is DIY-able; mortared installs are harder |
| Best for | Homeowners who prioritize natural aesthetics, are willing to commit to annual sealer checks, and choose the right stone for their climate |
Cost is the main barrier for most people, with installed prices often exceeding $20–$30 per square foot once you factor in regional stone availability and the skilled labor required to set irregular flagstone or large-format slabs properly. If natural stone aesthetics are important to you but the budget is tight, large-format porcelain designed to mimic stone is a legitimate alternative that's less expensive, requires less sealing, and performs more predictably in freeze-thaw climates.
Composite decking and artificial decking products
What it's like to live with
Composite decking is the low-maintenance answer for elevated or attached deck-style patios. It replaced pressure-treated wood as the go-to material specifically because it eliminates painting, staining, and the annual scrubbing that wood decks demand. Premium composite and capped polymer decking products from brands like Trex carry 25- to 50-year limited residential warranties depending on the product line, which is a meaningful signal about expected durability. The cap layer on higher-end composites is what makes them so stain- and moisture-resistant: it's essentially a protective shell around the wood fiber core, and it prevents the fading, mold, and swelling that plagued early-generation composite products.
For ground-level patio applications, composite decking is less common because it requires a structural frame (typically pressure-treated lumber or steel framing) elevated off the ground, which adds cost and a potential maintenance point if the framing isn't installed with proper ventilation and drainage. It's genuinely a better fit for raised decks, covered patios, and situations where a wood-deck aesthetic is the goal. If you're comparing composite decking to poured concrete or pavers for a ground-level slab replacement, cost is a significant factor: composite decking installed runs $25–$70 per square foot, significantly higher than most paver options.
Pros, cons, and key numbers
| Factor | Detail |
|---|---|
| Installed cost | $25–$70/ft² including framing; significant regional variation |
| Expected lifespan | 25–50 years for capped composites (per manufacturer warranties); framing lifespan varies |
| Freeze-thaw performance | Good for capped composite boards themselves; framing and fasteners must be rated for climate |
| Sealing required | None for capped composite boards; annual rinse and occasional mild cleaning is all that's needed |
| Repair difficulty | Moderate: individual board replacement possible but color matching older boards to new can be visible |
| DIY feasibility | Moderate to high: standard framing and decking skills apply; accessible for confident DIYers |
| Best for | Elevated or attached deck applications where wood aesthetics are desired with minimal ongoing upkeep; not ideal for ground-level patios |
Artificial turf deserves a brief note as a ground-cover option, though it's more of a lawn alternative than a patio surface. Installed costs run $8–$20 per square foot, warranties commonly range 8–15 years, and realistic service life under residential use is roughly 10–20 years depending on UV exposure and foot traffic. It's permeable, looks good under patio furniture, and eliminates mowing, but it gets hot in direct sun (significantly hotter than any hard surface material), compacts underfoot over time, and eventually needs full replacement. It works well as a border or infill material combined with concrete or paver patios, not as a standalone seating surface in most climates.
Design and installation choices that cut long-term maintenance
No matter which material you choose, a few construction decisions at the start will have more impact on long-term maintenance than anything else. The most important is drainage: the patio surface should slope away from the house at a minimum of 1/8 to 1/4 inch per foot, and the surrounding grade should direct water away rather than toward the patio. Water pooling on or under a patio is the root cause of most major repair scenarios across every material category.
- Grade and drainage: slope the surface away from the house and ensure surrounding grade directs runoff away; add a French drain or channel drain if needed
- Base depth: for pedestrian patios with pavers, a minimum 4-inch compacted aggregate base per ICPI guidance; deeper for problem soils or freeze-thaw climates
- Edge restraints: mandatory for any paver installation; plastic or aluminum restraints spiked into the base prevent lateral spread and joint widening over time
- Polymeric sand: use in paver joints to reduce weed intrusion, ant activity, and joint erosion; follow activation instructions carefully to avoid surface haze
- Non-plant borders: using gravel, pavers, or metal edging along patio borders instead of grass or garden beds dramatically reduces weed pressure at the edges
- Patio cover or shade structure: reduces UV degradation of sealers and surface materials, lowers surface temperature in hot climates, and extends cleaning intervals
- Control joints in concrete: proper joint placement per ACI 302.1R reduces random cracking and makes any cracking that does occur more manageable
- Accurate leveling: a laser level during base prep and final setting ensures proper drainage slope and prevents low spots that collect water and debris; this is one tool worth renting if you're doing a DIY install
Climate-specific recommendations
Climate is probably the single most overlooked variable when people choose a patio material, and it's the one that causes the most expensive regret. Here's a direct breakdown by region.
| Climate | Best Material Choices | Avoid or Verify Carefully |
|---|---|---|
| Freeze-thaw (Midwest, Northeast, Mountain West) | Concrete pavers, true porcelain pavers (frost-rated), dense granite/quartzite stone | Travertine, porous limestone, thin overlays without air-entrained mix |
| Hot/arid (Southwest, Texas, California desert) | Light-colored porcelain or concrete pavers, brushed concrete slab | Dark stone or pavers that absorb heat; UV-sensitive topical sealers |
| Hot/humid (Southeast, Gulf Coast) | Concrete pavers, porcelain, composite decking for elevated applications | Untreated natural stone that's porous and susceptible to algae/mold; gravel that migrates in heavy rain |
| Mild/temperate (Pacific Northwest, mid-Atlantic) | Nearly all options work well; wider choice available | Gravel in heavy-rain areas without robust edging; composite on ground-level without drainage frame |
| Variable (Plains states, transitional zones) | Concrete pavers or porcelain for freeze-thaw + summer heat performance | Stamped concrete overlays that cycle between sealer types in extreme temperature swings |
A simple maintenance schedule by material
Knowing what the actual maintenance calendar looks like is important before you commit to a material. Here's a realistic, no-fluff schedule for each major option.
| Material | Annual Tasks | Every 2–3 Years | Every 5+ Years |
|---|---|---|---|
| Poured concrete (plain) | Rinse, inspect for cracks | Apply penetrating sealer | Crack repair if needed |
| Stamped/decorative concrete | Rinse, inspect | Reapply topical sealer (often every 2–3 years) | Possible overlay or resurfacing |
| Concrete pavers | Inspect joints and edges, rinse | Reseal if using a sealer (every 2–4 years) | Refresh polymeric sand; reset any settled or lifted pavers |
| Porcelain pavers | Rinse, light scrub if needed | No sealing required | Inspect and reset any loose units |
| Natural stone (dense granite/quartzite) | Water drop test, rinse | Apply penetrating sealer every 2–3 years | Reset any settled stones |
| Natural stone (travertine/limestone) | Water drop test, inspect, rinse | Apply penetrating sealer every 1–2 years | Address any frost damage or efflorescence |
| Composite decking | Rinse, inspect fasteners and framing | Check frame/joists for moisture damage | Replace any damaged boards |
| Gravel/decomposed granite | Rake level, check edging | Top up material as needed | Full edge restraint inspection and refill |
DIY vs. hiring a contractor
Concrete pavers and gravel patios are the most DIY-accessible options. The skills involved (excavation, compaction, screeding, laying units) are learnable, and mistakes are correctable before you get to the end of the project. A plate compactor rental, a laser level for establishing drainage slope, and a screeding rail system are the main tools you'll need beyond basic shovels and levels. The laser level is worth emphasizing: getting the drainage slope right across the entire patio is where a lot of DIY jobs go wrong, and a good rotary laser makes that step straightforward even for first-timers.
Poured concrete, stamped concrete, and mortar-set stone or porcelain are genuinely contractor-grade work. Concrete has a narrow finishing window, requires proper curing, and a poor pour is expensive to fix. Stamped work requires timing and specialized tools. Mortared stone and large-format porcelain on mortar beds require tile-setting experience to avoid lippage and delamination. If you're set on DIY for porcelain, dry-lay and pedestal systems are more forgiving than mortar-bed installs.
On permits: patio slabs and ground-level paver patios often don't require permits in most jurisdictions, but check with your local building department before starting. Elevated composite decks almost always require a permit and sometimes engineered drawings. Anything involving electrical (for outdoor lighting, fans, or outlet circuits near a kitchen or mister setup) will need a permit regardless of the patio surface type.
Your decision checklist
Before you contact a contractor or order materials, work through these questions. They'll point you directly to the right material and help you avoid the most common expensive mistakes.
- What is your climate? Freeze-thaw zones narrow your material list and change your base depth requirements. Hot/arid climates favor light-colored materials and UV-stable surface treatments.
- How does your yard drain? Poor drainage needs to be solved at grading and base level before choosing any surface material. No surface compensates for water that pools under it.
- What is your realistic budget? Gravel and poured concrete are the entry points. Pavers and porcelain are mid-range. Natural stone and composite decking are at the higher end. Be honest about what you can fund without compromising the base.
- How long are you staying? If you're planning to sell in 3–5 years, a well-installed concrete paver patio or brushed concrete slab is often the smartest investment. If you're staying long-term, spending more on porcelain or natural stone can make sense.
- Will you DIY or hire out? If DIY, stick to pavers, gravel, or dry-lay porcelain systems. If hiring, get three quotes and ask specifically about base depth, edge restraint method, and drainage slope.
- Do you want a cover, mister, or outdoor fan? These add comfort and reduce UV and heat impact on the surface, but they require planning for framing, electrical, and drainage from the start.
- What is your honest maintenance tolerance? Be realistic. If you won't reseal every 2–3 years, avoid stamped concrete and porous natural stone. Porcelain and sealed concrete pavers are more forgiving of irregular attention.
- Have you checked permit requirements with your local building department? Do this before finalizing design, especially for elevated decks, attached structures, or any electrical work.
- Are there HOA restrictions or local impervious surface limits that affect your material choice? Some municipalities incentivize permeable pavers; some HOAs restrict certain finishes or colors.
- Have you bought extra material for future repairs? Order 10–15% extra pavers, tiles, or stone and store it. Discontinued product lines are a real problem 10 years from now when you need a replacement piece.
The honest answer on "best low maintenance patio" is that it depends, but not in a frustrating way. For most homeowners who want durability, repairability, and genuinely minimal upkeep, concrete pavers are the most practical all-around choice. If you want to take upkeep down another notch and the budget allows, frost-rated porcelain pavers are hard to beat. If cost is the primary driver, a well-poured concrete slab with a penetrating sealer is completely respectable and will serve you for decades. The key is matching the material to your climate, building the base correctly, and doing the 20 minutes of inspection and maintenance once or twice a year that keeps any patio in good shape for the long haul. For a quick decision guide on what type of patio is best, see our concise recommendation to match material, climate, and budget.
FAQ
What are the best low‑maintenance patio surface options and the key pros/cons of each?
Concrete (poured): Pros—lowest material cost, long life, versatile finishes; Cons—cracking if joints/base incorrect, needs resealing for decorative finishes. Concrete pavers: Pros—repairable, flexible for settlement, long lasting; Cons—requires proper base, joint sand maintenance, edge restraint. Porcelain pavers: Pros—very low water absorption (good in freeze/thaw), stain/UV resistant, modern look; Cons—higher material cost, must follow manufacturer installation for outdoor use. Natural stone: Pros—high durability (select stones), premium look; Cons—variable porosity (some stones need sealing), higher cost and heavier. Composite decking (on grade or raised): Pros—low routine care, no staining/painting; Cons—higher cost, heat retention, visible fading over years. Gravel/artificial turf: Pros—lowest cost (gravel) and lowest routine care (turf), fast install; Cons—gravel shifts/weed ingress and turf has finite warranty life and heat/UV degradation. Stamped/overlay concrete: Pros—affordable decorative option; Cons—more frequent sealing, overlay failure if substrate poorly prepared. For each, maintenance requirements and upfront cost/longevity tradeoffs vary—pick by budget, climate, and desired lifespan.
How do costs and expected lifespans compare across materials?
Typical installed cost ranges (U.S., current market) and typical lifespans: Gravel: $1–$4/ft², 10–30+ years (topdress/refresh as needed). Poured concrete: $5–$15/ft², 30–50+ years (with cracking managed). Concrete pavers: $10–$30/ft², 25–50+ years. Porcelain pavers: $12–$40/ft², 25–50+ years (manufacturer‑rated). Natural stone: $15–$40+/ft², 30–50+ years depending on stone. Stamped/decorative concrete: $12–$30/ft², typically 20–40 years with resealing. Composite decking (patio application): $25–$70/ft², 25–50 year product warranties. Artificial turf: $8–$20/ft², warranties 8–15 years (field life often 10–20 years). These ranges depend strongly on access, site prep, drainage, and local labor; higher initial investment in proper base and drainage extends life and reduces maintenance costs.
Which materials are most cost‑effective for low maintenance?
Most cost‑effective overall (balance of low maintenance, lifespan, and cost): plain poured concrete and quality concrete pavers. Concrete slab is low initial cost and durable; pavers cost more but allow spot repairs and typically require only periodic joint sand or occasional sealing. Gravel is cheapest up front but requires periodic regrading and weed control. Choose the option that minimizes long‑term service calls—for many homeowners, a well‑installed paver system or poured concrete with proper base and drainage gives best lifecycle value.
How should climate and freeze–thaw conditions influence material choice and installation?
Freeze/thaw: Use impervious porcelain (≤0.5% absorption), dense granites/quartzites, frost‑rated concrete mixes (air‑entrained) and properly designed bases. Avoid calcareous/soft stones without protective design. Permeable systems must be designed to prevent frost heave (proper subbase and drainage). Hot/sunny climates: porous materials, light colors, and cooling options (shade, misting, fans) reduce heat buildup—dark composites and some porcelain can run hot. Wet/tropical climates: favor non‑slip textured finishes, UV and moisture‑resistant materials, and corrosion‑resistant fasteners. Always verify manufacturer frost‑resistance ratings and follow recommended installation methods for your climate.
What grading and drainage choices reduce long‑term maintenance?
Key points: provide positive slope away from house (¼"–½" per foot minimum), ensure surface and subbase drain to a swale, drywell, or permeable area; include perimeter drains where groundwater or heavy runoff occurs; for permeable pavements, design an appropriate reservoir layer and maintenance access (sediment traps). Use edge restraints on pavers to prevent lateral loss. Avoid planting beds right up to the patio edge—non‑plant borders (gravel, metal/stone edging) reduce leaf/soil accumulation.
How do permeable pavements tradeoff maintenance with stormwater benefits?
Permeable pavements (porous concrete, permeable pavers) reduce runoff and improve water quality, which many jurisdictions encourage. They do require routine maintenance—inspection and vacuuming to remove sediment and maintain infiltration rates. If you want stormwater benefits with lower upkeep, combine permeable sections with sediment traps and a maintenance plan (annual or biennial vacuuming in many areas). Municipal programs sometimes grant incentives but may require documented maintenance.
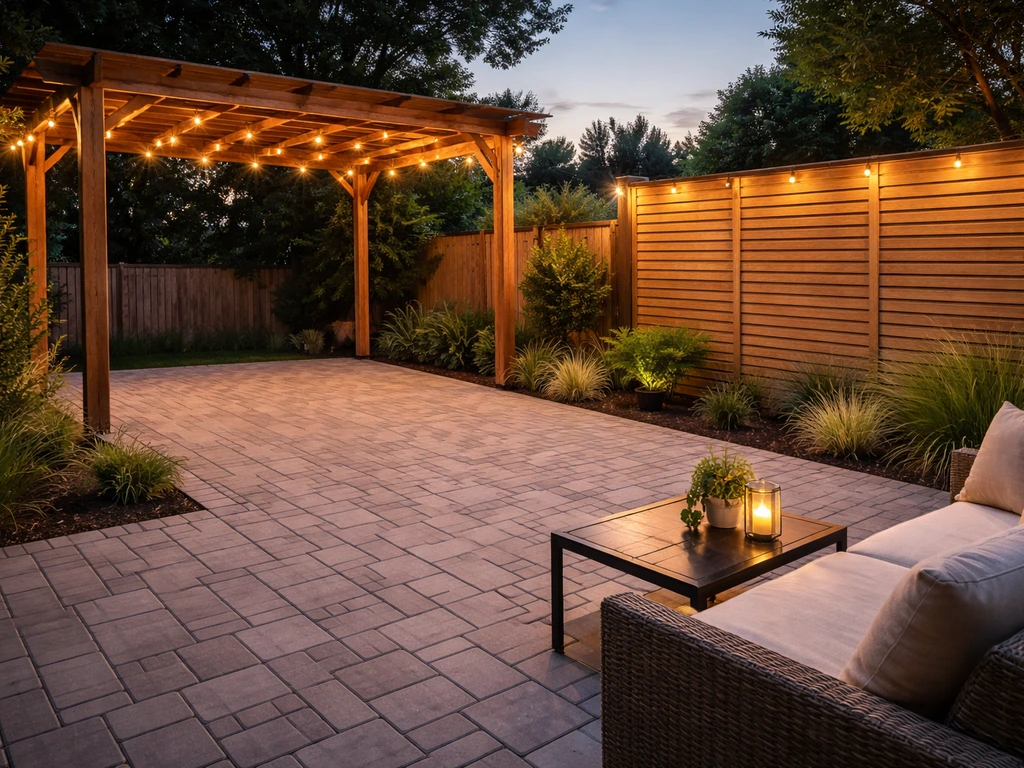
DIY outdoor patio ideas for planning, building, upgrading, and maintaining floors, shade, privacy, lighting, and decor.
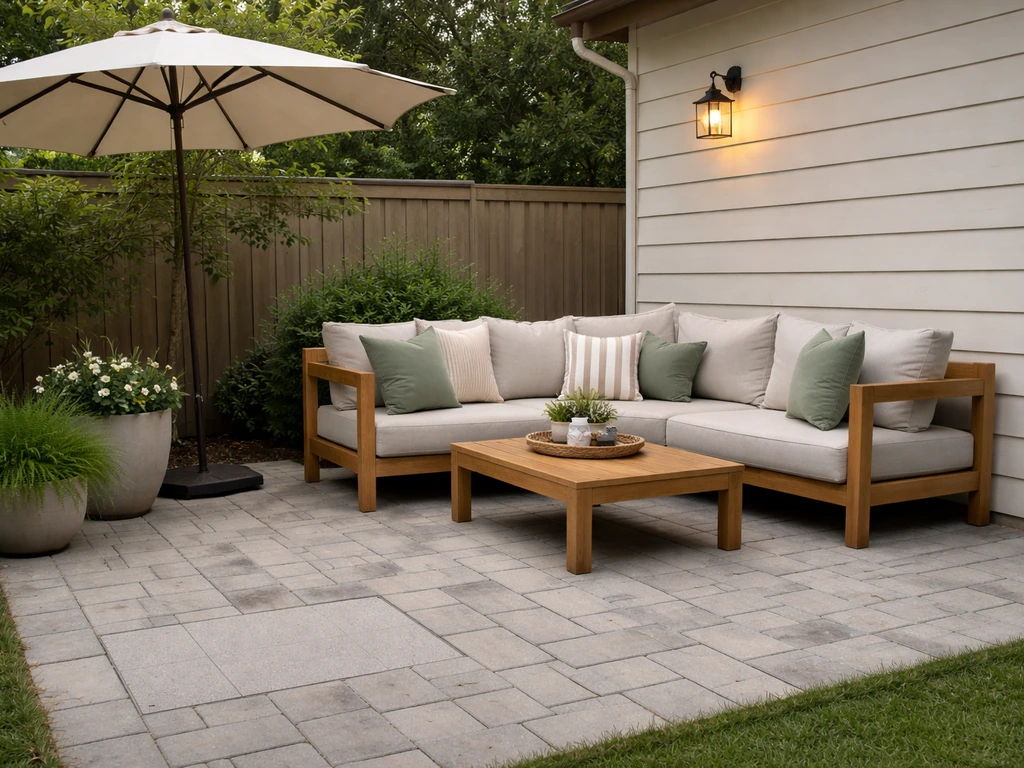
Quick fix patio ideas for fast comfort and style: cleanups, repairs, shade, flooring tweaks, and safe upgrades on any bu
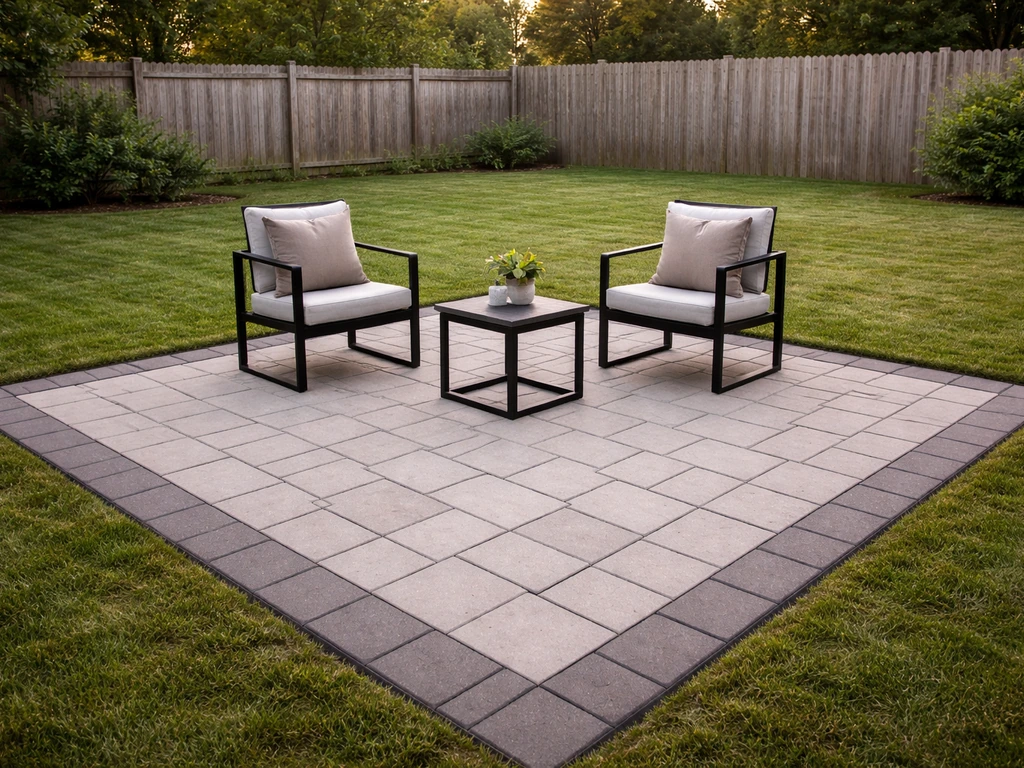
Budget DIY patio ideas with step-by-step flooring, prep tips, cost ranges, upgrades, and safety mistakes to avoid.