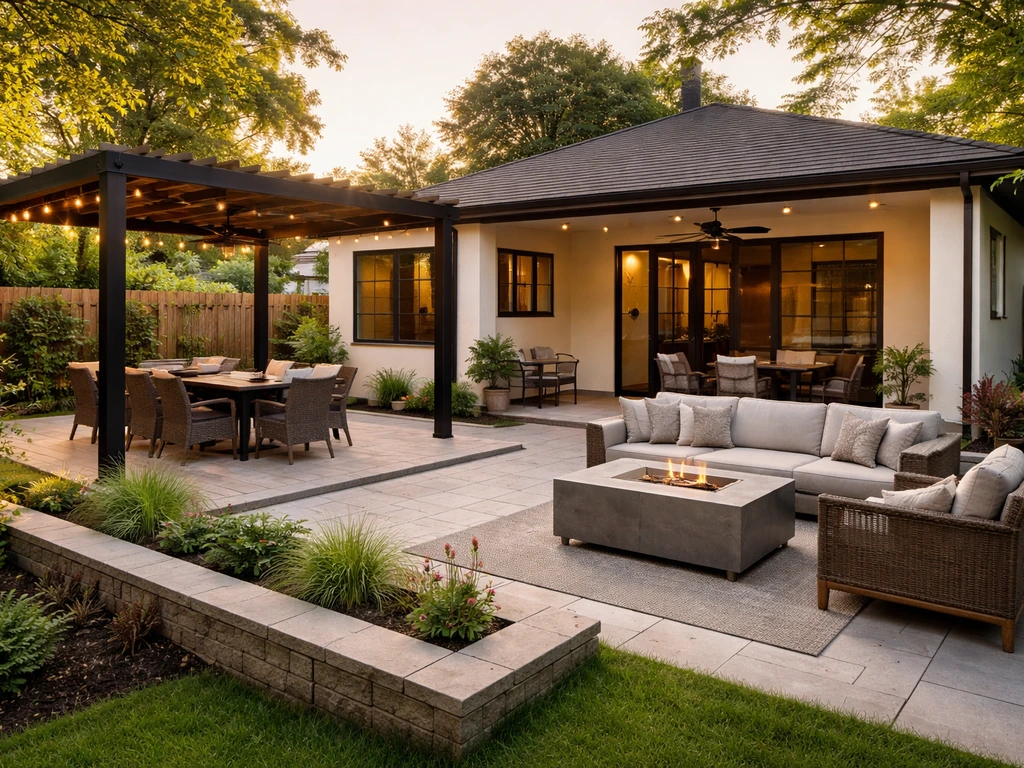
The best patio home design is the one that matches how you actually live, not the one that looks best on Pinterest. That means a covered outdoor dining room for a family that eats outside three times a week, a compact lounge patio with a fire feature for someone who hosts small groups on cool evenings, or a simple stamped-concrete walkout pad for a homeowner who just wants a clean, low-maintenance space off the back door. There is no single 'best' style, but there is absolutely a best fit for your yard, your climate, and your budget, and this guide walks you through how to find it. If you are still deciding, compare the common best patio shapes like rectangles, L-shapes, and courtyard layouts to see what fits your yard and routine.
Best Patio Home Designs: Choose the Right Layout for You

Phoebe Foster
6 May 2026
What 'best patio home designs' actually means for your property
Quick scope check: this guide is about designing an outdoor patio living space attached to or adjacent to your home, not about architectural floor plans or interior house design. Patio home designs cover everything from a basic concrete slab off your back door to a full outdoor room with a pergola, kitchen, fire pit, and lighting system. The phrase gets used loosely, so it is worth knowing upfront that the 'best' version for you is defined by your lifestyle goals, not by square footage or style trend.
One thing that catches homeowners off guard: local regulations matter more than most people expect at the planning stage. Permit requirements, setback rules, and HOA restrictions can change your patio's size, location, and structural options before you ever pick a material. Houzz specifically flags this as a start-of-project step, not an afterthought. Check with your local building department early, especially if you are adding a roof structure, pergola, or any electrical or plumbing components for an outdoor kitchen. Doing this before you finalize your layout will save you real money and rework.
Quick needs assessment before you look at a single design
Before you browse layouts or price out materials, spend 20 minutes answering the questions that will actually drive your design. The design should follow your lifestyle and function first, then materials and aesthetics second. This is the mistake most homeowners make in reverse.
Layout goals
- How will you use it most: everyday dining, weekend entertaining, quiet relaxing, grilling, or a mix?
- How many people do you typically host: just your household, small groups of 6 to 10, or larger parties?
- Do you need zones (dining plus lounge plus grill) or one single-purpose space?
- Is accessibility a factor for family members with mobility needs?
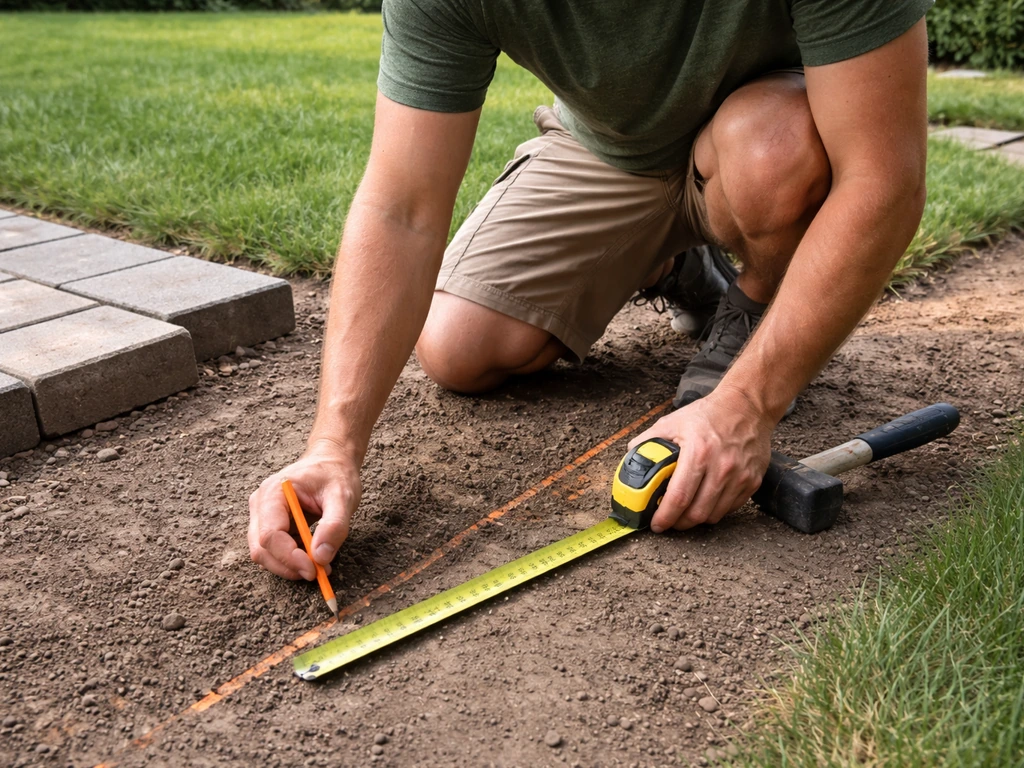
Yard constraints
- Measure your usable outdoor space before doing anything else. Note the distance from the house to the property line, fence, or landscaping.
- Check the grade. A sloped yard adds $500 to $1,000 or more for leveling and grading before a single paver is laid, and severe drainage problems push that figure even higher.
- Identify existing drainage paths. A minimum slope of about 2% (roughly 1/4 inch per foot) is the standard for concrete exterior slabs, and your patio needs to direct water away from the foundation.
- Note any utilities, tree roots, or irrigation lines in the footprint area.
Climate fit
Where you live shapes nearly every design decision. A patio in Phoenix needs shade coverage above almost everything else, while a Chicago-area patio needs materials that handle freeze-thaw cycles without cracking. A good rule from extension service guidance: your patio should capture shade in summer and sun in shoulder seasons, which directly affects where you place it relative to your home and how you orient any overhead structure. In the South and Southwest, a west-facing uncovered patio will be unusable from 3 p.m. to sunset six months a year. In the Midwest or Northeast, a fully covered patio can feel dark and underused in spring and fall when you actually want the warmth.
Top patio design styles and when each one works best
Here are the most practical and proven patio home design approaches, with honest notes on who each one is right for.
Covered outdoor living room
This is the most popular design type right now, and for good reason. If you are shopping for the latest patio trends, a covered outdoor living room is often the style that keeps showing up for good reason. A covered structure (pergola, solid roof extension, or patio cover) with seating, lighting, and a fan creates a true outdoor room that works in rain, intense sun, and mild cool weather. It is the right choice if you want to genuinely extend your usable square footage and use the space more than just in ideal conditions. Best for: hot or rainy climates, households that entertain regularly, anyone who wants the patio to feel like a room rather than a yard feature.
Dining-focused layout
A dining-first patio centers on a table and chairs with direct access from the kitchen or dining room, good lighting for evening meals, and enough space to pull chairs out without hitting a wall or planter. You need at least 10 by 10 feet for a four-person table with breathing room, and 12 by 14 or larger for six to eight. This layout works best as a standalone design for families who eat outdoors frequently but do not entertain large groups.
Grilling and outdoor kitchen zone
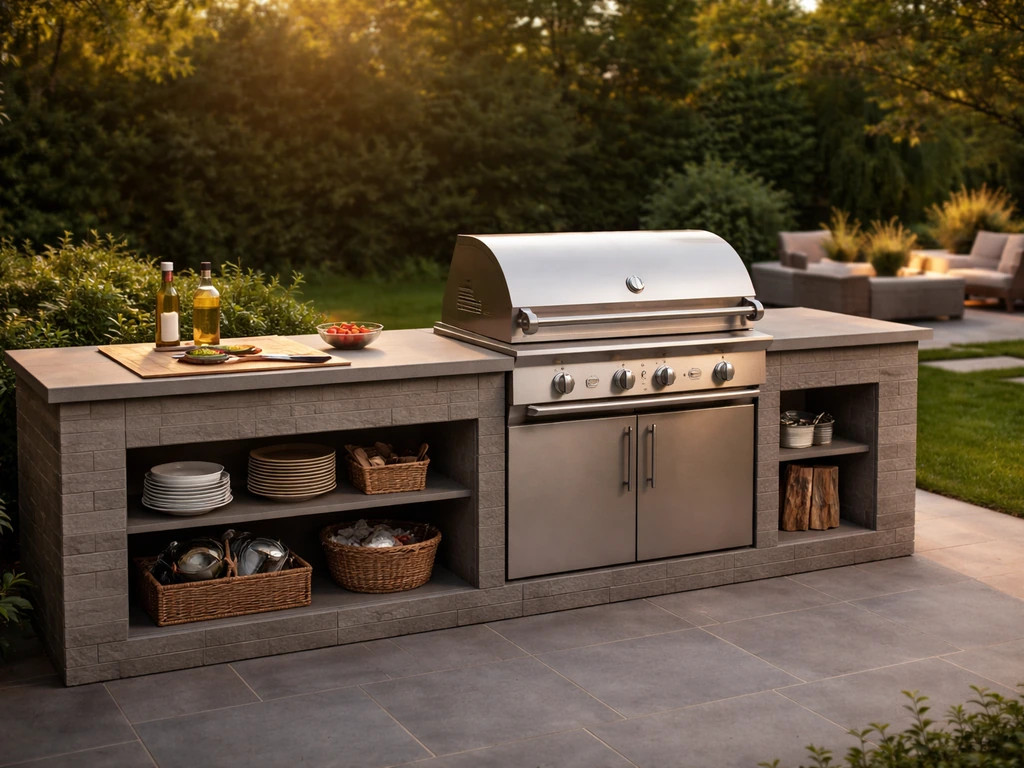
If grilling is the main event at your house, the grill station deserves its own dedicated zone with counter space, storage, and ideally a prep zone separate from the cooking surface. Functional zoning is the key principle here: keeping prep, cooking, and serving as distinct areas makes the space actually work the way a kitchen does. A basic built-in grill setup with a concrete block surround and countertop is DIY-accessible. A full outdoor kitchen with a sink, refrigerator, and gas lines is a contractor job and can run from $5,000 to $20,000-plus depending on scope.
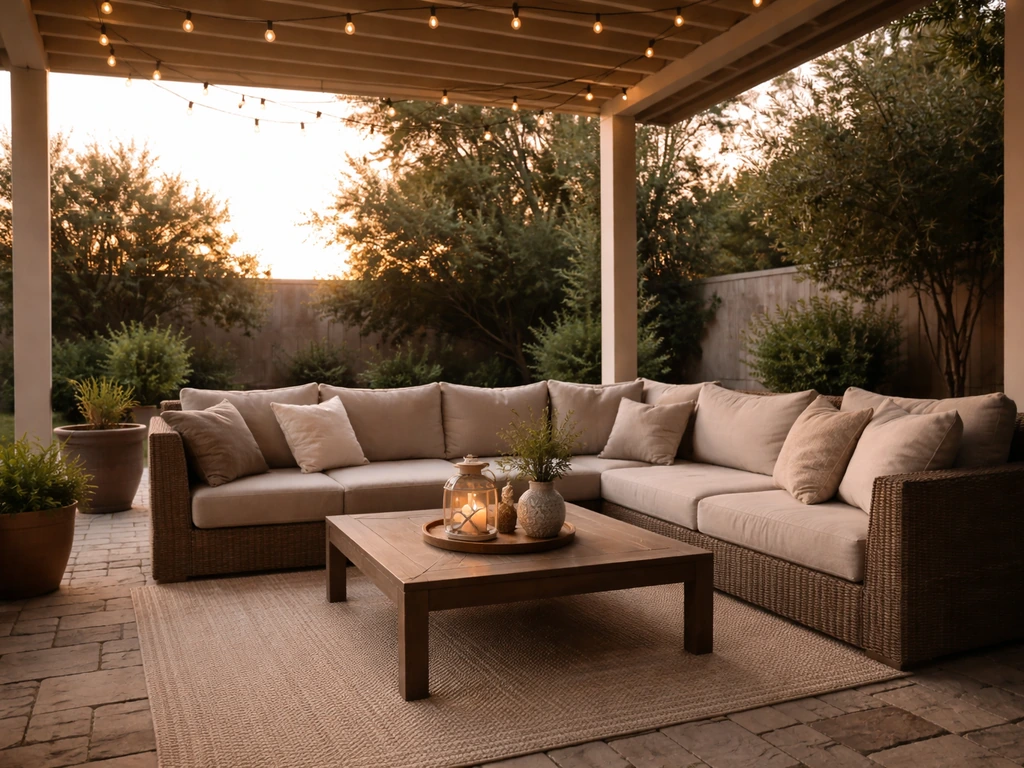
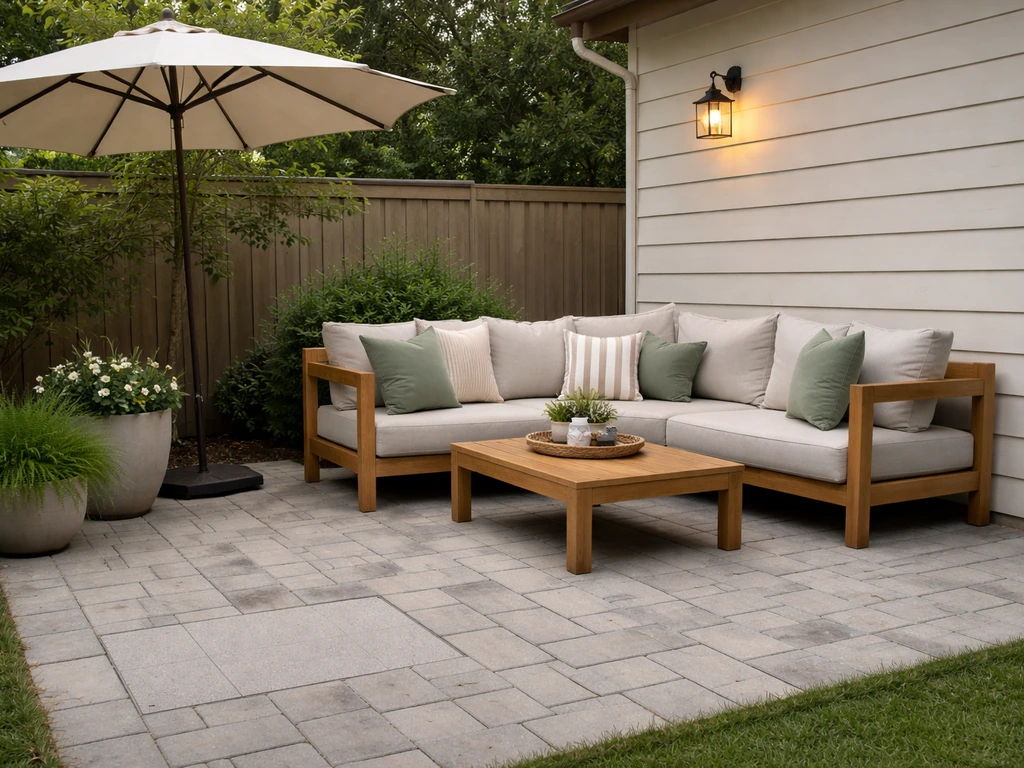
Fire feature lounge patio
A lounge-style patio with a fire pit or fireplace as the anchor works well for cooler climates and homeowners who prioritize ambiance and social gathering over dining or cooking. Seating curves around the fire feature, and the design is generally simpler and lower cost than a full outdoor kitchen setup. A gas fire pit insert in a concrete or stone surround is a mid-range investment that adds significant use-season extension in climates with cool evenings.
Courtyard-style patio
Courtyard designs work on side yards, front entries, or wrapped-corner lots where the patio is enclosed on two or three sides by walls, fencing, or landscaping. They create a private, intimate feel that open backyards cannot match. This style is especially strong in urban and suburban settings where yard space is limited but privacy is valued. The enclosed geometry also makes shade and wind management easier because you are working with a bounded space.
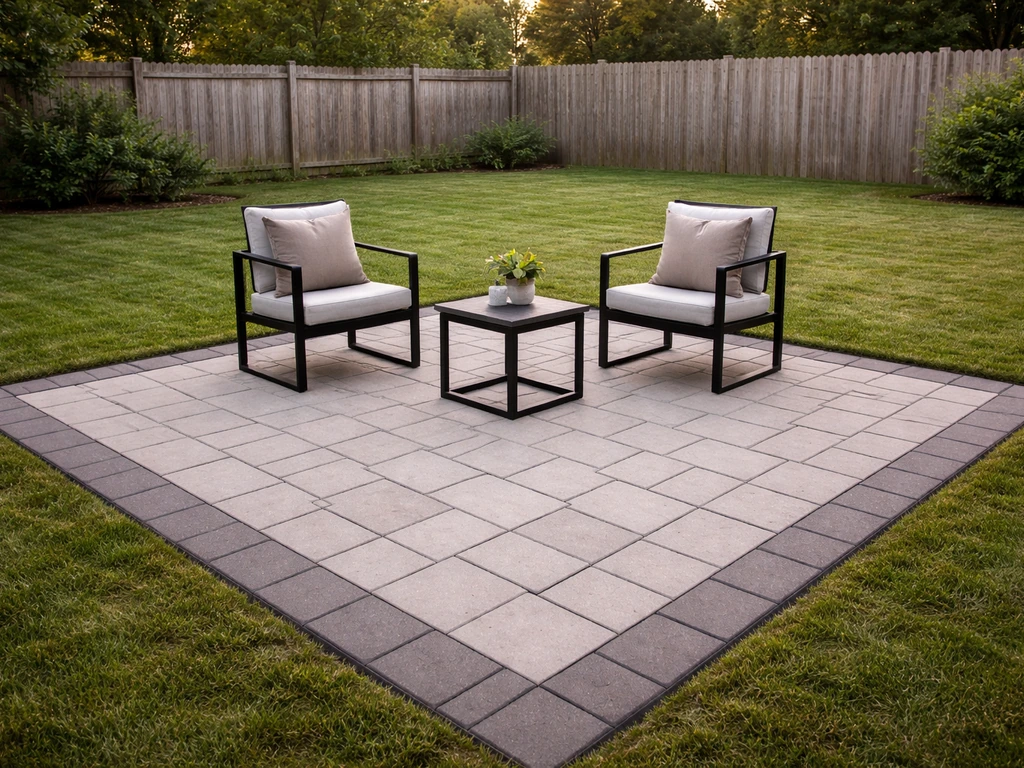
Compact and small-space patio
Small does not mean compromised. A well-planned 8-by-10 or 10-by-12 patio with the right furniture scale, vertical greenery, and a single focal point (small fire bowl, water feature, or statement planter) can feel intentional rather than tight. The key is avoiding oversized furniture and choosing multi-functional pieces. If your yard is genuinely small, this is the most budget-friendly path with the lowest permit complexity.
Walkout and entry patios
Walkout patios connect directly from a door, often at grade level with the interior floor or stepped down a few inches. They are the most common patio type and the most flexible starting point. A plain concrete walkout slab can be upgraded later with pavers, a pergola, or a built-in grill station as budget allows. If you are not sure where to start, a well-graded concrete or paver walkout pad is the lowest-risk, most versatile base.
Flooring, structure, and systems that make a design actually work
Flooring and surface options compared
| Material | Cost per sq ft (installed) | Durability/Climate fit | Maintenance | Best for |
|---|---|---|---|---|
| Concrete (broom finish) | $6–$12 | Good; can crack in freeze-thaw | Low; seal every 2–3 years | Budget builds, walkout pads, any climate |
| Stamped/decorative concrete | $12–$20 | Moderate; surface wear in cold climates | Medium; resealing needed more often | Curb appeal, mid-budget upgrades |
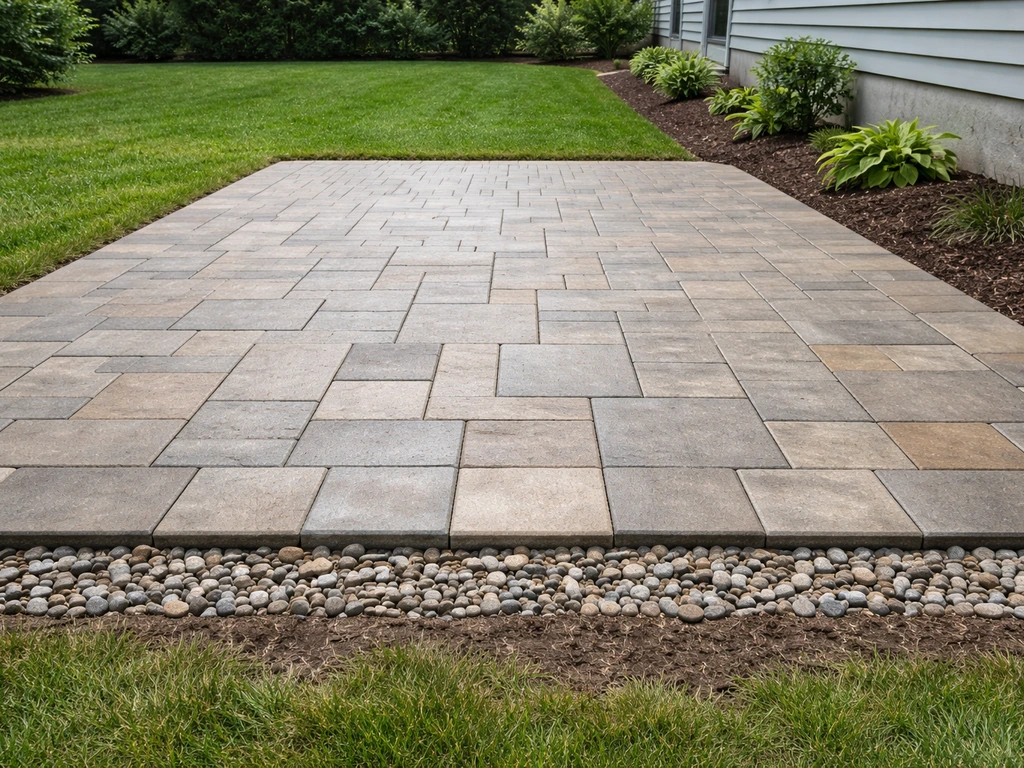
| Concrete pavers | $10–$20 | Excellent; freeze-thaw resistant | Low-medium; joint sand maintenance | Cold climates, long-term value |
| Natural stone pavers | $15–$30+ | Excellent with proper base | Medium; sealing recommended | Premium looks, dry/temperate climates |
| Permeable pavers (PICP) | $15–$25 | Very good; handles drainage and freeze-thaw well | Medium; periodic infiltration maintenance | Drainage problem areas, wet climates |
| Gravel/decomposed granite | $2–$6 | Variable; shifts over time | Low-medium; raking and top-ups | Budget patios, dry climates, casual style |
| Porcelain tile (outdoor rated) | $12–$25 | Good in mild climates; can crack in hard freezes | Low; very easy to clean | Covered patios, warm climates |
A few things to know before you pick: pavers outperform monolithic concrete in freeze-thaw climates because individual units can flex and individual pieces can be replaced without tearing out the whole surface. The base matters as much as the surface material. The Concrete Masonry and Hardscapes Association is clear that poor soil, inadequate drainage, or freeze conditions require increased base thickness, and skimping on base prep is the number one reason paver and concrete patios fail early. For paver joints, polymeric jointing sand is worth the upgrade over regular sand, it resists erosion, discourages weed growth, and extends the time between maintenance calls significantly.
For concrete specifically: a standard broom finish is the practical default for outdoor slabs. The brushed texture creates slip resistance without any special product, and it handles foot traffic, furniture, and weather well. If you want more visual interest, exposed aggregate or stamped finishes add character at a higher cost and some trade-off in long-term durability of the surface layer.
Drainage: the unsexy detail that ruins patios
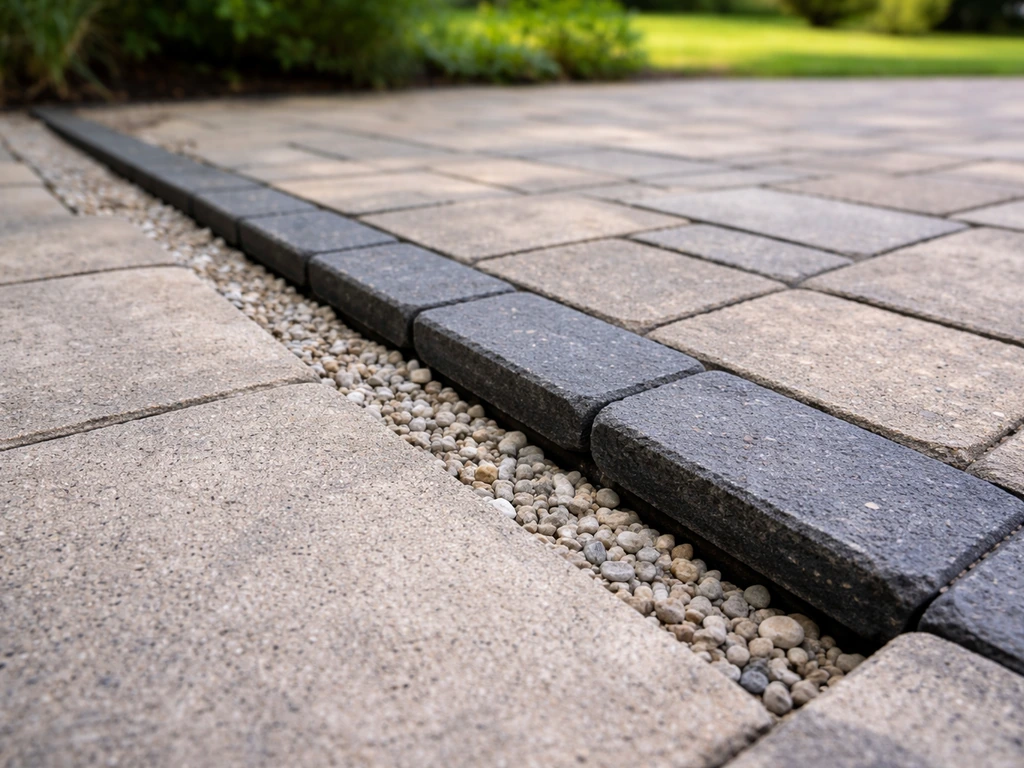
Get the slope right and your patio drains. Get it wrong and you have pooling water, foundation moisture risk, and surface damage within a few seasons. The standard minimum is about 2% grade (1/4 inch per foot) sloping away from the house. In wet climates or on sites with heavy clay soil, steeper slopes or a perimeter drain channel helps. If you have a drainage problem on-site, permeable pavers are one of the most effective solutions because water infiltrates through the joints rather than running across the surface.
Privacy, shade, and comfort upgrades worth the money
Pergolas and patio covers
A pergola is one of the highest-impact additions you can make to a patio. It defines the space, creates partial shade, and anchors lighting and fans. Installed cost typically runs $2,100 to $5,600 for a standard wood or vinyl pergola, with aluminum and louvered motorized systems running significantly more.
A 2026 pergola installation cost guide estimates a national average installed pergola cost of about $5,500 per pergola, though you should use editorial caution versus other sources Installed cost typically runs $2,100 to $5,600 for a standard wood or vinyl pergola. Attached pergolas that tie into the roofline are more involved structurally and usually require a permit, but they look the most integrated and provide the best weather protection.
Freestanding pergolas are more flexible and often permit-free depending on your jurisdiction.
Solid patio covers (aluminum pan covers, insulated panel covers, or a true roof extension) block sun and rain completely and are the right choice if your primary goal is weather protection and year-round use. They cost more than a pergola but deliver more usable days per year, especially in hot or rainy regions. In the South and Southwest, an insulated solid cover dramatically reduces radiant heat on the patio surface underneath.
Shade options at a glance
| Shade Option | Approximate Cost | Weather Protection | Permit Likely? | Best Climate |
|---|---|---|---|---|
| Open pergola (wood/vinyl) | $2,100–$5,600 | Partial sun only | Sometimes | Any; better in mild climates |
| Louvered/motorized pergola | $6,000–$15,000+ | Adjustable sun and rain | Often yes | Hot, rainy, or variable climates |
| Solid aluminum patio cover | $3,000–$8,000 | Full sun and rain | Often yes | Hot, rainy regions |
| Retractable awning | $1,500–$4,000 | Sun; limited rain | Rarely | Any; good for smaller spaces |
| Shade sail | $200–$800 DIY | Partial sun | Rarely | Dry, low-wind climates |
| Roof extension (attached) | $15,000–$40,000+ | Full weather protection | Yes | Any climate, year-round use |
Fans, misters, and heating
If you have an overhead structure, an outdoor ceiling fan is one of the best value-to-comfort additions you can make. It makes a covered patio feel 8 to 10 degrees cooler in humid summer heat, and it is a straightforward electrical project. Misters work extremely well in dry climates (Texas, Arizona, New Mexico) where the evaporative cooling effect is strong. In humid regions like the Southeast or Gulf Coast, misters add moisture to air that is already saturated, so they are less effective. A ceiling-mounted mister system on a covered patio in a dry climate can drop the perceived temperature by 15 to 20 degrees, which is the difference between using and not using your patio in July.
Privacy screens and fencing
Privacy is underrated in patio planning and often skipped to save money, then added as an afterthought when the space never gets used. Lattice panels, wood or composite privacy screens, tall planters with ornamental grasses, or a simple fence extension on one side of the patio can dramatically change how comfortable and inviting the space feels. If you are in a neighborhood with close setbacks, budget at least $500 to $2,000 for a privacy element before you call the patio finished.
Lighting, decor, and setting up functional zones
Zone your patio like a room
The best patio designs think in zones. If you want to stay current, review the latest patio designs, then filter them through your climate, layout, and budget constraints. Even on a modest 12-by-16 patio, separating the dining area from the lounge area with a rug, planter, or furniture placement makes both spaces feel more intentional and usable. A grilling station tucked to one side keeps smoke away from guests and gives the cook a work triangle rather than a single isolated grill. A fire feature anchors the lounge side. If you have a larger patio or L-shaped layout, plan each zone with its own purpose before you buy a single piece of furniture.
- Dining zone: table, chairs, overhead light or pendant above the table, proximity to kitchen door
- Lounge zone: sofa, chairs, coffee table, side tables, fire feature or focal point
- Grill/cooking zone: grill, counter space, prep area, trash and storage, downlight above the cooking surface
- Transition/buffer zone: planters, rugs, or a low step to separate zones without barriers
Lighting layers that actually work
Most patio lighting plans fail because they rely on one overhead fixture that creates flat, unflattering light and leaves edges dark. Layer three types instead: ambient light from a ceiling fixture or string lights overhead, task lighting for the cooking and dining surfaces, and accent lighting at ground level or in planters to create depth. String lights on a pergola are the most popular and affordable ambient option. Low-voltage LED path lights and step lights add safety and visual interest at a cost of $100 to $400 for a DIY install. Hardwired recessed lighting in a pergola or solid cover is the premium version and requires an electrician but delivers the cleanest, most year-round-functional result.
Decor and finishing details
An outdoor rug, weather-resistant throw pillows, a few potted plants, and one statement piece (a large lantern, a wall-mounted planter, an outdoor art piece) do more per dollar spent than almost any other finishing touch. Use furniture and textiles designed specifically for outdoor use. Fabrics rated for UV and moisture resistance last years longer than indoor furniture moved outside. Keep the palette simple: two to three coordinating colors are easier to refresh seasonally than a maximalist approach.
Budgeting realistically and deciding what to DIY vs hire out
Rough cost ranges to plan around
| Scope | Estimated Cost Range | Notes |
|---|---|---|
| Basic concrete slab (200–300 sq ft) | $1,200–$3,600 | Broom finish; excludes furniture and lighting |
| Paver patio (200–300 sq ft) | $2,000–$6,000+ | Includes base prep; more in freeze climates |
| Site grading/leveling | $500–$2,000+ | Adds to any base cost on sloped or drainage-problem lots |
| Pergola (installed) | $2,100–$5,600 | Standard wood or vinyl; louvered systems cost more |
| Solid patio cover (installed) | $3,000–$8,000 | Aluminum panel; more for insulated or custom |
| Outdoor kitchen (basic built-in) | $5,000–$12,000 | Grill, counter, block surround; gas line extra |
| Outdoor kitchen (full) | $15,000–$40,000+ | Sink, fridge, gas, premium finishes |
| Lighting (low-voltage DIY) | $100–$400 | Path, step, and accent lights |
| Lighting (hardwired, electrician) | $800–$2,500+ | Recessed, ceiling fans, outlets |
| Privacy screen or fence add-on | $500–$2,000 | Lattice panel, composite screen, or fence extension |
What to DIY and what to hire out
If you are comfortable with physical labor and basic tools, laying pavers on a pre-prepped base is genuinely DIY-friendly. The base work (excavation, compacting, setting the sub-base) is harder and less forgiving. Concrete pours are usually better left to a contractor unless you have experience, because timing, water ratio, and finishing all need to happen at once. Pergola kits from home improvement stores are designed for homeowner installation and are a solid middle-ground option. Anything involving electrical, gas lines, or structural attachment to your home should be permitted and handled by a licensed professional, both for safety and for resale protection.
Finding and vetting a contractor
Get at least three quotes for any project over $3,000. Ask each contractor to walk you through their base prep process specifically, because most patio failures start at the base, not the surface. Verify that they pull permits when required and check references for projects in your climate zone, not just visually similar projects. A contractor who has installed pavers in your area's freeze-thaw or clay-soil conditions knows things a general landscaper may not. Ask to see a completed project that is at least three winters old to assess how their work holds up, not just how it looks fresh.
- Ask: 'What is your base prep spec for this soil type and climate?'
- Ask: 'Will you pull the permit, or is that on me?'
- Ask: 'What drainage slope will you build in, and how do you handle runoff at the perimeter?'
- Ask: 'What is your warranty on labor vs materials?'
- Ask: 'Can I see a project you completed two or more years ago in this area?'
Your next concrete steps
Start by measuring your usable outdoor space and sketching two or three rough layout ideas based on your lifestyle goals. Check your local building department's website for permit thresholds and setback requirements in your zone. Collect photos of patio styles that appeal to you (apps and inspiration tools for this are worth exploring as a companion step).
If you are looking for the best app to design patio layouts, focus on tools that help you visualize zones, dimensions, and outdoor features apps and inspiration tools. Then request quotes from two to three local contractors with your rough layout in hand, a list of your must-haves, and the questions above ready to go. You do not need a finished design to start getting quotes.
You need a clear sense of your goals, your constraints, and your budget ceiling, and this guide has walked you through all three.
FAQ
How do I know whether my patio should be attached to my house or freestanding?
If you want the most weather protection and the easiest access from interior rooms, an attached patio and attached cover usually fit best. If you are avoiding foundation moisture risk, want more flexibility with layout and future changes, or your setbacks or permits get complicated near the house wall, a freestanding patio or freestanding pergola can be a better option. Ask your building department about roof attachment rules and where structural loads must land before you decide.
What’s the minimum patio size for a layout that actually feels comfortable?
For most households, a patio that is too small often fails because furniture hits walls or you cannot pull chairs out. As a practical target, plan around a 10 by 10 foot working footprint for a small dining set, then add clear circulation space (typically 2 to 3 feet around the dining area). If you are adding a lounge with a fire feature, include extra room for the seating arc so the fire is a focal point rather than a traffic bottleneck.
Should I design for “peak weather” or “average use” when choosing shade and materials?
Design for your actual usage windows. If your patio is used mainly in evenings, prioritize afternoon shade and wind control, even if you get some sun later. If you use the space in spring or fall, you may be better off with partial cover that lets warmth reach the seating area rather than a fully enclosed, dark-feeling canopy.
How much clearance do I need between outdoor furniture and hardscape features like planters or steps?
Aim for room to move without scraping or bumping, especially around dining chairs and walkways. A common rule of thumb is keeping at least 18 inches of clearance for typical chair movement and more (often 24 to 36 inches) near circulation paths and stairs. If you expect wheelbarrows, grill carts, or large items to move through, measure the widest item and plan a route before finalizing the layout.
What’s the best way to prevent patio water from damaging my foundation?
Treat drainage as a system, not just a slope. Ensure the patio is graded away from the house at roughly 2% and confirm where runoff will go (yard, drainage channel, or approved infiltration). In areas with heavy clay or frequent rain, consider adding a perimeter drain or using permeable pavers, and verify downspouts are not discharging directly onto the patio surface.
If I choose pavers, do I still need the same drainage and base prep as concrete?
Yes, base prep is still the biggest determinant of how long pavers last. Pavers can flex, but they will still fail prematurely if the sub-base is poorly compacted, if drainage is wrong, or if the base thickness is not suited to freeze-thaw or heavy soil conditions. Focus on proper excavation, compaction, and an appropriate aggregate base, then finish with jointing sand suitable for your climate.
Are pergolas worth it if I already have a patio cover?
They can be, but they serve different jobs. A pergola is often better for defining a zone and creating partial shade while letting more light in. If you already have a solid cover and your main goal is weatherproof year-round use, a pergola may be redundant unless you want to attach lighting, add fan mounting, or create a second visual layer for dining or lounge separation.
What electrical planning should I do before the patio gets built, especially for lighting and fans?
Plan wiring before you finalize the surface so trenches and conduit runs are not retrofitted later. Decide where ambient lights, task lights at the dining or grill, and any outlets or GFCI receptacles will be located, then confirm the locations with your electrician. If you add a fan or built-in kitchen appliances, verify you are meeting outdoor-rated equipment requirements and permit needs.
Can I install a gas line or outdoor kitchen sink myself?
If your plan involves gas piping or plumbing connections, assume it must be permitted and handled by licensed professionals. Even if some parts seem straightforward, safety and code compliance are critical for leak prevention, pressure regulation, and correct venting or shutoff placement. For DIY, you can usually help with non-plumbed elements like framing, hardscape, or finishing after the licensed work is complete.
What’s a common mistake when budgeting for the “best patio home designs” style I like?
Underestimating the non-visible costs, especially base prep, drainage corrections, permitting, electrical trenching, and structural requirements for overhead structures. Many projects also run into changes once homeowners realize clearance issues for dining chairs, grill doors, or seating movement. Build a contingency so you can handle these realities without cutting quality on base and grading.
How can I choose between a fire pit vs a fireplace feature for a lounge patio?
A small gas fire pit insert in a prepared surround is often the easiest upgrade if you want a focal point with simpler maintenance and controllable heat. A larger fireplace feature can create a more permanent architectural statement and stronger weatherproofing feel for the seating area, but it can involve higher framing, venting, and permit complexity. Match the scale to your patio size and local rules about clearance and combustible materials.
What privacy options work best if my patio is in a neighborhood with close setbacks?
Use solutions that can be adjusted for height and placement without violating setback rules. Tall planters with dense ornamental grasses, lattice or privacy screens attached to posts, and targeted fence extensions on one side can give you comfort without wrapping the entire patio. Before you buy, confirm maximum heights and where fences or screens are allowed, since rules often differ for side yards vs rear yards.
Should I buy outdoor furniture before I finalize the patio layout?
It’s usually better to finalize the layout first, then buy furniture sized to the planned movement space. If you choose furniture too early, you may end up with chairs that block doors, legs that sit on uneven edges, or seating that feels cramped around the fire or grill zone. If you already have furniture, measure it and design around it, especially for dining chair pull-out clearance.
How do I get the best contractor quotes for patio projects?
Bring a clear scope, including the base thickness or sub-base expectations, drainage plan, and whether the plan includes permits, electrical work, or structural tie-ins for covers. Ask each contractor to explain their approach to slope, compaction, and jointing (for pavers) so you can compare comparable methods. Request at least one project example from a similar climate and soil condition, then ask how it performed after multiple winters or wet seasons.
What should I inspect after the patio is built, to catch issues early?
Check that the grade drains away from the house, look for any pooling in low spots after a simulated hose run, and confirm that edges and joints are sealed or finished as intended. For pavers, verify that jointing material is installed correctly and is not washing out. For concrete, confirm the finish texture is consistent for slip resistance and that control joints are placed where they should be. Take photos during the final day before crews leave so you have documentation if issues appear later.
Next Articles

Do It Yourself Outdoor Patio Ideas: Build, Upgrade, Maintain
DIY outdoor patio ideas for planning, building, upgrading, and maintaining floors, shade, privacy, lighting, and decor.
Quick Fix Patio Ideas for Instant Comfort and Style
Quick fix patio ideas for fast comfort and style: cleanups, repairs, shade, flooring tweaks, and safe upgrades on any bu
Cheap Do It Yourself Patio Ideas: Budget Build Guide
Budget DIY patio ideas with step-by-step flooring, prep tips, cost ranges, upgrades, and safety mistakes to avoid.