The best patio design for your home is the one that matches how you actually use your backyard, not the one that looks best in a magazine. That means figuring out your goal first (entertaining a crowd, unwinding after work, or keeping the kids busy), then building a layout and material plan around that goal, your budget, and your local climate. This guide walks you through every decision in order, from the first sketch to the final string lights, so you leave with a real plan rather than a Pinterest board you never act on.
Best Patio Design Ideas: Layout, Materials, Shade, Lighting

Phoebe Foster
2 May 2026
Pick your patio goal and style before anything else
Most patio regrets happen because someone skipped this step. They built a beautiful dining area, then realized they mostly want a place to sit with a drink and watch the kids play. Before you look at a single photo, answer two questions: What will you do out there most often, and how many people do you typically host at once?
If your answer is 'entertain a group,' you need a layout that handles traffic flow between seating and a food or drinks area, durable flooring that can take spills, and overhead lighting for evening use. If your answer is 'decompress alone or with a partner,' you can go smaller, softer, and more intimate. A 10x12 foot patio with a couple of deep loungers, a side table, and a privacy screen can feel more relaxing than a 600-square-foot slab that echoes every time you walk on it. Family-use patios fall in the middle: they need durable, easy-to-clean surfaces, open space for movement, and shade.
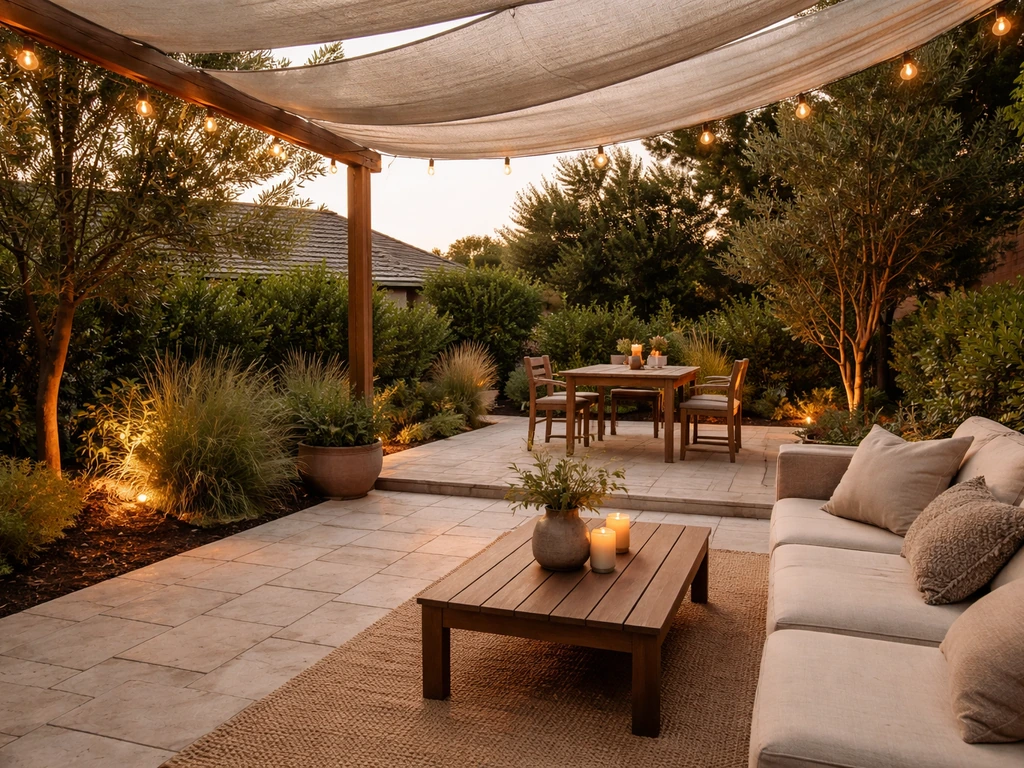
Once you know your goal, style usually follows naturally. Entertainers tend toward clean, contemporary lines (concrete, large-format pavers, built-in seating) because those hold up visually when filled with people. Relaxers often go warmer: wood tones, natural stone, planters, a pergola draped with vines. Family patios prioritize practicality, so stamped concrete or composite decking wins over delicate flagstone that wobbles underfoot. You can be stylistically flexible within those categories, but knowing which category you're in keeps you from making expensive mistakes.
Layout ideas that actually work in real yards
Layout is where most people underplan. The most common mistake is buying patio furniture before measuring the space, then cramming it all into one cluttered zone. A better approach is to think in zones first, furniture second.
Zones: the key to a patio that feels intentional
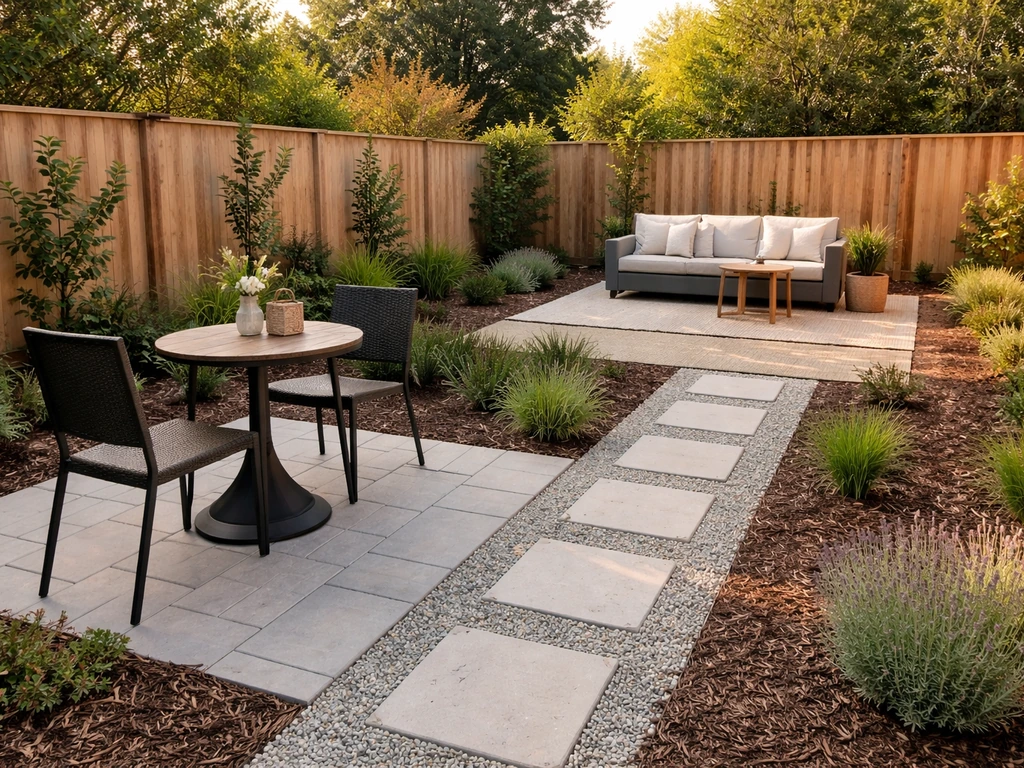
For patios around 400 square feet or larger, dividing the space into distinct zones transforms the experience. A practical multi-zone layout includes a dining area (table, chairs, enough room to pull chairs out without hitting a wall), a conversation or lounge zone (sofas, chairs, a low coffee table), and optionally a bar or fire feature as a focal point. Houzz's project galleries are full of examples where all three zones share a single patio footprint without feeling crowded because each zone has a clear visual anchor and a path between them.
On smaller patios (under 200 square feet), you usually pick one primary zone and one secondary one. A dining table with a small side seating nook works well. A lounge area with a built-in bar on one wall also works. Trying to force three full zones into a small space creates a patio that's hard to move through.
Flow and furniture placement
Traffic flow is the detail most people overlook until they're hosting a party and guests keep bumping into chairs. The rule is simple: you should be able to walk a visible, unobstructed path from any zone to any other without stepping around furniture. Wayfair's layout guidance puts it well, designing a clear path between the lounge and dining areas so circulation doesn't get blocked. In practice, that means leaving at least 36 inches between furniture groupings for a main walkway, and 24 inches as a minimum for secondary paths.
- Place dining closest to the house (shortest trip from the kitchen)
- Position lounge seating toward the yard, angled toward a view or fire feature
- Keep a fire pit or focal point at the far end so it draws people through the space
- Leave at least 36 inches of clear path between major furniture groupings
- Never block the route between the back door and the dining area with a plant or ottoman
Best materials and flooring for different yards
Material choice affects cost, maintenance, longevity, and how the space looks in ten years. There is no single best option, but there is usually a best option for your specific situation. Here is a practical comparison of the most common choices.
| Material | Installed Cost (2026) | Best For | Maintenance | Climate Notes |
|---|---|---|---|---|
| Concrete (plain) | $6–$12/sq ft | Budget builds, large areas | Low (seal every 2–3 years) | Can crack in freeze-thaw cycles without proper base |
| Stamped Concrete | $12–$25/sq ft | Decorative look on a mid-range budget | Medium (reseal periodically) | Same crack risk as plain concrete in cold climates |
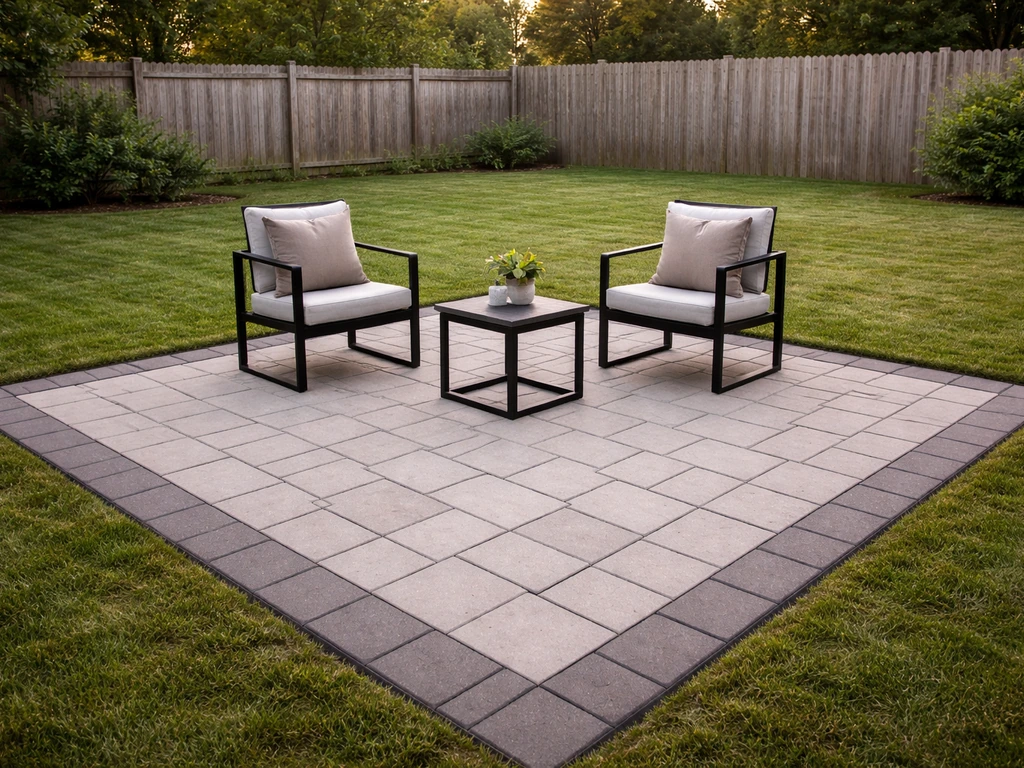
| Concrete Pavers | $10–$20/sq ft | DIY-friendly, repairable | Low-medium (occasional re-leveling) | Handles freeze-thaw better than poured slabs |
| Natural Stone (flagstone, slate) | $15–$30/sq ft | Premium, organic look | Medium-high (needs sealing, re-grouting) | Some stones are porous and freeze-thaw sensitive |
| Outdoor Porcelain Tile | $15–$35/sq ft | Modern look, freeze-thaw climates | Low (clean with water) | Less than 0.5% water absorption = virtually freeze-thaw immune |
| Composite/Wood Decking | $20–$45/sq ft | Elevated surfaces, warm aesthetic | Low-medium (composite) / High (wood) | Check for moisture and rot risk in humid climates |
| Gravel/Decomposed Granite | $2–$6/sq ft | Budget patios, drainage-heavy yards | Low (rake periodically) | Excellent drainage, poor for heels or rolling furniture |
Drainage: the thing everyone ignores until it's too late
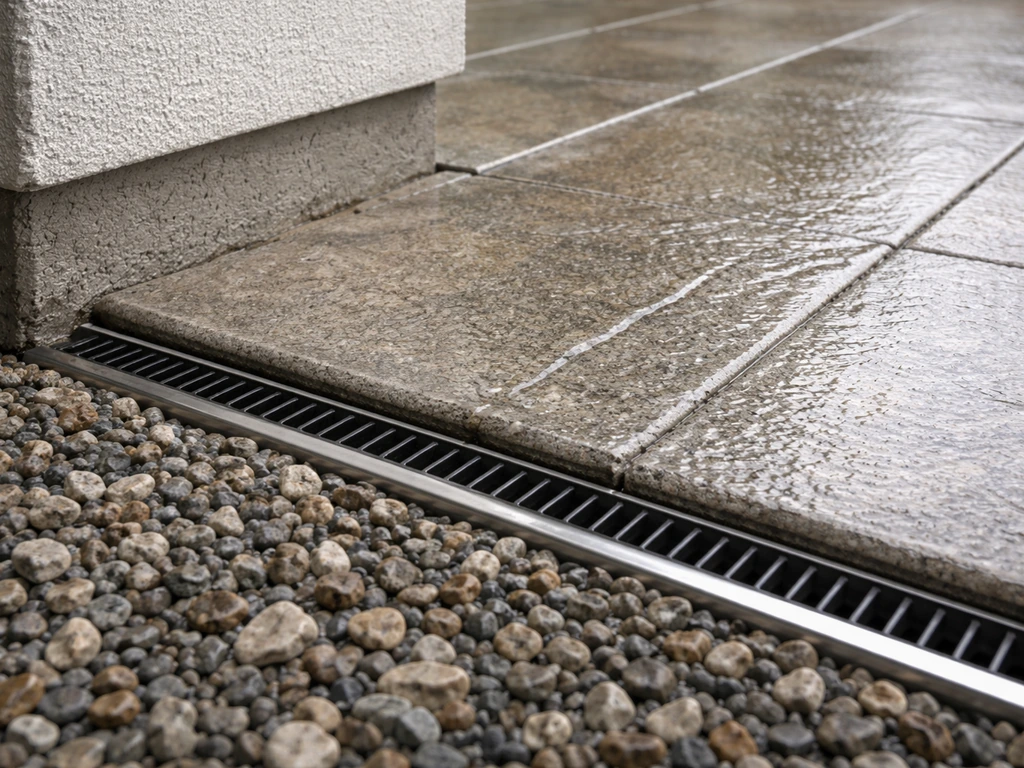
Every patio needs a slope of at least 1/8 to 1/4 inch per foot away from the house. If water pools on your patio after rain, it's going to creep toward your foundation over time and make the surface slippery. If you're in a yard with clay soil or a naturally low spot, gravel or permeable pavers are a better call than poured concrete. Gravel and decomposed granite are the champions of drainage, but for most people concrete pavers with a sand base hit the best balance of drainage, durability, and looks.
For cold-climate yards (the Midwest, the Northeast, or higher elevations in the West), freeze-thaw cycling is your biggest enemy. Outdoor porcelain tile is a standout here because its water absorption rate is less than 0.5 percent, which makes it virtually immune to cracking from frozen water expanding inside the material. Natural flagstone and standard ceramic tile don't have that protection, so they can crack over a few winters without proper sealing and a good compacted base.
Weather comfort and add-ons: shade, covers, misters, and fans
A patio you can only use comfortably two months a year isn't a good investment. Extending your usable season, whether that means cooling things down in summer or stretching into fall, is one of the highest-return upgrades you can make. What you need depends almost entirely on your climate.
Shade and overhead covers
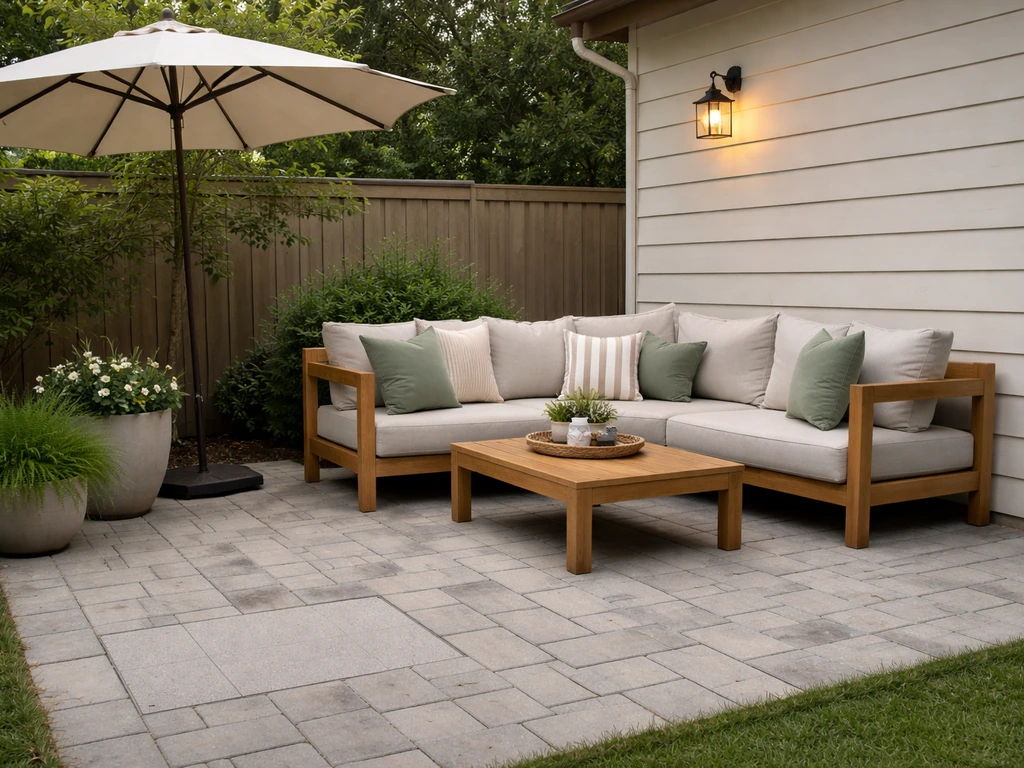
In hot climates like Texas, Arizona, or the Southeast, shade is not optional. A pergola gives you structure for climbing plants or curtains and drops the perceived temperature significantly, but it doesn't block rain. An attached patio cover (aluminum, wood, or polycarbonate roofing) gives you full weather protection and is worth the investment if you want to use the space year-round. Shade sails are the budget option: you can cover 12x12 feet for a few hundred dollars and reposition them seasonally. Retractable awnings land in between and are great for patios where you sometimes want full sun and sometimes don't.
Cooling: misters and fans
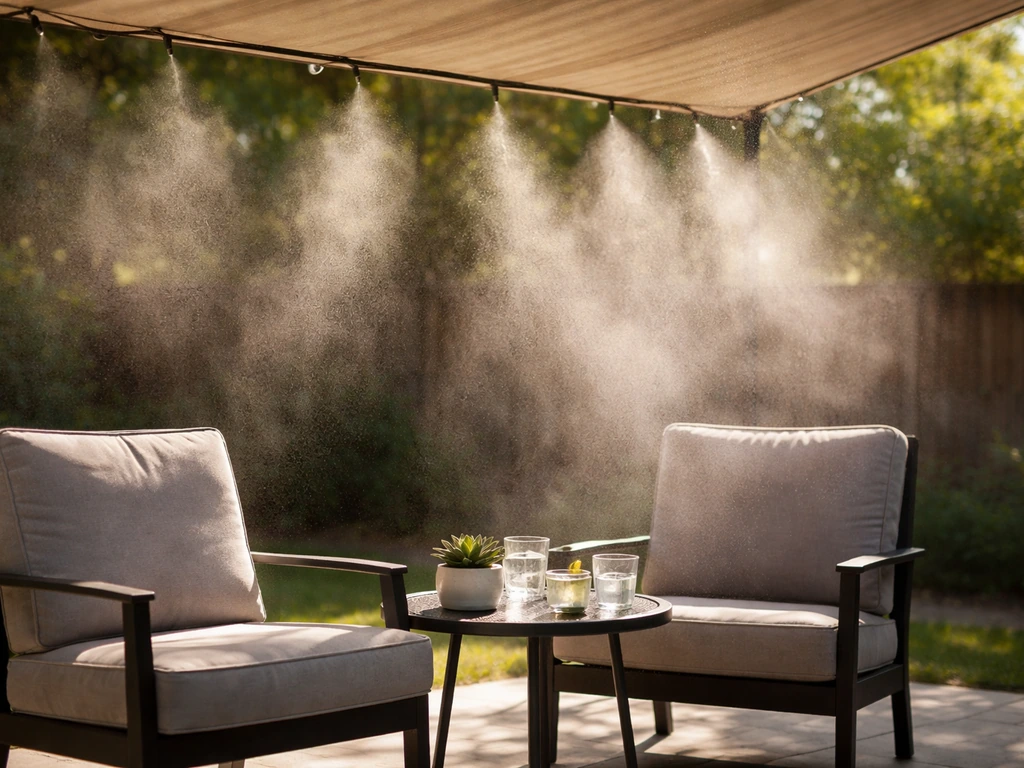
If you live somewhere that gets above 90 degrees regularly, a shade cover alone won't be enough. Misting systems drop the ambient temperature by 10 to 20 degrees through evaporative cooling, which works best in low-humidity climates (think Phoenix or Las Vegas). In a humid climate like Houston or Orlando, misters add moisture to already-thick air and feel less refreshing. In those humid areas, a ceiling fan installed under a pergola or patio cover is a better investment.
Outdoor-rated ceiling fans with DC motors move a lot of air quietly and run on a fraction of the electricity of a portable fan. Look for a wet-rated or damp-rated label depending on whether your patio is fully exposed to rain or partially covered.
Heat: extending into fall and winter
In the Midwest, Pacific Northwest, or any area with cool fall evenings, a fire pit or outdoor heater stretches your patio season by weeks. A built-in gas fire pit is the cleanest option and works as a design focal point, like the multi-tiered paver patio and fire pit installations you see from companies like Unilock that combine a fire feature with structured hardscape. Freestanding propane fire pits are a solid DIY-friendly alternative at a fraction of the cost. Infrared electric heaters work well under covered patios where you can't have an open flame.
Lighting, privacy, and the visual details that make it feel finished
This is the section most people skip when budgeting and then wish they hadn't. Good lighting and privacy features are what separate a patio that looks like a construction project from one that feels like a real outdoor room.
Lighting: layers and placement
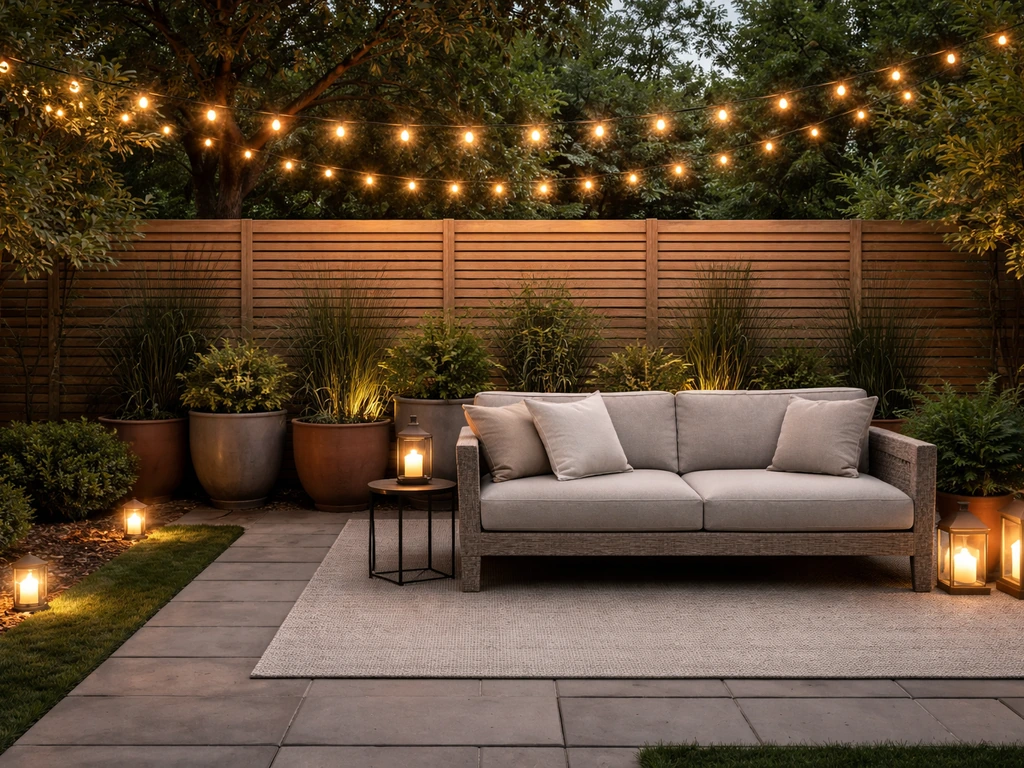
Good patio lighting uses at least two layers: ambient (overall brightness for the space) and task or accent (focused on specific areas like dining or a walkway). String lights strung overhead are the easiest way to add warm ambient light to an outdoor space and cost almost nothing relative to the impact they make. For path lighting, the Yardcast approach of 'light the path, not the fixture' is the right call: use downcast, hooded fixtures so the light hits the ground rather than blinding people walking past. Placing path lights every few feet and about 6 inches from the edge of the walkway gives even coverage without dark spots.
For wall-mounted sconces near a seating area or door, position them at roughly eye level (about 5.5 to 6 feet off the ground) and space them consistently for an intentional look. If you're lighting along a wall or fence line, fixtures spaced every 3 to 4 feet with stems of about 18 to 24 inches give a soft, even pool of light without harsh shadows. Solar path lights work for low-traffic areas, but hardwired low-voltage LED systems are brighter, more reliable, and worth it for heavily used zones.
Privacy
Feeling exposed kills the enjoyment of a patio fast. Privacy options run from cheap and fast to permanent and beautiful. Tall planters with bamboo, ornamental grasses, or boxwood give you a living screen in one season. Lattice panels or slatted wood screens are a middle ground that adds structure without full fencing. A privacy fence or masonry wall is the most permanent and expensive option but gives you true enclosure. For most homeowners, a combination works best: a wood or composite privacy screen on the side closest to neighbors, and planters or hedges to fill in gaps elsewhere.
The details that tie it together
An outdoor rug defines the lounge zone the same way a rug defines a living room. A consistent color palette across cushions, planters, and furniture ties the space together. Built-in or wall-mounted planters take plants off the ground and make the space feel more intentional. These are low-cost, high-visual-impact details that you can add any time, so don't let them hold up the bigger structural decisions.
Budget vs premium upgrades: what's worth the money
You do not need to spend $50,000 to have a patio that looks and feels great. The key is knowing which upgrades are actually worth the premium and which ones you can DIY without sacrificing quality.
| Feature | Budget Option | Premium Option | DIY-Friendly? |
|---|---|---|---|
| Flooring | Plain concrete or gravel ($6–$8/sq ft) | Outdoor porcelain or natural stone ($20–$35/sq ft) | Gravel yes, concrete and tile hire out |
| Shade | Shade sail ($150–$400) | Attached aluminum patio cover ($3,000–$15,000) | Shade sails yes, attached covers usually hire out |
| Lighting | Solar path lights and plug-in string lights ($50–$200) | Hardwired low-voltage LED system ($500–$2,500) | String lights yes, hardwired hire out unless you're comfortable with wiring |
| Privacy | Tall planters with bamboo ($100–$300) | Masonry privacy wall ($3,000–$10,000+) | Planters and lattice panels yes |
| Seating | Big-box store furniture sets ($300–$800) | Powder-coated aluminum or teak sets ($1,500–$5,000+) | Assembly only, all DIY-friendly |
| Fire feature | Freestanding propane fire pit ($200–$600) | Built-in gas fire pit with masonry surround ($2,000–$8,000) | Freestanding yes, built-in hire out |
| Cooling | Box fan or clip-on fan ($30–$100) | Wired outdoor ceiling fan + misting system ($500–$2,000) | Fan installation DIY if covered; misting systems hire out for permanent installs |
The upgrades that consistently deliver the highest return on enjoyment are shade (you simply won't use a baking-hot patio), comfortable seating (cheap cushions go flat in one season), and flooring (a bad surface is impossible to ignore every time you step outside). Those three are worth spending more on. Decorative details like planters, rugs, and accent lighting can almost always be done on a budget without it showing.
For budget-minded builders, stamped concrete hits a strong middle ground. At $12 to $25 per square foot installed, it gives you a decorative surface that mimics stone or brick without the per-unit material cost. It's not as durable or repairable as pavers, but for a tight budget it looks significantly better than plain gray concrete.
How to use patio design pictures to actually plan your space
Browsing photos is fun, but most people do it wrong. They screenshot a dozen patios they like, none of which look anything alike, then feel paralyzed when it's time to make decisions. Here's a better process. If you are shopping for the best patio home communities, use these planning steps as a checklist when you tour models. If you want truly top patio designs, use these planning pictures to translate style into a layout you can actually build and enjoy.
- Save 10 to 15 patio photos you genuinely love (Houzz's patio gallery is a solid starting point, with hundreds of real project photos filtered by size, style, and feature)
- Look at them as a group and identify what they have in common. Is it a specific material (pavers, wood, concrete)? A color palette (warm neutrals, cool grays, lots of green)? A feature (fire pit, pergola, built-in seating)? That overlap is your actual style
- Eliminate photos that show features you can't have: a 40-foot pool, a second-story view, a climate totally different from yours
- For the 3 to 5 photos that remain, note the specific elements: flooring material, furniture scale, shade structure type, lighting placement, and privacy features
- Sketch your actual yard footprint (roughly, even on graph paper) and try to map those elements into your real dimensions
- When you talk to a contractor or use a design app, bring these photos as references, not as exact blueprints
Houzz and Pinterest both let you tag photos to collections, which makes the culling process easier. If you want to go further, there are free and AI-based patio design apps that let you upload a photo of your actual yard and drop in design elements. Those tools are worth exploring if you're a visual thinker who needs to see the layout in your real space before committing.
Apps specifically built for patio planning can save you hours of back-and-forth with a contractor and help you show up to that first meeting with a much clearer vision. Some of the best AI patio design free tools can turn your photos and measurements into quick layout suggestions you can refine before you hire anyone patio design apps.
One practical photo-matching tip: pay attention to the patio's aspect ratio in the photos you love. A long, narrow patio layout will not translate well to a short, wide yard. When a design photo feels wrong in your space, it's often a proportion mismatch, not a style mismatch. Find photos that roughly match your yard's shape and work from those.
How to turn your plan into a real patio
Having a design you love is step one. Getting it built without surprises requires a few practical steps that a lot of homeowners skip.
Measure and map your space
Before you call a contractor or finalize a design, measure your yard accurately. Note the distance from the house to the property line, where utilities are buried (call 811 before any digging), and whether there are any grade changes or drainage issues. Mark where the sun hits in the morning and afternoon so you know where to position shade structures. A rough sketch with real measurements is worth more than a beautiful design that doesn't fit your property.
Permits: don't skip this step
Many homeowners assume a patio doesn't need a permit. That's often wrong. Some jurisdictions require a permit for any patio construction regardless of size. If your project adds 500 square feet or more of impervious surface (that means any paved area that doesn't absorb water), many localities require a grading plan as well. Setback rules also apply: your patio may need to stay a certain distance from property lines or structures. Check with your local planning and zoning department before you build. Getting caught without a permit can mean tearing out work you've already paid for, which is an expensive and frustrating outcome.
DIY vs hiring a contractor
Here's an honest breakdown: gravel patios, paver patios on flat ground, pergola kits, shade sails, string lights, and freestanding furniture setups are all reasonable DIY projects for someone comfortable with physical work and basic tools. Poured concrete, stamped concrete, outdoor electrical wiring, attached patio covers, built-in fire pits, and anything requiring permits almost always benefit from a licensed contractor. The money you save DIY-ing concrete usually disappears when you have to fix cracking, settling, or poor drainage a year later.
When hiring a contractor, get at least three quotes and ask each one to walk you through how they handle drainage and base prep. That question separates contractors who do it right from those who cut corners. Ask to see photos of completed projects similar to yours, and check that they're licensed and insured in your state.
Timeline to expect
A basic paver or concrete patio takes one to three weeks to install once materials are on-site, but getting a contractor scheduled can take four to eight weeks in peak season (spring and early summer). Permit approval can add another two to four weeks depending on your municipality. If you want a patio done by summer, the time to start planning and getting quotes is right now, not in June. Design first, measure second, permits third, contractor fourth. That order keeps the process from stalling at a critical step.
Your planning checklist
- Define your primary use case (entertaining, relaxing, family)
- Measure your outdoor space and note sun exposure, slopes, and drainage
- Set a realistic budget range (include a 15 to 20 percent contingency)
- Choose your primary flooring material based on climate, budget, and maintenance tolerance
- Decide on zones: dining, lounge, fire/focal point
- Plan shade and weather comfort features based on your climate
- Sketch a lighting plan: ambient overhead, path lighting, and accent zones
- Add privacy features to your design where needed
- Collect 3 to 5 reference photos that match your yard's shape and your confirmed budget
- Check local permit requirements before doing anything else
- Get at least three contractor quotes with a written scope of work
- Confirm contractor timing and order materials early to avoid delays
FAQ
What’s the best way to choose a patio style if I’m trying to match more than one outdoor view (living room and kitchen)?
If your patio is visible from multiple rooms, design it as the “front view” first by matching materials and sight lines to the main approach. Even if you zone the patio for use, keep one continuous visual surface or rhythm (same paver pattern or grout line direction) so it doesn’t feel like separate patches.
How much room do I really need around a dining setup so chairs don’t block traffic?
Plan for seating pull-out space around the dining table before buying chairs. A common slip is forgetting the chair slide clearance when people stand up, aim for roughly 24 to 30 inches behind chairs or an adequate path that doesn’t require guests to squeeze between the table and a wall.
How do I prevent patio lighting from looking nice in photos but being unsafe to walk on?
For a path that guests can use at night, use non-glare fixtures with the light directed downward, then aim for overlap between light cones. If you use warm string lights plus path lights, keep the string lights higher and thinner so the path lights provide the actual walking visibility.
Can I get real weather protection without building a full attached patio cover?
Yes, but do it intentionally. If you want a covered feel without full roofing, combine a pergola or partial cover with wind control, like louvered panels or outdoor curtains, and confirm clearance around doors so you can fully open them without snagging fabric.
Is it okay to build a patio directly on existing gravel or old base material?
It can, especially if the furniture weight is high or you expect heavy foot traffic. For pavers, make sure your base is compacted and properly bedded, then avoid “setting” tiles directly on top of older gravel or soft topsoil, which often leads to uneven movement.
What should I do first if my yard slopes toward the house or I see standing water after rain?
If your ground is uneven or drains toward your house, don’t try to “fix it with furniture.” Correct drainage first (slope away from the home, then choose the right surface). Patch-and-level flooring without addressing water flow often causes repeated settling.
What measurements matter most before installing a pergola, awning, or shade sail?
Pergola and awning systems need clearance and wind rating checks. Measure the drop and roof height so planters, doors, and overhead lights have adequate clearance, and confirm you can secure the cover to framing that’s designed to handle wind loads.
What are the most common cold-climate patio mistakes besides choosing the wrong material?
If you’re in a cold region, prioritize low water absorption materials and a properly compacted base, then plan for maintenance sealing as recommended for your specific stone or tile. Also avoid selecting materials that rely on thin bedding layers, which can shift during freeze-thaw.
How do I choose the right fire pit size and placement for comfort and safety?
A fire feature affects clearance and safety, not just aesthetics. Verify local rules for gas or propane installations, keep a safe distance from siding and low overhangs, and choose a fire feature size that matches your primary seating distance so heat reaches people without forcing them too close.
What’s the right order for picking furniture, outdoor rugs, and planters so the patio doesn’t feel “off”?
Many patios fail aesthetically because the rug and planters are chosen first and then the furniture ends up disproportioned. Instead, pick furniture dimensions based on zones, then choose a rug size that extends past seat edges (so the seating feels anchored), and only then finalize planter heights so they don’t block sight lines.
What should I spend money on first if I need to build the patio in phases?
Budget swaps that usually work are upgrading the “big three” first (shade, durable seating, flooring) and then adding privacy and lighting as phased projects. Avoid postponing drainage and base prep, because resurfacing later rarely solves underlying movement or pooling.
When should I choose hardwired low-voltage lighting over solar path lights?
Solar path lights are fine for low-traffic, decorative guidance, but for dining or frequent walkways, choose hardwired low-voltage LEDs that match your expected usage time. Mixing solar and hardwired can work, but ensure the hardwired section provides the true visibility so guests aren’t relying on inconsistent charging.
How can I tell whether my patio project is likely to need a permit (even if it’s “just a patio”)?
Not always. Even if a patio doesn’t feel “structural,” adding coverage, a fire feature, or a large paved footprint can trigger permit and grading plan requirements. Treat any project that changes stormwater flow or increases impervious area as potentially regulated.
How do I build a realistic timeline from design through install without getting stuck waiting on materials or approvals?
Plan the schedule by working backward from your intended use date and accounting for lead times on pavers, furniture, and cover systems. If you need outdoor electrical, treat that as a separate milestone because approvals and weather windows can add delays even after your contractor is booked.
Next Articles

Do It Yourself Outdoor Patio Ideas: Build, Upgrade, Maintain
DIY outdoor patio ideas for planning, building, upgrading, and maintaining floors, shade, privacy, lighting, and decor.
Quick Fix Patio Ideas for Instant Comfort and Style
Quick fix patio ideas for fast comfort and style: cleanups, repairs, shade, flooring tweaks, and safe upgrades on any bu
Cheap Do It Yourself Patio Ideas: Budget Build Guide
Budget DIY patio ideas with step-by-step flooring, prep tips, cost ranges, upgrades, and safety mistakes to avoid.